I’ve been considering trying to make a Lichtenberg generator. How did you make yours?
1 Like
Very cool, I want to try that myself. Thanks for the inspiration.
That is awesome! The blue lends itself to lightning or water. I tend towards lightning.
You know it is good art when it raises questions on how it was produced.
Thank you for sharing that with us!
3 Likes
SPEECHLESS!! So beautiful!
2 Likes
Did you use the lichtenberg generator to burn those channels into the wood? And then fill them with resin or paint or something?
It’s a really beautiful frame. I like how the little lightening bolts look glowy.
5 Likes
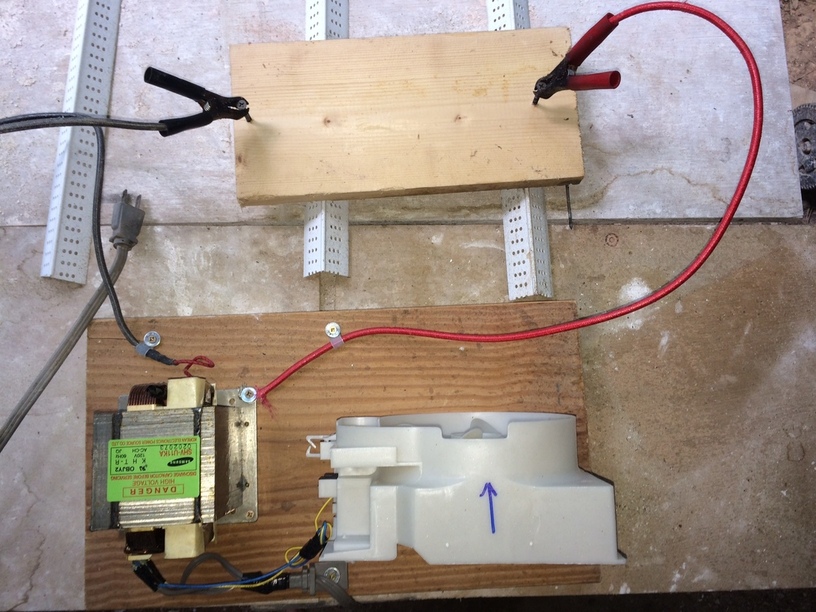
Before I began generating Lichtenberg pattern in wood, I first viewed many of the YouTube videos to learn the theory (very little) and practical experience. Frankly, I am surprised that some folks lived to make their YouTube video. The wiring is simple, but I wanted to be sure it was safe over time. The transformer, power cord, and fan came out of a Goodwill microwave ($5.00). The 110 volt side of the primary coil was obvious. The 4000 volt lead comes directly out of the secondary coil. The two other leads that can be cut off and tapped off. The high voltage circuit is completed with a ground wired directly to the transformer. I added the fan for my safety, since its a visual and audible indicator of a powered-up transformer meaning 4000 volts coming out of the secondary. It is not required, but also blows the smoke, improving visibility. Also for safety, I opted to directly connect the microwave’s power cord to the transformer rather than through a switch. That way I am always about 6 feet away from arching in the wood.
Since wood is not a good conductor, an electrolyte needs to be painted or sponged on to the surface of the wood before applying power. Baking soda and water (1 or 2 tbl per cup of water) is generally used, but I have found calcium chloride produced good results. Its safe (used in pickling, cheese making, deicing, and water treatment) and I read that it has more available ions than baking soda.
Experimentation is required to get the wood wet enough to conduct, but overly wet does not work. Some woods get dried out as high voltage is applied. I have found that longitudinally grained pine gives me consistent (but not predictable) results. Cedar worked ok and plywood burned too much. Method and placement of high voltage contacts on the wood is open to experimentation also. Generally I do not let a high voltage cycle exceed one minute. I like lightning-like lines, not charcoal gouges. I dont know if its a potential problem, but short cycles seem to keep the transformer from overheating.
I constantly remind myself that the transformer is putting out between 2000 and 4000 volts with enough amperage to stop my heart forever. Be safe.
19 Likes
I tend to use simple materials I have on hand. After I scrubbed the charred wood and soot from the crevices with water and dish soap and allowed it to dry, I gave it a light sanding. Then I filled the “valleys” with a water-based wood filler, thinned out to flow slightly. Another light sanding (trying not to remove the fine fractal details. I painted a blue water color paint (borrowed from my wife) in the valleys over the light colored filler. Three or four coats of shellac with a very light steel wool to cut the sheen. Thats it.
4 Likes
I am going to try that, I plan to use epoxy with glow in the dark powder mixed in to fill the groves.
4 Likes
Thank you so much for the detailed explanation. Very nice craftsmanship, technically and artistically! [quote=“daskeland, post:623, topic:1731”]
I constantly remind myself that the transformer is putting out between 2000 and 4000 volts with enough amperage to stop my heart forever
[/quote]
Little room in you mind for anything else… focus where it is required. Everything else is peripheral.
Bookmarked.
6 Likes
That is phenomenal, and very kind & selfless of you to post your process details! Many thanks, much appreciation…
I really wanted to try this…but this line gives me great pause: “I constantly remind myself that the transformer is putting out between 2000 and 4000 volts with enough amperage to stop my heart forever.”
5 Likes
That is an awesome setup! Have you had any issues with it tripping your breaker?
Have you tried anything besides wood? When (if my wife lets me) I make one, I want to try this with sand to make Fulgurites! 
1 Like
Not a bad idea, I think a lightning discharge carries up to a billion volts.
Dwell long enough and you should get hot enough to fuse silica. Just not instantly.
1 Like
Shouldn’t trip your breaker as it is not a short circuit. The wood is a resistive path so the current should be low.
The Lichtenberg transformer is on a 15 amp circuit and does not trip the breaker. I do minimize the load on that circuit when I am frying wood. I dont think 4000 volts is enough to create a fulgurite. If you “need more power, Mr. Scott”, Amazon does have a 12,000 volt neon light transformer already wired and ready for about $60.
3 Likes
It’s beautiful!
1 Like
Very cool! Love the chaos pattern… 
1 Like
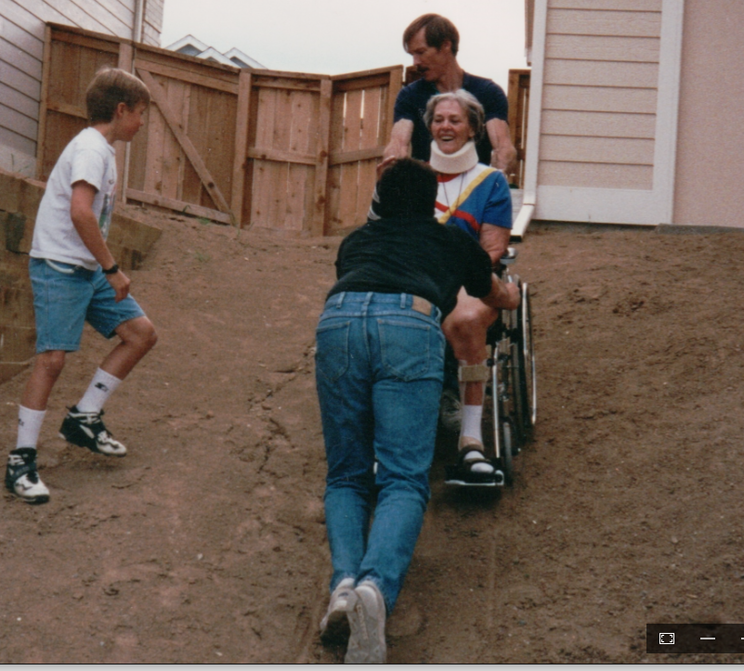
Crafting on a larger scale. Landscaping from the front to the back walkout basement. (My Wife’s Mother was greatly enjoying the struggle)
Before;
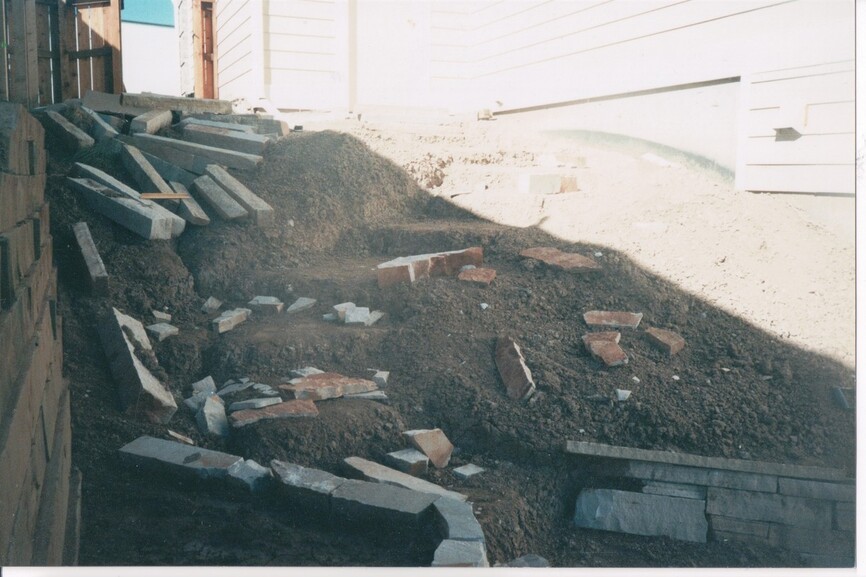
No plan other than a mental image, started at the bottom with a flat blade shovel and started sculpting stairs until it pleased my eye.
12 tons loaded with a forklift onto my truck (2 trips) unloading and every other movement was by hand.![]()
With the stairs roughed in I started defining them with the planters.
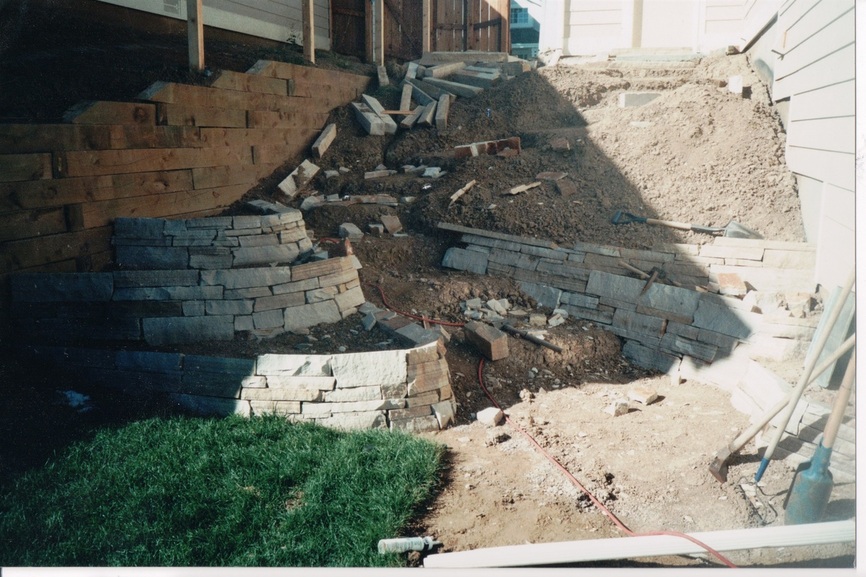
After.
Took the summer, cladding the stairs was last, and each one took a day. The risers are 4 times the depth you can see.
A chisel and a 5 pound hand sledge.
The risers and stair treads cut with a 9" angle grinder with a 10" diamond blade.
All dry set except the pond.

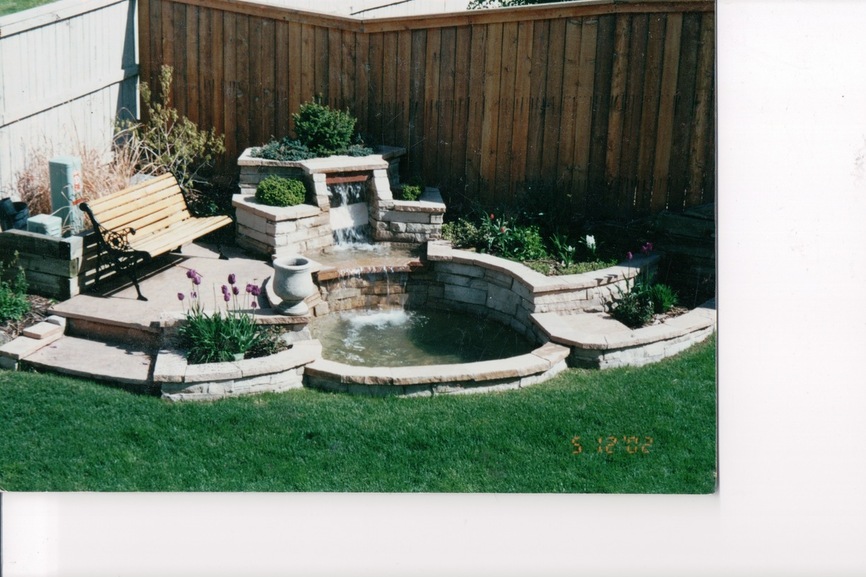
That took the next summer… Nice place to have a beer!
43 Likes
That’s spectacular! I love it!
4 Likes
Yep! Spectacular is the right word. 
2 Likes
Me using my glassblowing lathe

21 Likes