Have led’s near the ends of the legs with some sort of tube/tunnel there the centripetal force would complete the connection to light it ( as it spins).
2 Likes
My wife is a therapist with adolescents and young adults. She was looking over my shoulder as I read this thread and watched the video and has asked me to come up with some designs along this line to keep in her office for her clients to use.
3 Likes
This totally reminds me of the Spinny Thing we had when the kids were much younger. I wonder how many levels deep you could go if you mounted a bearing on a little peg so it could spin something perpendicular.
2 Likes
I whipped up a few myself. Didn’t really document it.
Main thing I learned is that my laser has some slipping in the belts, so none of my circles came out as actual circles. But press-fitting still worked.
You need to ensure you leave enough space around the bearing for the pressfit, or it will break the acrylic. I found with 1/8th inch acrylic I needed to leave about 5mm around each pressfit.
3 Likes
I had no issue with round cuts and I am glad about that. If I can’t rely on it to do precision work I would be disappointed. We added about .01 to the diameter of the bearing to get a good fit.
4 Likes
Wow, that just seems like so much extra. Really? 5mm? just wow. - Rich
That does indeed seem like a huge amount of kerf! Maybe he meant .5 or .05mm?
That wasn’t the kerf. That was how much material I had to have from the hole (where the bearing goes) to the edge of the entire object.
If my press-fit holes were looser, I could have less material, but would need glue or something else to hold the bearing in place. If I had thicker acrylic, I could possibly have thinner walls.
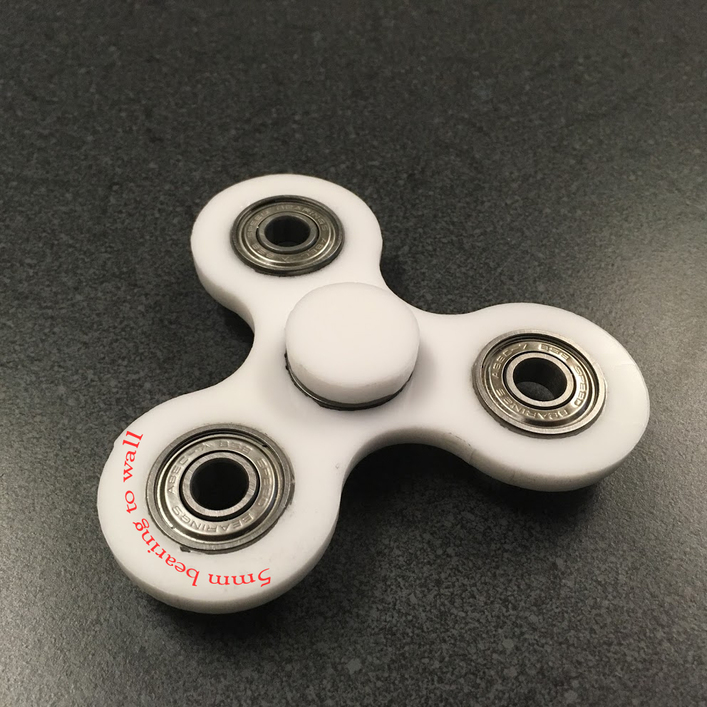
It is where the red text overlay is that I could not make thinner, or it would snap during press fit.
8 Likes
Ahhh…thanks. - Rich
That makes far more sense.
Main reason I was playing with going smaller was so my 7 year old could play with the toy. But also I had hoped to be able to hold on by any of the four bearings and still spin it around in my hand.
I might try again sometime with a larger hole so there is less stress, then apply some glue to hold the bearing in place. A smaller fidget is certainly desirable for me.
1 Like
Try annealing the acrylic at around 170F for 20-30 minutes. It relieves a lot of the stress from cutting and you might have less breakage.
6 Likes
@jkopel …Josh …is that before or after lasering?
Plenty of smaller bearing sizes out there if you’re serious about size. And sometimes at decent prices.
A search for “roller skate bearings” on AliExpress turns up lots of interesting options. Pretty coloured bearings, and many for less than USD$3.00 per 10 pieces, shipped!
1 Like
After. But don’t go too much higher or it will start to deform/droop.
2 Likes
Super! Thanks a bunch! 
After. The intense heat along the cut edge sets up internal stresses. It is usually not a big deal, but if you put solvent glue on a laser cut part you can often see tiny cracks form when the stress pulls the softened plastic apart.
If you are having trouble with parts cracking it seems like it would be worth a shot.
http://makezine.com/2015/10/29/skill-builder-acrylic/
Sorry @jamesdhatch the page did not refresh so I missed that you had replied already.
8 Likes
Excellent! Guess I need to get another toaster oven for the process. (Garage sales…here I come!) 
1 Like
Can’t make the video work on my iPad 