Simple Marble Run v1.1.6 (No hardware required)

Edit: This design was submitted to :glowforge: and accepted for the catalog! If you are a subscription holder you can get the latest version with full instructions for free (32 pages with detailed pictures)!

Original Post:

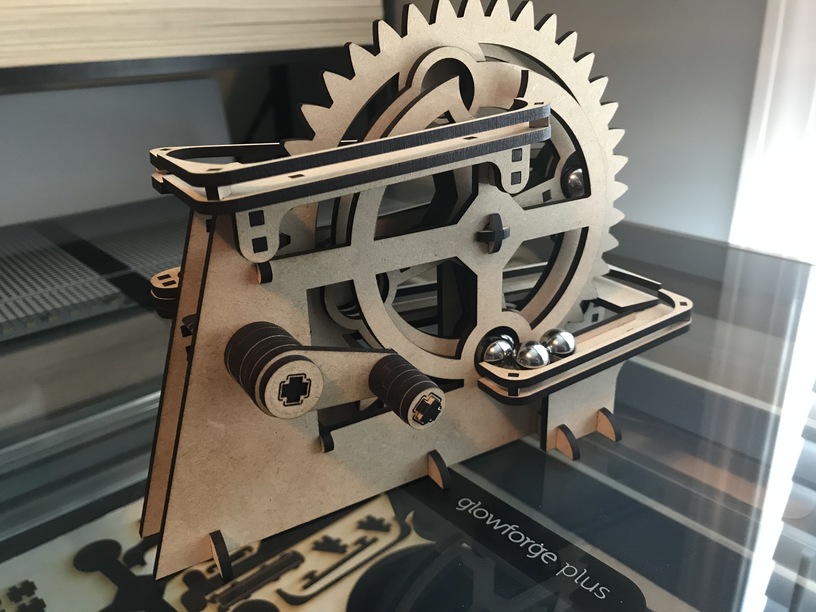
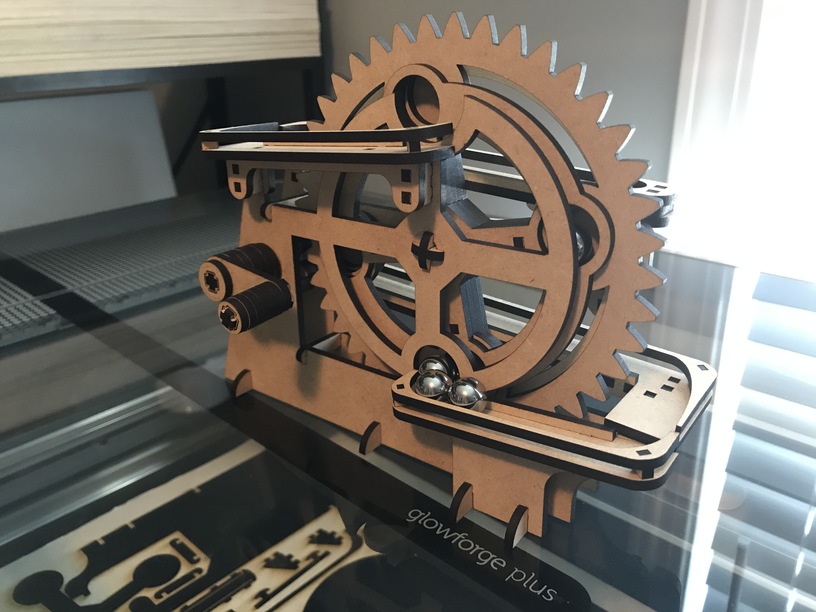
Here is the latest iteration of my Simple Marble Run. This version does not require any additional hardware. (Designed for 1/8" thick material and is designed to be used with 1/2" diameter “marbles”, I use ball bearings.)

Marble Run (v1.1.6)
Note: When printing on the GF, set the second grouping to “Score”.

General Instructions: (Be sure to use the finished images below for reference also!)

  1. Put the main wheel together. Be careful not to flip any of the layers, otherwise they may not line up properly.
  2. Assemble one of the small cross-axles. Insert it into the front of the front structure, and hold it in place with an axle-lock on the other side.
    instruction-pic-1
  3. Assemble the long cross-axle. Insert into the back of the back structure. Install the following on the axle so that it is inside the structure:
    A. Axle washer
    B. Three axle gears (aligned)
    C. Axle washer
    instruction-pic-2
  4. Install the assembled wheel on the front structure axle, and put the two structures together. Feeding the long cross-axle through the front, and install the following:
    A. Axle washer
    B. Five axle-spacers
    C. Axle crank
    D. Axle lock
    instruction-pic-3
  5. Install the structure braces. Be careful with the upper braces, they are small and can break easily.
  6. Install the ramps
  7. Complete the crank handle
    instruction-pic-4

There are several pictures of the original designs you can use to help see how it goes together on the original posts:

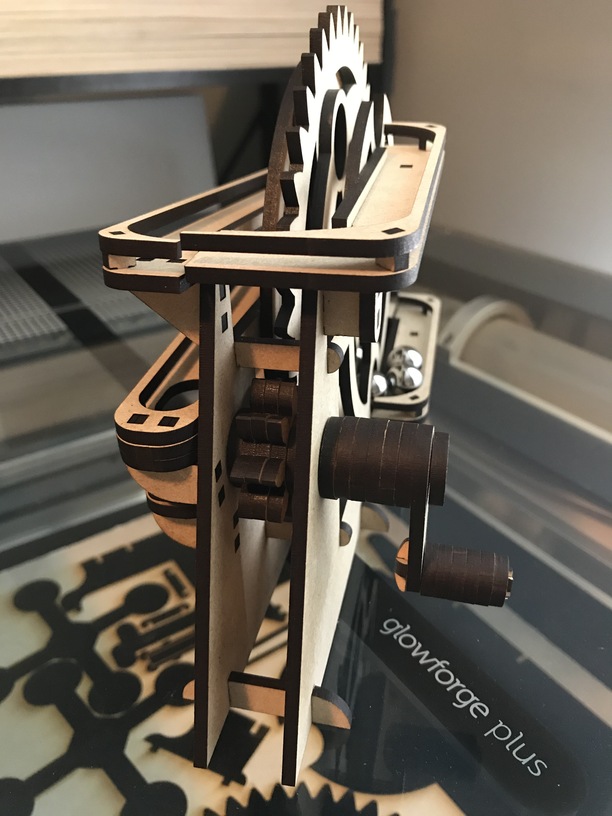
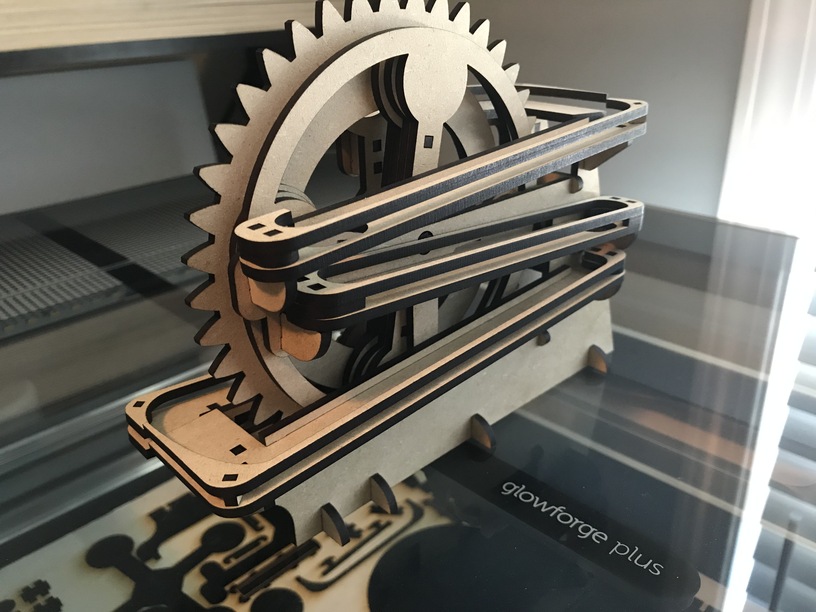
Here are some photos of the new design with raised edge rails:


No Marbles, no problem!
If you want to try to make you own marbles, here is a pattern that will make the right size:
marble test
They are a tight fit to hold together. Insert the “X” into the “round” and twist so the final piece can lock it together.

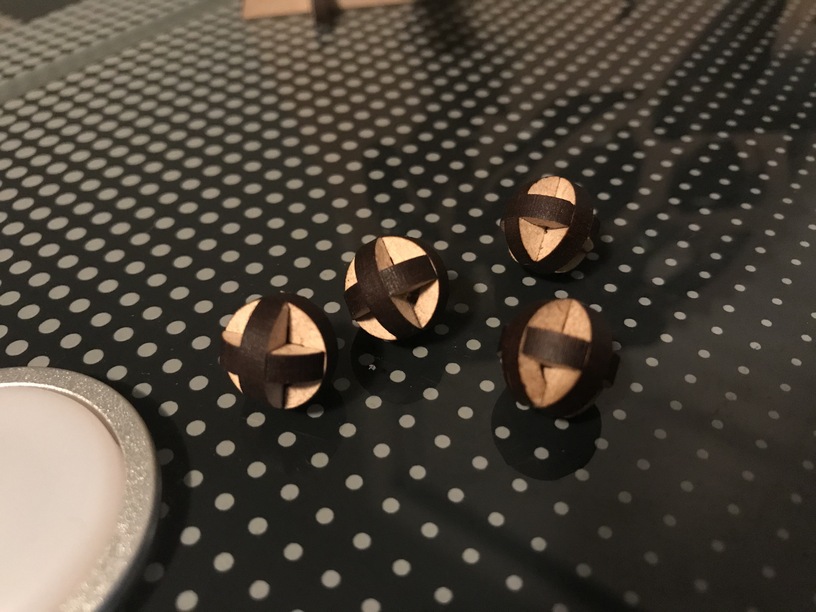
You will need to fill the openings with wood filler (or some other filler) to ensure they roll properly.

This is an active project, so I need your help!
I am new to my Glowforge and this creator space, so I am actively learning and trying new things. This is where I need your help! Please give me feedback, good and bad. If you don’t tell me what was a problem for you, I cannot fix it.

If you try it out, please post pictures! Thank you, Glowforge Community, for the chance to learn and grow with you!

117 Likes

The next version will have the rails raised, in an attempt to prevent balls from jumping off the tracks when not entirely level.

7 Likes

Wow, such a generous offering—thank you!

6 Likes

You might want to specify the material thickness like you did on the other one, as I know it has to be pretty close to work…

3 Likes

I think if I tried I would likely lose my marbles. Amazing design.

7 Likes

But, but, but, you can always make more :rofl: he even included the SVG for them. :upside_down_face:

10 Likes

Thanks, that is a great point! I updated the main post.

1 Like

Thank you for a great project.

Could you post some pictures of the “no hardware” version of the finished product?

4 Likes

I should have! …before I tried to test the raised ramp-edges… I broke some the ramps on mine trying to get the pressure fit edges off… I think those ramp pins need to be adjusted.

I am running some more tests, and when I have the next version ready, I will be sure to update this post and add pictures.

7 Likes

I love this so much… thanks for the share!

6 Likes

Fun share. Thanks! I especially like that you included a “marble” - that’s above and beyond!

4 Likes

Thank you for sharing. I will be making this for sure.

4 Likes

Got mine together and it works great.

I forgot one spacer on the big gear. I was able to super glue some thin shims to the wheel to compensate.

Should the axle for the big gear be a little longer?

Thanks again for sharing your work. People like you make the GF community great.

K

4 Likes

Are you asking because you are having issues with it falling out? Or are you asking because the space cut out in the rail edge behind it?

I have not had any issues with the length of the axle, but there was a cut-out in the edge behind the axle. (It has been removed in the latest version.) This space was required when there was a bolt serving as the axle.

The next version has now been updated on the main post. It removes that space and raises the rail-edges to prevent balls from jumping the track if the base is not entirely level.

Can you post pictures of yours too?

2 Likes

Does this version use the same size ball bearing? I downloaded the laser cut marbles, but they seem larger. I wanted to double check before I order some.

1 Like

Yes, all these designs I have made so far have been using 1/2" diameter chrome steel ball bearings. (Mainly because that is the size I have.) I even measured the ball bearings and the laser cut balls with the “Gift of Good Measure” to confirm that they were the same size.

I want to play with smaller sized balls. I think that would be easier to design for. But, I have a couple other projects I want to play with first before going down that road.

4 Likes

Love seeing all your evolving work on this!

Thank you so much for sharing your thoughts and design!

2 Likes

Love it, how do u design it ? which tool is used to design the mechanism?

1 Like

I used GearGenerator.com to get the SVGs for the gears. The rest of the design I manually drew in markup (text) and then viewed it in Chrome to see what adjustments needed to be made. I would put the drawings together on the same SVG to test out measurements and how things lined up, but each individual piece is saved in its own file.

I used Notepad for the text editing (I need a better text editor now that the projects are getting more complicated) and I used Inkscape to bring all the pieces together into a single file for printing (like Tetris).

I used TinkerCad.com to test the pieces together virtually, and found a few changes that I needed to make before I actually cut it out and built it physically.

5 Likes

Thank you, I will work and learn this is all very interesting to me

1 Like