It has been a while since I’ve visited. That’s life…
The Glowforge is no longer a curiosity but rather a tool waiting to be used.
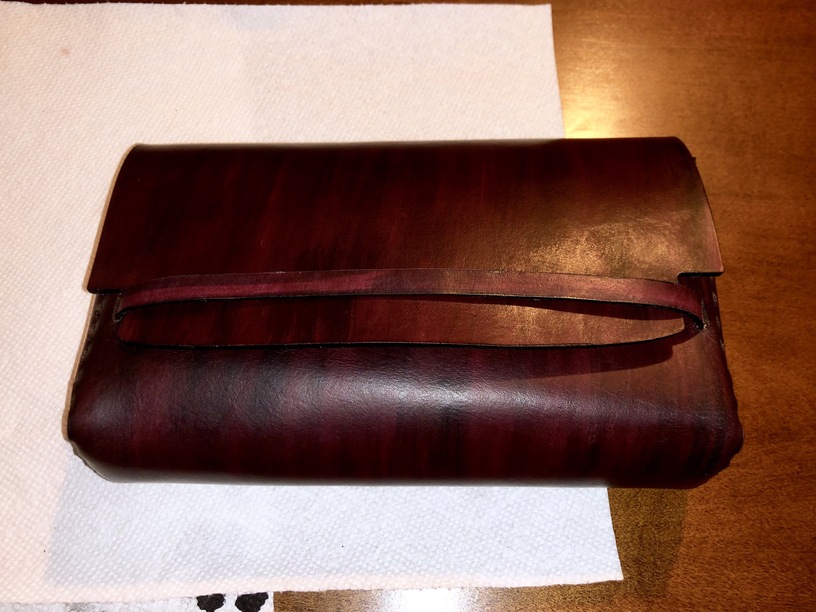
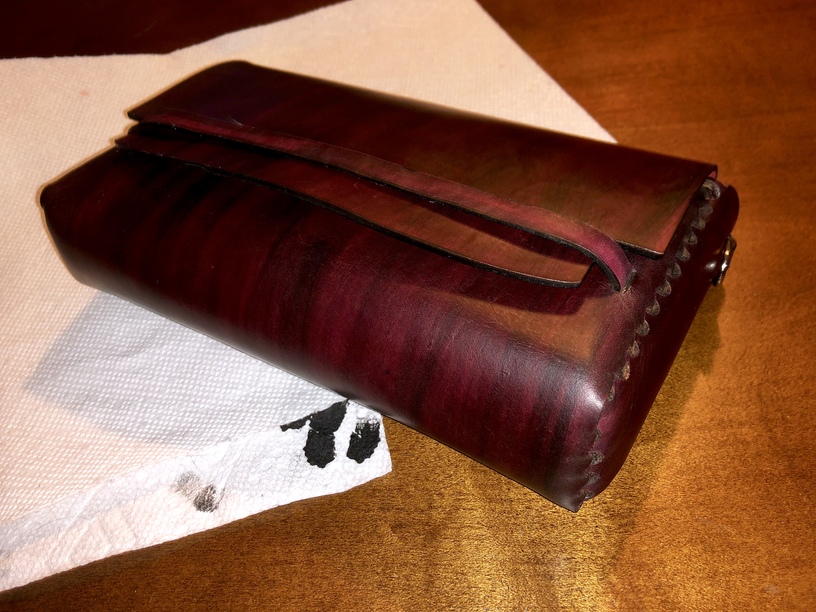
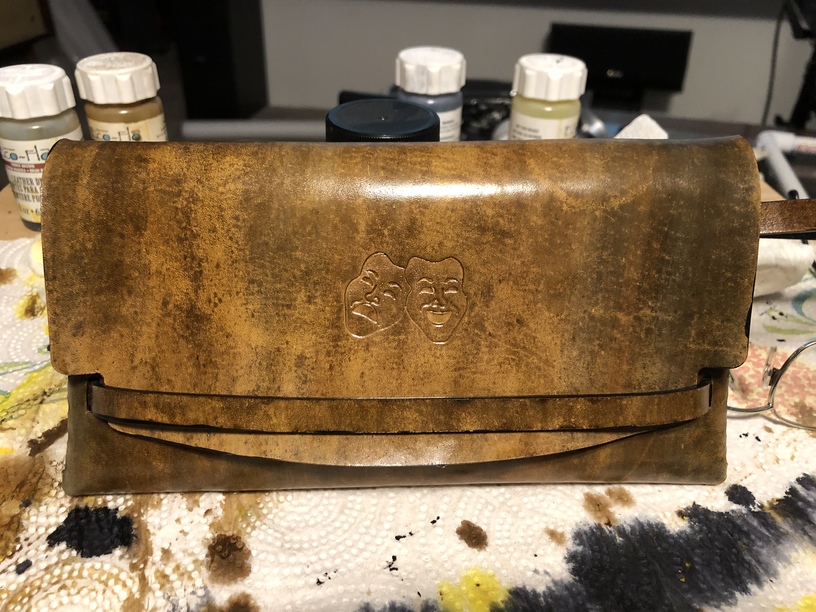
I’m not sure if I have posted this design before but I’m upping the swank this time around. Some time ago I created a small purse using what I learned making the clutch. It uses the same tabbed concept but adds side panels so it can fit more than just a phone.
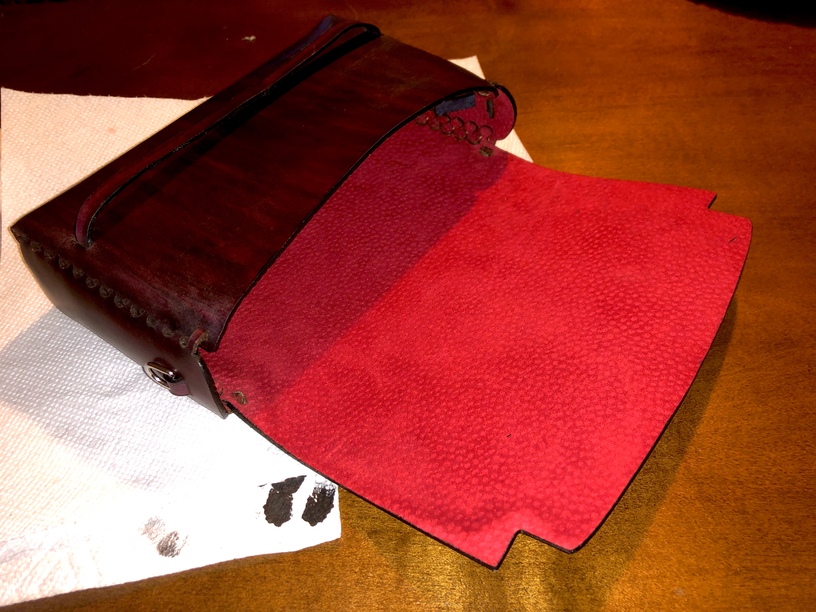
The new part in this one is that it is the first one I have added a lining too. The outside is veg tanned leather around three or four oz. The inside is really thing pigskin attached with contact cement.
I have also done more conditioning to the veg tanned leather so it is more supple. It had a nice feel to it but could still be nicer. It will be interesting to see how the cement holds up.
The cut edges or the tabbed edges? The tabbed pieces are very similar to the small clutch design in the web store. I created them from scratch and still need to work on the corner design a bit but it works - it is just a bit difficult to put the corner together.
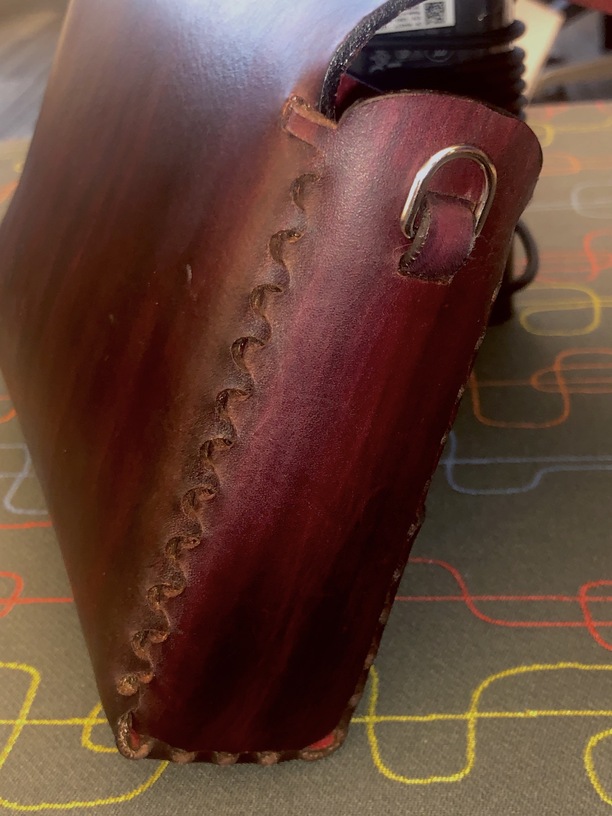
If you mean the cut edges it is just finished with some Edge Kote and paddle. There is still a bit of slop in places but my hand is getting steadier at applying it.
I really like your update to that design! I made the clutch as well (exactly as designed) and it is a bit limiting, volume-wise. I would think that your design was also easier to assemble since the sides are not as close to each other.
Nice–adding the gussets makes a lot of sense & functionality.
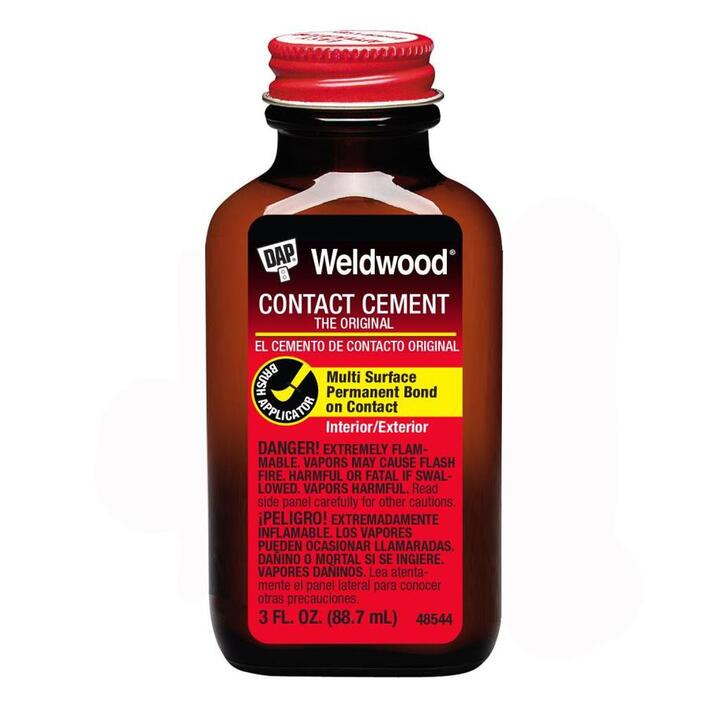
For the contact cement, it’s likely the leather will fail before the glued joint does–when I started leather work, I used Barge’s leather cement–amazing stuff & takes a while for the smell to go away. But after take a lesson with leather designer/crafter who switched to a white leather cement after many of her friends developed liver cancer, I avoid Toulene now, too… wasn’t happy with the non-Toulene version of Barge’s, but really like Fiebings Leathercraft Cement. And it’s a little faster to work with, since you don’t have to wait for it to get tacky before bonding surfaces.
Yeah, the clutch can’t hold much more than a typical cell phone. I’ve made a few of them and that has been a common complaint. I created the design from scratch but you can obviously see the similarities. The next iteration will have a different flap. As it is you can tell it is pretty much a recreation of the clutch’s design.
You would think the tabs would be easier to manage but surprisingly they are still quite a pain. I was worried that they might not hold together very well but the joint is quite solid. The corners are a bit tricky and I will eventually change the design there some.
I’m not sure how well the contact cement I used will hold up. Definitely not the best kind for this use.
Awesome adaptation! You could make a whole collection of these in various sizes and take pictures showing everything you can fit inside each one - Tic Tacs, phone, wallet, etc. I’d love to see how this design would work as a laptop case.
I think most adhesives do instruct to apply to both surfaces, but for the white leather cement, I usually just do one side, but that is also because I edge stitch (machine). If not stitching, first follow the adhesive instructions–and hammer it–and test. It may be contact cement works best for this purpose, but get a version formulated for leather! (I’m sure the Weldwood will hold fine, too).
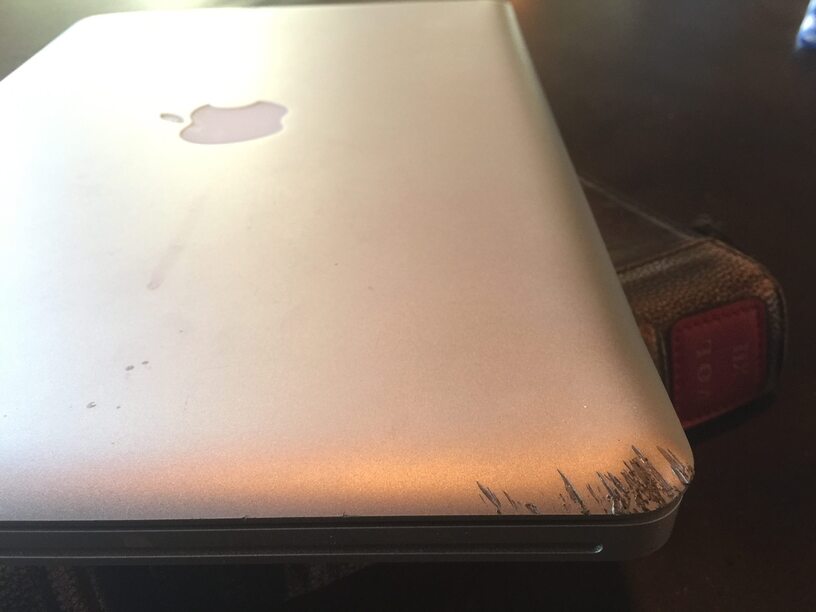
Laptop case, now that’s an idea. I think it would look pretty awesome with a nice dye job. For my personal laptop I would have to go with a distressed theme. The MacBook Pro has hit the pavement at 60 MPH. It took me 20 minutes just to locate it at the bottom of a ravine.
Machine stitching would be nice but out of my budget at the moment. I’ve been buying too many wood shop tools lately. The mask and hat I posted elsewhere took me 10 and 12 hours to hand stitch but I know that will only get better with practice.