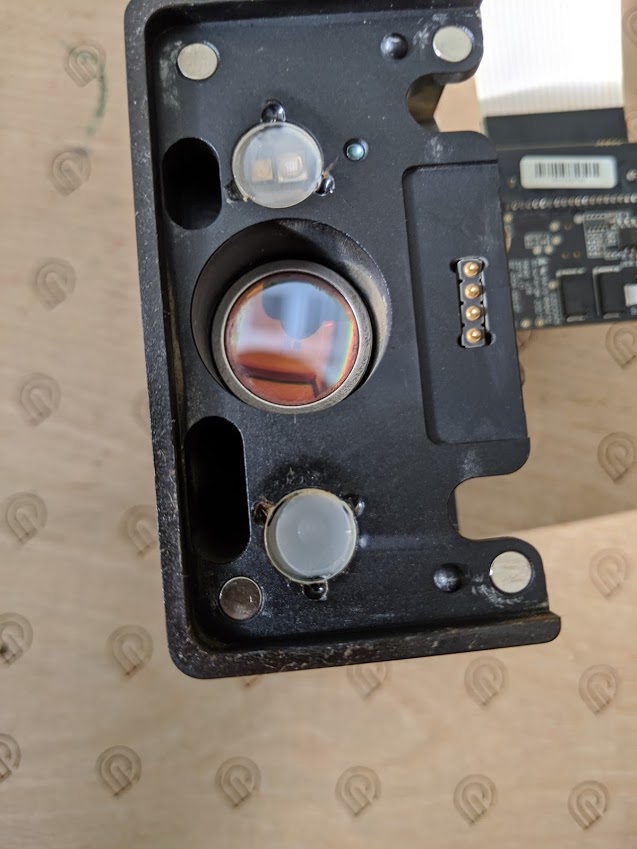
We’ve started to experience some noticeable degradation in engraving detail and cutting power. We clean the machine and the printer head regularly according to the recommended process given here. But I noticed when I removed the printer head to clean the lenses that there seemed to be buildup/smokiness BEHIND the “small windows” to either side of the lens.
Around each of these windows is three small divots. It seems like they are designed to pop out for cleaning, but I can find no direct guidance to this, and every video or page that I can find for cleaning only says to “wipe” the outside of the windows with lens wipes.
Should I attempt to remove and clean these two small windows? It looks like the GF might be using these to focus and determine height and other measurements which might in turn cause issues with focus and cutting power if they are dirty.
It is not recommended that you remove these windows. Wipe them clean. Also, have you cleaned the window on the side of the machine and side of the print head?
Yes, all windows and lenses associated with the laser have been cleaned. I replied to my original post with a picture that shows how clouded they are. It seems like they are glued down, so I agree that removing them for cleaning would not be a good solution… but there appears to be no other access to the inside, so I am at a loss for how to clean them.
I’m so sorry to hear that you’re running into trouble. The windows you’ve referenced in your photos cannot be removed, but I appreciate you cleaning the outside.
I’d like to create a baseline for your Glowforge, and have you perform a specific test print to ensure your Glowforge is performing within specificaiton.
We’d like to have you try a few troubleshooting steps for us:
Turn off your Glowforge.
Check for small pieces of debris or dust.
Check the lower door to make sure it closes all the way. It may require some force to open, but open it, wipe any dust off the edges, and close it all the way.
Remove the tray and clean any dust or debris from the surface underneath. Pay careful attention to remove all debris from the four dimples where the tray rests.
Check the lid to make sure it closes all the way. Small particles of material, such as dust or debris, can prevent it from closing completely.
Check the surface your Glowforge is on to make sure it’s flat. Ensure it is not twisted slightly and that there is no debris propping up one side of the machine.
Turn your Glowforge back on.
We included an extra piece of Proofgrade Draftboard with your materials shipment for troubleshooting. Place the Proofgrade Draftboard in the center of the bed and print the Gift of Good Measure using the default settings.
When the print finishes, leave the lid closed and wait until the fans stop and the picture updates. Without moving your artwork or your material, take a screenshot of the Workspace to show us the difference between the artwork placement and the actual print placement. Make sure to include the rulers in your screenshot and show as much of the bed as possible.
Mac: Press Shift-Command-4 and click and drag a box around your image. You’ll find the screenshot file saved on your desktop.
Windows: Click on the Start Menu and type “snipping tool”. Open the Snipping Tool > New then click and drag a box around your image. Click the Save icon and name and save your file.
Send us the screenshot along with the date and time of the print, and we’ll investigate.
Once the print completes, let us know how it goes! We’ll extract the log files from the print, and send over any additional steps.
It’s been a little while since I’ve seen any replies on this thread so I’m going to close it. If you still need help with this please either start a new thread or email support@glowforge.com.