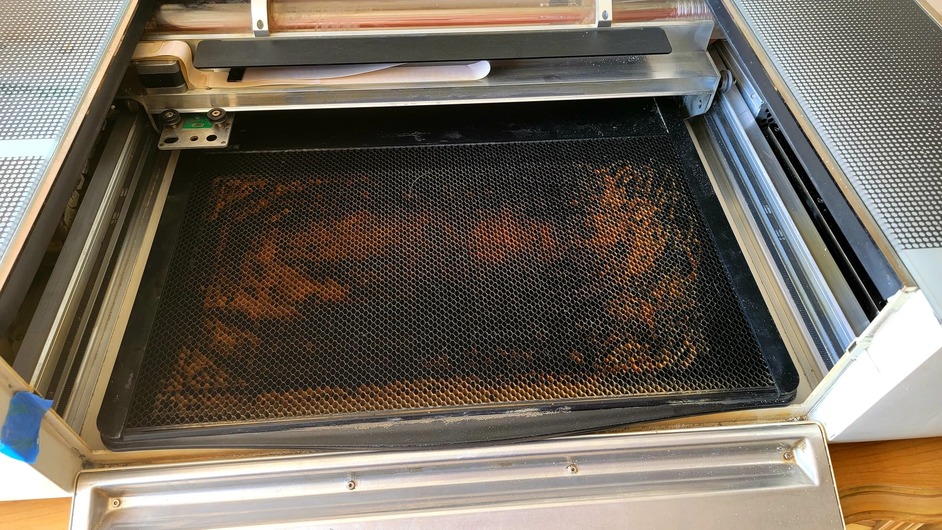
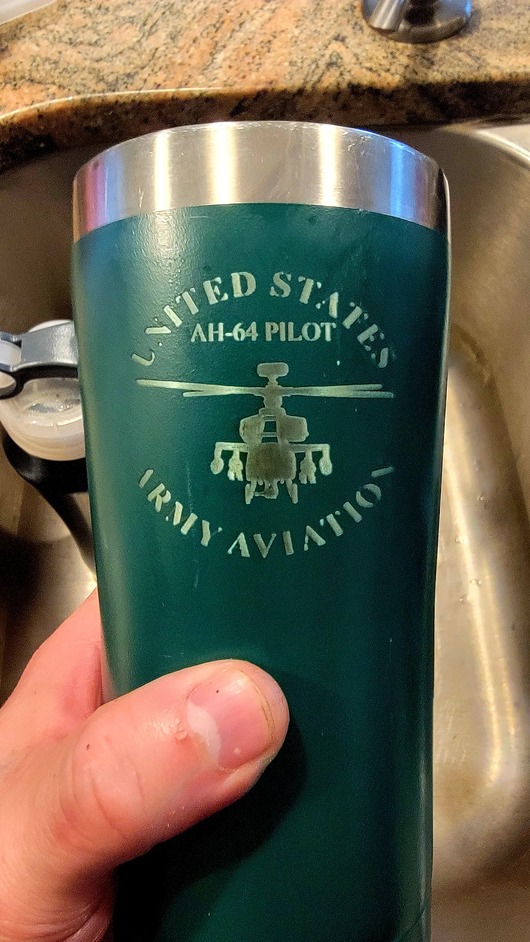
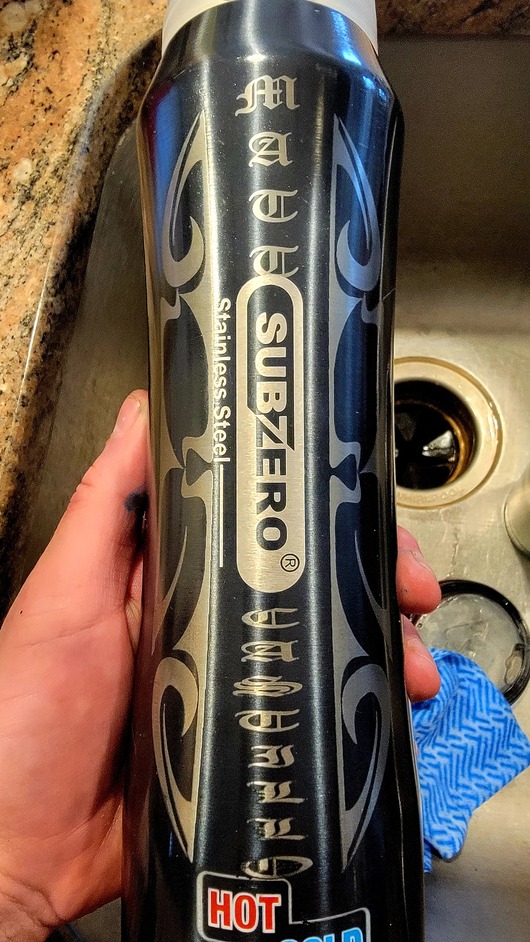
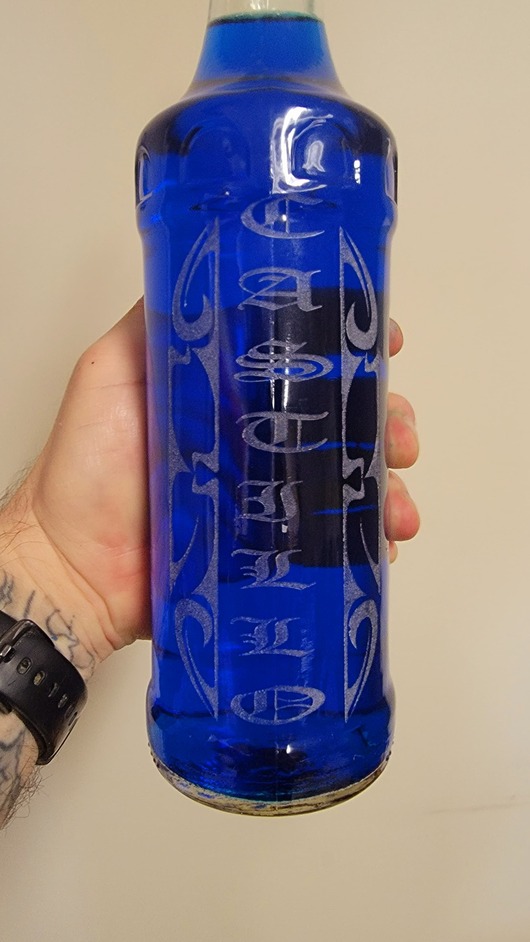
So I did something today, I cut the bottom out of the GF to garner greater depth and it was surprisingly easy. After I was done I decided to test it out on a cup, a water bottle and a glass bottle.
I’m new to this whole cylindrical material engraving and would love to hear from any one who has done this successfully.
What are your techniques for centering graphics?
What is the greatest width you use?
Do you do one graphic in multiple engraves if so how?
What I did was find the center line mark a half inch on either side and made the graphic an inch wide. Then I turned the material a half inch and did the next part. I felt like it was a lot of work. Is there any other ways that make it easier? I think biggest issue is going to be alignment. If you can give some insight please help.
Now that you’ve cut the bottom out, you can engrave much larger objects. You could modify my fixture design, to which @evansd2 shared the link above, to handle full circumference engraves on larger bottles.
I had an old dress my GF was sitting on top of. So I centered the GF cutout hole on the top drawer and cut out a hole in the dresser. That way I can load it from the top and also pull the drawer out.
Thanks for your reply, I am intrigued as to how it works. I’m by no means an expert or engineer. Lol I watch your videos but can wrap my head around how you got the dowel to spin without having to manually spin it and also how you got it to spin at the correct speed. Again thanks for the reply and hopefully I can learn something new from yall.
So how it works, is the fixture essentially drags the dowel, tumbler, etc. along the bottom surface causing it to roll. The speed at the bottom is the same as the speed at the top, which is the same as the speed of the Glowforge Y axis. To encourage rolling rather than sliding, I use masking tape attached sticky side up to the base under the rolling object. To prevent the fixture from sticking to the tape, I place a few layers of masking tape sticky side down past each end of the rolling object. Let me know if this helps or if you have any other questions.
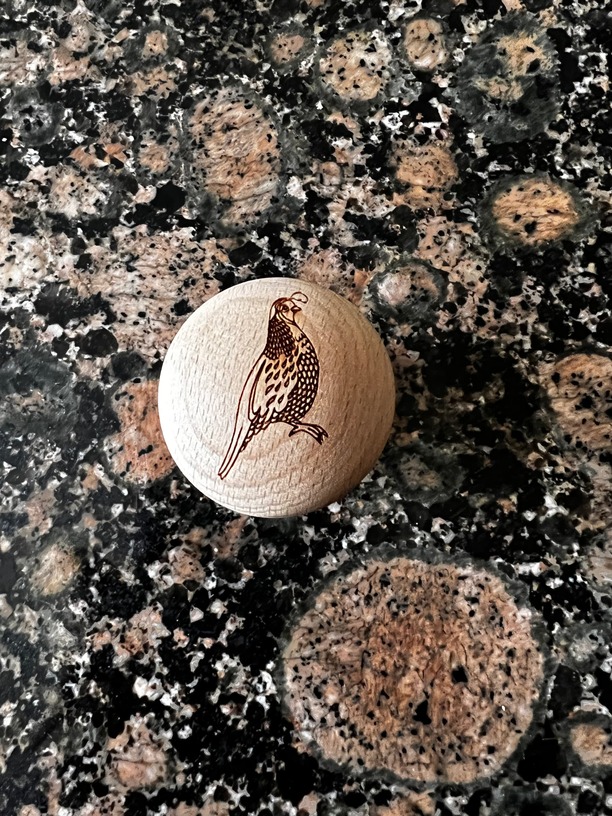
I was at the AWFS this summer and looked at the Trotec’s. They engrave a domed wood knob. The guy demo’ing said to set the focus just a bit off the high high point.
Have you considered disconnecting your Y axis and connecting the cable to an aftermarket rotary device. The y axis cable should rotate the material. Thoughts?
I have considered using a motorized rotary device. The problem is that there is too limited space. Most devices won’t fit beneath the carriage, or if they do, you will only be limited to very small diameter objects. The challenge with connecting the existing y axis cable will be that the step count between the Glowforge and the device will most likely be different, so some sort of electronic conversion would be necessary.
Better to get a machine designed for round objects than try to make your glowforge do what it is not designed for. You could cut a sheet of plywood using a drill to have the holes close together but why?