@Jules, I expected your two pictures to be different, but they seem to be identical positions for the print.
What am I not understanding about your pics ?

@Jules, I expected your two pictures to be different, but they seem to be identical positions for the print.
What am I not understanding about your pics ?
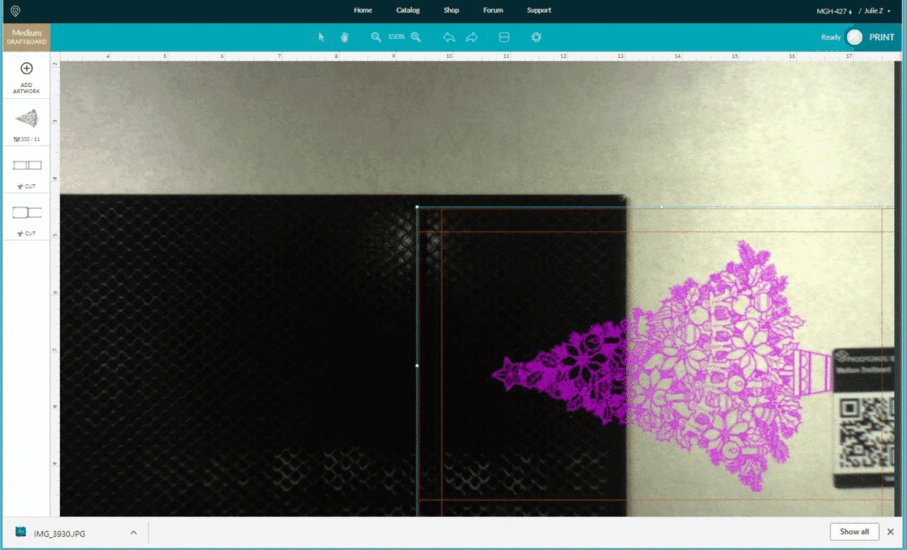
A comparison between the on-screen placement with medium draftboard and thickboard - you can compare the difference by using the QR sticker at the base of the tree as a reference point.
???
I still don’t see any difference. The QR sticker is in exactly the same place with reference to the tree in both pics.
At least it is from my perspective.
Do I need new glasses ?
Thanks JB!..
Yes it’s easier to see if you click on the first photo to enlarge it, then click the left or right arrow.
Look at the base of the tree stand in both pictures. It’s shifted slightly to the right in the bottom pic.
Ok, I get it now. There is a movement of about 1/32 - 1/16". Is that the problem ?
After my experience with the first Glowfinger, the second one is a precision machine, so the change in the alignment between the two pics in small beer to me.
Perhaps I just don’t need that sort of precision, so the movement in the placement caused by incorrect thickness data seems to be insignificant to me.
My UK 2d worth !
Thanks, JB.
Pretty much the same for me. It means more for really tight tolerance designs being dropped onto a pre-existing object/shape. But there are also folks here where 0.01" is a lot and causes them serious angst even if all they’re doing is getting it 1/64" closer to the edge of a brand new sheet of material. It’s all dependent on use cases. ![]()
Sweet animation! 
Hey @Jules, you’ve made this claim several times in the past (try searching “focus the lid camera”). It does not.
True. Technically it’s not the physical camera itself that is adjusted, it is the preview that we see during the placement. It’s not actually spinning the camera dial.
I left out the word “output”. (I’ll go fix that so that no one is confused by my error.)
Once again Jules for the WIN.
I can say this much: if your material or design is placed to where the red dot doesn’t hit the material (and goes into the crumbtray), it will throw a material height error.
is that the case even if you specified your own material thickness or focus height?
Would appear so. I was using non-PG with a height specified. I haven’t tested it (better things to do with my time) but the red dot uses an area within the design. So I’m fine that it threw an error because I wouldn’t have hit my material.
well, that’s different than what previous owners have found:
but then again, it’s possible that GF has pushed an update between the posts and we didn’t know about it
I actually haven’t done any controlled tests where the material measurement is out of range, or when material isn’t present.
I can, and shall. ![]()
I think all of the quotes you mention, there was material in the spot checked by the red dot within the 0-0.5" range. The error message is when the red dot camera doesn’t see a red dot.
Precisely. Basically a “null” value.
I’m not as fine with that. It’s not a big deal, but I would love an override button that said “just go with teh $#%#% height I told you!”
My case was engraving a bunch of dice in a jig. The red dot kept landing just off the edge of a die and giving me an error unless I aligned the jig just so (and a bit off from where I wanted it)