Where do you find the software to download, so I can get started
There is no software to download. You simply go to app.Glowforge.com, sign in and that is it. Do you have your Glowforge already?
yes, I have afriend that has one . She is the one that said about software. They don’t sent you anything with this and it takes forever when you email support.
Your friend with the Glowforge can allow you access to his/her Glowforge and you can then design in the interface. Other software that you might want to use include Inkscape, Adobe Illustrator, and Affinity Design. All of these are software programs that are available to download from the company. Glowforge, however, has no software that resides on users computers.
1 Like
Thank you. I feel like an idiot because I am having so many issues. Now it is taking forever to focus and won’t let me print
Don’t let the frustration get the better of you. What browser are you using? Are you trying to print a Glowforge file or one you designed?
1 Like
I am just starting so I was trying to print one of the samples, just a star.
If it takes a long time to focus, it may be a wifi issue or sometimes it can be related to ambient light in your workroom or the material in the Glowforge bed. Try turning off any nearby bright lights or shading from direct sunlight. If that doesn’t help, try turning of the machine with no material on the bed.
1 Like
I’m sorry for the challenging start. I’m glad to see that you’ve already been receiving some great advice from @dklgood!
I extracted the logs from your unit, and it looks like it might be getting stuck because the Glowforge is having trouble communicating with the printer head. There are two key connections I’d like you to check for me.
Could you please do the following?
- Turn off your Glowforge.
- Holding only the finished black surfaces, grasp the printer head as shown. Pull gently up and back to disengage the magnets and remove the head.

- There is a small tab in the center of the wire ribbon. Push down fully on the tab to release it, and gently pull the wire ribbon plug from the printer head.
- Take a clear photo of the gold pins inside the printer head where you just unplugged the wire ribbon. It should look like this.
- Pick up the printer head and wire ribbon. Make sure the tab on the wire ribbon is facing up. Slide the ribbon back into the head until it clicks.
- As shown, lower the printer head over the metal plate so that it rests next to the two round posts. Then push it gently away from you – you’ll feel a “click” as magnets pull the printer head until it sits snugly atop the metal plate.
- Pull the laser arm all the way forward.
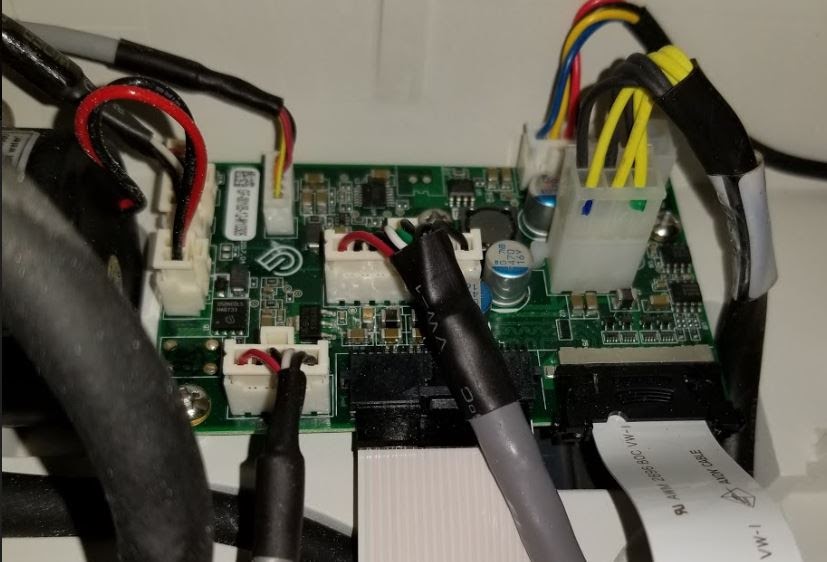
- Reach over the laser arm, and to the left of the inside of the unit and you’ll see this circuit board:
- Take a photo of this board.
- Turn your Glowforge back on.
- Send us the photos you took in step 4 and step 9.


We’ll review the photos and then follow up with next steps.
I would add Gimp to that list for any images (raster) that you need to modify.
1 Like
I see you already emailed us about this issue and we’re working on it there, so I’m going to close this topic.