My laser stopped firing mid cut. A bright light turned on the printer head. It still went through the motions of finishing the cut but the laser was not firing. My start button is now solid orange. When I turned my Glowforge off and turn it back on. The orange light is gone but laser won’t fire. Any ideas?
Oh no, I’m sorry to hear about the trouble.
I see you emailed us as well. I’m going to close that request so our conversation can continue here.
I extracted the logs from your Glowforge to investigate, and it looks like the orange button is appearing because the Glowforge is having trouble communicating with the printer head. There are two key connections I’d like you to check for me.
Could you please do the following?
Turn off your Glowforge.
Holding only the finished black surfaces, grasp the printer head as shown. Pull gently up and back to disengage the magnets and remove the head.

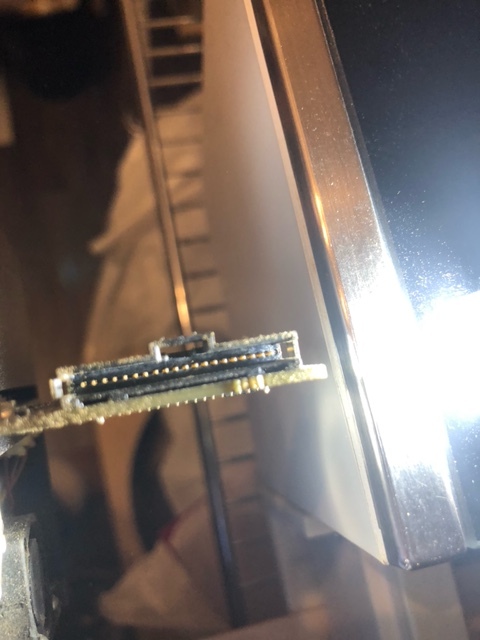
There is a small tab in the center of the wire ribbon. Push down fully on the tab to release it, and gently pull the wire ribbon plug from the printer head.
Take a clear photo of the gold pins inside the printer head where you just unplugged the wire ribbon. It should look like this.
Pick up the printer head and wire ribbon. Make sure the tab on the wire ribbon is facing up. Slide the ribbon back into the head until it clicks.
As shown, lower the printer head over the metal plate so that it rests next to the two round posts. Then push it gently away from you – you’ll feel a “click” as magnets pull the printer head until it sits snugly atop the metal plate.
Pull the laser arm all the way forward.
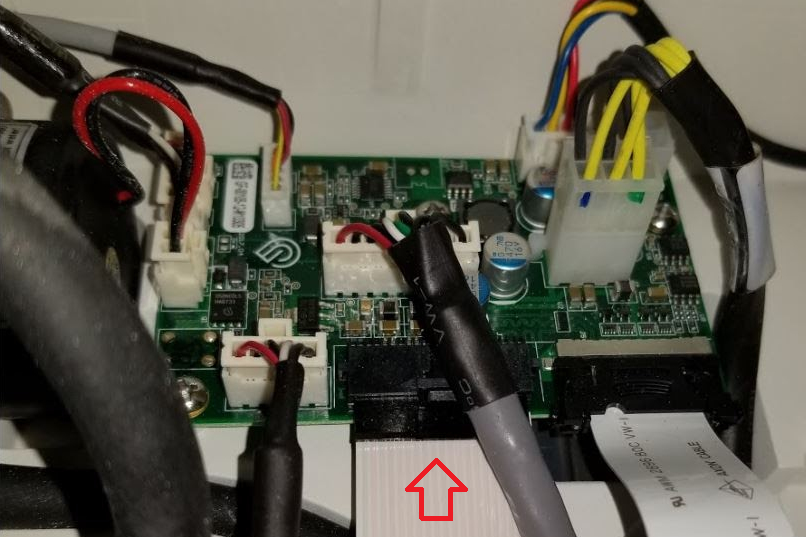
Reach over the laser arm, and to the left of the inside of the unit and you’ll see this circuit board:
Take a photo of the circuit board. If the cable I’ve indicated above with the red arrow appears to be loose, please reconnect it and try printing again. This cable should ‘click’ back into place.
Turn your Glowforge back on.
Send us the photos you took in step 4 and step 9.


Let us know how it goes!
Attachments
![]()


Good evening,
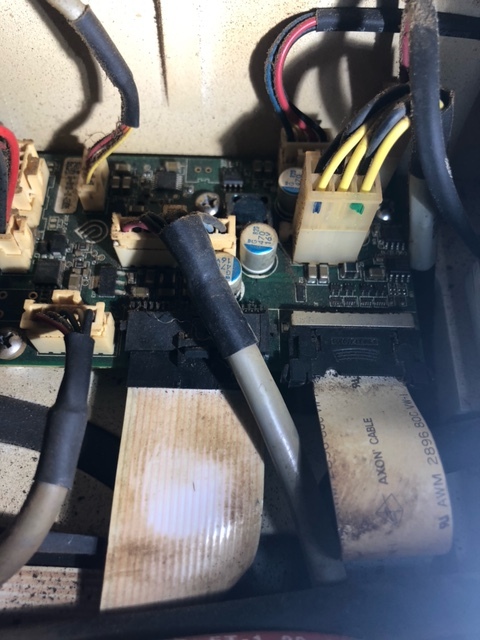
Attached are my photos. Disconnecting the white cable did not work. The end connected to the circuit board on the left was not loose. I can’t remember if the laser lights up when you turn on the machine because this is also not happening.
Thank you for helping me with this problem. Let me know what I should do next.
Cheers,
Heather
Good afternoon,
I sent the pictures last night. I was just wondering if there were next steps for me to try.
Thanks,
Heather
I seem to be having the same issue. I just set up my GF yesterday and went to make the (Gift of Measurement), and it is doing everything BUT the cutting. It starts and stops. Every piece I have tried to make has been different (Some cut while others dont). Also, When it is done and cools down I get the yellow/orange light and It stays in “Focusing”.
I checked the cables as shown above and still have the issue.
Very frustrated that I cant get the simplest project done.
Welcome to the community. If you wish to open a ticket with support, you must post your own thread as they will not be able to assist you when your issue is mentioned on another person’s post.
Thanks
Same here frustrated!!
Thank you so much for sending over those photos.
To help us take a deeper look, I’d like to check over a few additional things.
First, let’s check to make sure the mirror in the printer head is installed correctly and not in the path of the laser beam.
1. Follow steps 1-5 under the heading Wiping the Mirror in the Printer Head.
2. If you see damage to the mirror or the plastic handle (for example, if the plastic handle has been melted), please check the interior of the printer head for any additional damage. If you notice anything out of place, please take a photo and include it in your reply, so I can help with ordering replacement parts.
3. If the mirror and printer head look good, reinstall the mirror and move to the next steps.
Next, please run a test print. To help me determine the specific source of trouble, I’ll have some questions for you about what the printer is doing while printing.
1. Place a sheet of Proofgrade material in the bed of your Glowforge and open the Gift of Good Measure design.
2. Before you start the print, please select the default Proofgrade settings for the material you are using. Once you’ve selected the material, you will see the word, “Cut”, “Score”, or “Engrave” under each step in the design.
3. Once you are ready, push the button and start the print. While the print is running, please note your answers the following questions:
- Is the laser marking the material as expected?
- Is the printer head moving during the print?
- Do you see a light in the laser tube during the print?
- Do you hear any unusual noises from the left side of the printer?
4. As the print finishes, leave the lid closed and wait until the fans stop and the lid image updates on screen in the App.
5. If the laser appeared and the print was successful, the likely issue was the setting on the previous print was set too low for the laser to appear. If so, please check your settings and try another print. If the laser did not appear, please move to the next step.
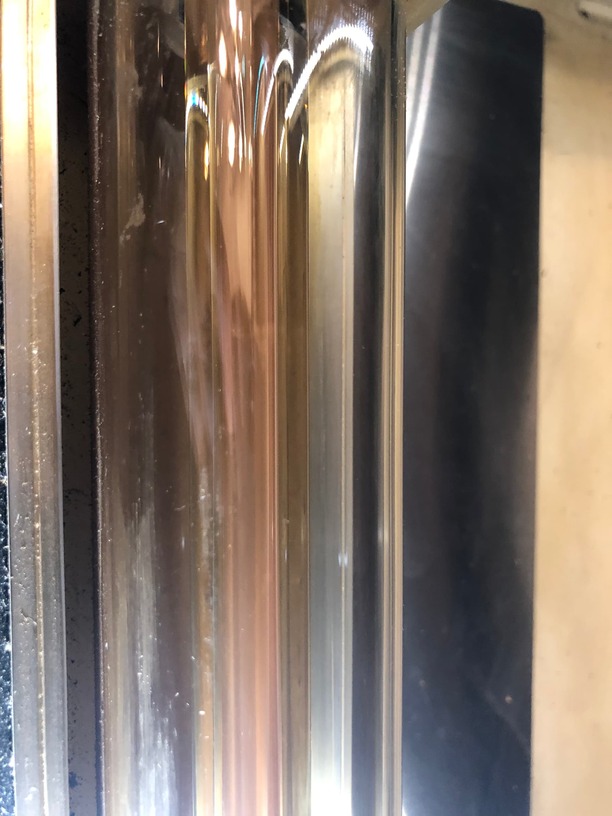
6. Take a close look at the laser tube. If you see any of the issues on this list, please reply and include a photo.
Do you see any damage to the inner glass tubes, such as a crack or loose pieces of glass?
Do you see anything in the laser tube that looks foamy or bubbly? (When normal, the coolant is clear.)
Do you notice any liquid in or around the printer?
Good evening,
- I wiped the mirror and there is no damage to the mirror or the plastic part. I have included a picture.
- I ran the Gift of Good measure on Pink Proofgrade acrylic. The laser was able to read the QR to upload the settings.
- Is the laser marking the material as expected? The laser did not mark the material.
- Is the printer head moving during the print? The printer head moves as it normally would when cutting a file.
- Do you see a light in the laser tube during the print? The laser tube is not firing up.
- Do you hear any unusual noises from the left side of the printer? No unusual noises coming from the machine
- I attached a short video of what it was doing well it was on the print. After the print the orange light came on.
- Do you see any damage to the inner glass tubes, such as a crack or loose pieces of glass? There is no loose glass or cracks.
- Do you see anything in the laser tube that looks foamy or bubbly? (When normal, the coolant is clear.) No bubble or foam.
- Do you notice any liquid in or around the printer? I took out the crumb tray and no liquid at the bottom or around the printer.
Please advise about next steps.
Thanks,
Heather

Hi @hstoness. Thank you for getting back to us with the videos of your Glowforge as it tries to print. Because it is continuing to fail after running through all the checks in Jeremy’s last response, this may need to have the printer replaced as a next step. For this process, it will require confirmation of some private information. I reached out through a separate email to help with this. Can you confirm you have received it through email? I will leave this thread open until I can confirm my email has been received and I’ll look forward to hearing back. Thank you!