Alrighty, I did a little experimenting and it turns out that the offset tool isn’t going to produce the same geometry so actually isn’t the lifesaver I was thinking.
I did come up with a strategy that I think may be helpful. I recorded a video and it’s currently uploading to YouTube. The content of the video is pretty dry, but hopefully the time spent watching it will save you time overall.
It is so weird how different people pick up on different things! For someone who claims to not to know Fusion very well, you sure taught me some valuable things.
I did know that offset was not going to work but glad you played around and made the video as I had no idea you could link multiple dimentions the way you did!
Some of the things that gave you trouble were weird as they don’t do that to me. Like the dialog box that needed scrolling and trying to place the splines precisely. If fusion ever gives me trouble placing a point I always just scroll in until it gives up and lets me place the point where I want it.
Thanks, that’s really good to hear; you’re welcome!
There seems to be a LOT of similarities between Fusion 360 and SolidWorks so I guess once you get a pretty good handle on one you can probably kludge your way through the other.
Yeah, you can link them and also add mathematical operators to them as well, or even combine a few dimensions together (eg. “d2 + (2 * d3)”). Very handy indeed!
I did a few trial runs before getting that video recorded and I think the snap points worked OK the other times… silly computers.
Hey @Clone your the first person to sort of get how I ever did mine. I used the excel spread sheet I made up some time ago(ill dig up the link later…) and just graphed it out. I used a sine wave and plotted around a circle with some variable to change the frequency and amplitude. The spreadsheet made a graph I could save as a PDF then load into Inkscape. The spread sheet took less then a minute to run, and Inkscape took no time.
Looks great! Nice 3D rendering
Edit: I think if you look through @karaelena link above to my original post you should find the spread sheet I used, I think.
Just an idea: once you have the design set up, make a multilayer jig (with whatever ugly alignment holes and pins you need) out of UMHW or PET(G) or polycarbonate or whatever other wood-glue-immune material is handy.
i just use a curved syringe from Lee Valley with a 50/50 wood glue-water mixture. Do a layer then put a few heavy books on it for a few minutes. Wash rinse repeat
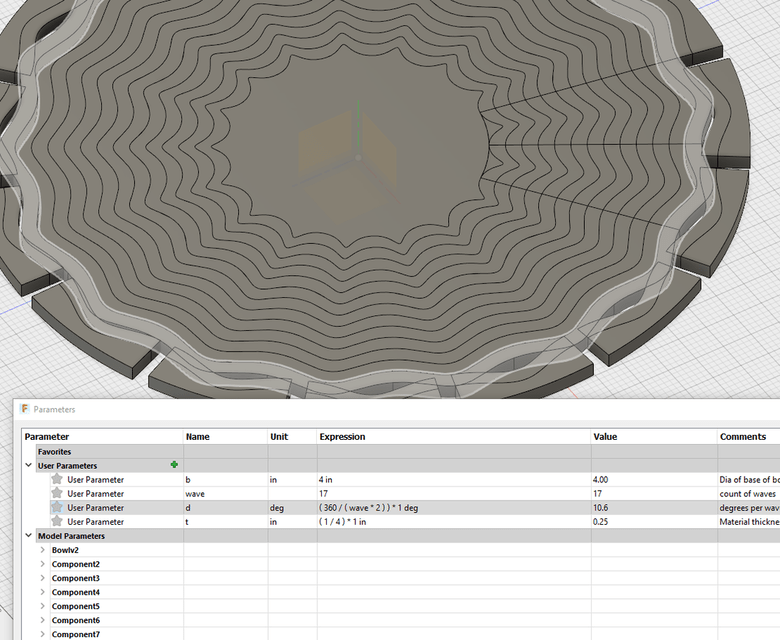
so pattern was much faster however… when I went to change bowl size in parameters I’m clocking now well it recomposes everything. before I applied the patter resize was instant.
so this is 100% parameter driven so the bowl size(base), material/rib thickness, count of waves.
the thing that I still have not figured out is layer count, so right now its kind of static based on the rings I put out. so will think more on this but I think it is what it is
edit recompose finished looks like on the dynamic resize the tangent got lost so its just a radius, wonder if I need to include the tangent in the pattern
re did the pattern and selected the tangent but nope still busted full radius instead of smooth waves. would really stink if I have to delete the pattern resize and remake the pattern each time going to try that now
nope cant edit or delete the pattern I delete the pattern and the objects all remain ger…
ok so I did undo until good and everything is back, so I said what happens if I just slide the sketch a we bit… well all the smooth curves vanished back to radius
ya if I make any change what so ever the replica’s of master loose what they should look like
That’s no good! (Tried it and it did the same to me.) I’m guessing this is a bug rather than the way it is suppose to work.
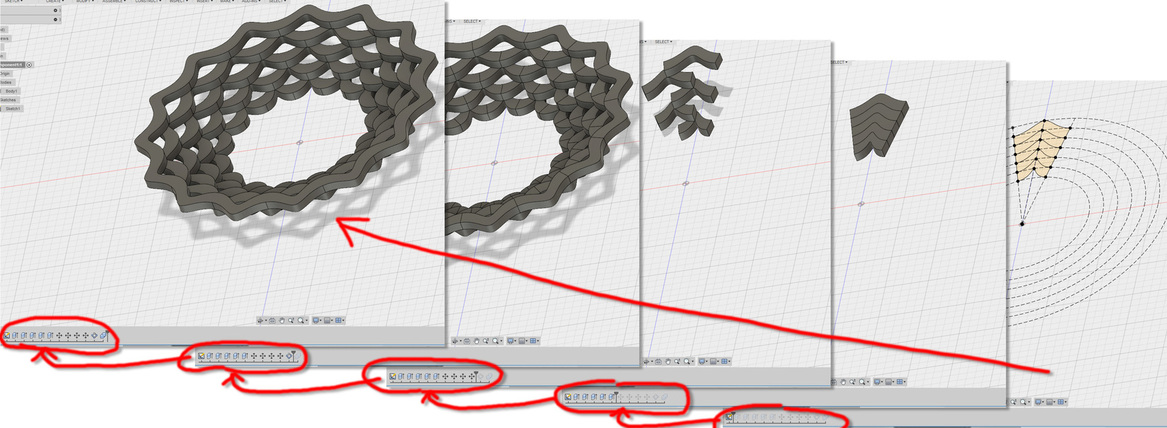
A possible workaround is to “cap” the ends of the initial splines and use them to create short 3D sections of a single wave and… argh, so much easier to show than explain…
I made another video and it’s uploading… It here…
PS When I said I couldn’t find a “join” option, I meant I couldn’t find a way to automatically join the result within the pattern tool.
PPS Oh, I guess a way you could save some entries in the history would be to extrude each of the single waves individually (note: use the “new body” option to create a new body for each extrude and avoid automatically joining them to any existing bodies). Then move each of the single waves to the position you want them to be. Then array… I mean pattern… all of them, then do a single join to merge all the bodies into one.
great work around using the body as a pattern, ya defiantly seems like a bug for the sketch to blow out like that
ya all the match with constraints and that using only 1 cpu thread eck
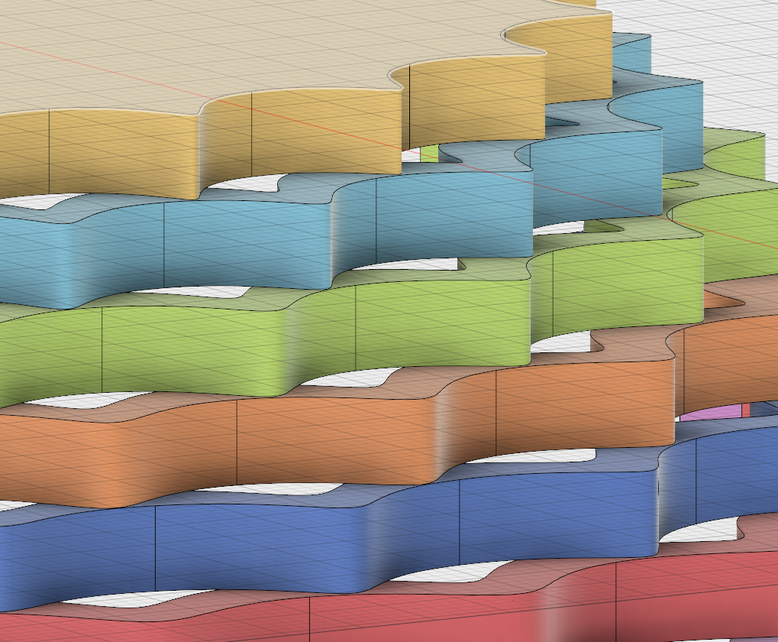
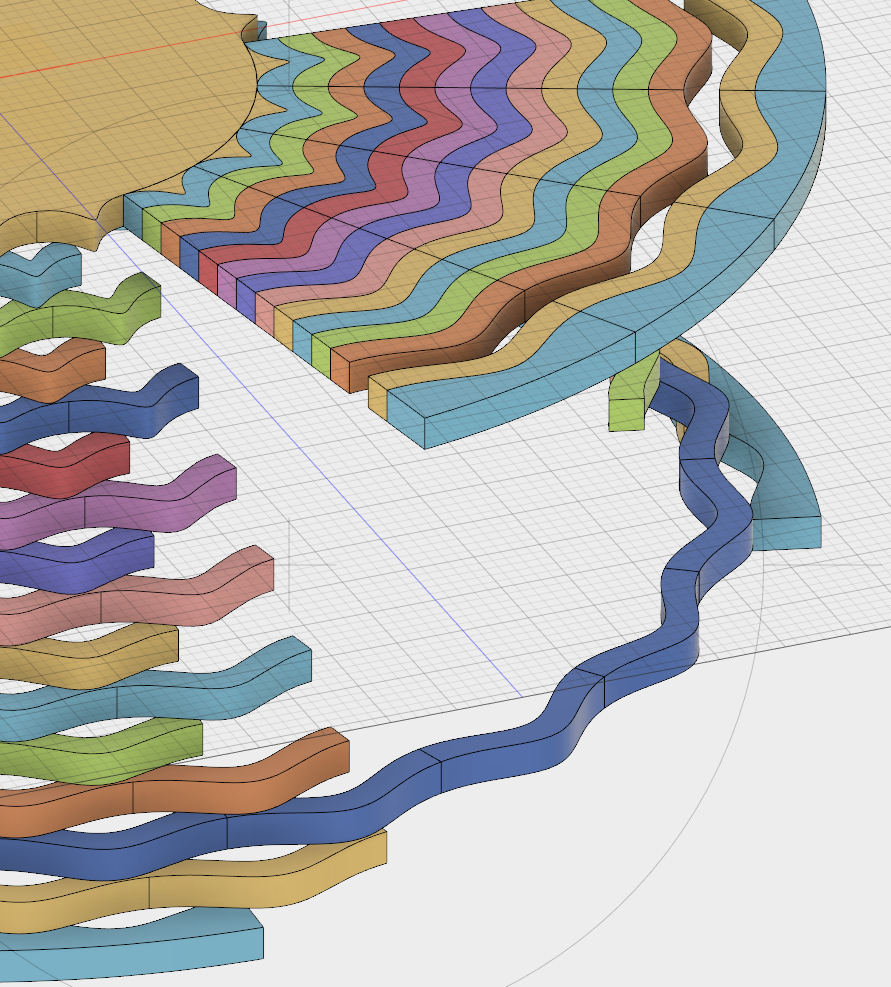
fully parametric now, still no way to remove extra layers and have a nice full circle on the top but eh ill live. when adding waves you have to re combine body when removeing waves it just works.
by using move to align the parts when waves change the rotation alignment messes up but its cosmetic not functional