You’re amazing, thank you thank you thank you!
1 Like
WOW very impressive. I will be referring to your cut charts over and over again.
1 Like
I tried using masking film, but it just wasn’t sticky enough. Turned out not to be worth the hassle.
This is an impressive list of test cuts, great data. I have a pile of test cuts and engraves from paper to cardboard and some wood samples too. Thank you for sharing. 
2 Likes
When you do proofgrade stuff, there are “cut” and “score” presets which basically cut through the material (cut) or just part of it (score).
When you use manual settings the difference between a cut and a score is basically whether it goes through the material. For paper there’s an in between: not quite going through but leaving enough fibers so that you can easily tear the sheet apart by hand. All the test cuts (curve, cross, line) in a row are all done using the same settings. The goal of this experiment is to determine what settings are needed for a cut.
The photos show only the top and not whether the laser cut through, so it looks like the material is cut in all of them except for the very clearly not cut through ones. The photos honestly aren’t super helpful; I’d use the table in the top post to get a better idea of what each setting does.
2 Likes
Thank you for doing all this work. It make me more eager than ever to jump into burning paper in the laser. I think a lot of amazing work can be done with paper and the precision of the laser adds a lot to what can be done.
2 Likes
Thank you for all the great info. This is very helpful.
2 Likes
Amazing!!! Thank you so much for posting this!!
1 Like
So, I have some sample paper to cut and I am getting a consistant error that the GF cannot measure the height of the material. I have put in a thickness manually it still does not register a thickness to cut either. The image is a .PNG file imported to GF.
We have a single 20lb sheet held in place with magnets.
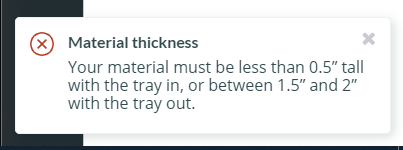
Any thoughts?
Is the paper on a Seklema mat or anything besides the honeycomb tray? Try using the set focus tool.
2 Likes
OMG I love you for this… Thank you so much!! Huge help!
3 Likes
THANK YOU THANK YOU THANK YOU  This is amazing, and has saved me SO MUCH GUESSWORK!!!
1 Like
Thank you so much for sharing this information : so HELPFUL!
1 Like
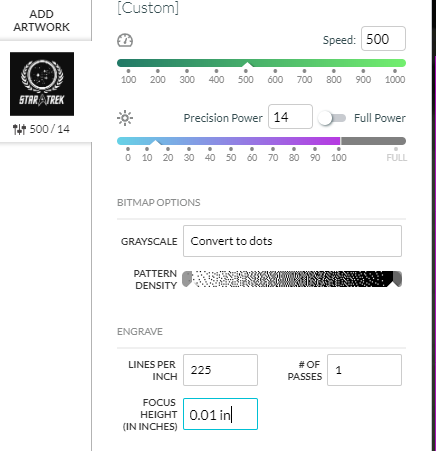
I found out that the best setting for cutting out card stock with minimum burn edges is 180 speed / 10 power / 0.01 inch.
11 Likes
Hi, thank you so much for your topic, I’m new to Glowforge so still learning things… just have one question, (lb) - what is it? Thanks
“lb” is “pounds” - it’s really a terrible way to judge paper, but it’s what we use with our lovely (sarcasm) imperial system 
If it’s helpful, there’s a calculator here: https://okpaper.com/toolbox/calculators/calc-lbs-gsm
3 Likes
Thanks!!!
1 Like
It’s even worse than most people realize.
Basis weight is the weight, in pounds, of a ream of sheets at their original manufactured or “basic” size. While that sounds straightforward, different grades of paper have different basic sizes and, the number of sheets in a ream can also vary in some cases. So, 80lb writing stock and 80lb cover stock will be quite different.
It also doesn’t really provide any information on thickness (“caliper”) or rigidity/stiffness.
Grams per square meter (g/m^2) standardizes sheet sizes making the measurement comparable across grades of paper and, more intuitive.
I guess the key Glowforge take-away is that, as with most materials, testing is required with your specific stock to determine optimal settings.
5 Likes
Thank you so much!!
1 Like