When I place the file on my computer, it looks like it’s all the way at the top to make the best use of wood (Proofgrade), but when it cuts, it’s not at the top, it actually has left about 3 inches at the top which is super annoying. Why is this happening?
The camera shows the usable area of the bed - not its entirety. If you look at the printhead in its home position you will see that there is material behind and to the left of it. The Glowforge cannot print behind or to the left of the home position. Orient your design and material relative to the lower right corner of the bed.
The actual cutting area is less. What you see in the camera is pretty close to what you can actually cut. I found that if you place your project as close to the BOTTOM RIGHT, you will actually be cutting at those edges. If you are using Proofgrade and don’t want to cut the barcode, then flip it around so the barcode is on the top left. I don’t use Proofgrade (too expensive), so I am not sure if the Glowforge will read the barcode when it is located on the top left. Maybe someone else can verify that.
edit: dklgood beat me too it! ![]()
Maximum area that can be cut is 19.441 x 10.972.
If I properly seat a piece of PG and cut the max rectangle out, I am left with .69" on the left and .25" on the right, .687" along the top and .39" along the bottom.
The material needs to be against the front lip on the crumb tray. If you’re getting 3" at the top, it sounds like you’re seating it against the lip at the rear.
Totally counterintuitive isn’t it?
You’ll get the hang of it soon enough. ![]() As everyone else has mentioned, starting from the bottom right will give you the best shot at using all your material.
As everyone else has mentioned, starting from the bottom right will give you the best shot at using all your material.
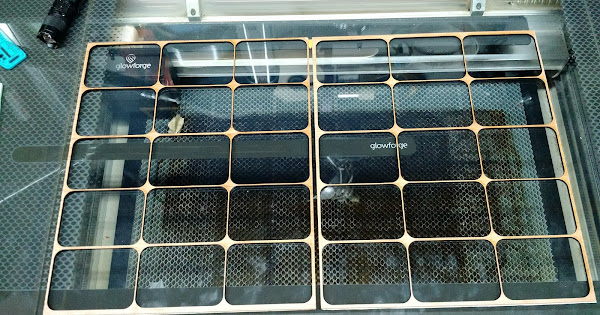
You can also plan your cuts -

These two pieces are one full sheet of proofgrade. Two operations, but I use all of it that way.
This topic was automatically closed 30 days after the last reply. New replies are no longer allowed.