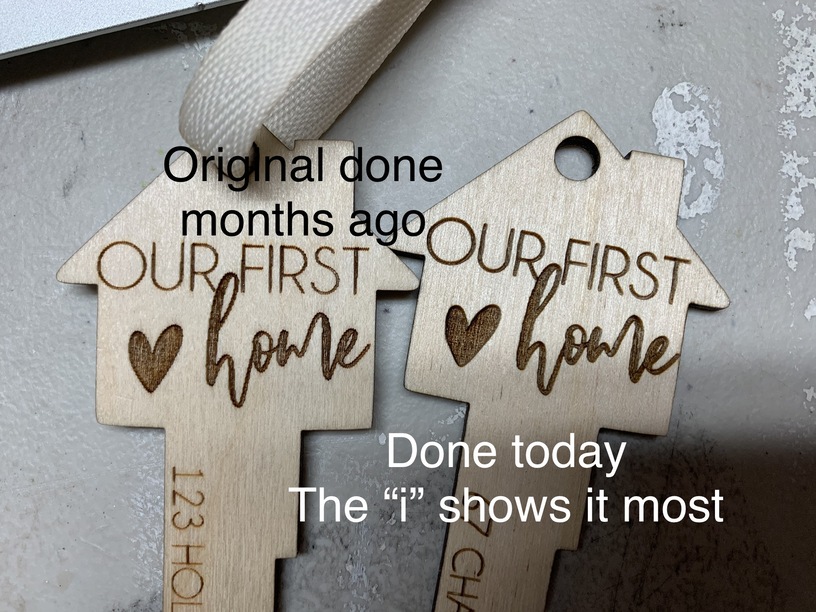
As of yesterday for some reason all my straight lines when engraving are squiggly! Plus some of my engraves have a strange zebra pattern to them.
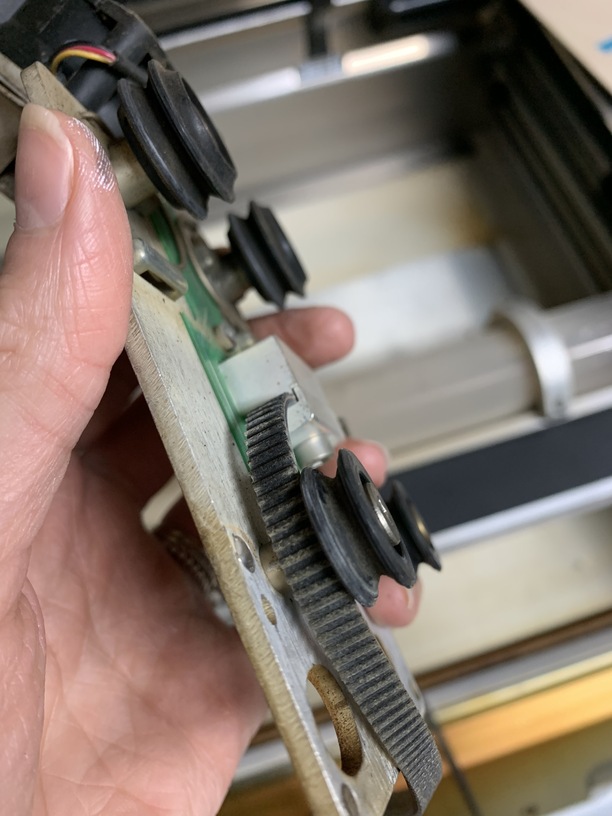
I cleaned all lenses, including a deep clean to the air assist fan. We thought maybe the belt was loose, so I even had my husband tighten it since I felt I couldn’t get it as tight.
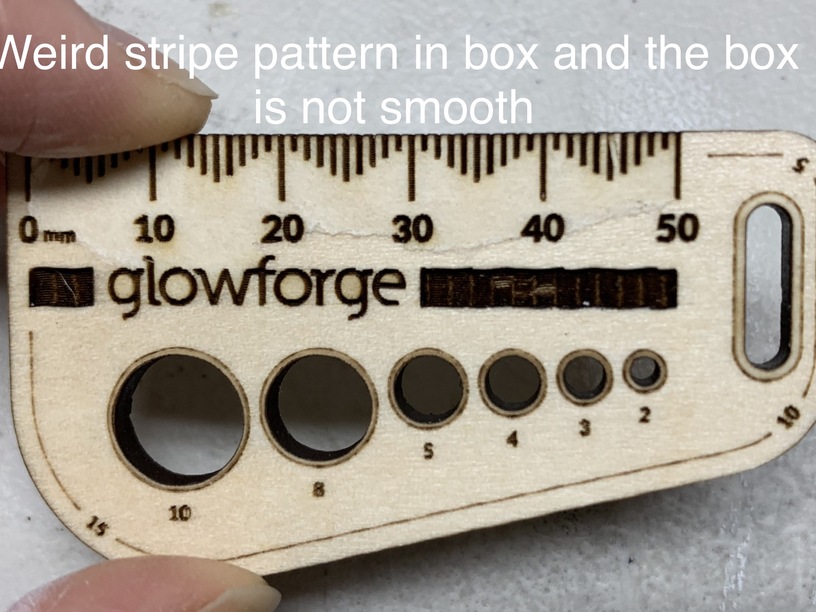
Still, I am getting this weird squiggly lines. And a lot of my engraves have this strange zebra stripe pattern, even on proofgrade material.
I also just cleaned the track and all the wheels…they were pretty gummed up. Honestly thought that would fix the issue. But still coming out slightly wavey.
It may be a belt tension issue then? If you search that you may find some help on checking and correcting that.
No I haven’t heard of anyone greasing anything. Just make sure the rail and wheels are clean by wiping them down.
Just checked it out, not twisted.
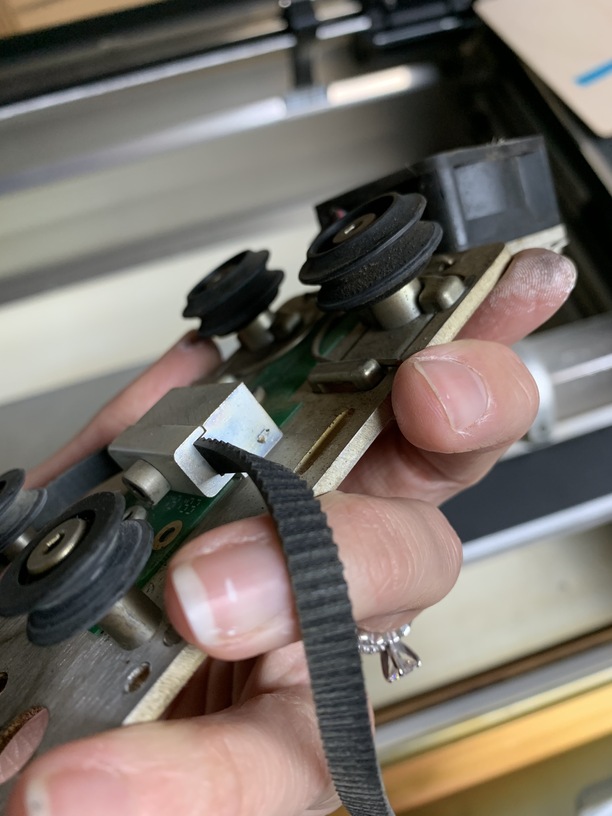
When I put it back I used the allan key method and pushed the pully as far right as I could and tightened as hard as I could.
I think it has more give than it should. If I push with my finger tip on the front part of the belt it touches the back.
There is definitely more give on the x-axis belt than the y-axis.
Found this using the search function. Hope it helps:
How to Adjust the Carriage Plate Belt Tension
The belt under the laser arm is attached to the carriage plate and moves the printer head to the left and right. If your belt is too loose or too tight, you can use these instructions to adjust the tension.
Turn Off Your Glowforge
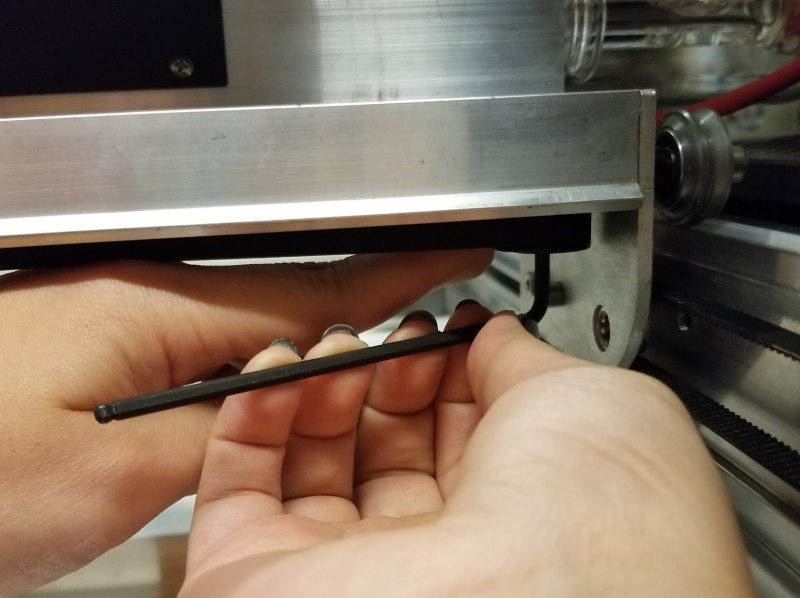
Once you have located a 3mm hex key, power off your Glowforge. Open the front door and carefully remove the crumb tray.
Locate Laser Arm Pulley
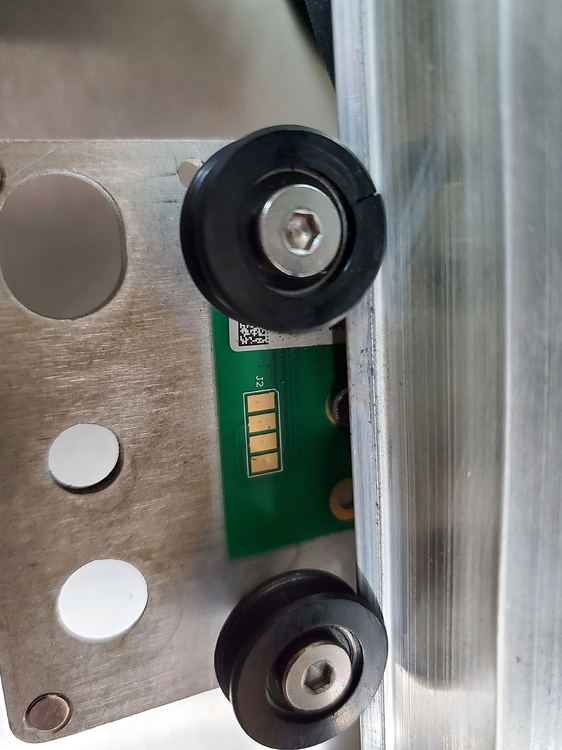
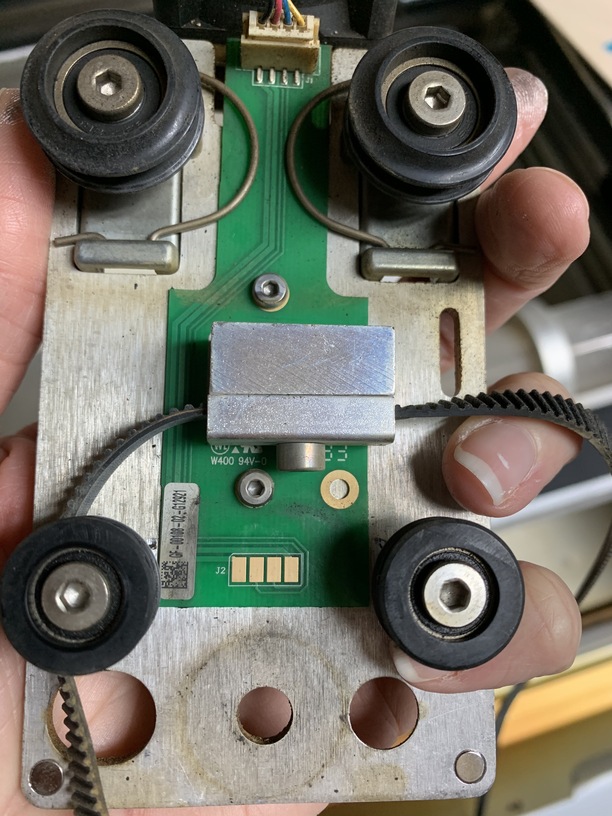
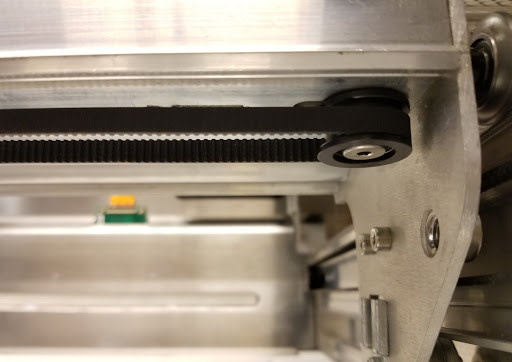
Without removing the carriage plate and belt, locate the black pulley fastened by a metal screw on the right end of the laser arm.
The pulley on the right side of the laser arm. The crumb tray has been removed.
Insert a 3mm Hex Key into Pulley
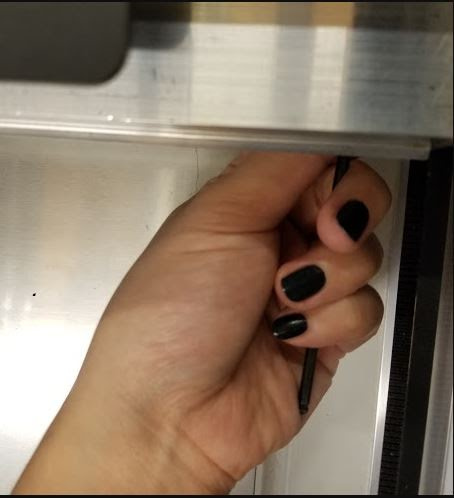
Insert the short side of the 3mm hex L-key into the metal screw with the long handle pointing toward the front of the unit.
The hex key is in the pulley ready to loosen the screw
Loosen the Pulley
Turn the key clockwise to loosen the screw until the pulley can slide with some friction. Don’t remove the key from the screw.
Slide the Pulley to the Right
Holding the key with your one hand, position your other hand to push the pulley to the right until the belt is fully extended.
One hand holds the pulley in place, while the other holds the hex key.
Tighten the Pulley
While keeping tension with your other hand, turn the hex key counter-clockwise to tighten the screw in the pulley.
Check the Belt Tension
When pressing lightly on one side of the belt, the other side should not move. It may take a few tries to get the belt tension correct. If the belt has too much slack, loosen the pulley and try again.
Try a test print if you are satisfied with the tension on the belt.
A belt issue definitely makes more sense. If I slow down the engrave, it’s not as wiggly of lines, but as soon as I speed up the engrave I get wiggly lines.
Yeah that’s exactly what I did.
I couldn’t get the belt back on after cleaning the air assist fan, and did that method. Even had my brother tighten it in case I wasn’t strong enough haha
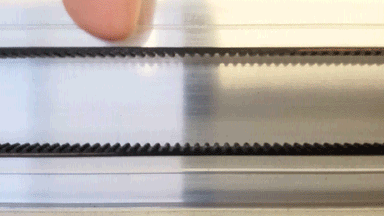
So I just did an interesting test. On the left I did a slower speed/power 340/42 Lines per inch 270 and on the right I did proofgrade settings 1000/full LPI270.
Looks like speed is definitely playing a factor! The slower it is the less wiggly. Does this seem like it could be a belt issue?
Sigh - it really really looks like a belt issue, but there are only those 3 :-/
I will suggest an overall check all the screws for tightness, see if you can find wiggle in anything. It’s possible a staffer will be able to see something on the back end, but it sure seems mechanical.