Stencil Photo Painting

Yesterday I saw a youtube video of a creator demonstrating spray-painting stencils to create some awesome artwork. Now, I have no where near the talent he does, but I do have a camera in my phone, a laser cutter and I know a thing or two about computers.

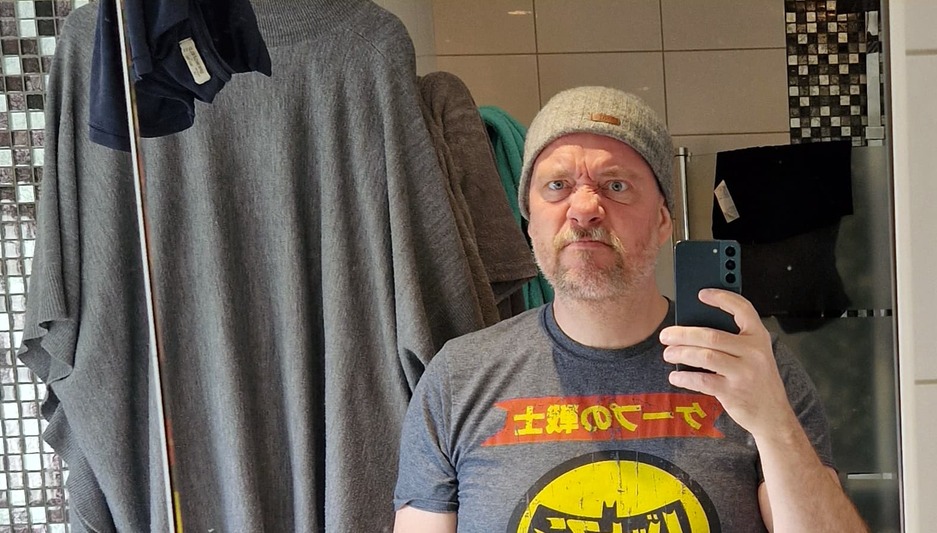
So I promptly marched into the bathroom, where I can find I facial expression I want to recreate as an art piece;

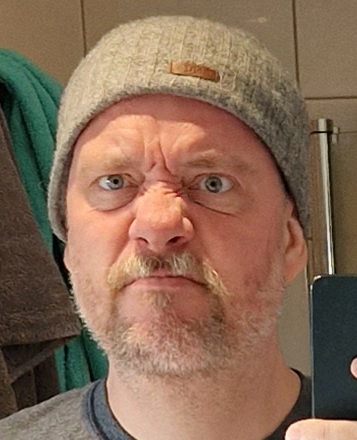
Once the photo was shot, I moved over to Paint.Net and cropped the image.

orig

I separated the part of the picture I was interested in (the background is super similar to my hat, so it was quite painful). Next, I changed the picture to black and white and I used the “Reduce Colors” function to only have 6 colors.

Reduced

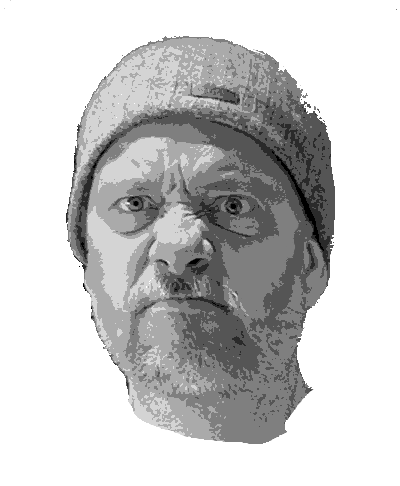
I planned to use four stencils and draw the lightest whites and the darkest blacks by hand, that’s why I picked six colors.

Next I started looking for software to convert my image to SVGs that I could use on the laser, but none really fit my requirements. Eventually, I coded my own version, because that’s what I do, but I’m sure Inkscape or Corel Draw would have done splendidly.

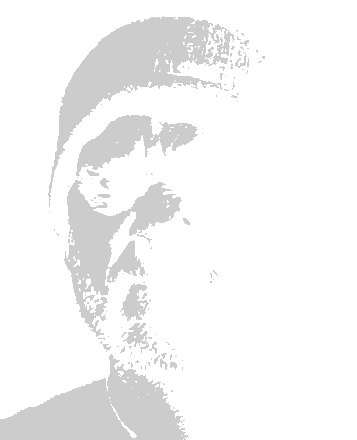
I created SVGs for the four stencils, one for the second lightest that encompassed the entire image.

Second Lightest

Next came the lightest

Lightest

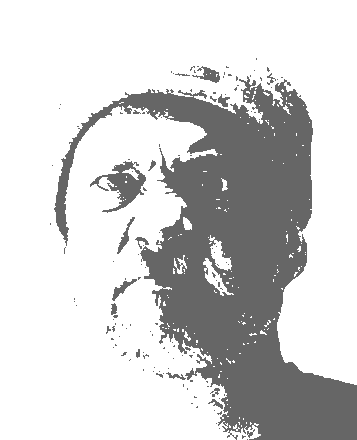
And then the second darkest
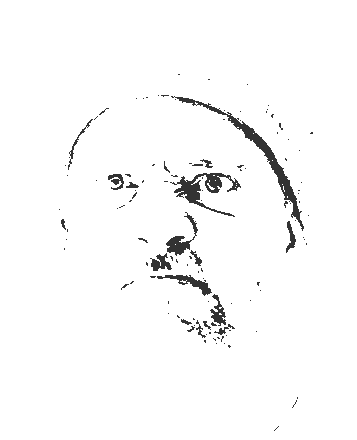
Second Darkest

And the darkest

Darkest

The software I created allowed me to pick a number of colors and create an svg for all pixels of those colors (first stencil contained RGB(51,51,51) and RBG(102,102,102) etc.

This is what the finished SVG looks like:

Together

Note that that SVG is separated into four separate SVGS - I used Affinity Designer for that.

Werking

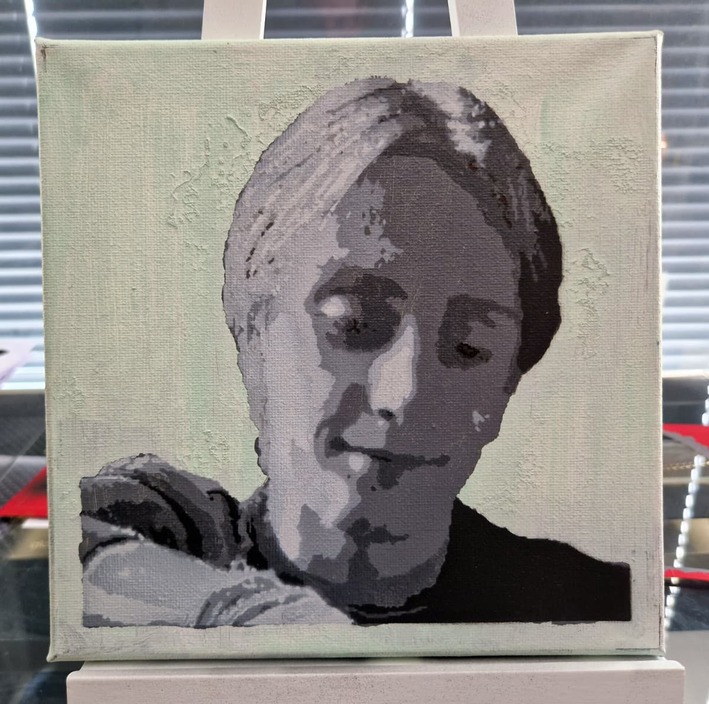
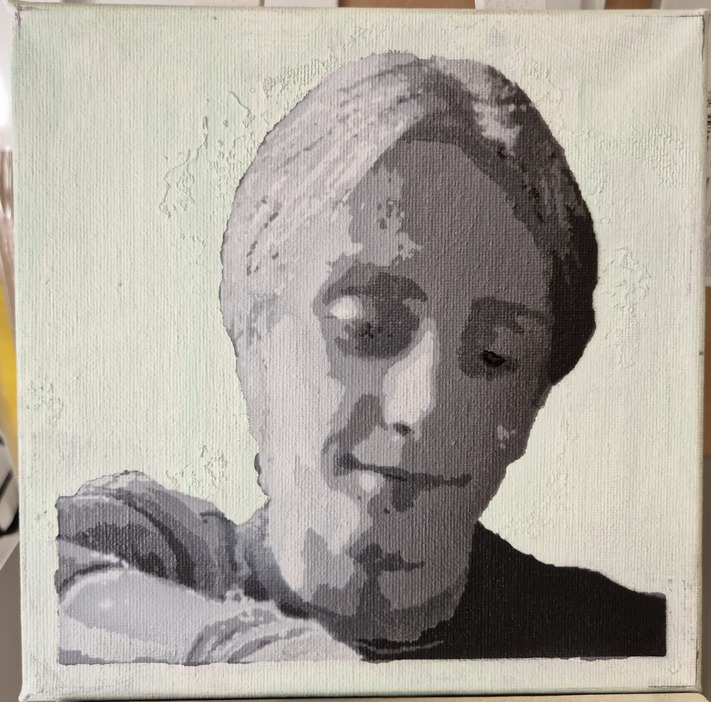
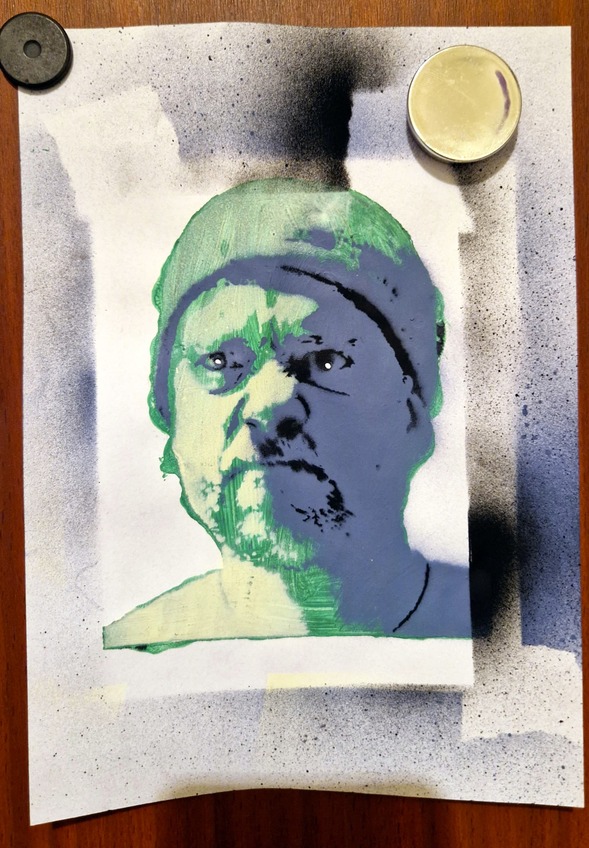
Once i had the stencils, I cut them from simple card stock about 125mm high. I won’t lie, I had serious doubts whether it would work when I saw the stencils.

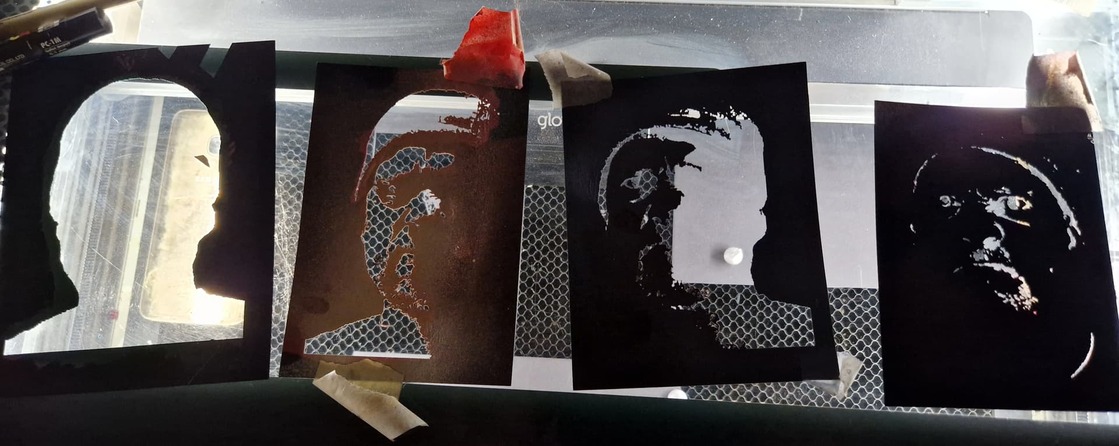
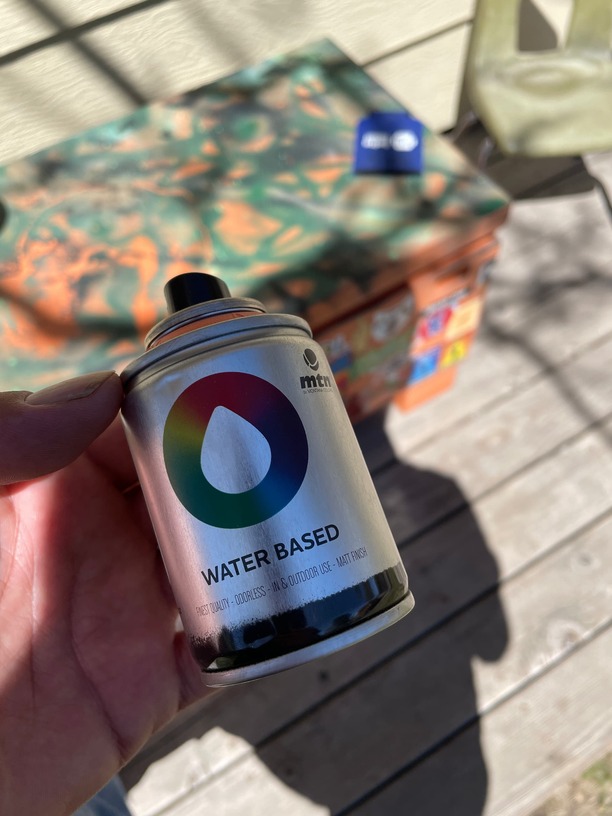
But taping them down to some paper and painting the first two layers using acrylics and spray painting the second two layers had me laughing out loud at how well it turned out. That’s how grumpy I actually look!

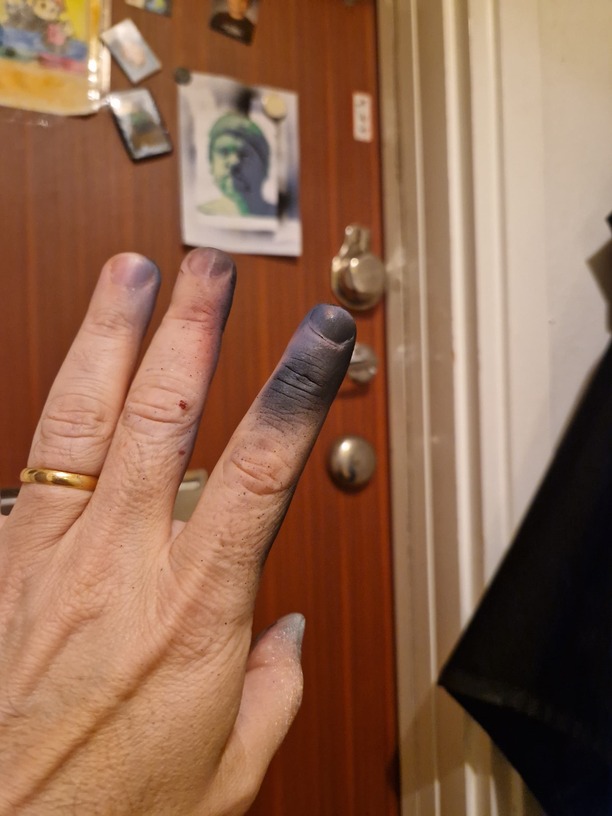
Oh, and some of the paint gets on your fingers:

50 Likes

I’ll note that I see tons of ways of improving the image:

None of the black colors where enhanced but the eye-highlights were added using a white marker. The dark that i included might have been slightly too dark, I’ll try for a slightly lighter dark ink in some full black features in future revisions.

One more shadow color would have helped a lot, and cutting another stencil isn’t very hard. So in future I might design for 7 values where 5 get their own stencils and pure white and pure black are included in the lightest and darkest stencils to be inked by hand.

Using acrylics for the light green and the mid tone greens really gave the picture some texture. The hat looks like I tried to paint it in the orientation that the weave lies, but that’s coincidence, when I panted that part the entire thing was like a large egg but painting in that orientation seemed appropriate. A more deliberate strategy would surely be helpful.

The white highlights are way off. They should be up and to the left, not down and to the right. Don’t know what I was thinking.

The method I used for spray painting was extremely messy, because the templates are quite small and don’t cover the final canvas (paper in this case). That was just laziness on my part, but for this test piece the crazy texture is quite interesting - to me at least.

When I created the color reduced BW image, I separated the hat from the face. The reason I did that is that i didn’t want the values of the hat to influence what colors to actually pick - I wanted the best possible values for the face. Once the colors were picked, I color reduced the hat also but overwrote the colors to colors that already had stencils.

Let me know if you’re interested in more details on this topic, I think it’s a super fun way to make a simple photograph into something quite special, but perhaps that’s just me;)

19 Likes

Nice work! That is an interesting technique. At first glance, I thought it was Mickey Rooney. :upside_down_face:
Thanks for the write-up.

8 Likes

Great results from your method. I like the overspray effect.

8 Likes

Thanks for sharing this experience with us. Another technique to explore.

6 Likes

Wow! You’ll be Banksy before you know it!

9 Likes

Sensational job on that! You really captured the detail wonderfully. Tagging @jbv because I know he does this too.

5 Likes

Cool, I’d love to see what they’ve come up with!

2 Likes

Nice job!
Depending on how careful you are with cleaning and drying them, card stock stencils can hold up for a while before they get too saturated and start to fall apart.
I really like using oilboard for stencils in the laser. It cuts great and doesn’t deform in the same way from moisture in the paint.

Here is my stencil post from a while back:

9 Likes

Nice stuff and good tips. Your results are sensational! I had similar ideas for hooking the stencils together, but as I’m thinking more layers my idea is a little different. I’ll let you know if I pull it off.

I’ve ordered a $50 cordless airbrush, should turn out cheaper than spray paints though you’d probably move faster with spray paints.

2 Likes

Thanks! Yeah that flappy stack has limits for sure. Certainly not an end-all technique! I’m interested to see what you come up with.

I’ve always had issues with airbrushes, probably from a lack of instruction. I’ve had some success with the airbrush attachment for Copic pens, but I always seem to turn back to the high-pigment, quick drying fine art sprays like Montana, MTN, and Belton Molotow.

3 Likes

My method will probably be be even floppier :wink:

Interesting about the sprays - I’m working in a non-well ventilated area and Acrylics have some upsides there. But if I’m unhappy with acrylics, I’ll look into sprays.

I’d like to match colors from real life/the base picture, though - and that seems like it would be easier with acrylics and airbrushes.

1 Like

I imagine you are right, especially if you learn to use the airbrush effectively!

The water-based mini cans from MTN are super low-odor (although you still want to use a respirator) but for your situation it sounds like an airbrush would be the best option.

5 Likes

Great idea!
Neat effect!

2 Likes

This is really great! I love messing with photos, appreciate you sharing your process, and would very much be interested in more details.

3 Likes

Thank you for sharing how you did all it. And the last pic is why I always wear rubber gloves when using spray paint, or even Easy Tack, neither of which comes off the fingers very well!

3 Likes

Words to live by!

1 Like

Thanks for the how to. I’ve been wanting to do this. There are some classic portraits that really adapt to this. It nice to see it work for you just a normal but livable mug

2 Likes

Here’s my second image, 13 stencils in total.

6 Likes

I also added some shading to the painting, using a stencil to airbrush some dark color on the right side and some light color on the left side.

Btw, there are $50 battery driven airbrushes these days, in case anyone wants to try something similar!

4 Likes