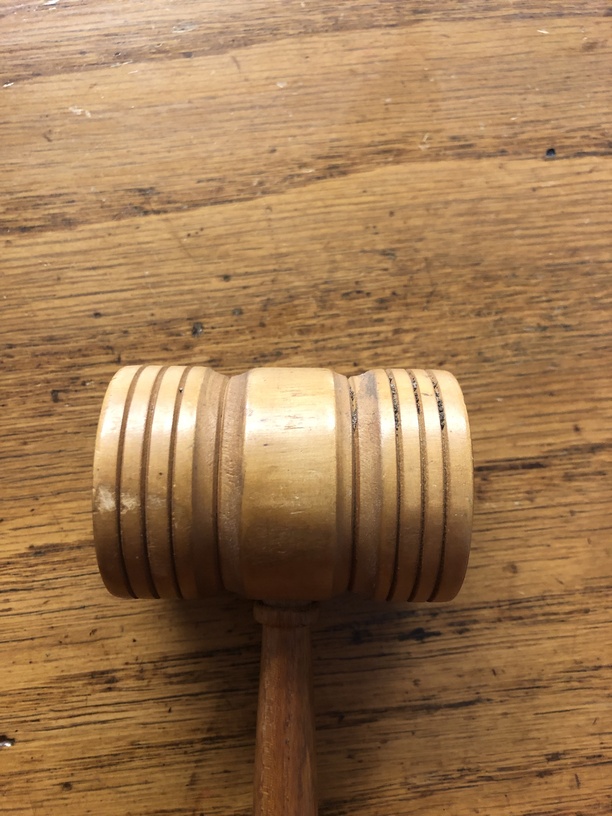
My best friend has a last minute request for her husband who is an auctioneer. She asked me to engrave his initials on this gavel. I’m going to clean it up and sand it a little, but I’m nervous…
It is 1 3/4" tall and a softwood. Is this possible???
My best friend has a last minute request for her husband who is an auctioneer. She asked me to engrave his initials on this gavel. I’m going to clean it up and sand it a little, but I’m nervous…
It is 1 3/4" tall and a softwood. Is this possible???
I don’t think it would be that difficult. You obviously want a jig if you are even a little unsure of your alignment. I am assuming the initials would be in the center part of the gavel and not the handle?
The handle might unscrew so you can put the initials on “top”…
That’s correct.
Any suggestions for a jig? Are there actual jigs for the GF or do people use make shift ones?
People make their own which are unique to their particular object.
Stating the obvious–I hope–but once you remove the crumb tray, and then figure out the height of the gavel off the bottom of the unit and the difference between that and the “0” of the crumb tray is your new material height. If you search the forum, there are some really good details on all the math.
For a jig, doesn’t have to be fancy–just some blocks/wedges that hold it in position and will keep it from shifting or slipping.
The distance to the bottom is far enough that small magnets might work, or you can cut a hole the size for the head to barely fit and even tape that to the bottom. Then I would use the set focus on the top. Just make sure the head is less than 2 inches tall as that is the maximum possible.
A couple of scraps of any material will be sufficient. Even a couple of pencils. It’s not going to move while engraving.
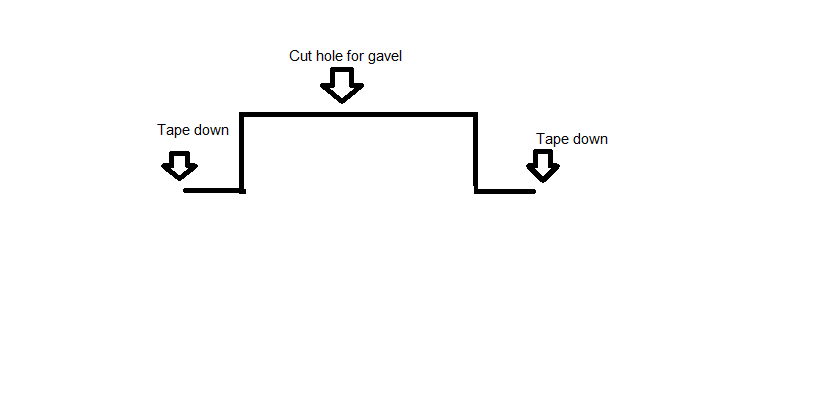
Unless I am missing something the commenters above know about, they are leaving something out. In order to use a jig for exact positioning you need to precisely place it. In a system like the glowforge without a known 0,0 home position that means you cut the outline of your jig first, place your object in it without moving it and then do the engrave. For the gavel the outline can be two rectangles. One the size of the head and the other for the handle. Your problem is that you have to do this without a crumb tray. You will have to make a “crumb tray you can cut a gavel shaped hole out of.” I would suggest a cardboard box about 1.5" high. Something like this:
In my scheme you make a file that has a rectangle for the head and one for the handle and then you combine them. If that is a tiny gavel and you are engraving the face of the mallet combine a circle and rectangle. In the head-rectangle (or face-circle) you place the initials for engraving. You tape the box down to the bottom of the glowforge and cut out the outline with the initials set to ignore. You then place the gavel in the hole you made, close the lid, set the outline to ignore and engrave the initials.
Not missing anything. If you position it under the lid camera, alignment will be fine. I’ve engraved plenty of objects using the camera for alignment, even before the calibration process and set focus came out (and my machine was out by over an inch near the edges.) Now it’s accurate to within a mm across most of the bed area.
I know you asked about engraving the gavel, but as an alternative, you might consider laser engraving a strip of painted brass or aluminum (or anodized aluminum) and bending/fitting it around the gavel’s head. I did this, gluing and then adding a couple of small brass screws, and it came out great. No need to worry about jigs and curvature.
You guys are AWESOME! I am still learning, but these comments are very helpful. I think it will help that the handle pulls right out of the gavel head. I went ahead and sanded it down smooth just in case there was any sort of finish on it previously.
I am searching for my digital caliper to do some measuring with the crumb tray out. @bansai8creations I went and searched the forum and found some helpful videos to get me where I need to be. I’m sure in the next few hours other questions may arise…
Yes. The handle comes out so I am going to create a jig of some sort to hold it in place.
I considered that, but for now this is going to have to work! 
Dumb question, but did you still do the math and everything to determine material height and such with the crumb tray removed? I can’t find my calipers so I’m struggling with figuring this out without messing up the gavel (it’s the only one I have and has some sentimental value).
Since they implemented Set Focus (click on the gear icon in the GFUI and then click Set Focus) math is only necessary to make sure you’re within 0.5" of the bottom of the laser head. For some things it is easier and faster to enter your own height, but for something like that gavel head Set Focus is highly recommended.
I use Set Focus but it doesn’t always work. For example, I worked on a 0.4" bamboo cutting board yesterday, which is well within the 0.5" limit and completely flat, but Set Focus failed and I had to enter the material height manually.
What you can do is use a much lower power setting and be prepared to cancel the job (just open the lid) if it looks like it’s not going where you expect it to.
Awesome!
Any suggestions for settings? I’m just really nervous about screwing it up and then having nothing.
One thing you can do is use a lower power, faster speed and see what happens. If it is not dark enough/deep enough. Click Print again and repeat. Just don’t move anything. On your computer screen it will look like your engrave has shifted. It hasn’t. Do not move the gavel. Do not move the file on your screen. Click Print; Press the glowing blue button; don’t move anything. Repeat as necessary.
For a starting point look at the settings for basswood in the GFUI. Manually pick basswood hardwood and then look at the engrave settings. Then use settings less powerful than that (if you are going to use the above method.)
What is the overall diameter of the gavel head?