Material: 1/8" ![]() Maple Plywood
Maple Plywood
Size: 6" x 3.30"
Cut Time: 44 minutes
Summary:
My mother-in-law was visiting us this weekend to attend my kids summer dance recital. I hit the jackpot and got one that I adore, so I wanted to something for her while she was here.
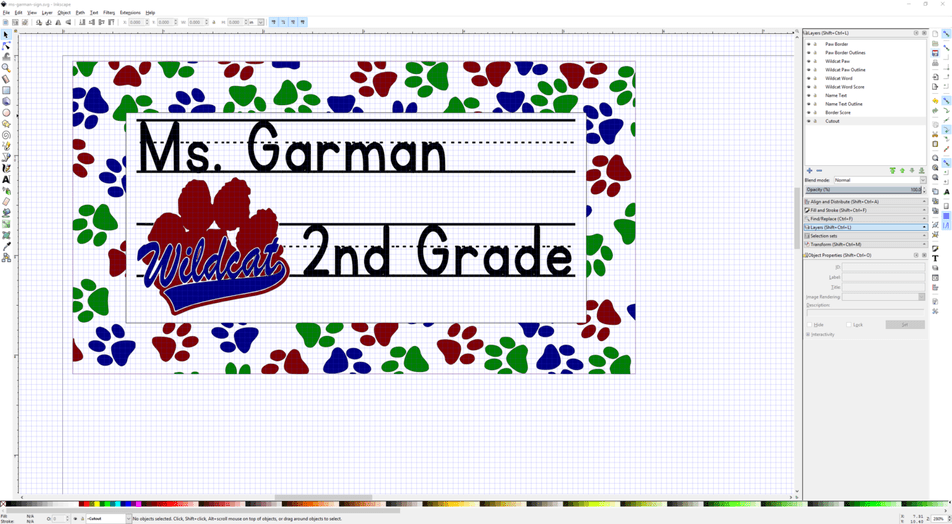
She is a second grade teacher, so I thought I’d make her a name plate for her desk at school. The mascot at her school is a Wildcat and there’s a pawprint that is often also included with the mascot, so I whipped up the design below. Each pawprint is a vector and I split them up across three different color[s so that I could have a mix of darkness across them.
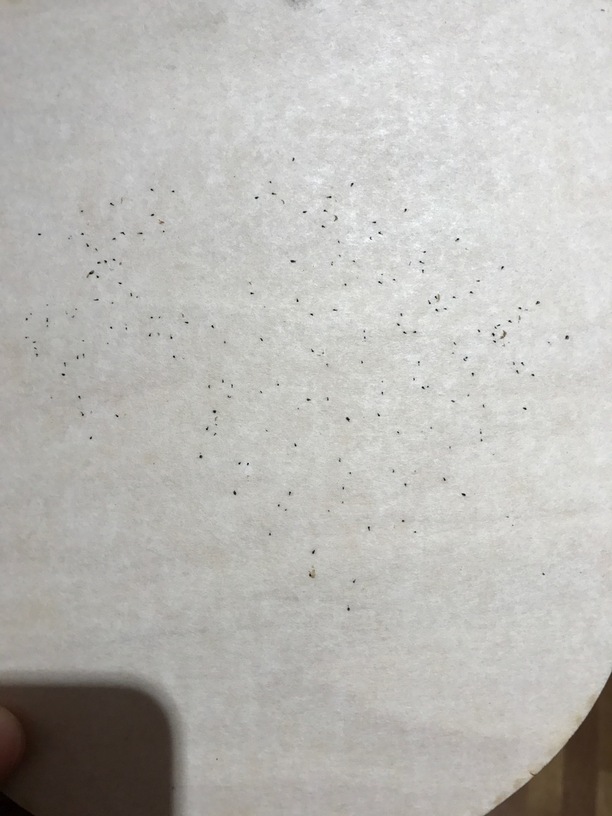
I didn’t get a final picture of it – the one below wasn’t as fully weeded as I thought when I took the picture, but all in all I’m happy with the result.
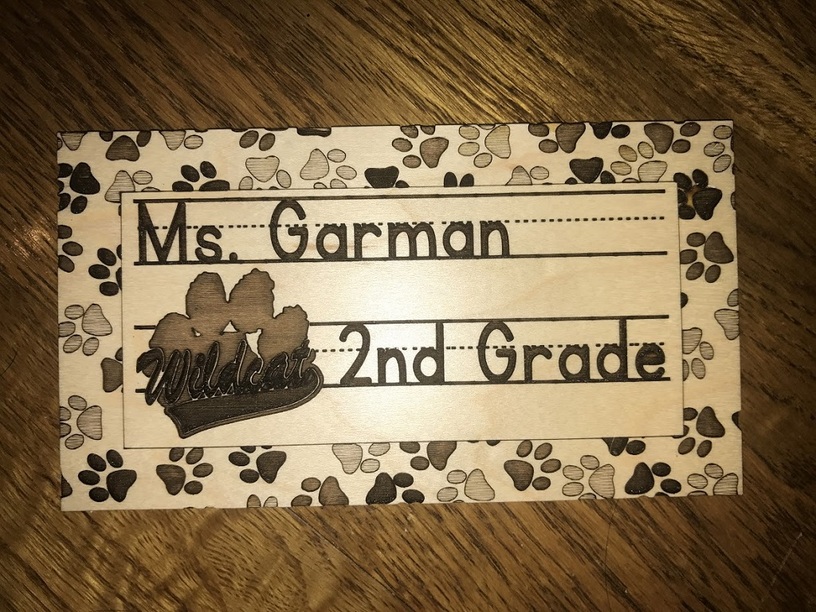
Not pictured is a simple triangle to be glued on the back as a stand.
Lessons Learned:
- I put a score around every engraved vector. In retrospect I wish I had only done that for the paw prints. It made some of the other engraves look muddier when there wasn’t much whitespace.
- I got some black dots on the backside where there where the score overlapped a section that already had a dark engrave and burned through. It’s not too bad and it’s the back so I wasn’t too bothered.
- I wish I had done more cleanup on the large Wildcat logo/paw. I vectorized it from a bitmap and split the text out. I wish I had edited the vector to provide more of a border between it and the paw to make the dark engraving of the Wildcat text stand out more. This is one area in particular where the score really hurt it too – it ate into the little bit of border that was already there and reduced the contrast.