George?
(kidding. Smart is generally a last name ![]() )
)
I’ll show myself out.
Happy ![]() -day @tjleasa
-day @tjleasa
Ha ha…but, yes…please. ![]()
Have to agree with @Jules. Modification to the machine should be in BTM. It isn’t anything the company directly supports or endorses.
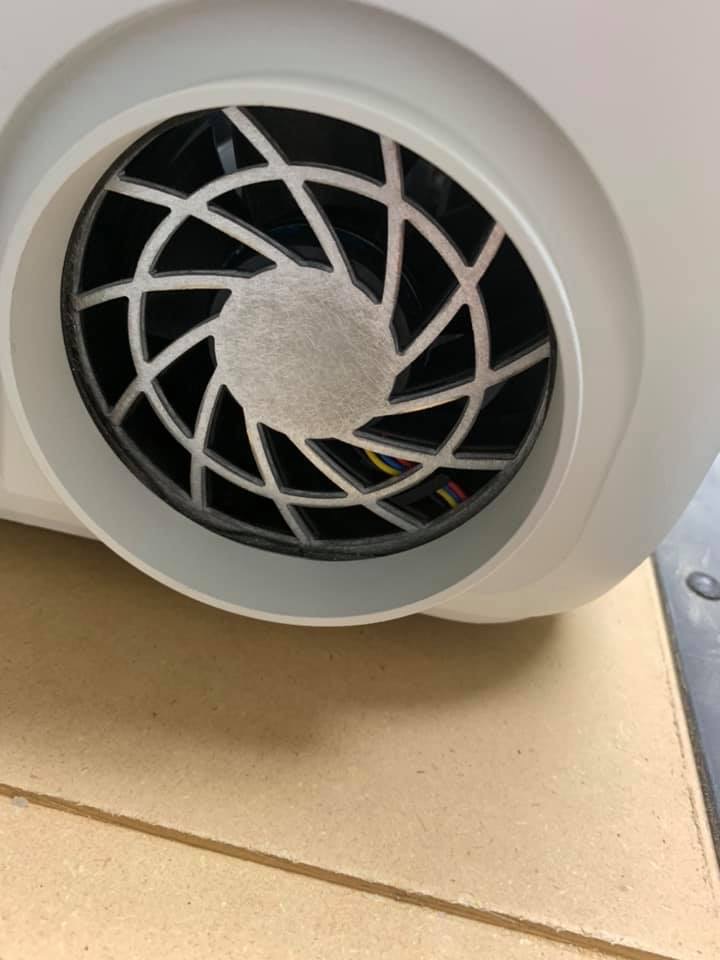
Someone posted on the Facebook group the other day that their fan guard was different on a replacement unit that they received.
Thank you, as I was thinking about removing the guard. I thought “I must be out of warranty,” I guess so since it’s my cake day and I had a 6 month warranty. Time goes fast
I’d remove my grate but it’s a much larger pain with a pro. I don’t want to take out the whole coolant system just to get at the fan.
Heck I don’t really want to take the side glass off.
A shame it wasn’t designed to be more easily serviceable.
Happy cake day to you @tjleasa  and the 25 others as well but you are the only Regular
I never realized it was angry 
Oooooh, Fancy shmancy. That looks a lot better. Also looks like the hose connector is shaped differently or has a lip on it - which will help a lot as well.
I cut mine out from the back, which is why I didn’t get the whole thing.
I held out as long as I could hoping the would do this on the replacement unit I received. No Joy.![]()
I didn’t want to get little metal bits inside the machine. Dremels make a mess. How’d you handle that?
Didn’t worry about it TBH. Most of the dust/cuttings came out my way anyway. Quick vacuum, then a fan clean to push any more c**p out.
I’m thinking of using a 4" hole saw from the back. Or a 3 & something.
A Dremel with a side cutting bit instead of a cutoff wheel might be good - less crap spit out that will need to be vacuumed out. Could also tape a small hose connected to the vac hose - could get it pretty close to the bit & it should work like a shop dust collector ![]()
One could just set the fan to on and blow everything out as it was created but you would have to be careful not to hit the fan
One could also use a piece of masking and block the fan from the inside to contain any swarf.
I already had the top left glass off so cleaning wasn’t an issue.
@jbmanning5 - I think that’s an improvement… less restriction, but the ability to unscrew the fan guard and remove it to facilitate cleaning would be much better.
I was thinking to try to wedge some cardstock in the gap. Haven’t looked to see if it’s feasible though.
The fan mounts flush to the aluminum plate that has the grill cut out of it, blocking the fan intake from the inside would eliminate any metal shavings from getting in. A couple of strips of wide masking tape would do it, but my basic doesn’t have the cooler in the way.
Removing the top glass really is easy, one screw in front and two in back next to the lid, and deflect the three plastic tabs and it pops right off. I was paranoid to do it the first time, but nothing to it really. To replace it just position it, push down and the plastic tabs snap into place perfectly. replace the three screws and done.
The lid position isn’t affected at all, the screws just secure the inside edge of the glass panel.
A vacuum hose. The soft bristle attachment does wonders.
Yeah that’s what I’ve done in the past.