Greetings -
I contemplated posting this in Everything Else as only a few of the components are made on the GF. But, this is how I’ve been using my machine lately, and I feel the GF cut components are what makes the project what it is. So here we go -
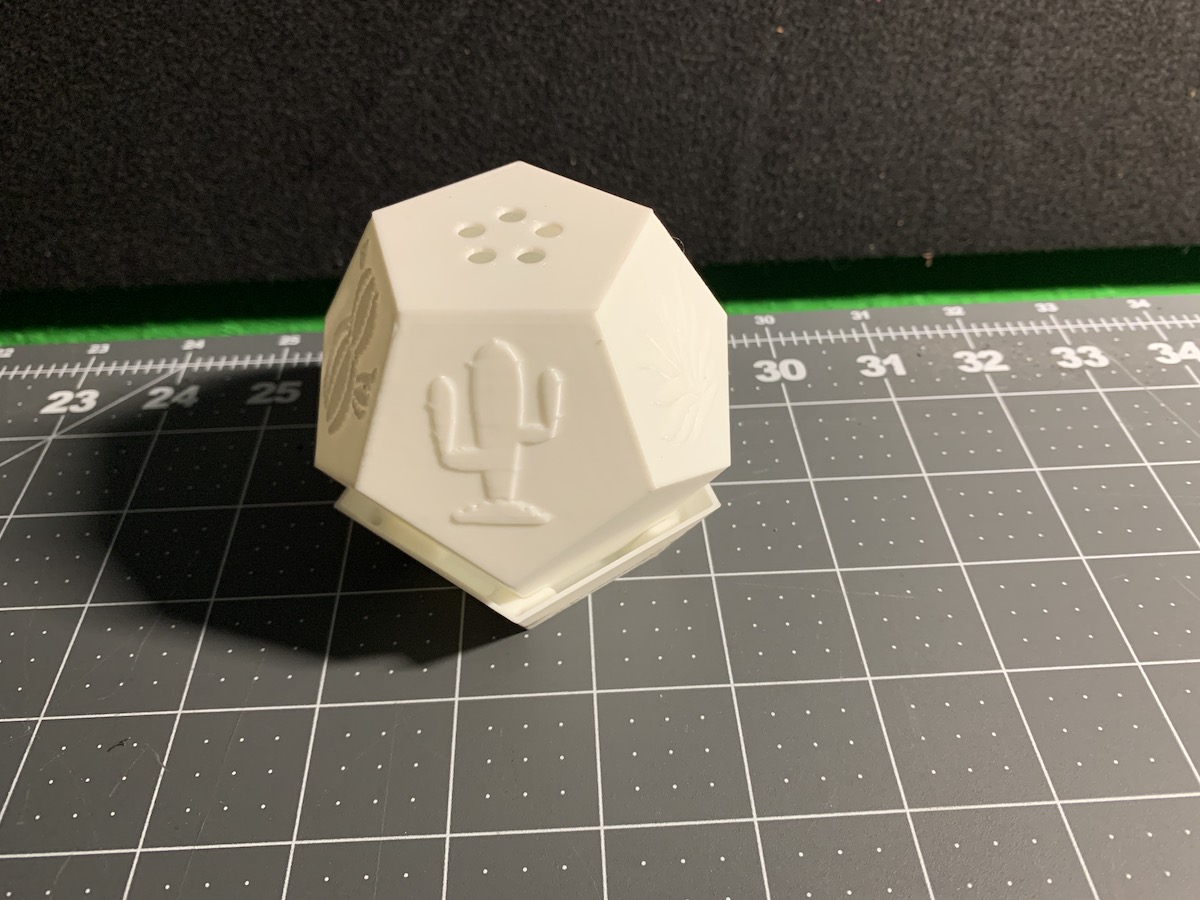
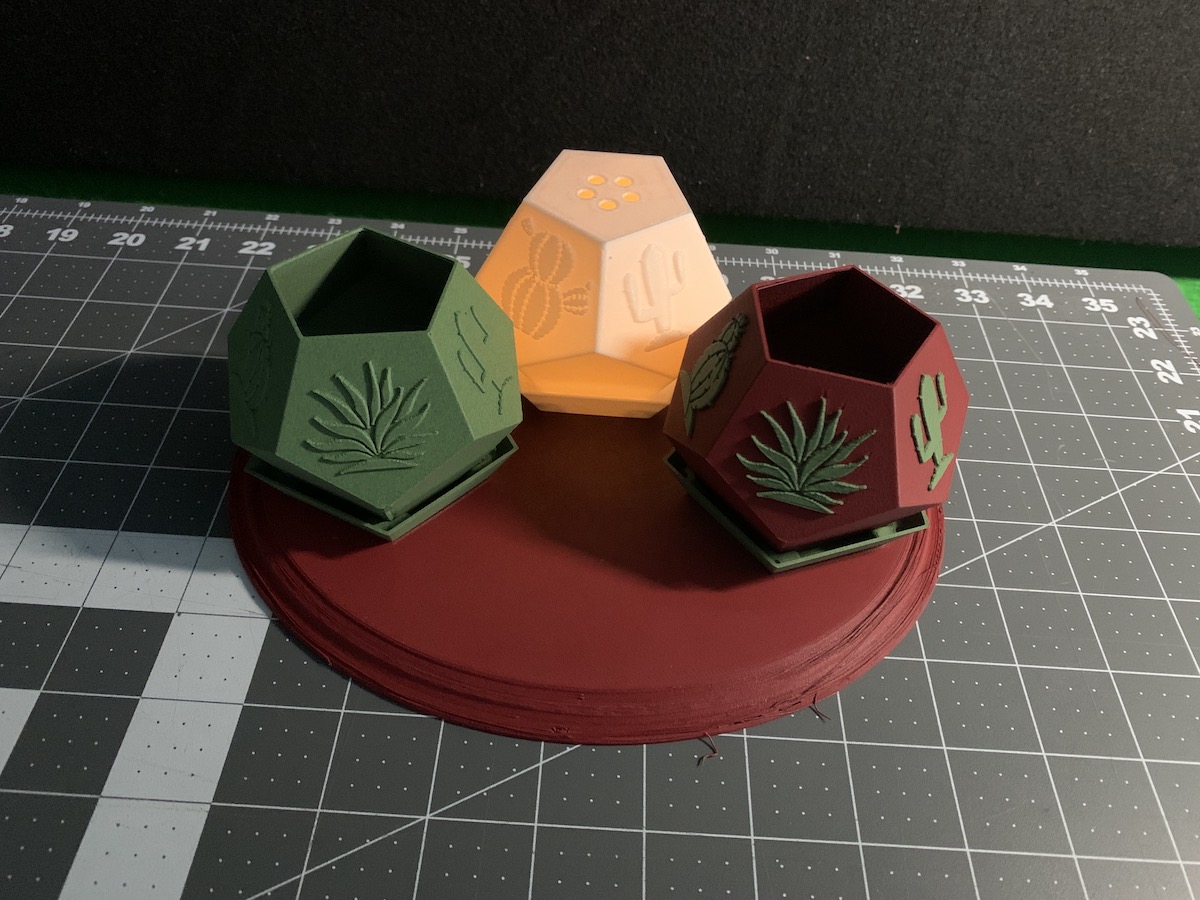
I found this Dodecahedron planter on one of the free 3d printer plan sites and printed one.
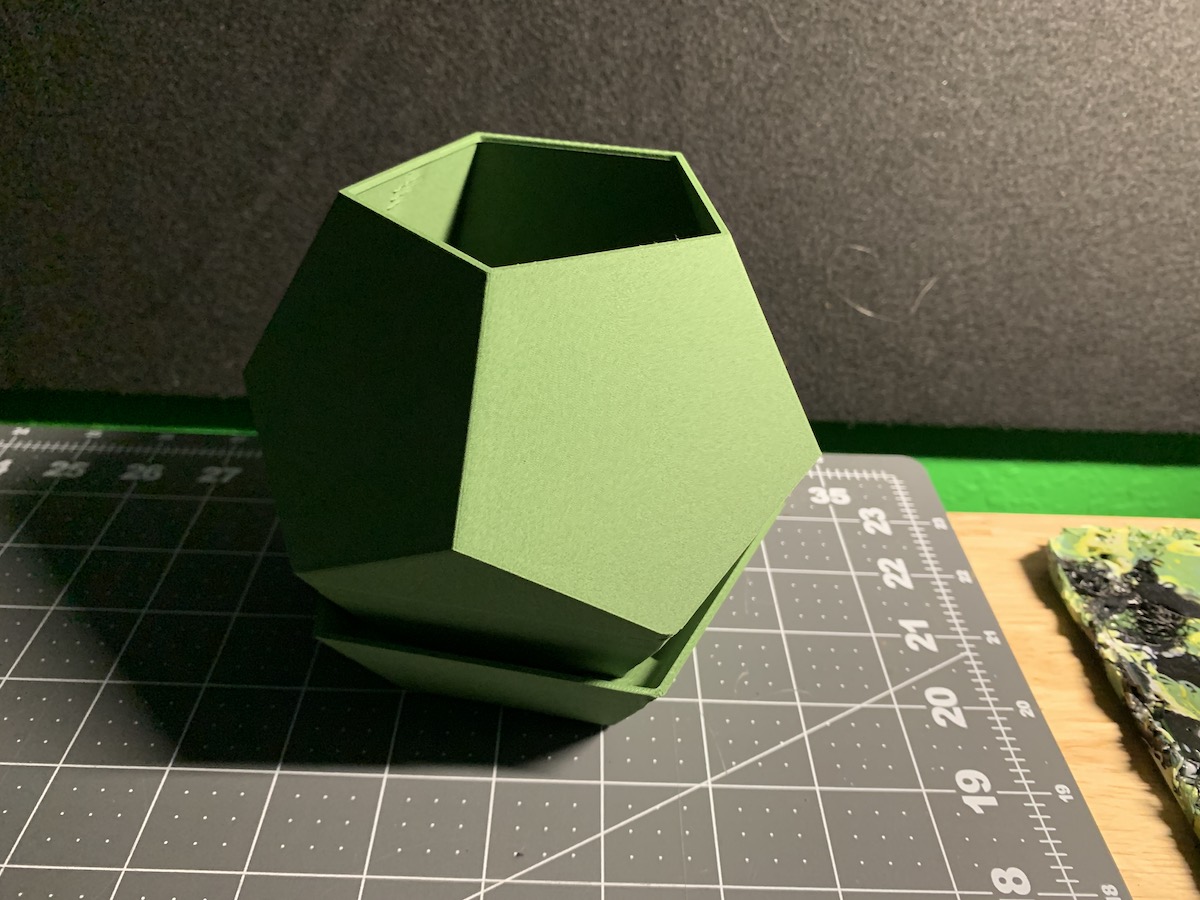
Cool, but kinda boring. So I downloaded some SVG icons, made them 3d and added them on for more interest.
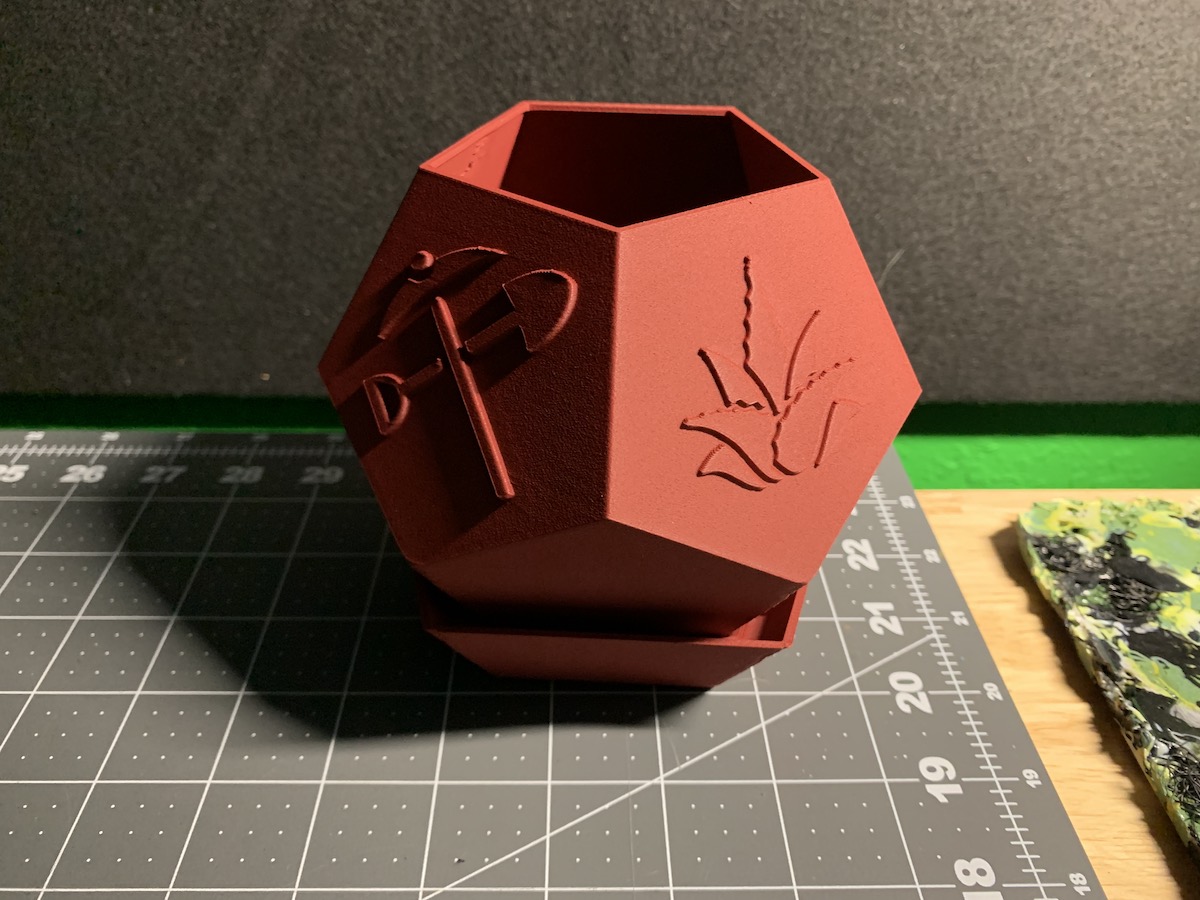
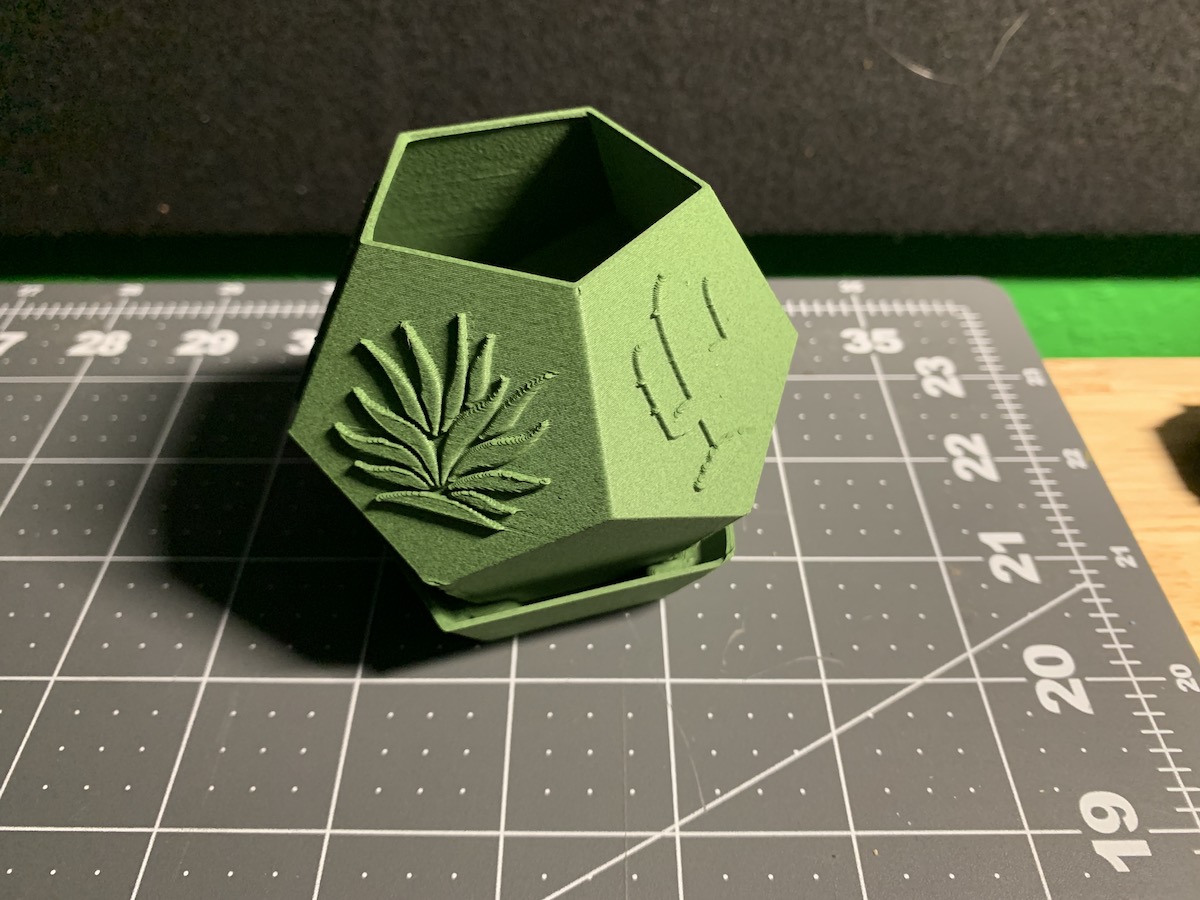
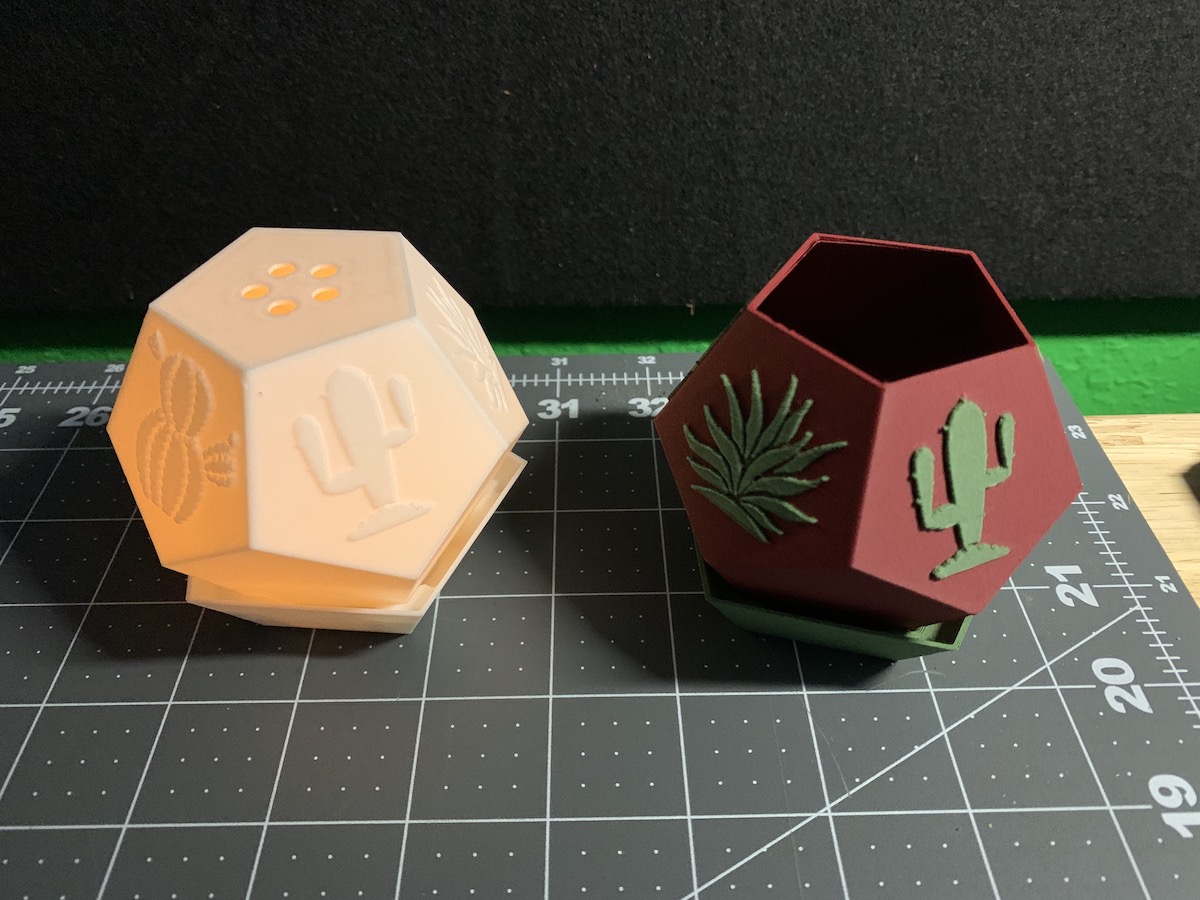
They are quite functional, and big. So what about a small version for either a cactus start, or just display. No Problem…
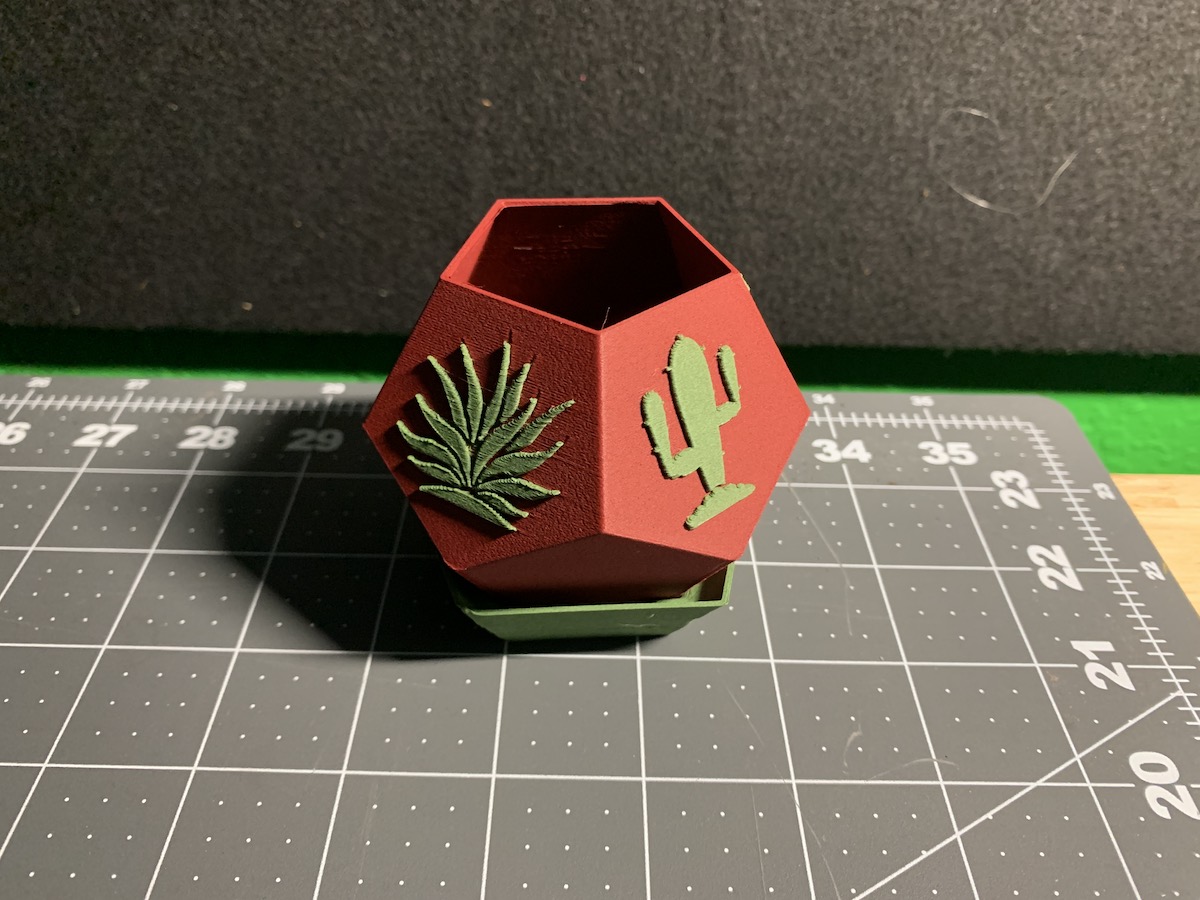
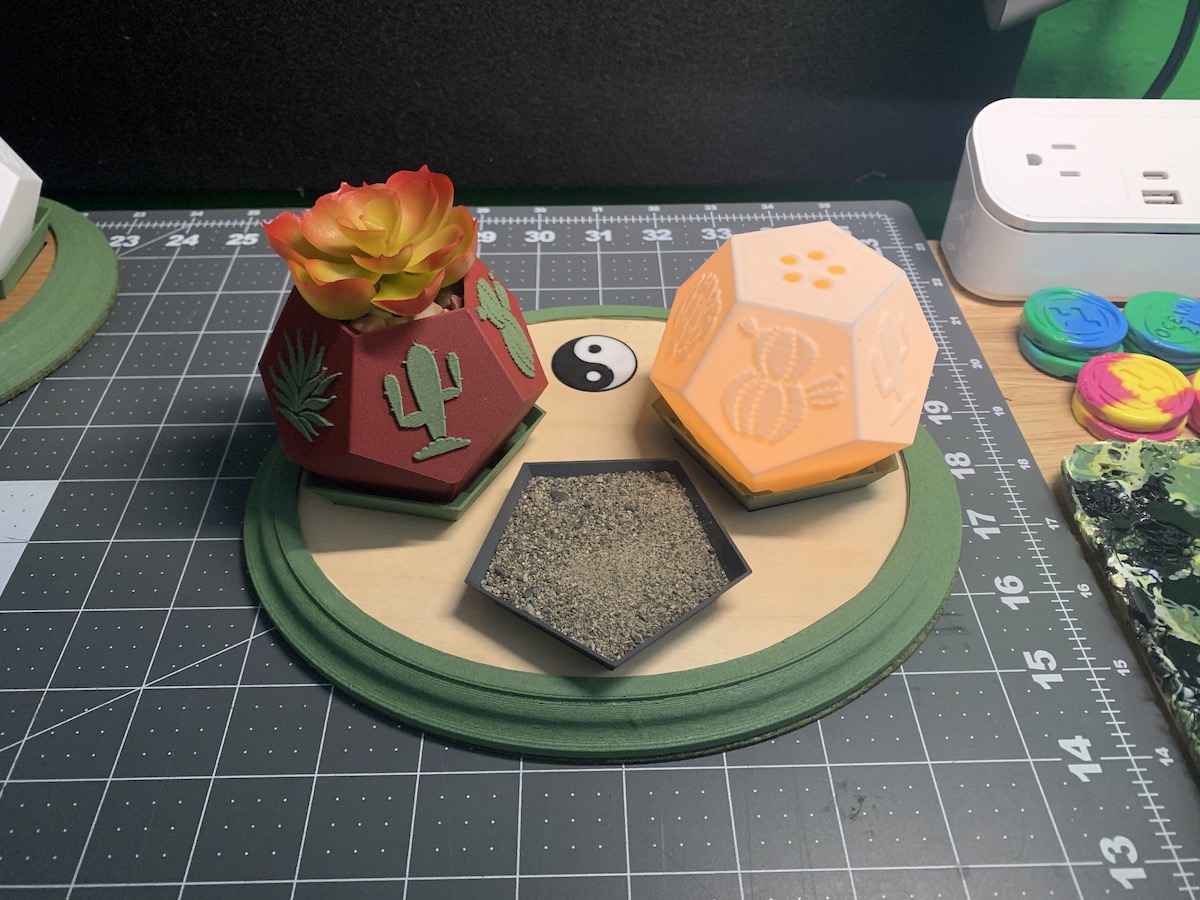
And let’s print one with a second color to liven it up. This is really cute.
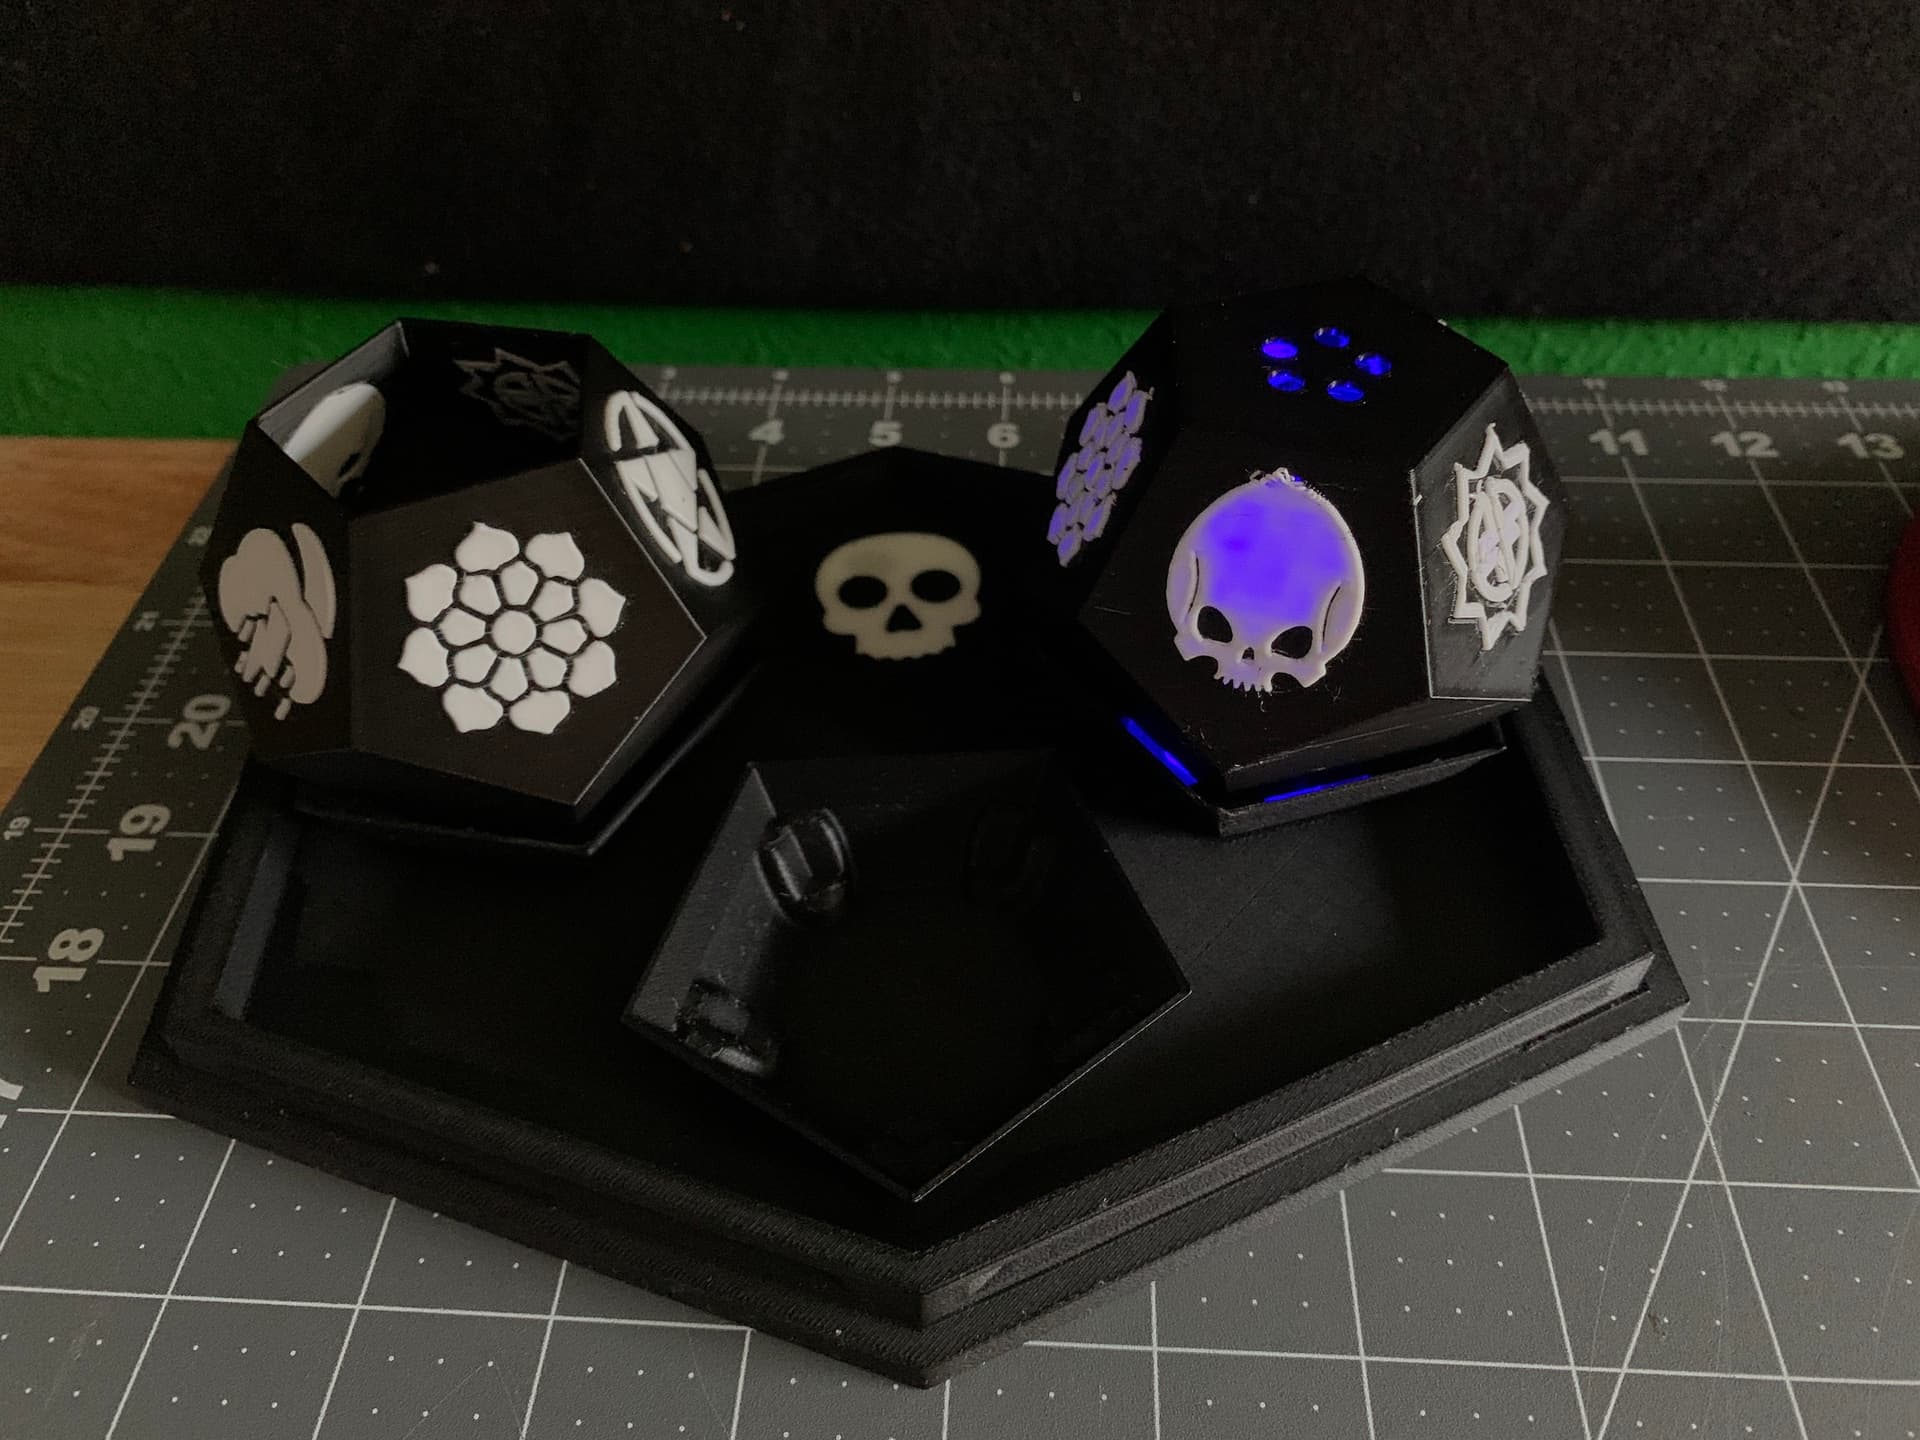
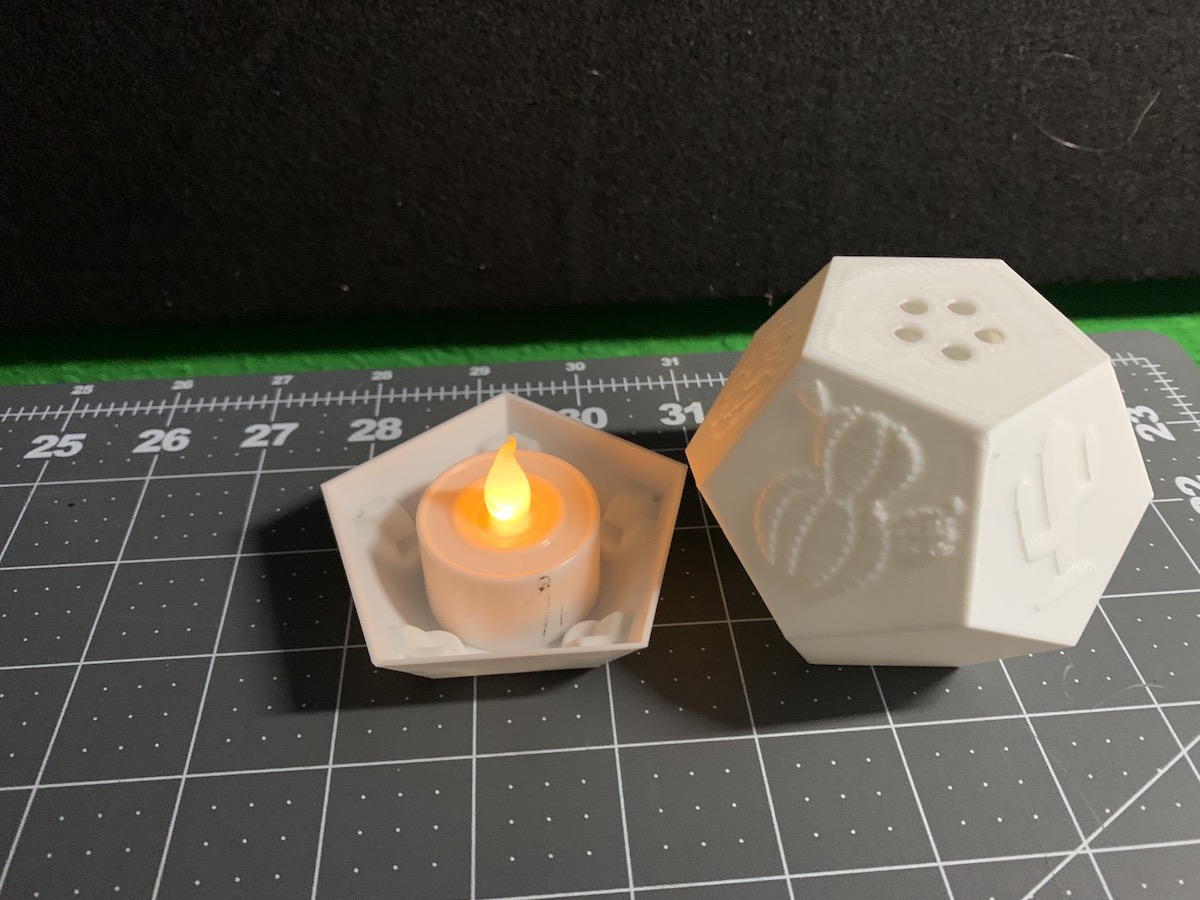
Hmm, what if I flip this thing over, rotate the graphics, and print in white.
I’ll bet a ‘candle’ will fit in there. Didn’t plan that, but it’s perfect…
Ya, this is interesting. I’m feeling a project piece coalescing…
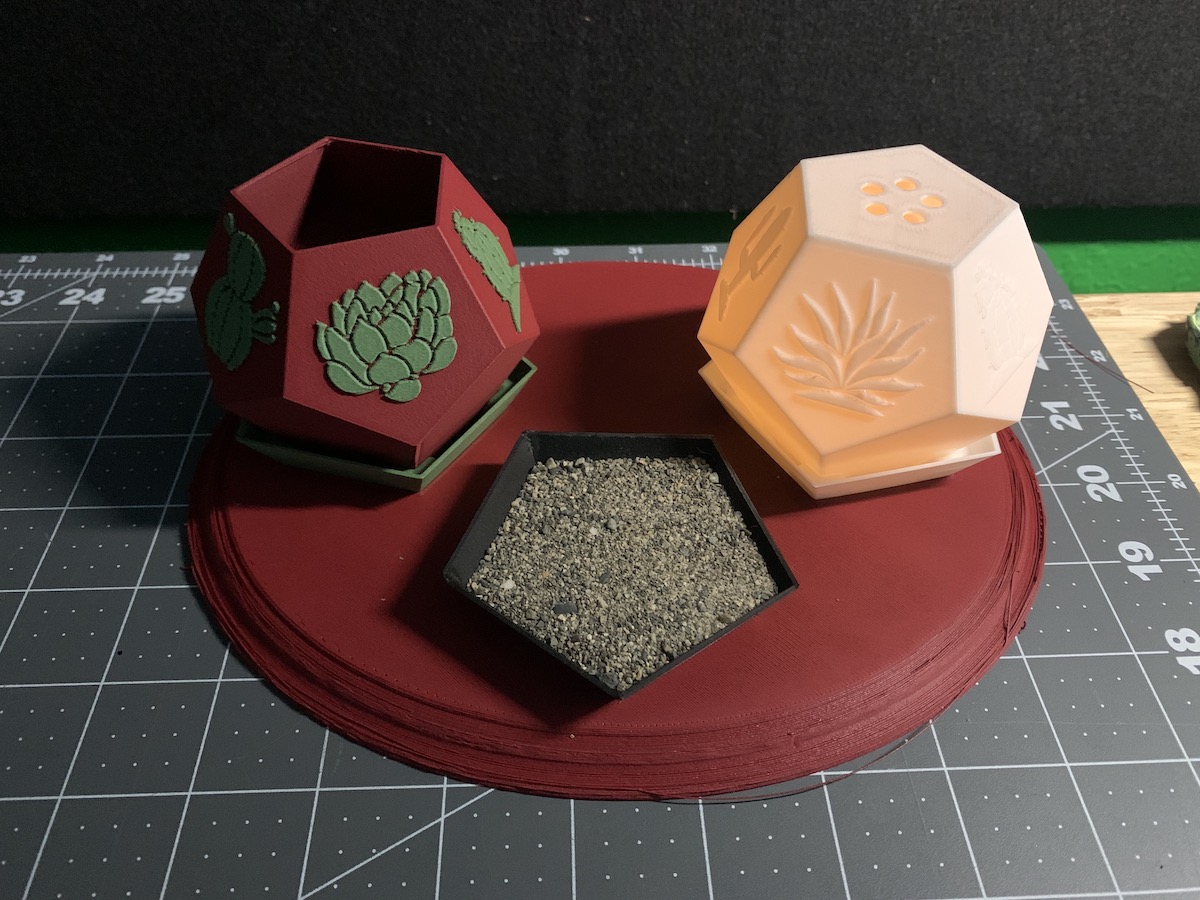
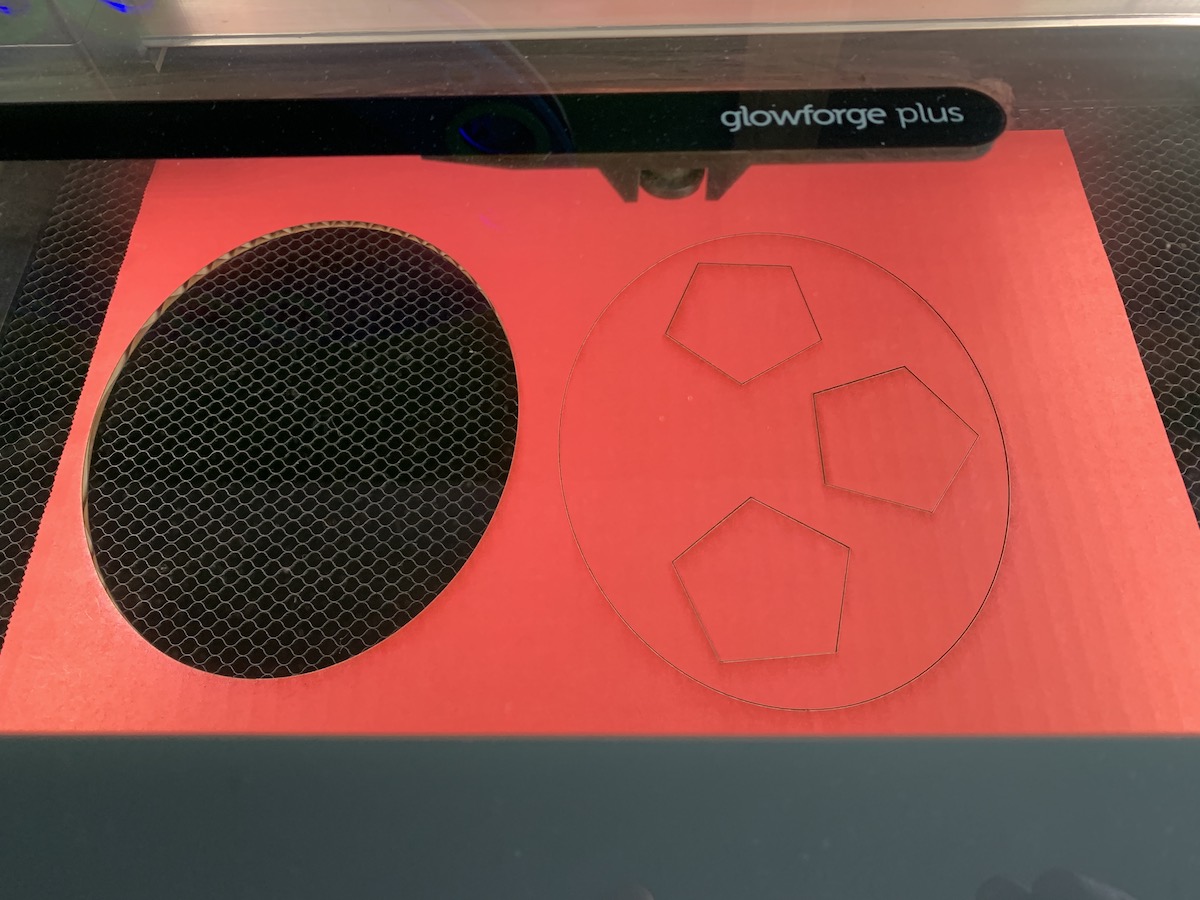
Mabey a tray to put them on, with cut outs to keep them in place.
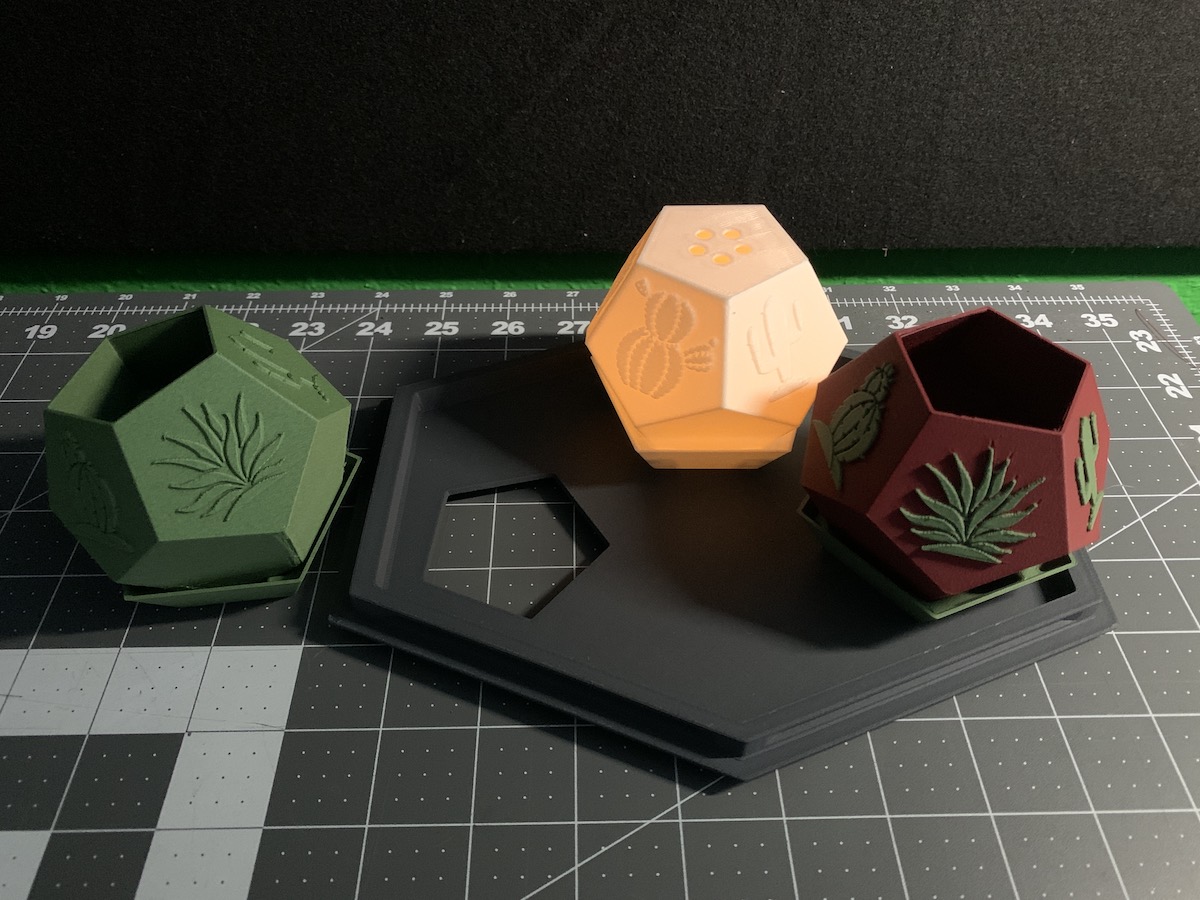
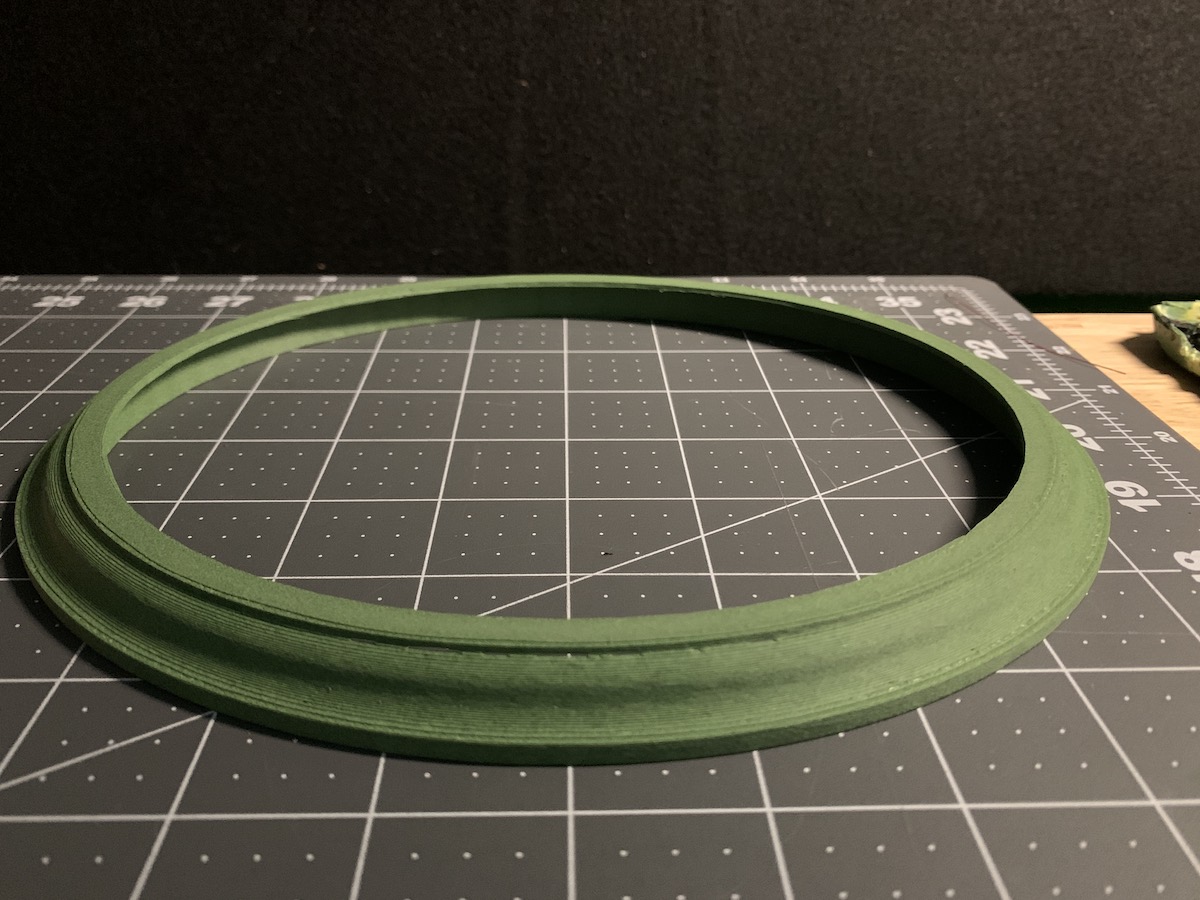
A tray suggests you’re moving it around, and this probably isn’t that kind of thing. Plus the geometric tray is too mechanical, and it’s all plastic, which doesn’t have any warmth. Let’s try a quick oval, and more of a ‘base’ than a tray.
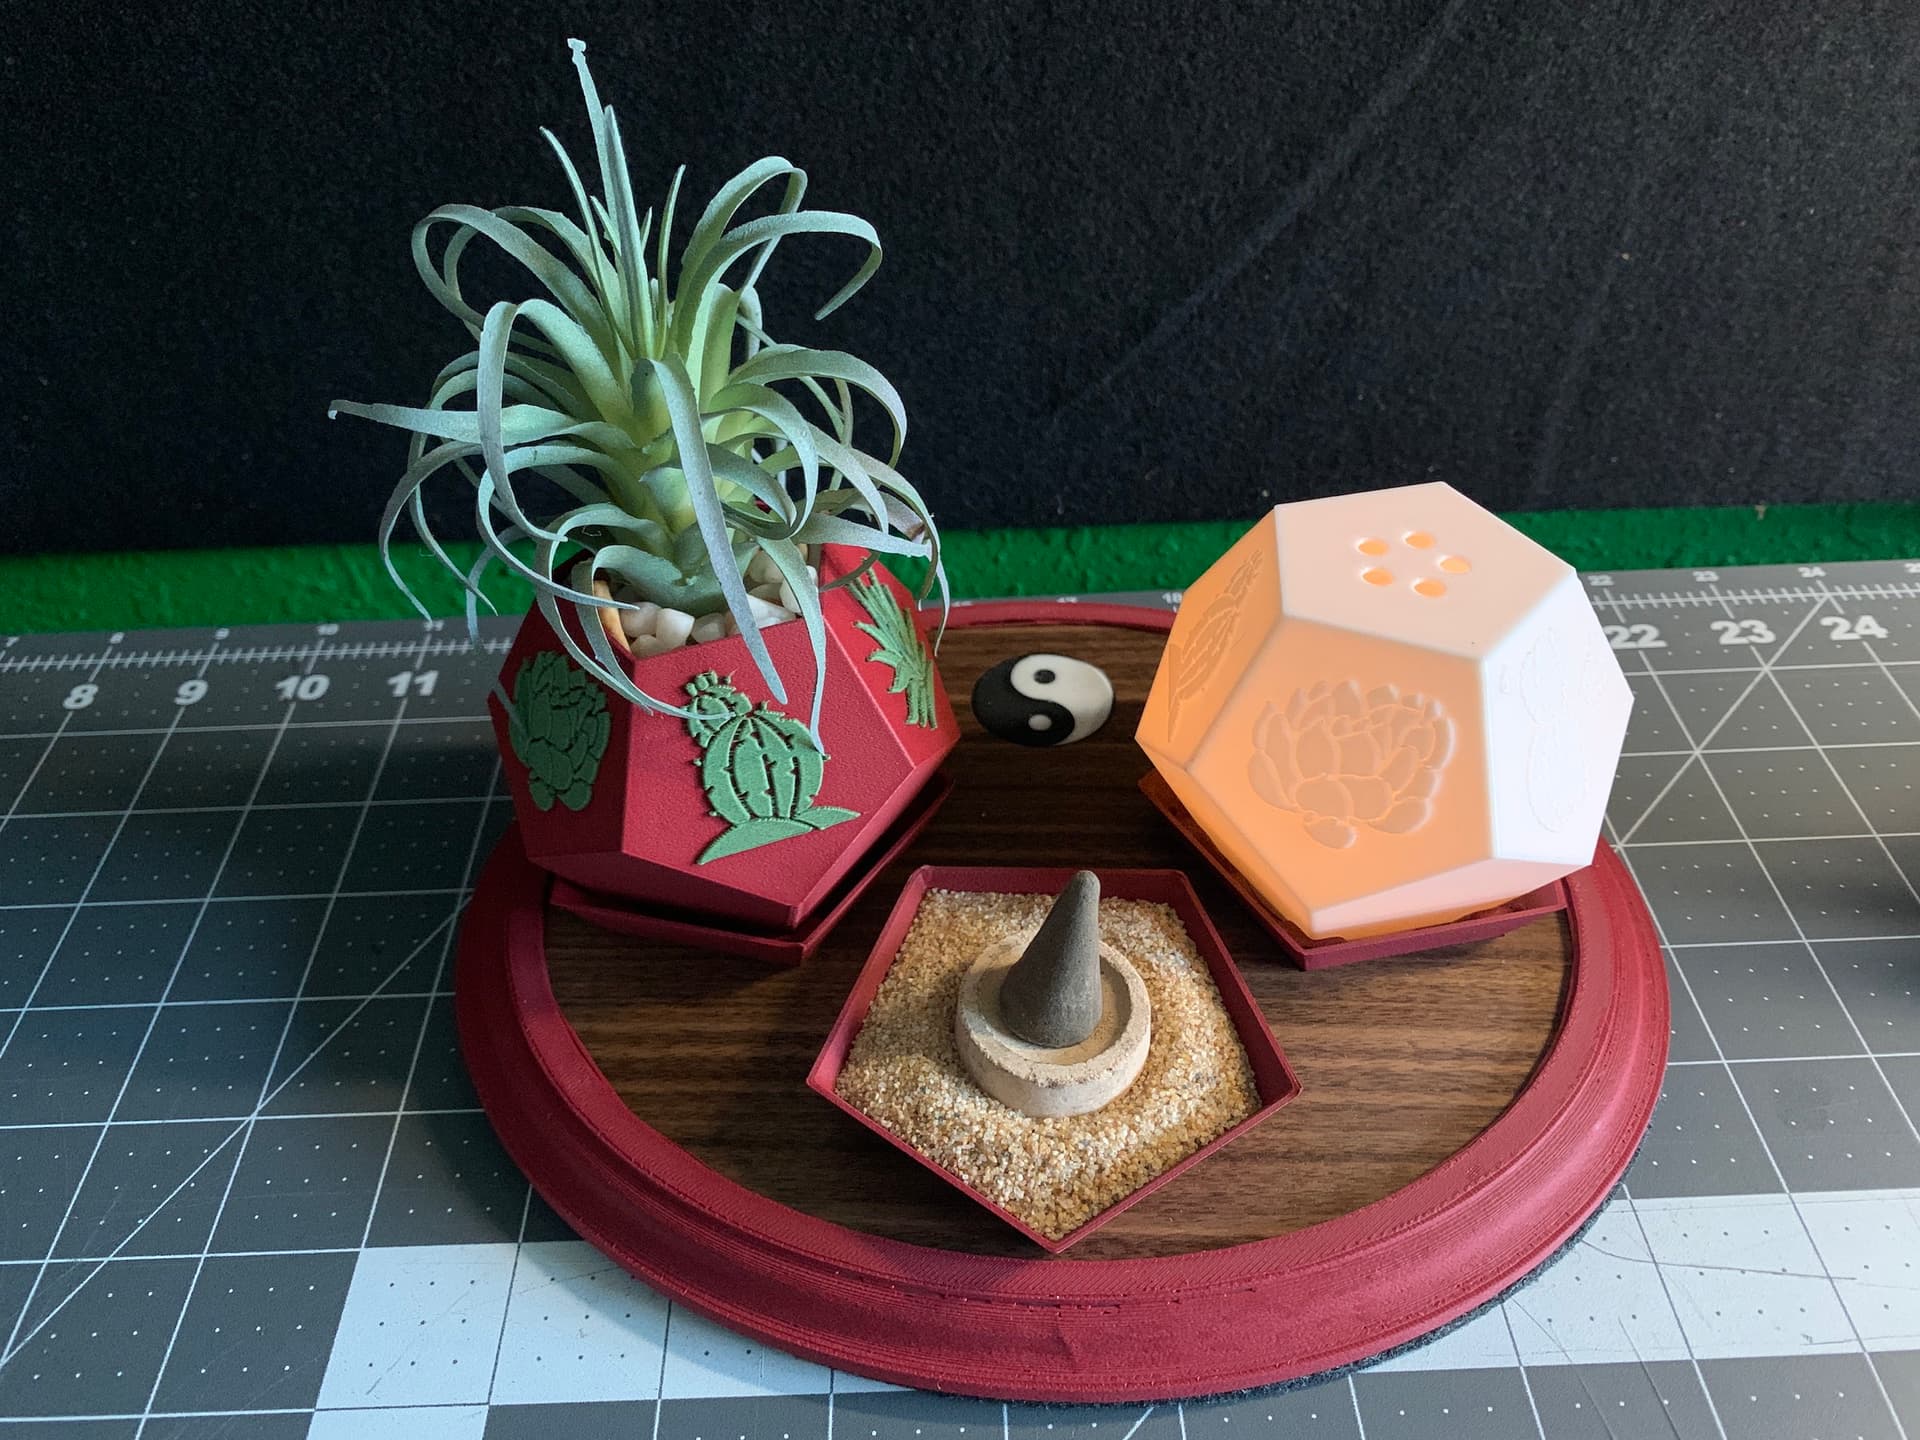
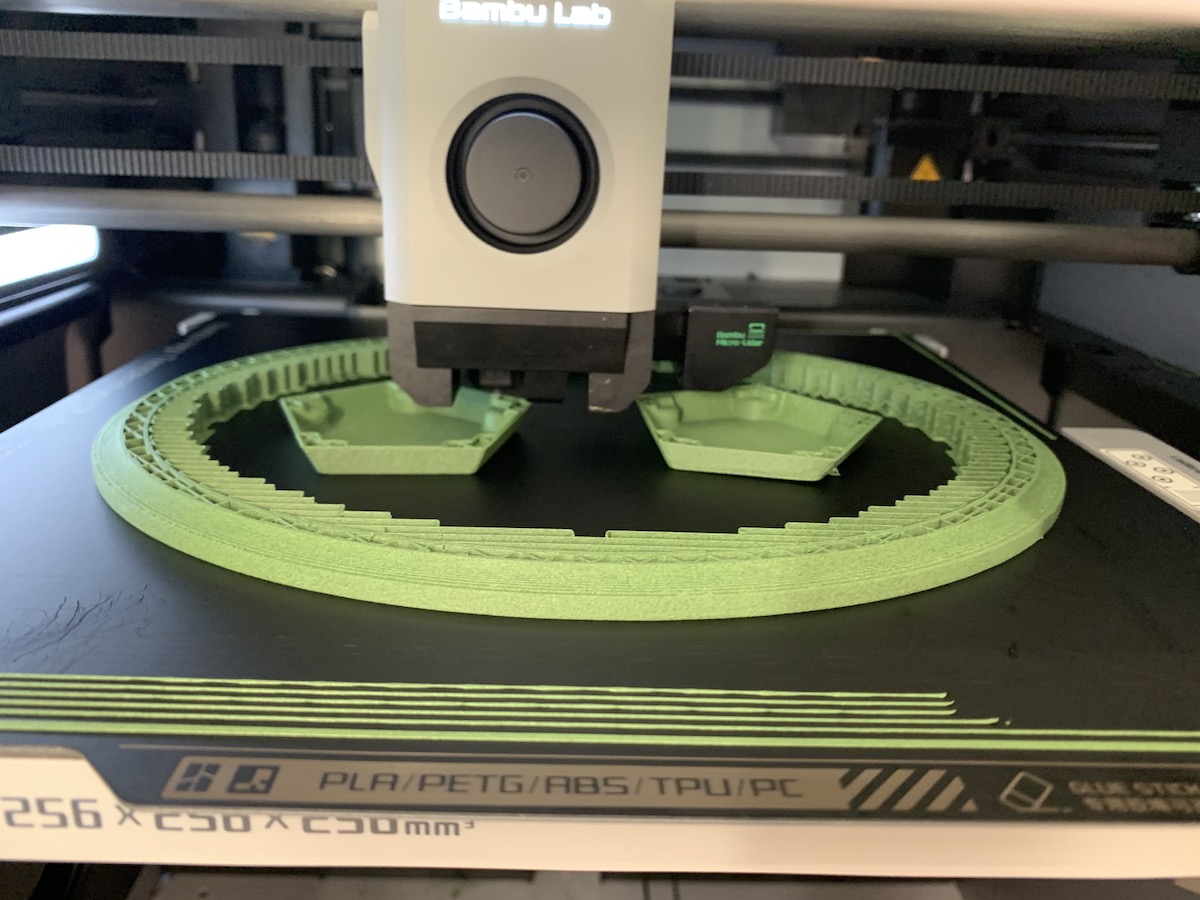
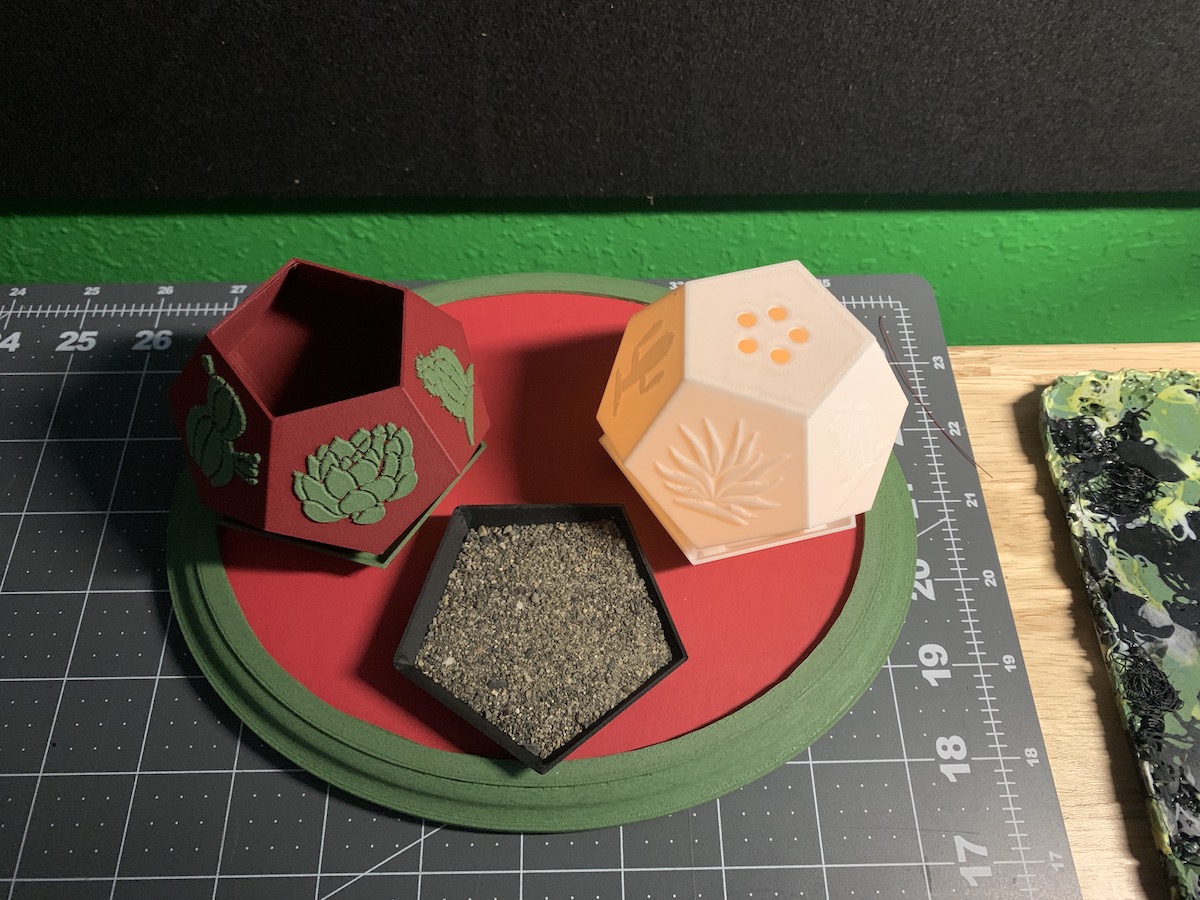
This is better, but too heavy on top. Mabey two cubes is better, and use one of the cube bases for sand, like those zen sandbox things.
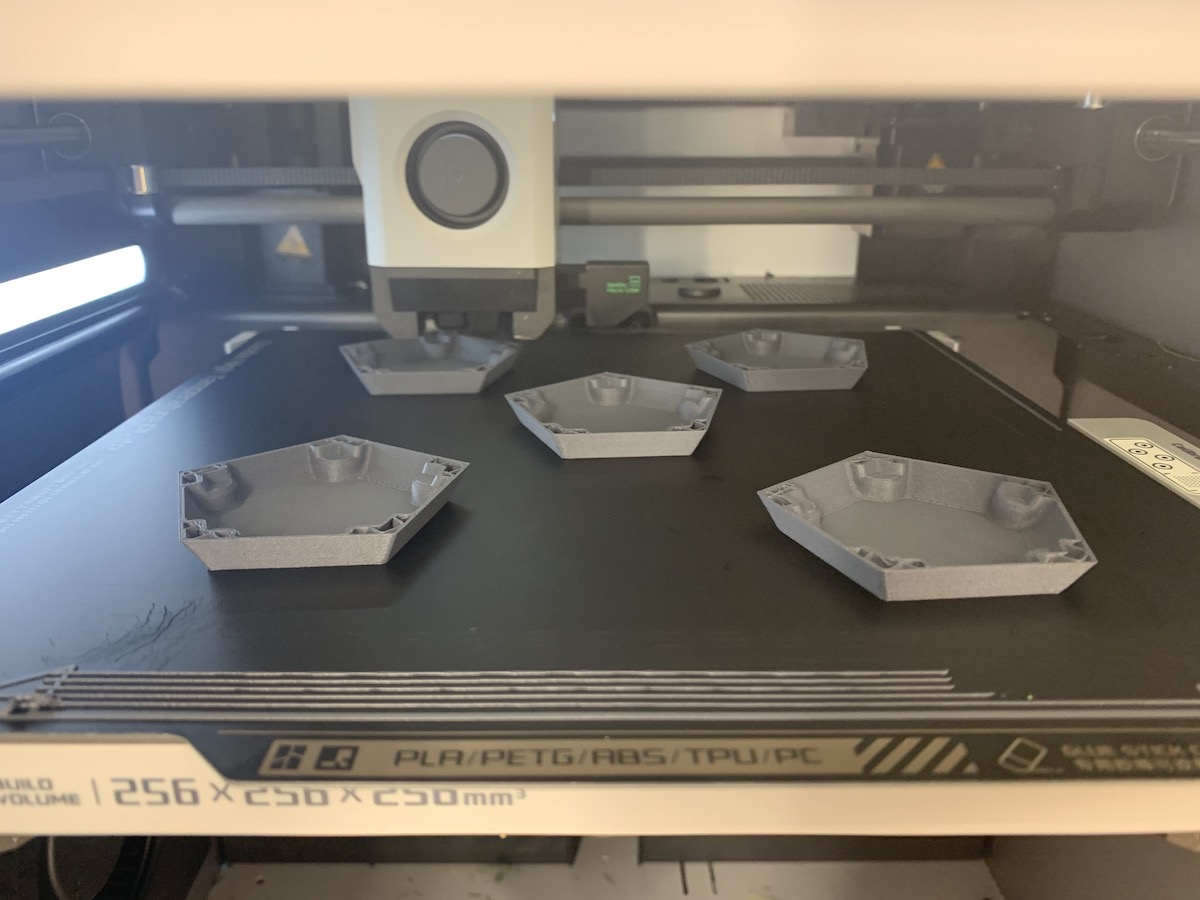
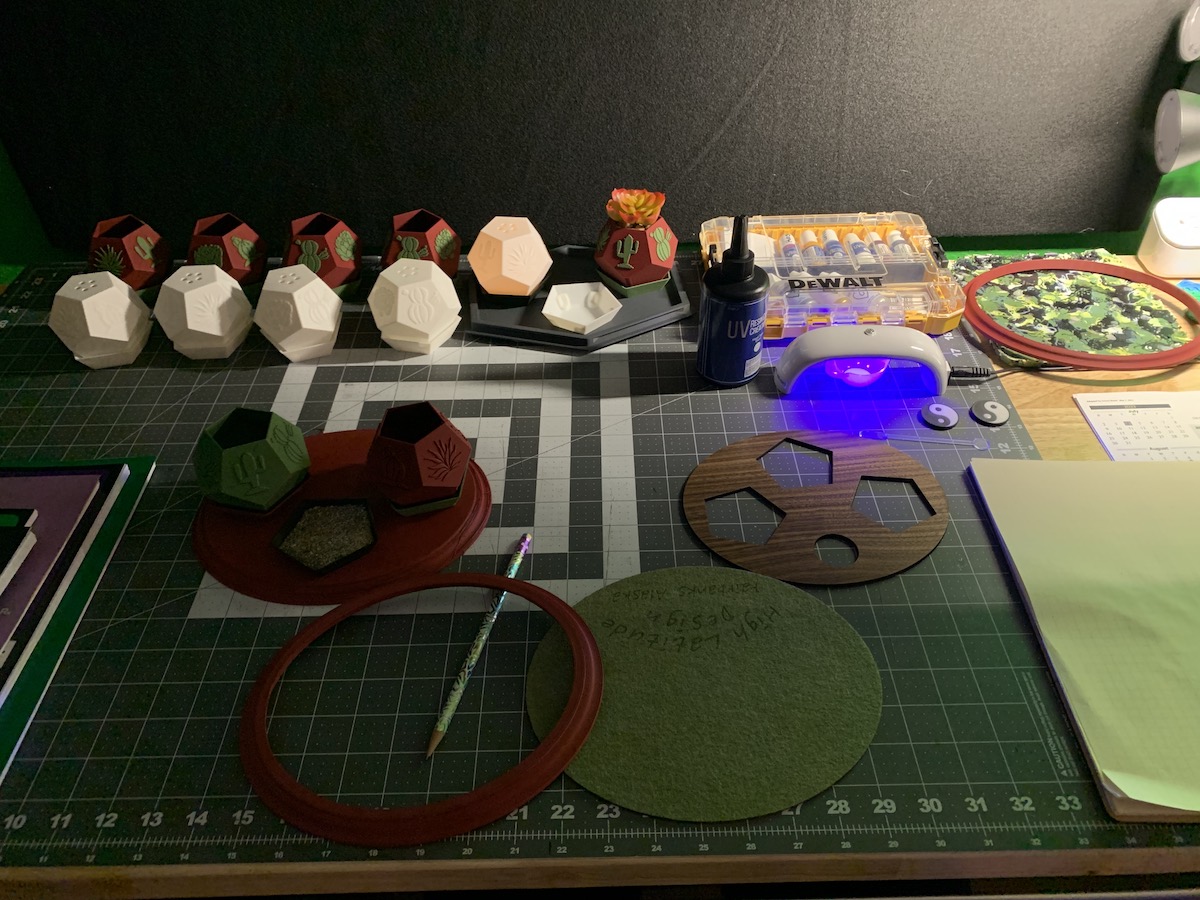
It’s getting close I think. It’s still all plastic, and needs more warmth, like some wood. But I’ll need to redo the base to clean up the strings, and hollow it out to reduce print time.
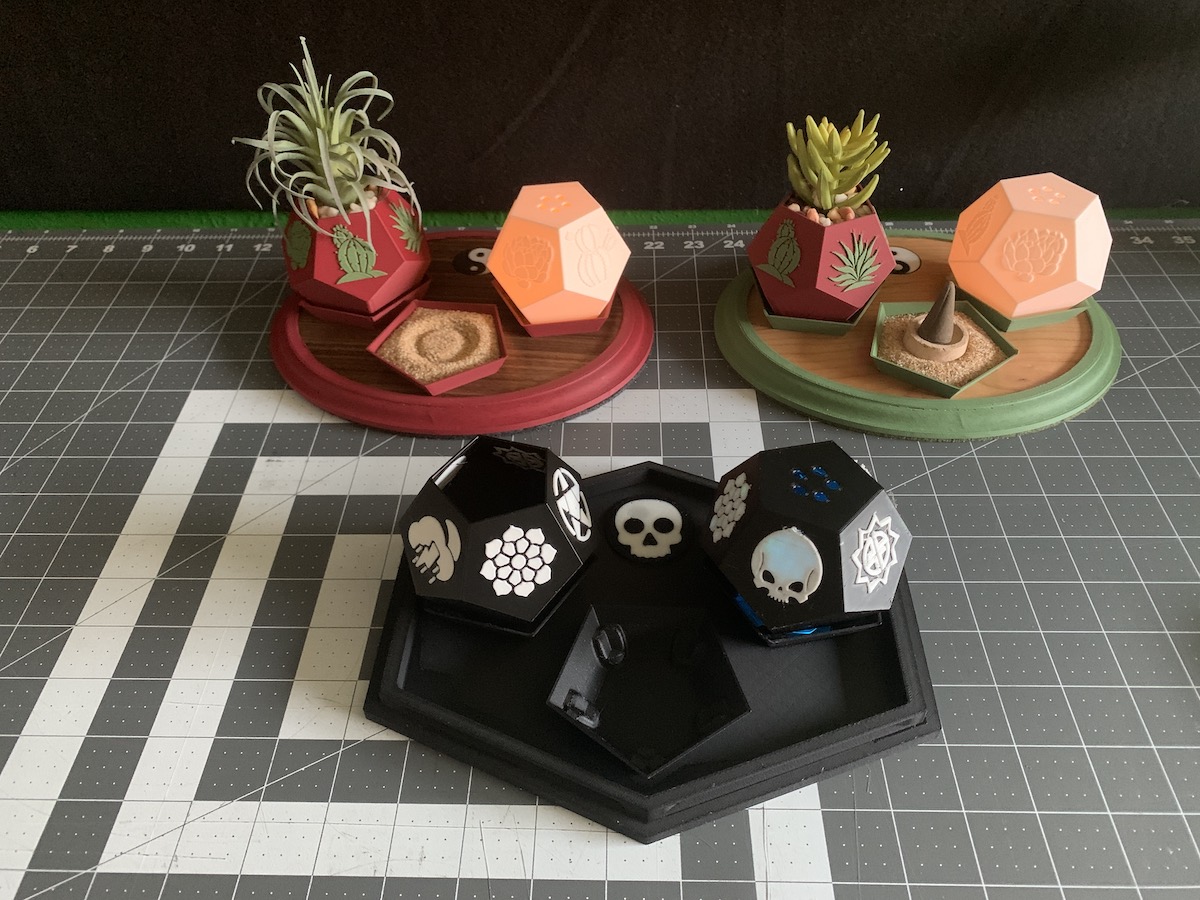
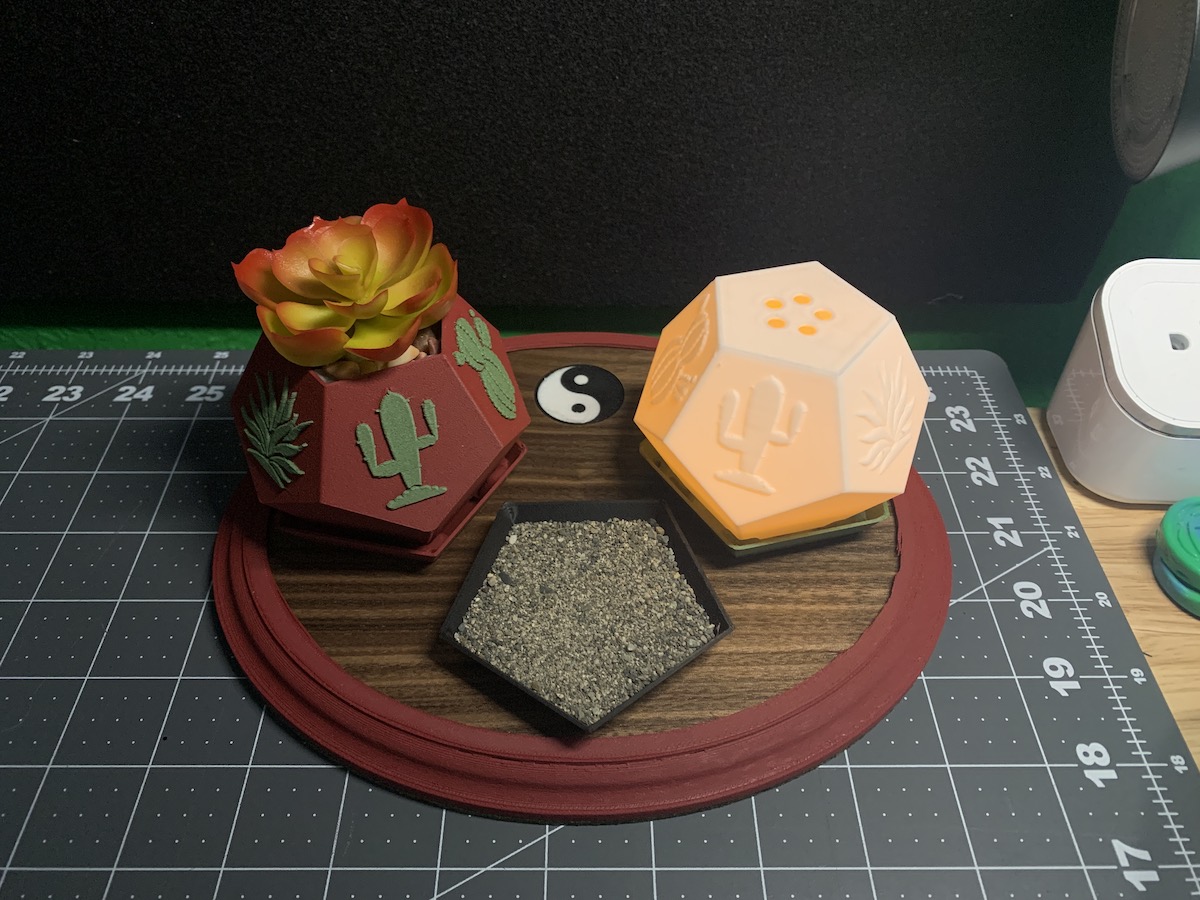
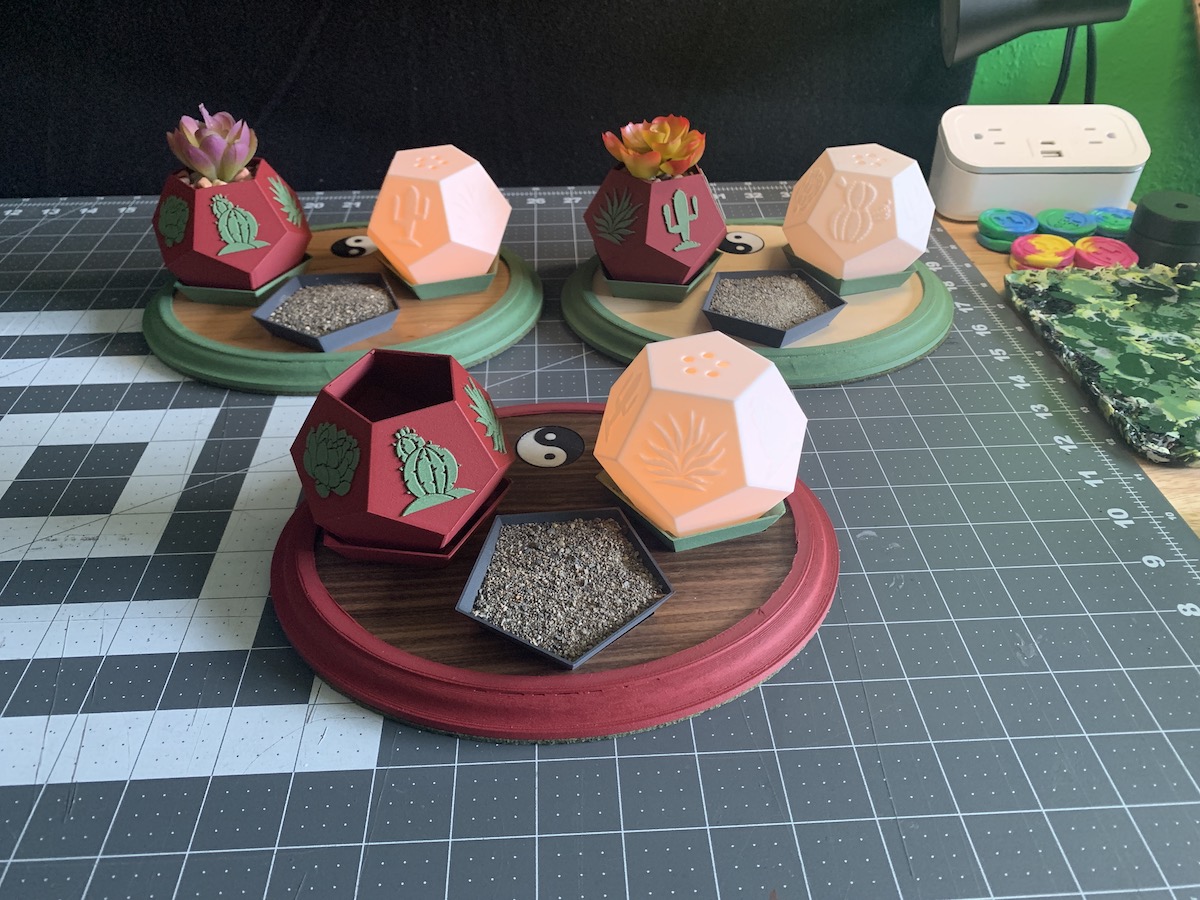
That’s better, and I printed a red version as well, for some variety.
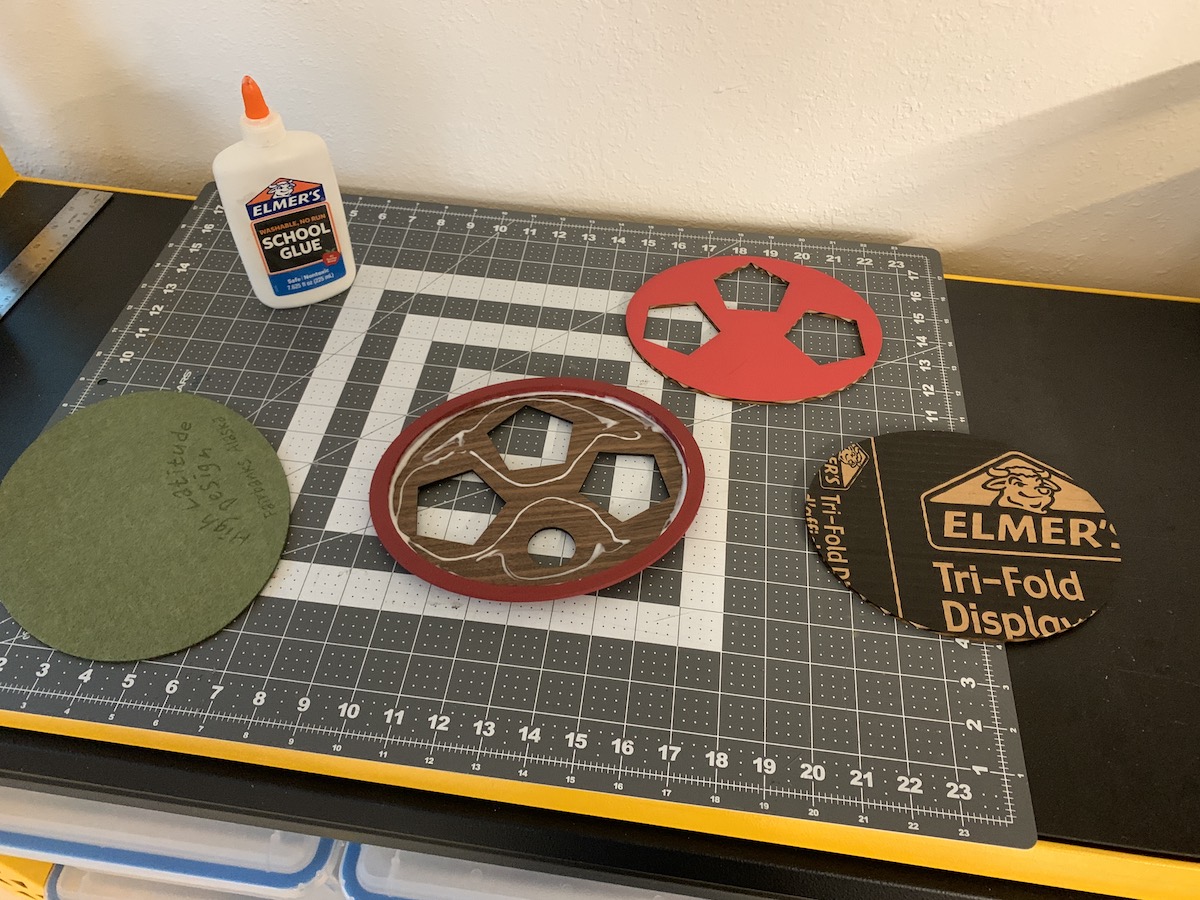
Now I can layer in some GF cut cardboard filler, and cut some PG Plywood to make a nice surface. Mock up with some cardboard first, of course.
I like where this is going…
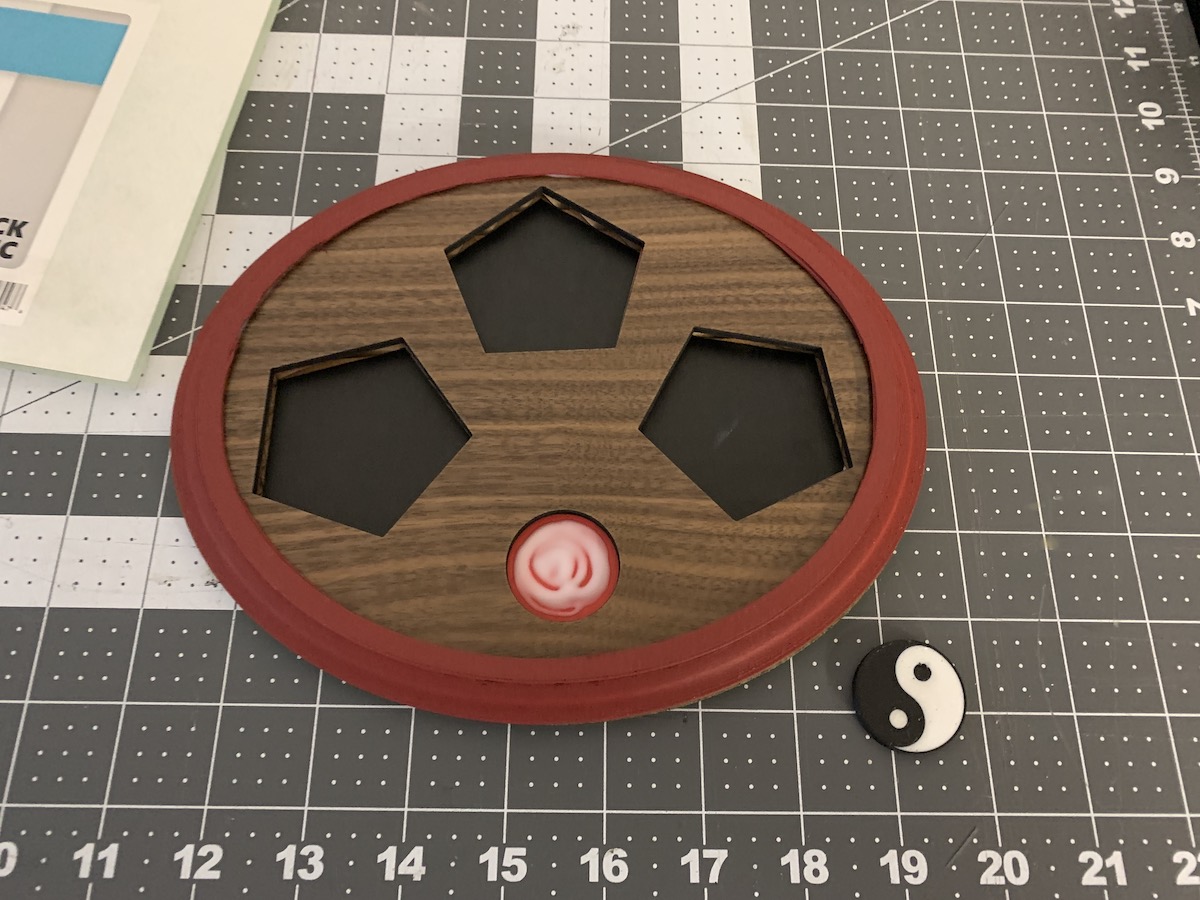
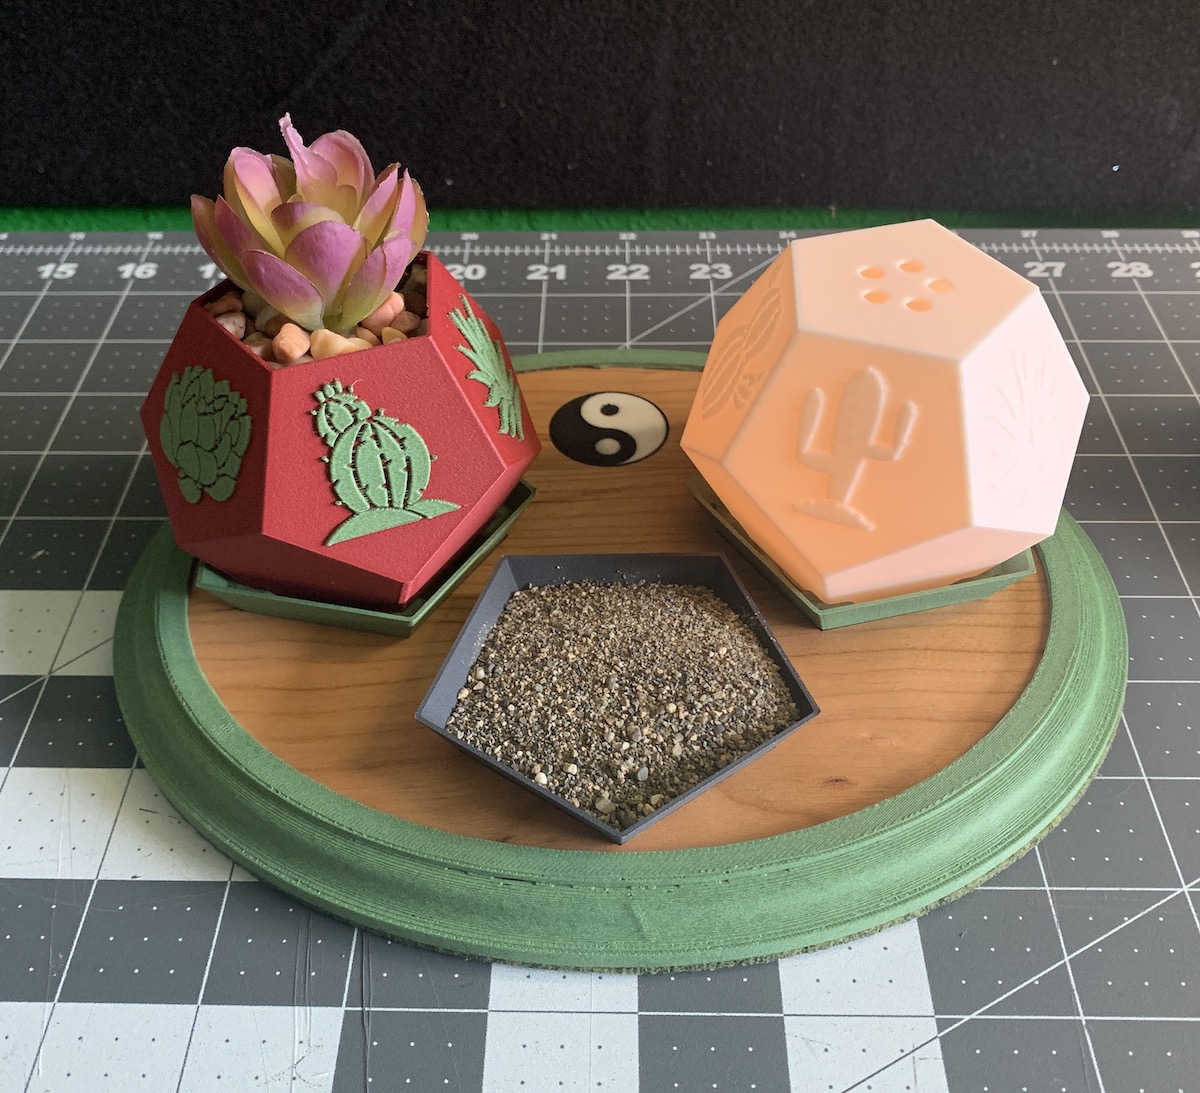
The space at the top (center) needs a little something too. Mabey a circle cut out for a medallion, or a logo engraving. Since I’m going for a zen desk feel, I’ve got an idea. And let’s go ahead and cut some Medium Walnut Plywood for the surface layer on this first one.
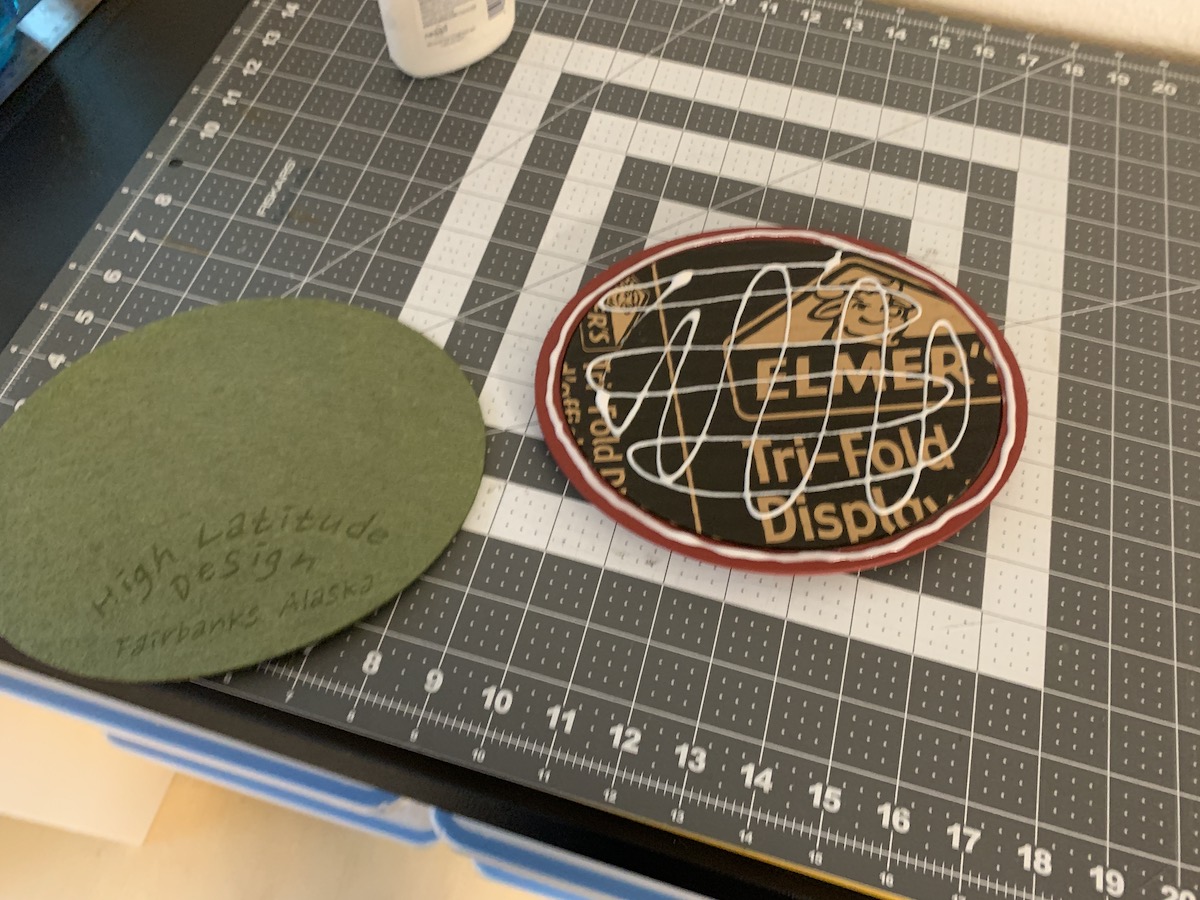
Add a nice felt bottom.
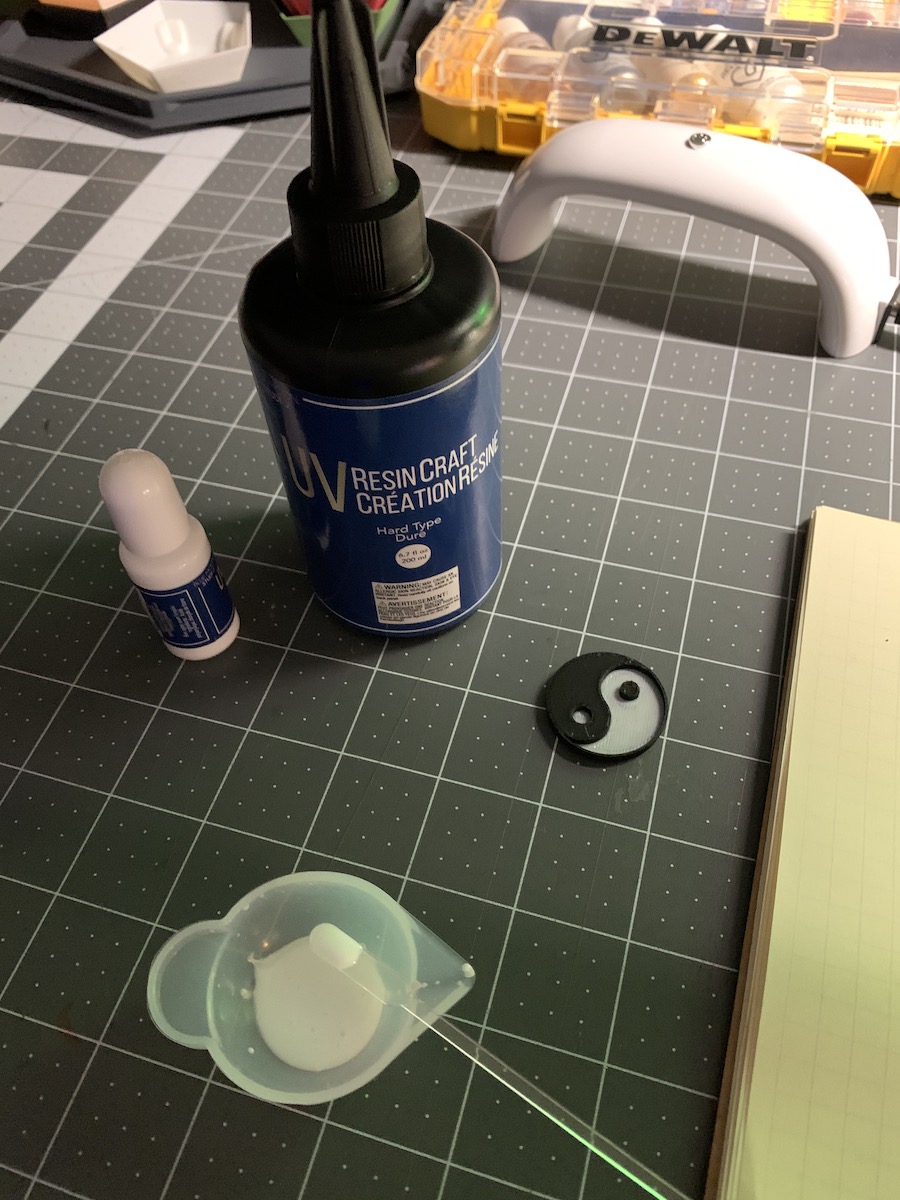
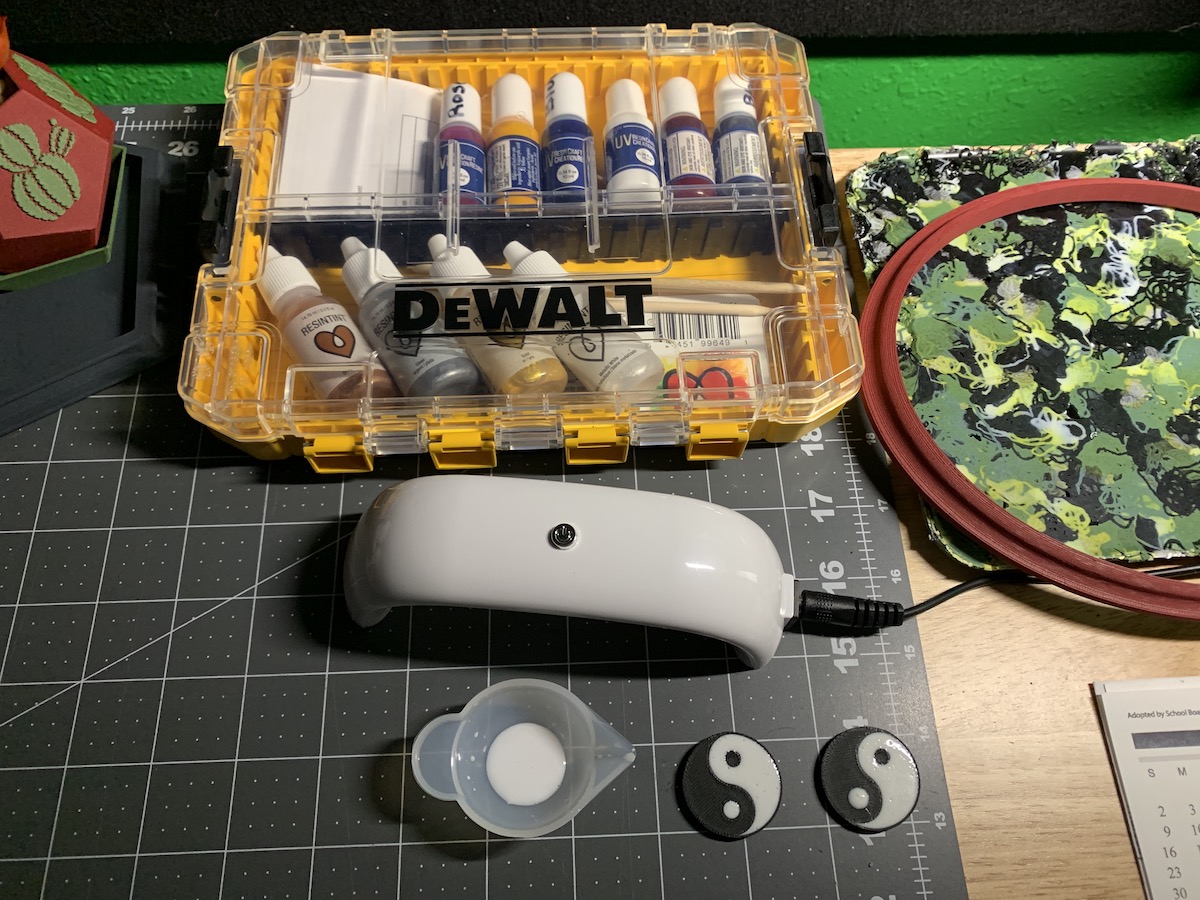
And before the reveal, let’s work on the little circle cut out. I’ve tried UV cure resin a couple times and this is a good application for it, with a 3d printed Yin Yang symbol.
Totally happy with these.
Glue this in -
Smash it all together and wait for the glue to dry.
And here it is.
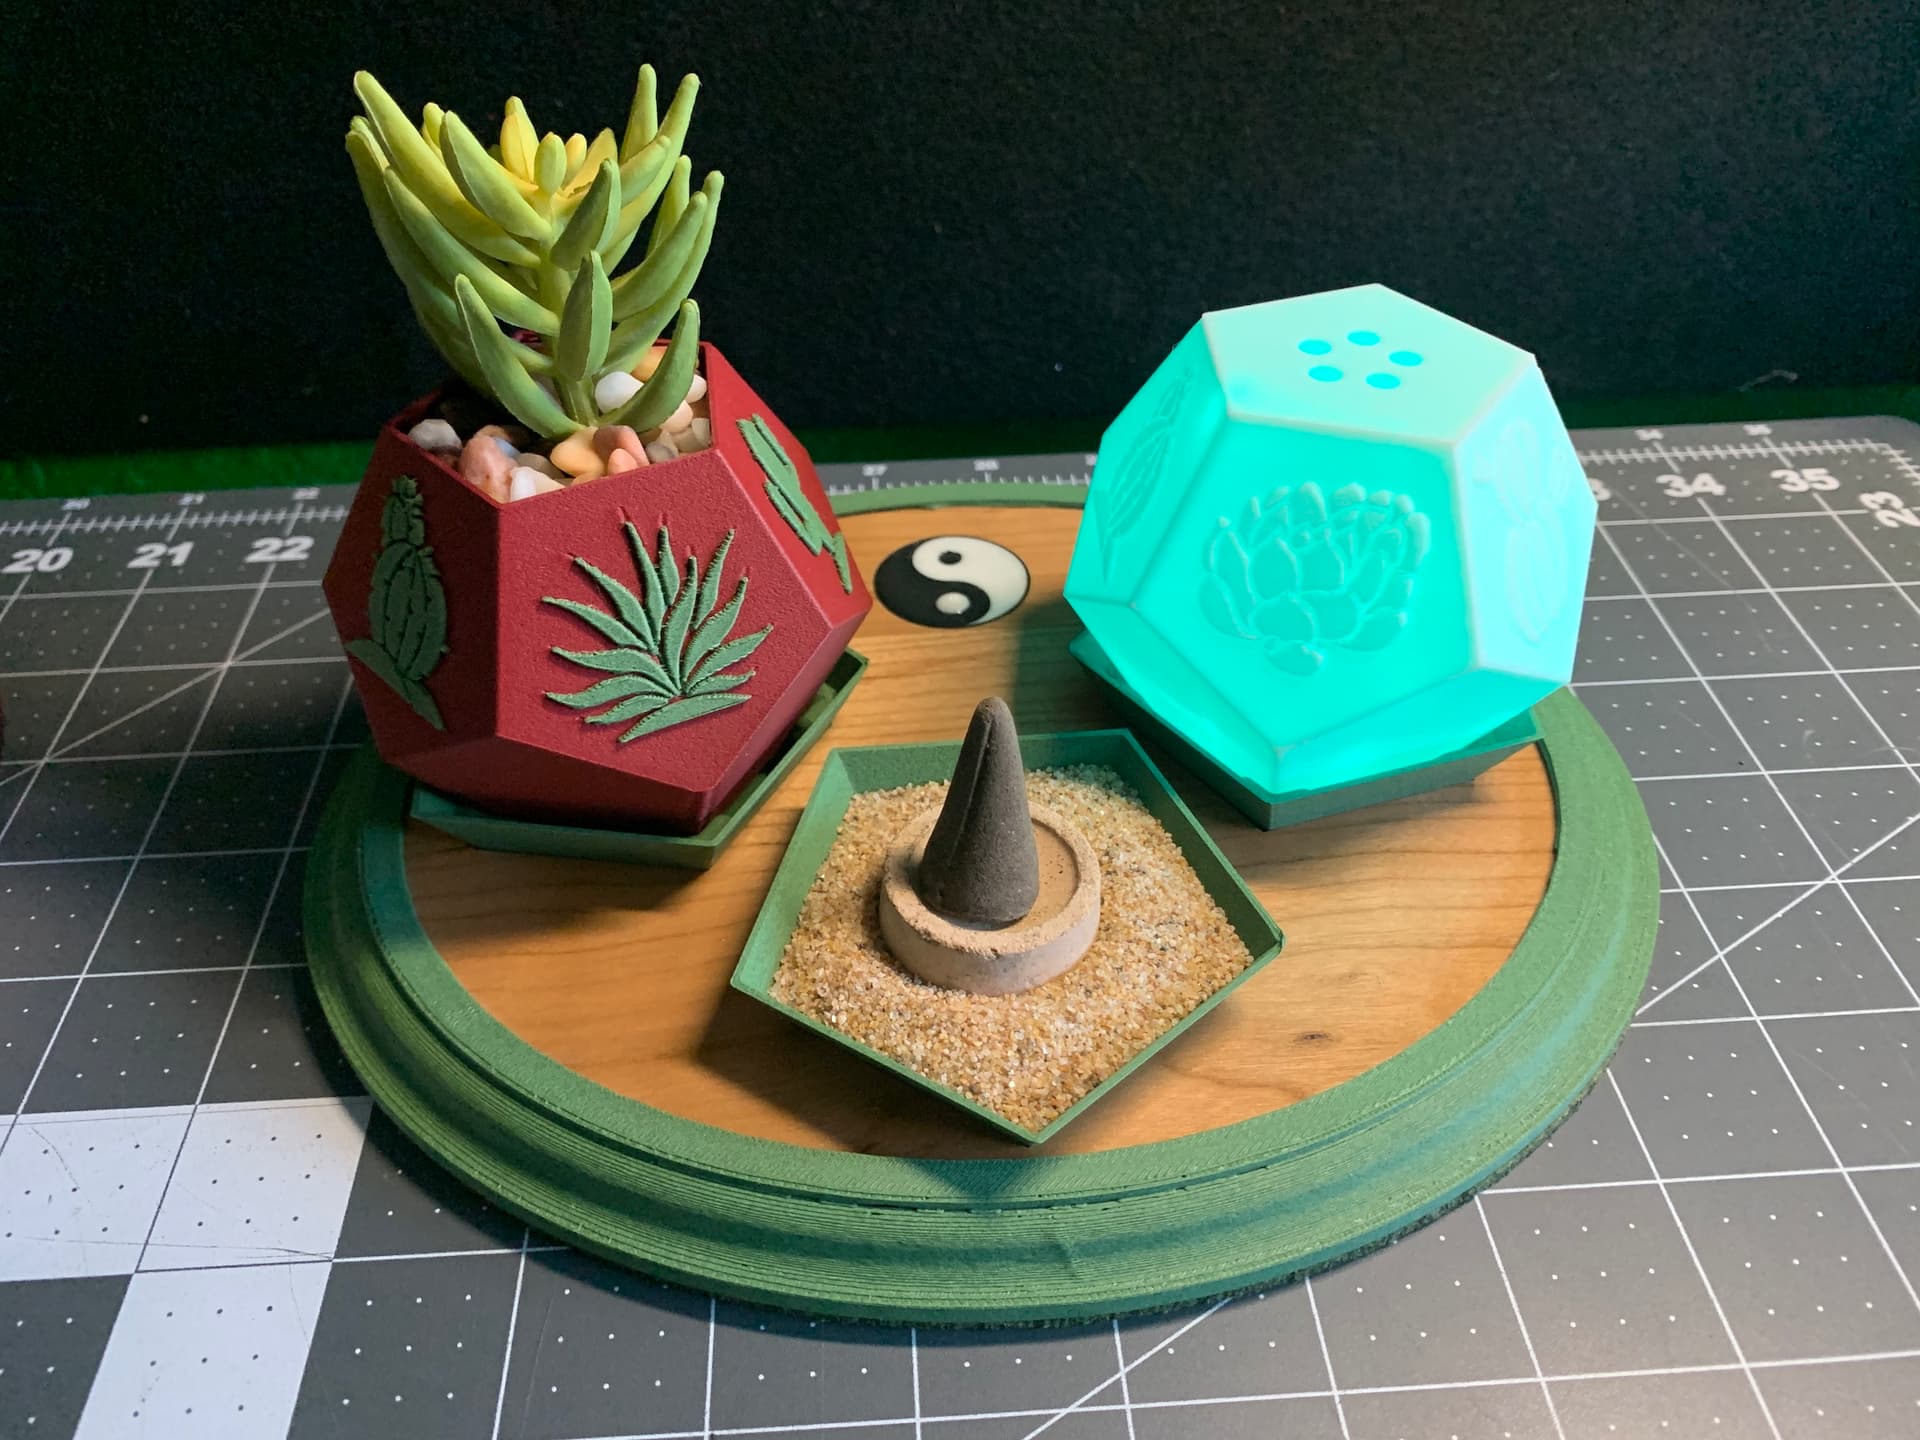
I also tried Aura friendly Light Maple and Light Cherry plywood, in addition to the Walnut. For those I liked the green base trim the best.
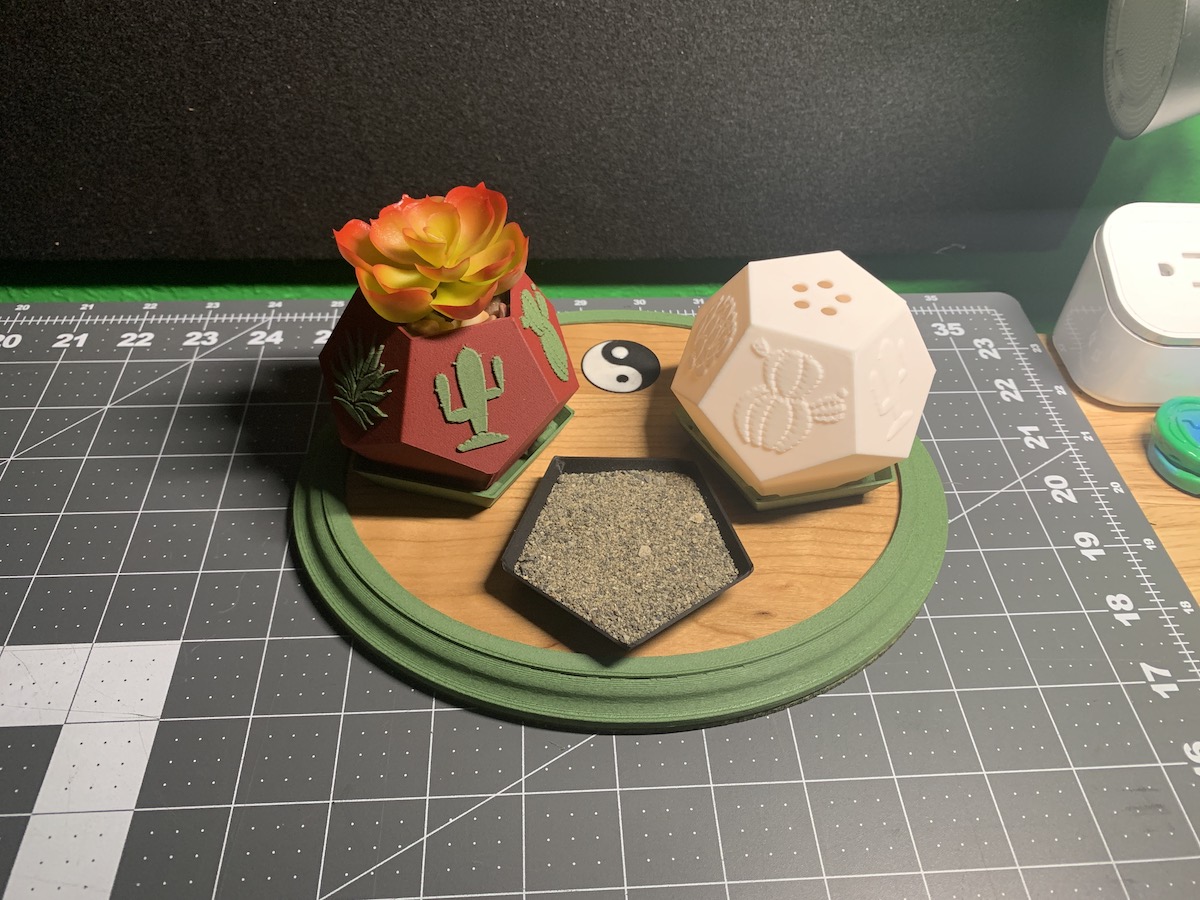
I’ll be planting real cactus starts in the containers, but it looks pretty good with the fake ones I had on hand. And for the sand trays I’ll do them in grey, the black just doesn’t feel right.
Of course I made 5 total, to mix and match colors and see what looks the best. These three combinations I like the most.
The Base trim is a little thin in spots, as my 3d editing skills are pretty rudimentary. So I’d clean it up if I was going to ‘produce’ them. But overall a fun project, and they’ll make nice gifts.
Thanks for checking it out…
HL