Ocean24 Medallion - Cutting HDPE and PLA

Greetings All -

Thanks so much. I learned a lot on this one. And it was just a fun, no expectation, kind of creative exercise.

And I didn’t quench it. Just a Will Stelter joke. :wink:

Which reminds me, it occurred to me that not only did George Foreman help me with this project, but so did Dwayne Johnson.

FYI - the sample of each was 162 grams of HDPE and 117 grams of PLA. Note the greenish teal color on the surface of the HDPE. It only touched the copperish colored grilling mat that I heated it in. And I used a separate one for the PLA. So ya, must have been some copper rubbing into it when I was smashing it. :slight_smile:

Also, I forgot to include a pic of the 3d file it anyone is interested.

I do have quite a number of testing and extra Yellow and Magenta reflector blocks and grid mounts left over from the Fire Box project.

So ya, I’m on it.

HL

7 Likes

Very cool. Thanks for sharing!!

5 Likes

Greetings - to wrap this one up. Here we go -

Same process, just less material this time. Only 80 grams -

17 minutes and checking - This is going much faster, and looks much flatter. Pound on it, then turn 180 degrees, and put back on the grill. Down for another 15min -

At 35 minutes, oh man, it’s done. Stop, ‘Mallet Time’. Put it in the plywood sandwich same as before. Wait a little to cool and what do we have. The back is nice enough -

And the whole thing is around 5mm. Seems perfect. Cuts perfect and the top, where I laid those thin strips. Shut up…

Ya, I’m happy…


A lot like poker chips.

Same pressed sandwich cookie. But yummier.

The wording was too thin so not terribly legible on most.

But overall, for a simple add on project

I’m very satisfied. Thanks again for checking it out -

HL

8 Likes

image

You cut out a little Earth :slight_smile:

I love your final coins!

I’m curious why not heat and squish both sides of the coin at the same time?

I ran across a YTer who was making their own acrylic this way, but with acrylic scraps - they made beautiful patterned pieces, but I imagine like yours there was a lot of time spent tinkering!

8 Likes

Greetings -

I couldn’t figure out a practical way to do it, and I was already worried about the whole thing getting too soft and just stretching out of shape trying to manipulate it. In other words, I felt it would have been a floppy, molten lava disk, hotter than glue stick, waiting to cling to a finger, and melt in for the long haul. :fire:

The only practical way I could think of, would have been to heat the PLA blank in the mold, so an oven, until the whole thing was hot enough to have the coin melty, but the mold not so hot it too melts. Then take out and press with heat gloves and all the rest of burnt finger tip fun. :slight_smile:

So in other words, since I was only doing a couple, I just went the easiest route I could think of.

HL

6 Likes

Yeah ok, that makes a lot of sense. I have been burned by SO MANY glue sticks!

5 Likes

I love your write ups! You always explain what you’re doing well, and humorously! Wonder if a reversible waffle iron would work the same as the George? I have an old one that the plates flip from waffle to flat (great for grilled cheese sandwiches). Maybe there would be more chance of a uniform thickness? Of course, I’d have to find another one, because I don’t think I’d want to use it for food afterwards, and my husband likes his waffles. Hmm…ours must be almost 50 years old! I think I got it as a wedding gift!

9 Likes

My son and I were watching a YT video yesterday (from Smarter Every Day, some interesting stuff!) where something this guy said really resonated with me:

Paraphrased by me:
If we’re going to mess up, let’s mess up as much as possible so we can learn as much as we can.

Seems to kind of fit with what you were saying. :smiley:

11 Likes

Totally worth rewinding that video to the very beginning to get the intro on what/why!

SO wildly cool!

5 Likes

My mantra for garage tinkering.

9 Likes

His whole channel is pretty fascinating. My son discovered it last week and has been watching tons of his videos. (I think he’s already watched all of the Mark Rober videos on YouTube lol)

8 Likes

Your write up, creativity, patience and experimentation are mind blowing.

You are a Glowforge Superhero.

3 Likes

Greetings - Thanks all -

I’m going to keep this thread going, as I have additional projects finish. So let’s get on it -

After the Aquarium and fire builds, I decided to work on mesh editing and do a large dodecahedron planter pot for my kid. With symbols from their favorite band, multicolor printed into it. Pretty fun, but I didn’t write it up as it was a ‘learning experience’, and personalized, so I didn’t want to show it. The pot came out pretty good though -

It had a large number of filament changes between white, green and black. So the poop begins…

‘First’ melt at 176 grams 400f for 15 minutes.

Since it took 30 hours to print, ya, it had a lot of poop. ‘Second’ melt - Add in the rest

At this weight, and 7" x 7", that’s about 9+mil thick. So it might be too much, but I’ll figure that out later. Put back into oven at 400f for 15min. Remove and nest marble filled pan on top. Put back in oven for 45 minutes.

Let cool. Wow, this thing is definately hefty -

This is way nicer than I expected -

Reminds me of a Creeper. :slight_smile:

I’m not sure what I’m doing with this yet, as it’s too thick to deal with for coins. I have an idea, though it requires me to go shopping. Until next time, unless it fails… :sunglasses:

HL

9 Likes

Which makes it a success regardless of the outcome :grin:

3 Likes

Greetings -

Here comes another - The Cactus Pot project just ended.

So I’ve got some delicious looking ‘stuff’ to melt down. This should be interesting…

Let’s chop it up.

That’ll do.

Oh, found this one too. Nice…

Divide more or less evenly.

Choose your pan by weight, I ended up with 190gm, so 7" x 7" at 1.24gm per c3, equals roughly 6mm. Perfect.

And prepare your dish. It’s like plastic Lasagna.

Sprinkle with more southwest colored goodness.

And fill with, well you know, poop.

Here we go.

400f for 15 minutes, uncovered. To let it melt down in height.

Remove, Spray bottom of marble tray with pam and nest on top, and reinsert.

bake at 400f for add’l 45min. Although 30 is probably plenty. Open door and let cool down to ‘not molten anymore’. Or atleast 15 minutes.

Depending on how much cooled, the bottom pan may pop off when twisting both pans a little.

If still quite hot, because you’re impatient like me, the lasagne will still be stuck to the bottom of the marble tray, set the marble tray, with the Lasagna still attached to the bottom, in a cool water bath.

When cool, I transfer the Mables into the ‘other pan’, and flip over to get a look at one side of the piece. Yup, Cactus Lasagna.

Man this thing is awesome. It should just pop off the pan when flexing at this point. Are you kidding me…

I mean, it totally looks like Cactus Salsa, or, an alien brain exploded. Not sure which. But I dig it.

Trim and clean it up. Oh man. Not sure if I’ll make ‘coins’ out of it. I’m open to ideas…

HL

10 Likes

I like this one the best. The colors are great together. The base is perfect with the red ring & walnut woodgrain.

1 Like

Greetings -

In case anyone is still interested in where this ended up, so far, here’s an update. I wanted to get all the old PLA melted into plates, and then cut into medallions, for future use. I’m also slowly working on a plan for a heated stamping mill of sorts. Anyway, here we go -

Melting station set up - with hose just in case. :wink:

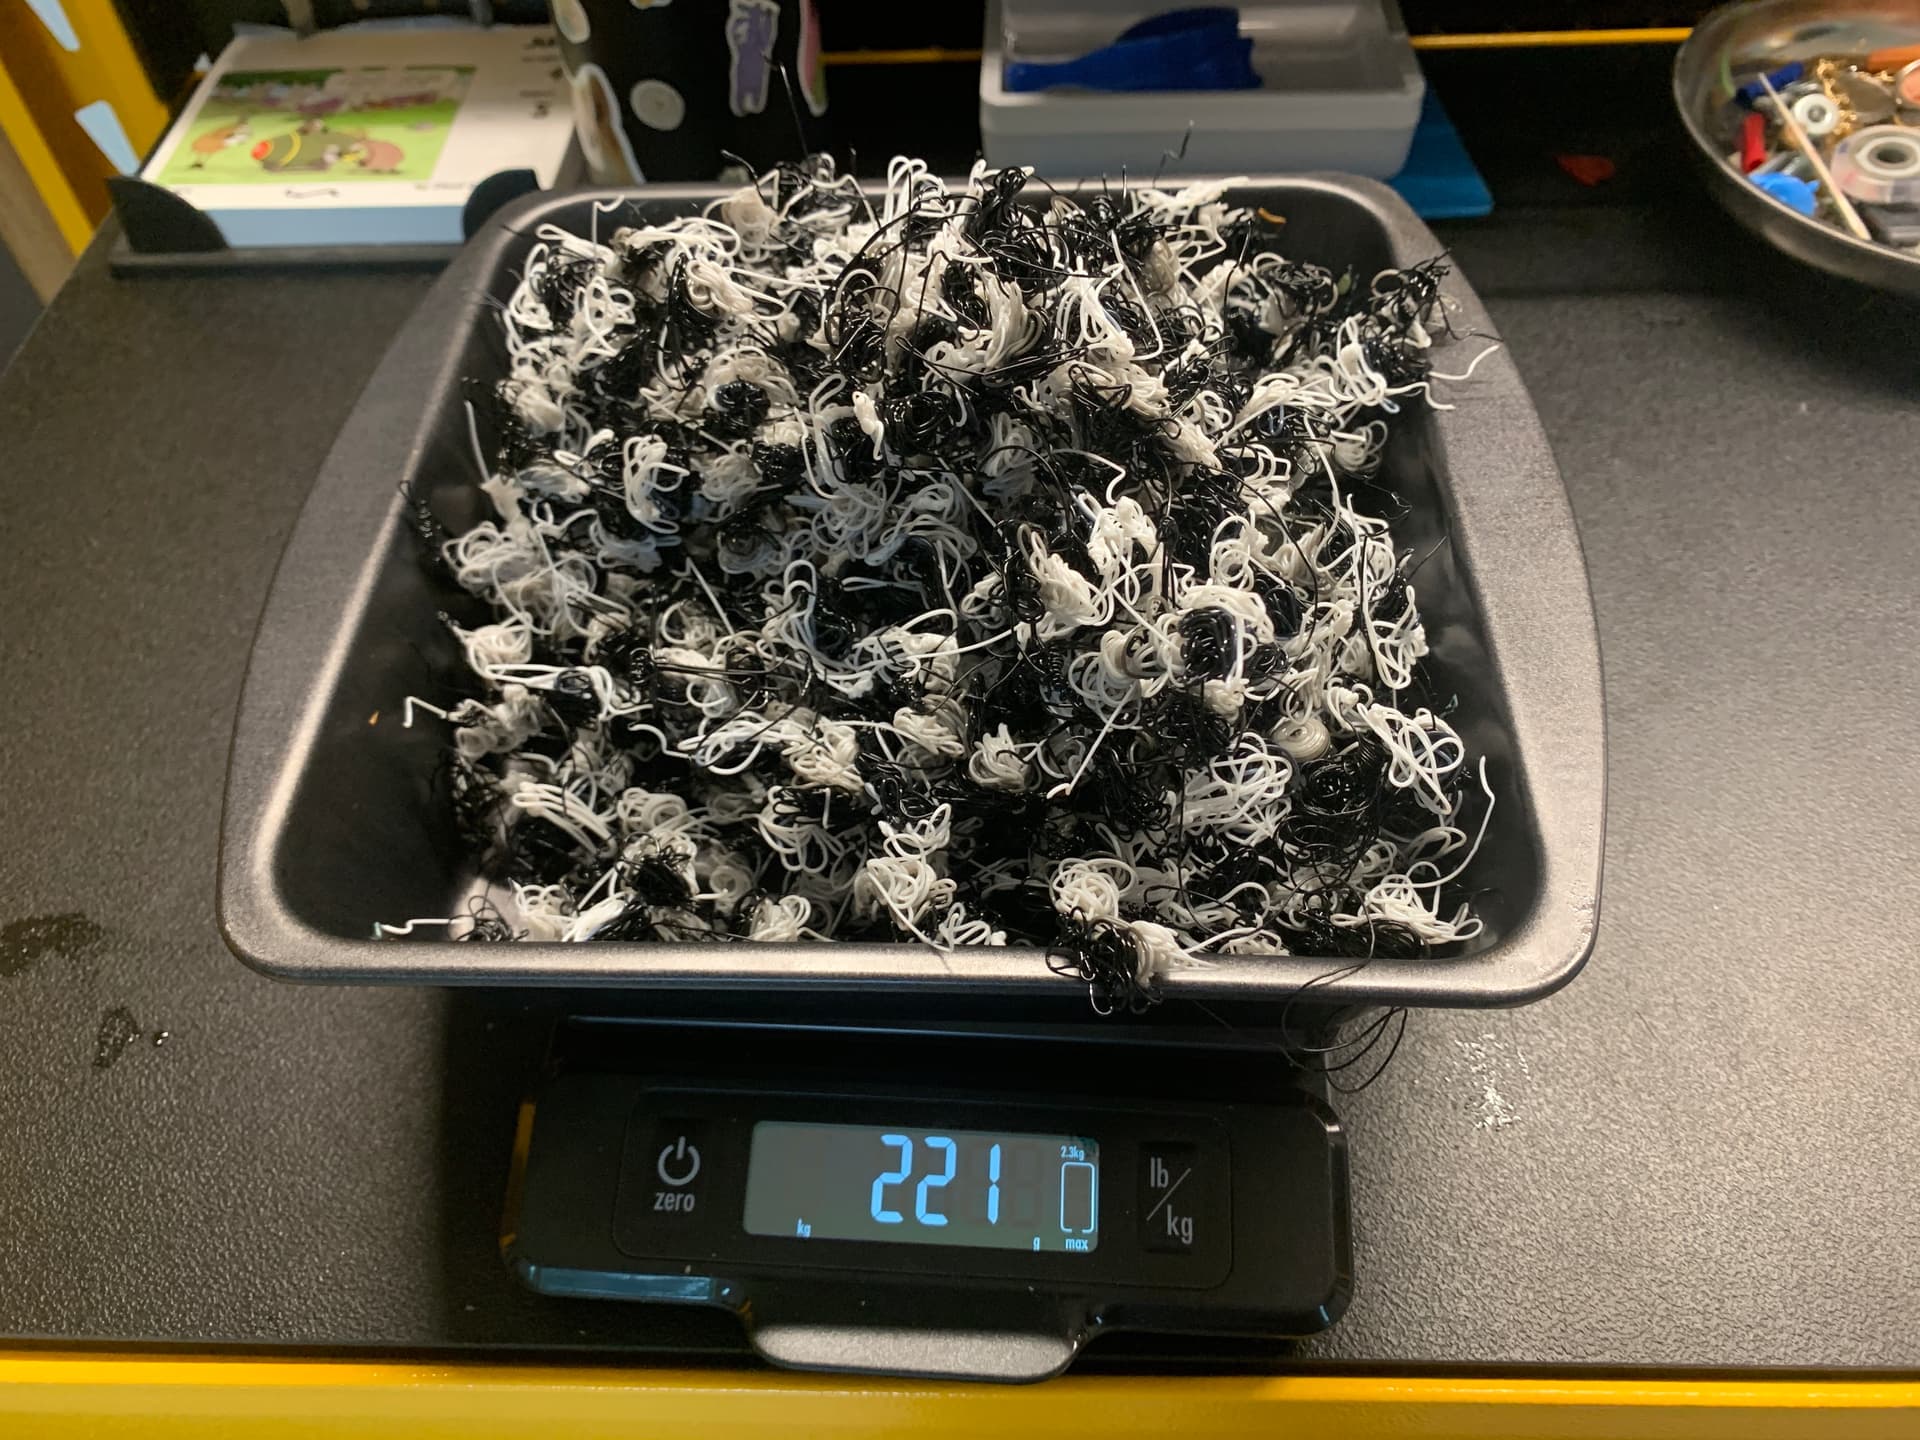
You know the process from earlier in the thread, rinse and repeat - Ghost poop from The Cactus Pot project up first -

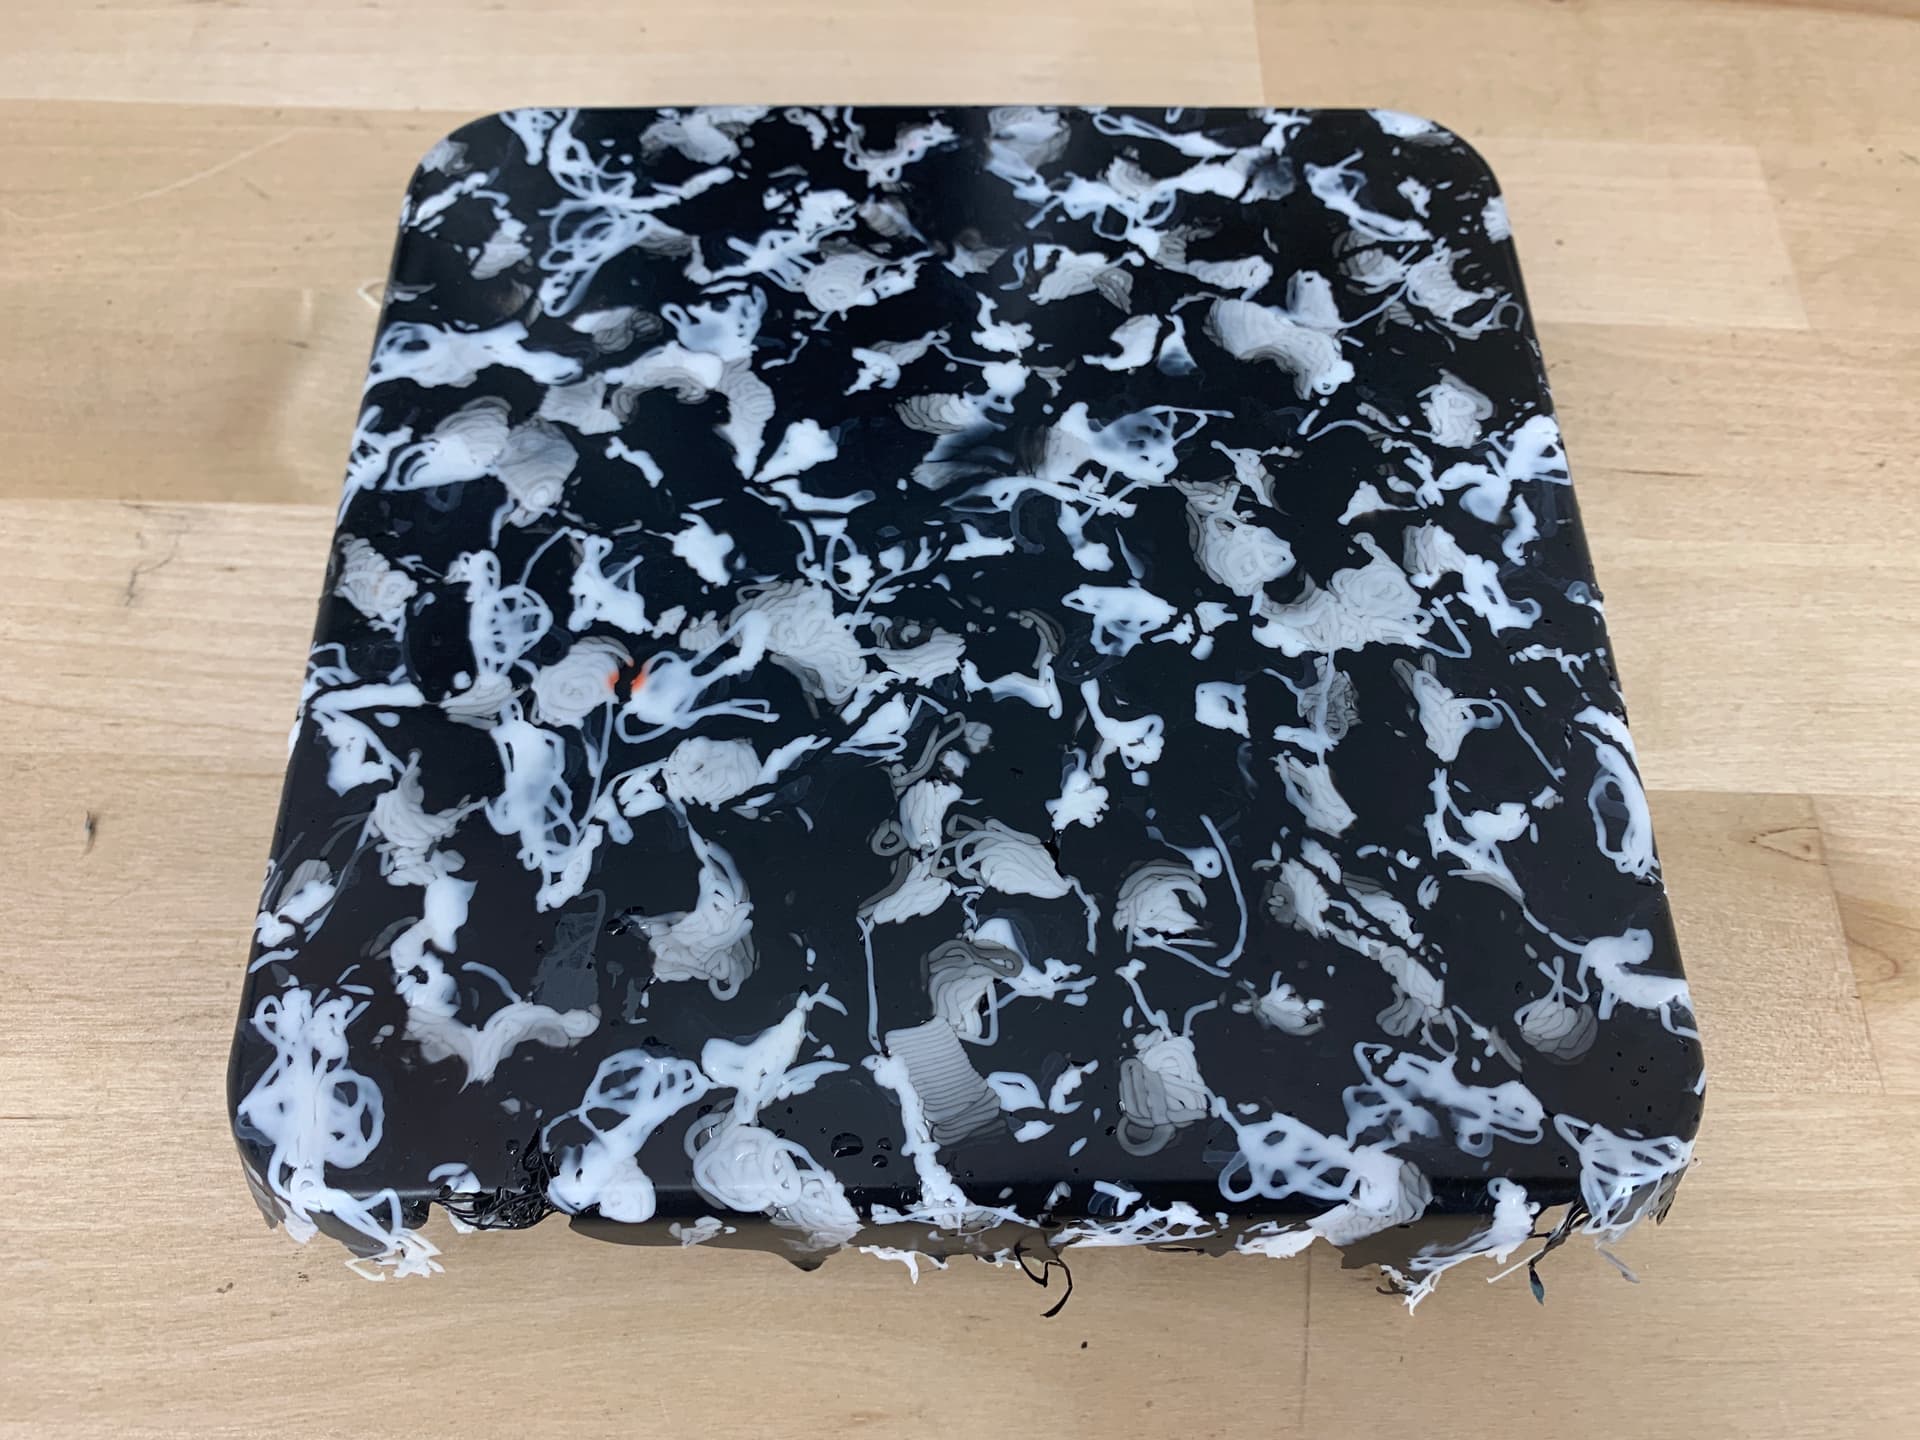
Bling - That’s pretty freaky…

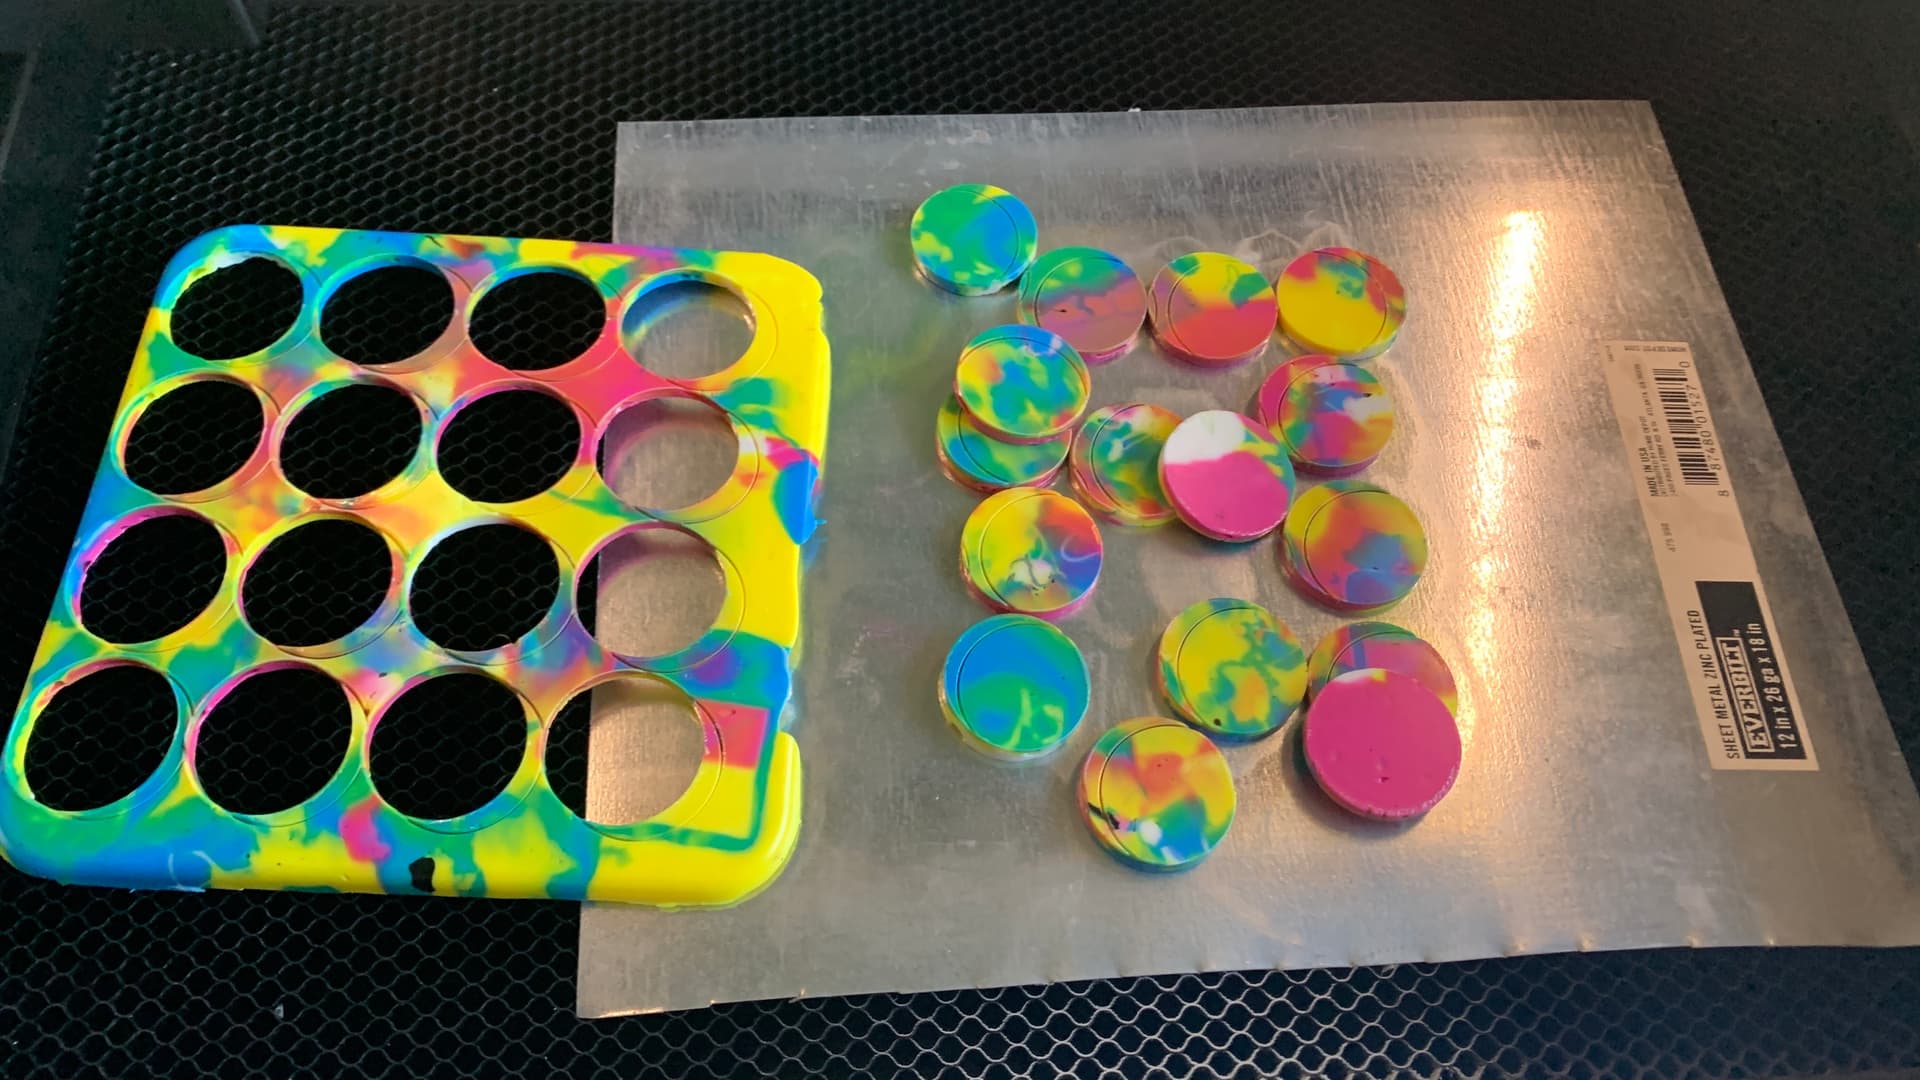
Here’s some Ikea Skadis Fun pieces of scrap -

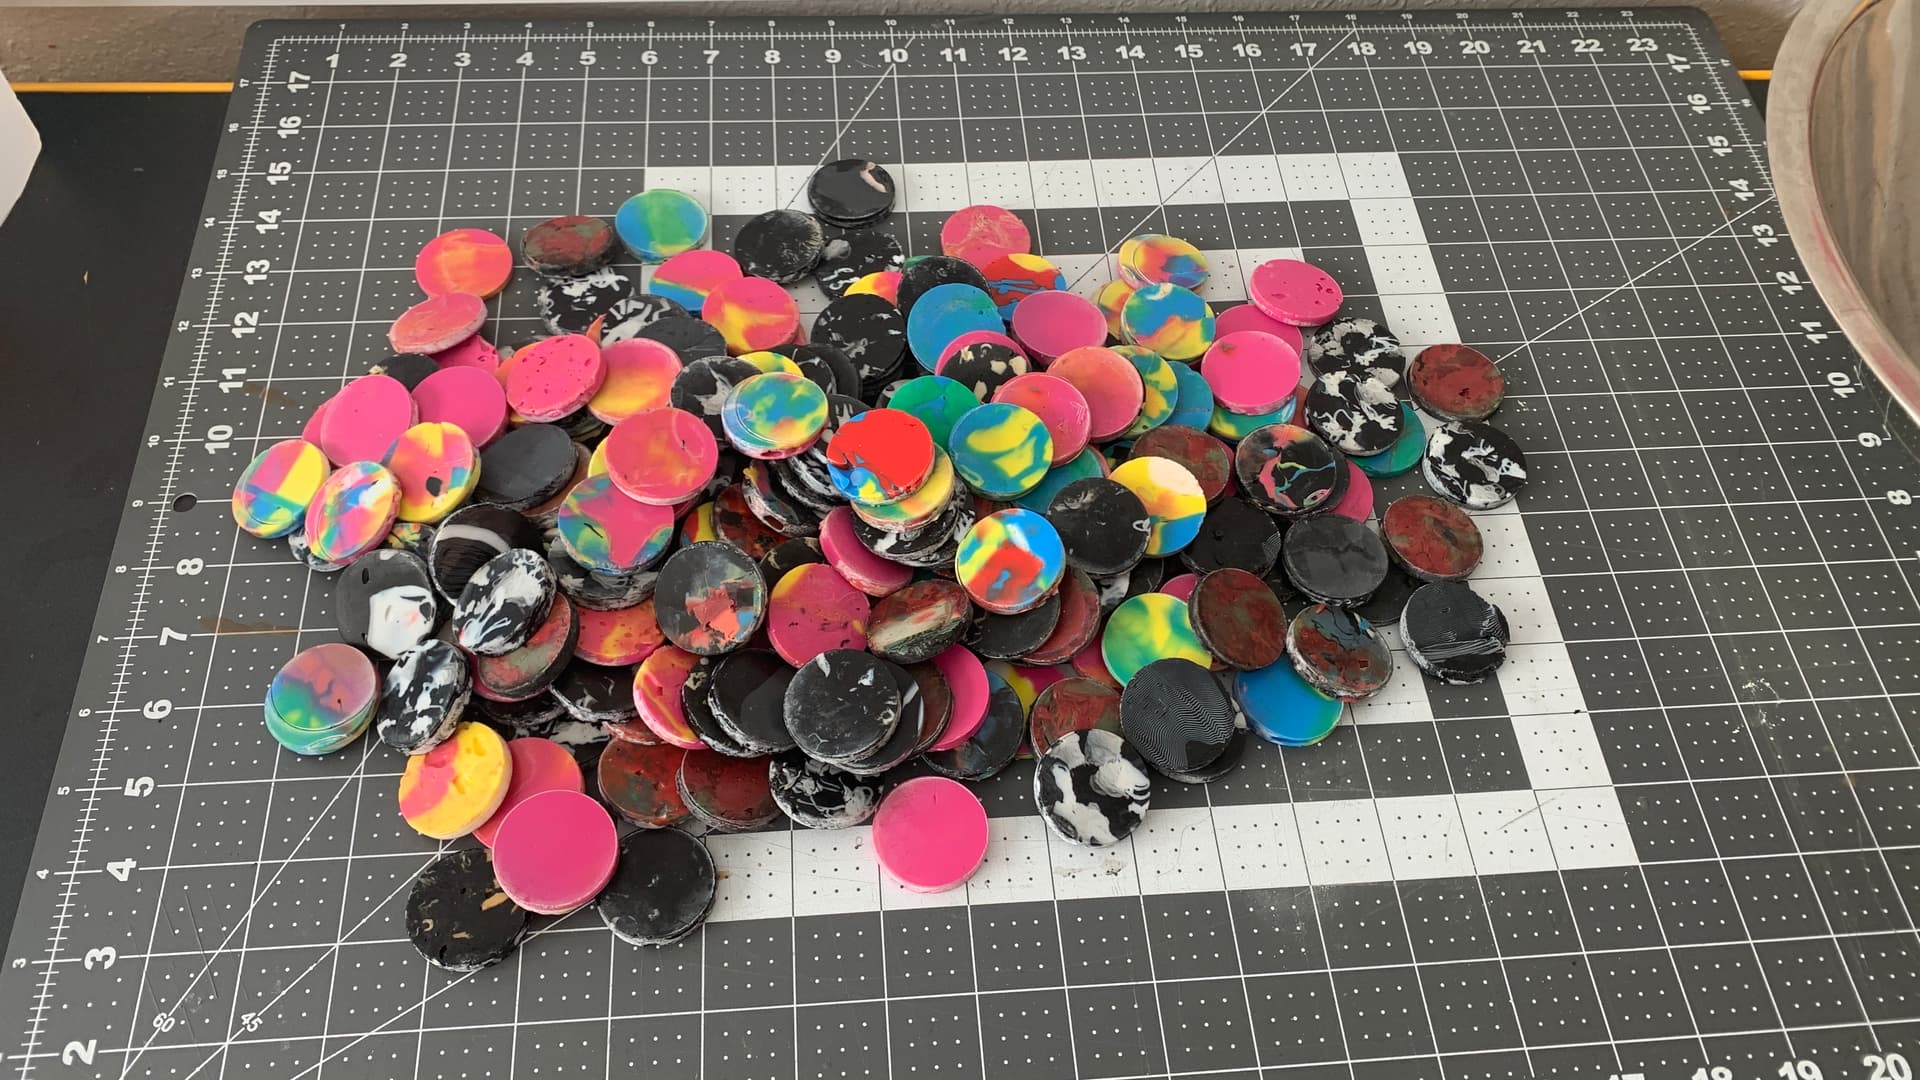
Ya, operator error on the first couple cuts, and had to move the piece to get through. Oh well, I could have just remelted the square, but the final coin stamps will remelt the surface anyway. they are colorful.

I also cut the Cactus Salsa noted above. As that material was PLA-CF (Carbon Fibre), I think the fibre inside absorbs the laser not allowing it to cut through nearly as fast. It took a lot of passes to get through, and scorched the edges. I probably won’t remelt / save that poop in the future.

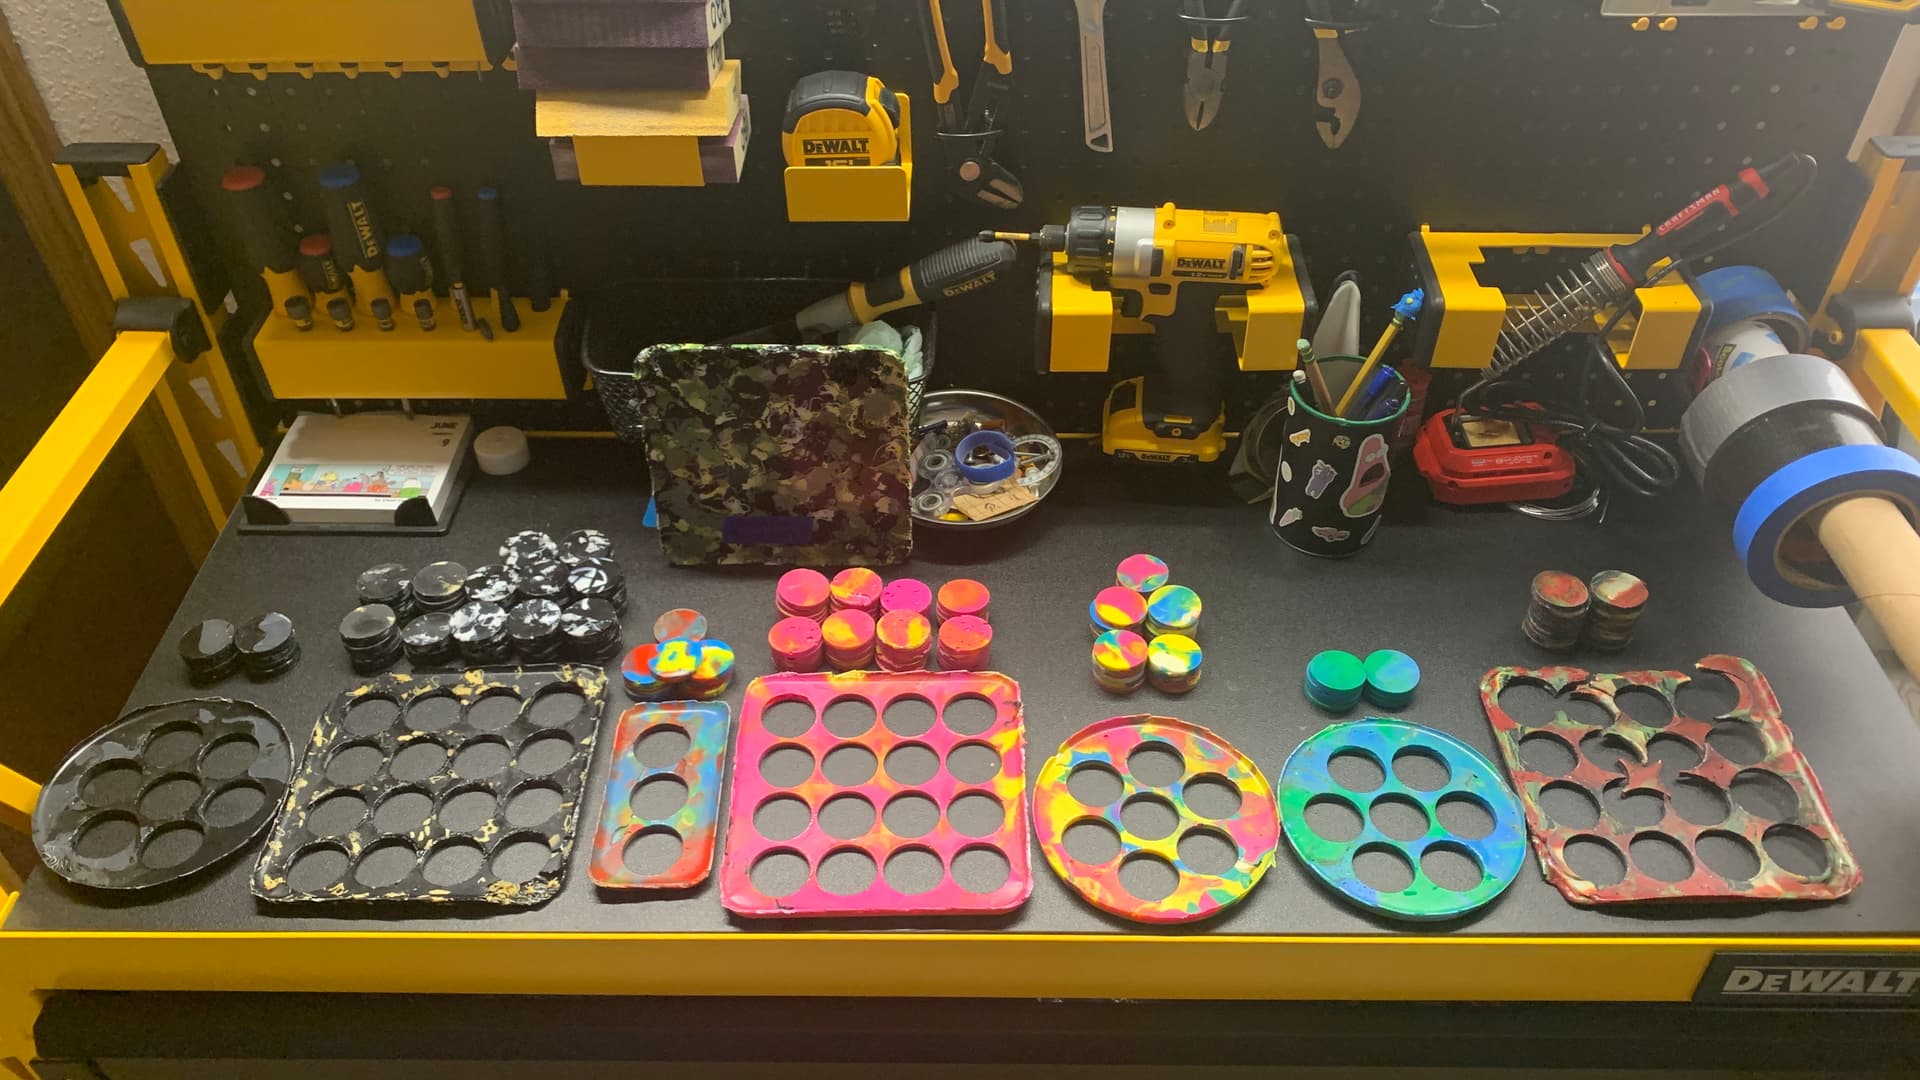
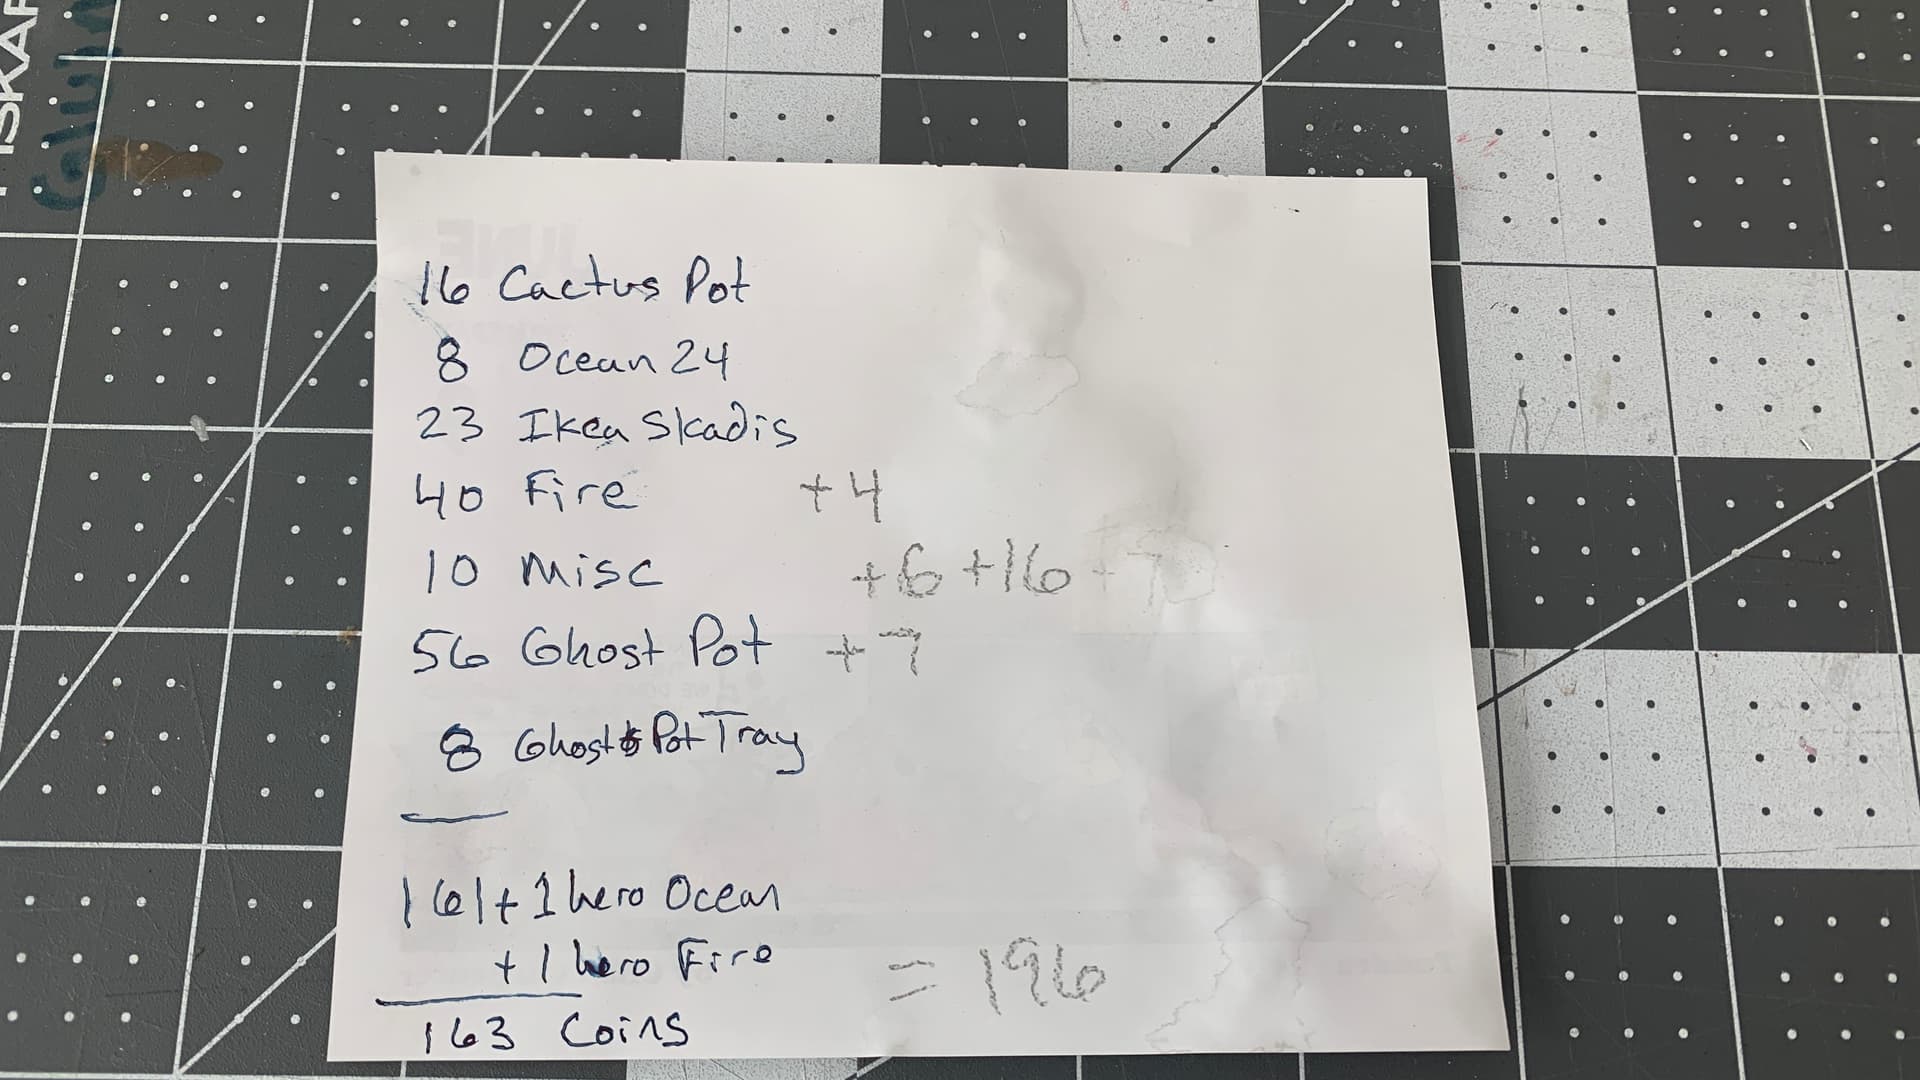
Anyway, what did I end up with - the number of coins per project, first melt. 163 total

I didn’t cut the ghost pot material as it was 9mm thick, and CF. I’m thinking I’ll cut it into smaller pieces and remelt super thin. IDK yet, so set that aside.

I then figured out, the left over ‘Square’ can be broken into pieces and remelted into the small circle mold, to yield 7 more 5-6mm (thick) coins. So (re)melt - Round two - cutting the square remnants into smaller circles.

After the PLA has melted twice, it’s starting to get brittle and the white in the ghost poop is getting brunt a little. So that going to be it for remelting. Final Total - 196 Coins.

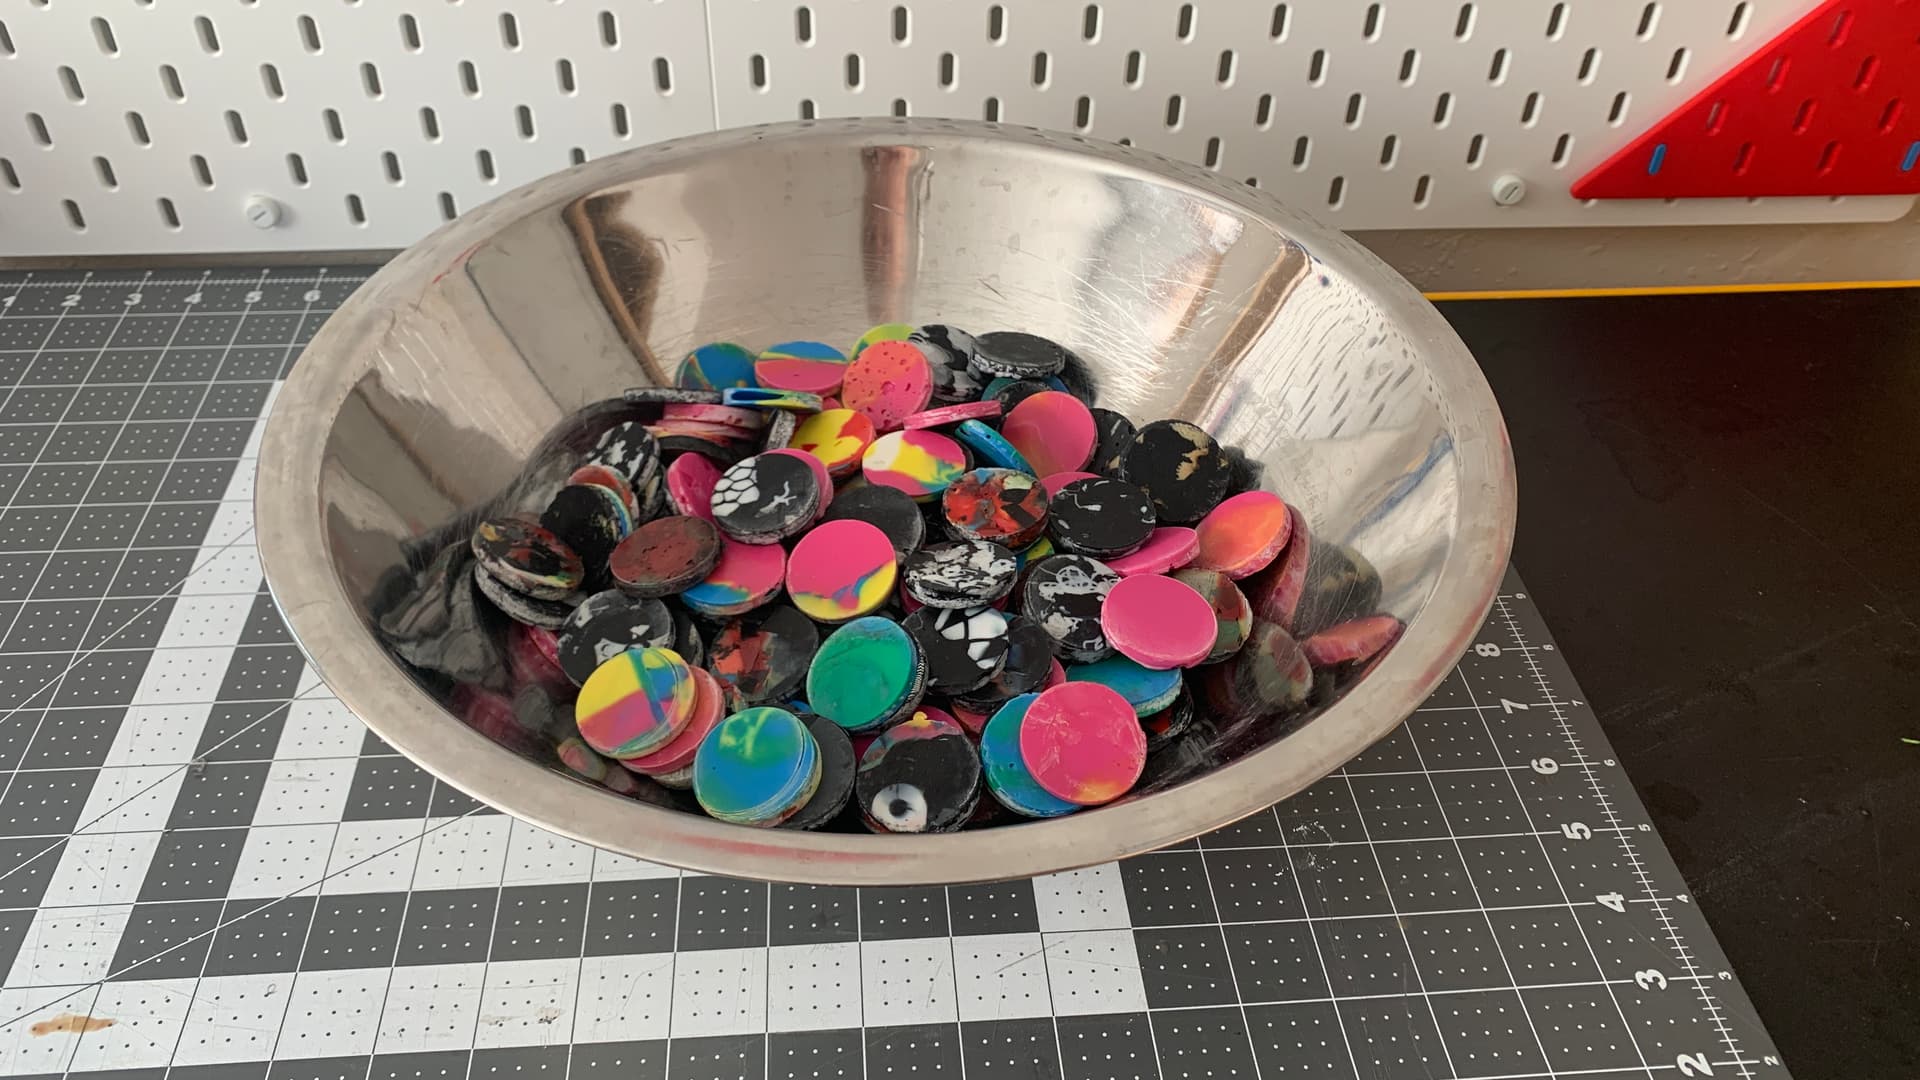
Cool. Some were sticky and had PLA residue and such. So I washed them really well in soapy water and set out in the sun to dry. And here we are -

Some fun and usable base for another project, and another day.

HL

9 Likes

Love how the colors turned out!

Love the medallions. I have some serious shop organization envy - especially the tapes.

2 Likes

The ghost poop is especially striking, I think, because you can still see the spirals in the final melt. The others become much more smooth. Not sure if that’s a function of the material or the time spent melting.

So many coins!

2 Likes