The Chinese laser experiment

Sorry to keep you all waiting. Without further delay here is my second post in the Chinese Laser Experience (thanks @jkopel lol)

Assembly:

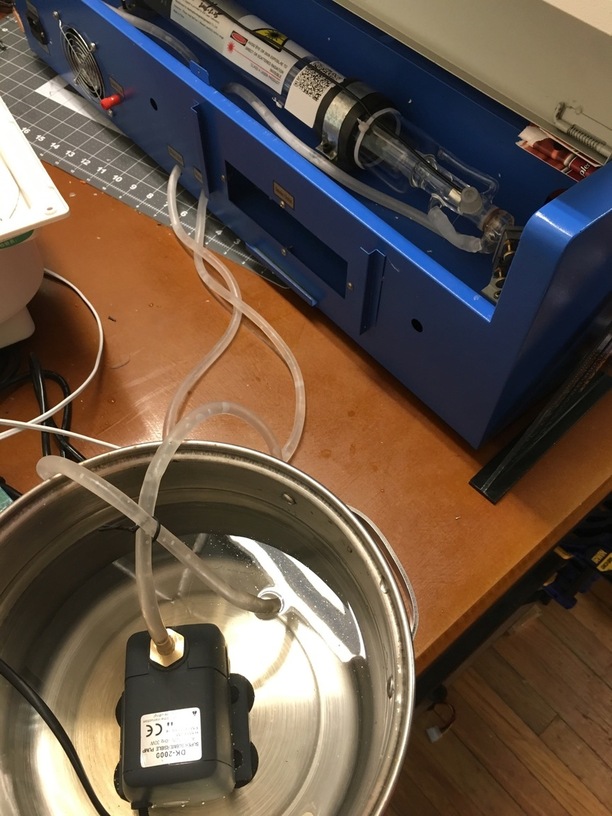
The laser comes with the laser unit, a water pump, and a fan. The water pump is submersible, and I had a pot sitting around I use for vaporizing acetone to smooth 3d prints, so that will do for now. This feels incredibly unsafe and destined to have issues. A lot of people put these on the floor just in case. For tonight its here so I can get all the air bubbles out.

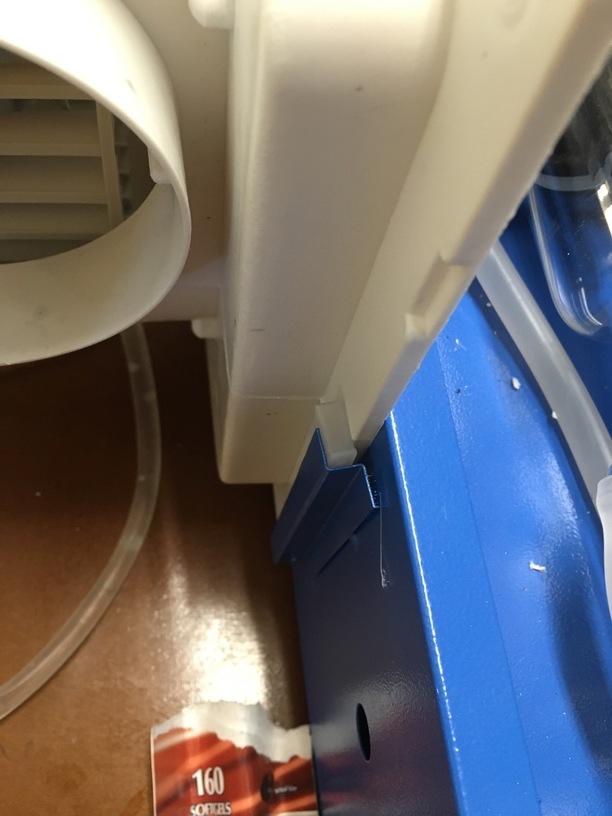
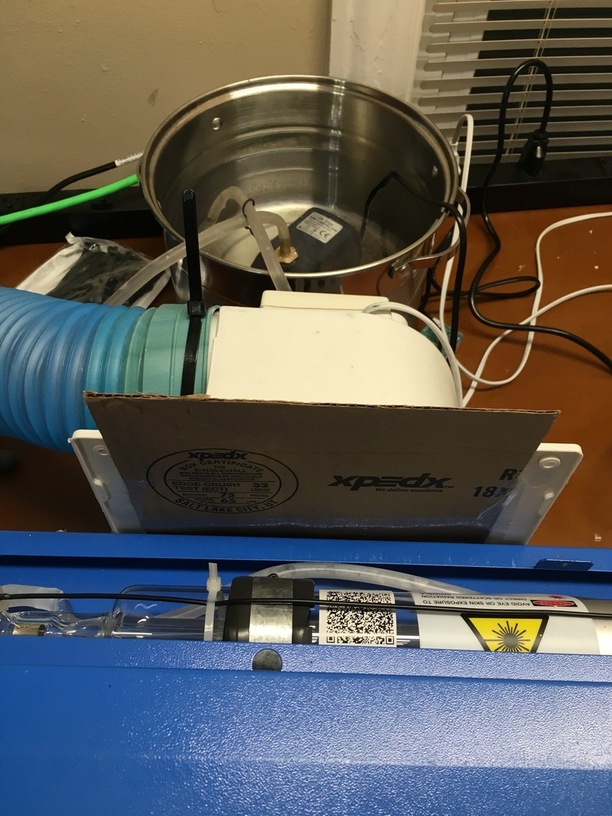
Next is the fan. If you look in the picture above you can see a thin slot and some mounting brackets for the fan. It is WAY taller than this slot, and the mounting pieces on the fan are much thinner than the allotted space. Luckily I had some HDMI end covers sitting around that were the right size to take up the slack. I covered the open part in the top with some cardboard (cant say I dont have some to spare haha!). It moves some air, but feels really ineffective when inside the unit. Either way, its attached and doing its best.


Alignment:

Next up is the alignment of the beam. So many things to take into account here. There are 2 mirrors with 3 adjustment knobs on each. You have to move the carriage around and test reflection from each one in the proper sequence to make sure you are getting a perfectly aligned beam. Unless the carriage is bent and unsquare which im starting to think is the case with mine after all that shipping.

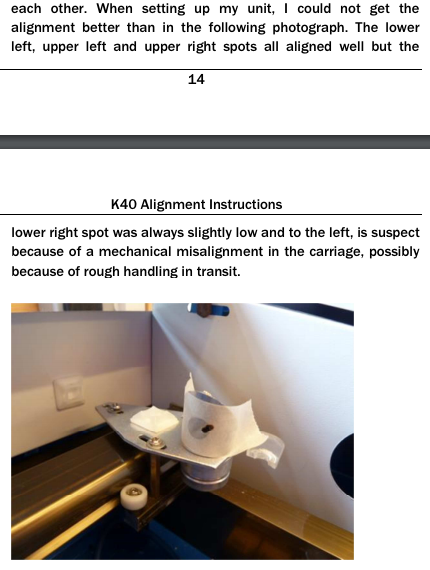
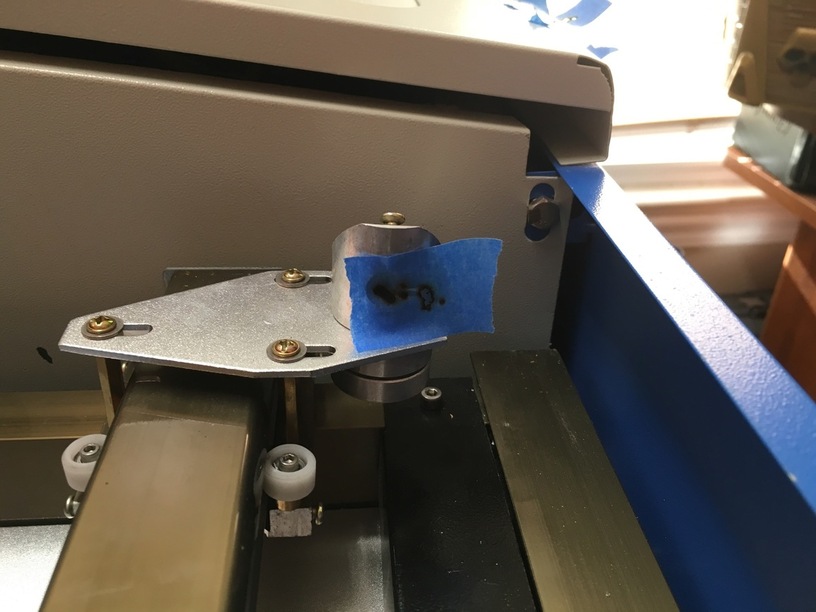
In order to tell if a mirror is aligned properly, you block off the next mirror down the chain with a piece of tape or cardboard or anything you can see that will get a burn mark from the laser. You then move the carriage to each corner of the bed to see if the marks land on top of each other. If they do great, if they dont, well… they probably wont.

As you can see in the following picture, things arent lining up quite so well out of the box

And after another hour or two of messing around with it, it seems its only out of alignment in the bottom right corner. You can see the remnants of all my attempts! I could make an abstract art piece out of these haha

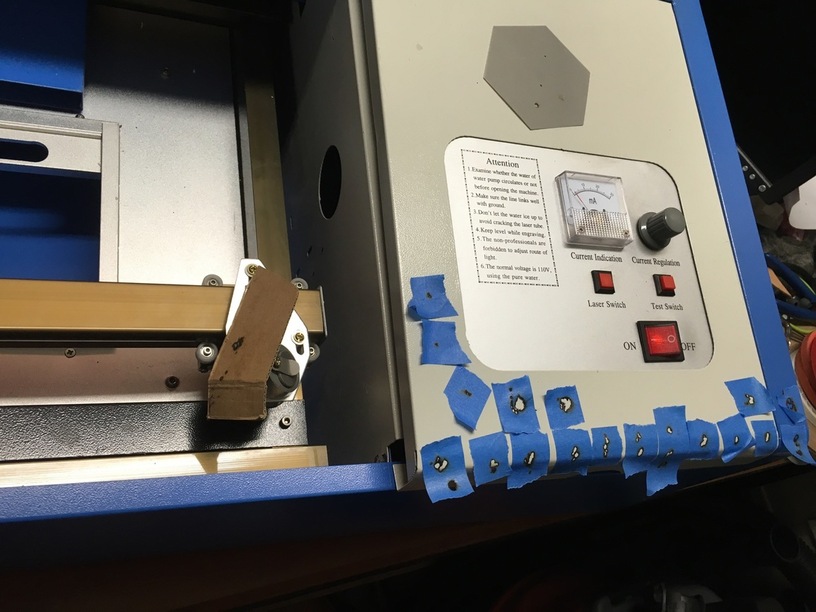
So after all that it seems im going to have to do a little more investigation into whether that corner is really out of square or not. Everything in this unit wobbles and wiggles, and when you try to move the carriage you can tell that if you moved it back it wont be in the same place it was to begin with. No rigidity here.

Having said that, its about time for Game of Thrones to start, so Im going to call it a night on laser work. Ill post more updates as they come!

15 Likes

Mine was. It was about 1/2" out of square in the lower right. Just grab a speed square and try to tuck it into the corner. You’ll see if it’s out of alignment.

If it is, you’ll need to take the rails out to get it squared. That’s easy enough but for you, first you need to get rid of the bed (I did mine so long ago I don’t remember how many screws or where but it was pretty obvious at the time). Then there are 4 bolts - two on each end that you take out and the whole rail assembly comes out. Make sure you pull the cables for the stepper motors - grab a picture of the connections so you get them in the right place (if one is the flat cable FFP type that won’t be hard - except which direction is up is something you want to make sure you know - a picture helps).

While you have the rail out, take the blue exhaust manifold out. It just gets in the way and it restricts the air exhaust. Again 2 or 3 screws/bolts. Nothing tricky, hard or hard to get to. Throw it away.

To square the rail I needed to jump the belt a tooth or two. No need to mess with the X-axis rail or the head - it’ll just be a question of getting the belt lined up right. There’s a screw & adjusting nut on the far end of the rail. Loosen that and you’ll be able to push the end of the X-axis rail toward the out of square end and feel it jump the belt teeth (the axle on the stepper motor is toothed). Run the rail to the end and measure at both ends of the X-rail to get it right. It’s easier to jump a tooth towards the front of the machine than toward the back so take it a tooth or two at a time. When you get it right, tighten up the screw on the end, making sure you have the same slack in the belt as is on the left side.

Re-assemble and re-align the mirrors.

No, this is not the machine for people who aren’t comfy with a screwdriver and wrench. But for $350 you get a decent little laser that can do a lot. (You’ll learn a lot about Adobe Illustrator, Corel or Inkscape when you get to the software part.)

4 Likes

Yup, definitely not for me. I’ll (im?)patiently wait for my Glowforge! :grin:

1 Like

My wife is probably gonna be glad you got this thing because reading this is quickly killing my urge to order one. :wink:

I’m also really interested to see if @dan’s experience with the one he ordered mirrors yours.

3 Likes

Did any of you guys get any instructions on alignment ( or of any kind?) All I have written is about taking the styrofoam out from the tube area (and the interesting phrase printed on the acrylic). I found an external DVD drive for my laptop so Im about to install the “virus”. Still not brave enough to plug in machine itself.

Instructions? Manual? I got an unlabeled dvdr disc. And the feeling that whoever built it had no idea what it actually was.

I received it. It can’t be legally run in an office, and I wouldn’t trust it in my home. Further, I don’t trust the software not to contain some sort of dire virus.

We all just gazed upon its wonder, and now it’s sitting in a corner gathering dust.

I can tell you this: there’s a great deal more engineering in the head of your Glowforge alone than in the entirety of that thing!

–dan

16 Likes

Definately don’t want that software run on any computer near the GF offices !! ( I installed mine so far on a Win 7 laptop off my network -off any network) - Still not brave enought to turn on the power yet and check alignment.

1 Like

This thing is sounding like it should be relegated to a off grid lean to in a empty field where the only thing it can burn down or infect is a couple of sticks and foraged leaf roof

4 Likes

Good instructions on how to align the mirrors here: http://www.floatingwombat.me.uk/wordpress/wp-content/uploads/2015/02/K40-Alignment-Instructions.pdf

Mine worked out of the box. The software I use is my own copy of Corel with their plug-in. No virus. They supply a copy of Corel as well but it’s not licensed and my AV software flagged it. They also have a proprietary software application (LaserDRW or MoshiDRW) similar to ones like LaserCut (which came with the $5000 laser in our MakerSpace).

They are definitely not in the same class as a GF is (will be). But they are solid & serviceable if you want to play & practice. You can get good stuff out of it (see my Laser Made posts). It’s also simple enough that you can tweak it out and upgrade it in a bunch of ways if you’d like. I figured if I’m going to do something wrong and break my laser I’d rather it was the K40 than my GF. It also helps keep my laser-lust in check while I await December’s delivery (and made the delay a lot less angst-ridden for me than many others here).

It’s not the HP LaserJet of laser cutters.

1 Like

I saw that yesterday, and found this part funny, but spot on:

I checked for square right after pulling it out from the box, but EVERYTHING was out of square. The bed wasnt anywhere close to square with the casing, but I figured there might be a chance the bed was square with itself. It seems thats not the case. Ill take it apart some night this week when I have a chance.

1 Like

Looking at that picture - loosening the ring nut on the head and turning it counter clockwise would get that centered on the mirror. Then it’s tiny adjustment time with the moving mirror to get the two spots overlaying each other.

reading this makes me want to buy one… The engineer in me would love to rip it apart and fiddle with it till just purrs along. (or at least limps quickly)

5 Likes

I thought the same thing for a little while, then considered all the other projects I want to work on between now and then. I’ve got enough time sinks already.

1 Like

oh thats a photo from the document, not mine. Mine are all aligned except in the bottom right corner because the chassis is bent a bit.

that was exactly the impetus here. Im gonna get it working with what it came with first for the sake of science. Then im gonna rebuild a new machine with the parts

1 Like

Mine was off in the lower right as well but I just had to jump the belt on the right side a few notches. There’s a screw on the upper right rail you can loosen and then manually move the belt over the toothed drive wheel. Measure the Xrail on the left & right side and when it’s the same tighten up the snugging screw.

Mine was aligned perfect upon delivery. Didn’t take me long to fix that!

4 Likes

So I have the water running (I installed the corel on an isoa=lated laptoip), to test out the laser do I need the dongle yet or the laptop or can I just try a plug in and swithc on and hit the test button. Good thing the glasses came from Amazon already - still waiting on a fire extingusiher. Should I tape the mirrors first? top see where that hist s=then move down the line to see if they are lined up/. (again i do that by hitting the test button- corect?)

You can test it without the dongle or PC.

Stick some material on the bed, turn it on (rocker switch) and then there are two square buttons. One enables the laser circuit & one fires it. Close the lid. There is also a power knob. Turn that all the way counterclockwise (lowest), push the laser on button and then push the fire laser button (it’s a momentary on button). You should see nothing happen. Keep pushing it and twist the power knob clockwise until it’s around 5-10ma. You should see it fire once you get over 3-4ma when it first lases. Let go of the fire button.

That means the laser is working. You can check the focus now and do those adjustments.

You don’t need to worry about the dongle & PC until you’re ready to test engraving and cutting.

1 Like