After seeing cool journal covers from a few members including @pubultrastar and @cynd11 I decided I needed to get in on the action. I haven’t actually made anything yet but I have done my homework on binding types and machines. I’ll post a summary here in case it helps someone else.
I am pretty new to this so if anyone spots errors please issue a correction. ![]()
Binding Types
There are many many binding options.
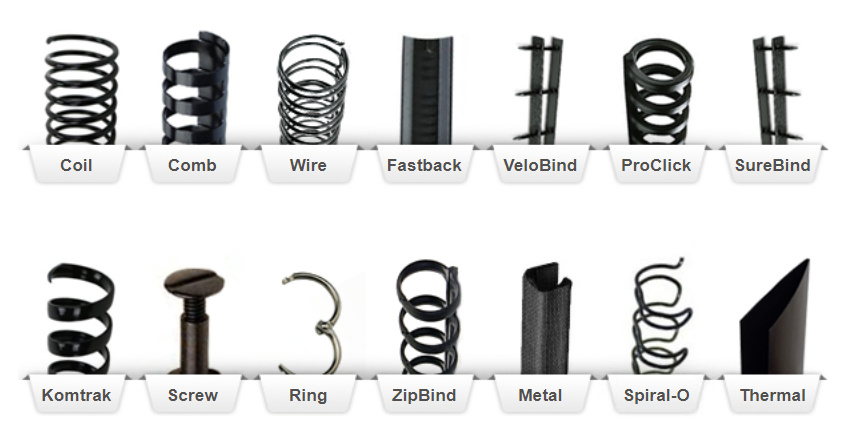
(I ended up buying a machine from MyBinding.com, by the way, which is where this image came from. I found that they had good prices, or at least no worse than elsewhere… and their web site also does a really good job of educating you about the machines. They list pros & cons of each and even have many video reviews. Lastly they have an open box section, which is where I got my machine for $100 off with no downside… More shopping sites should be like this.)
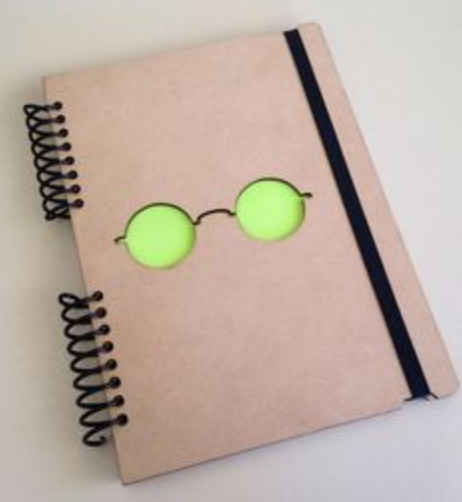
Some of the most popular binding options are spiral (AKA coil), comb, and twin-loop wire (AKA wire-o). You have probably seen spiral and comb binding on class handouts, and wire-o on nicer-looking products like this one from @pubultrastar. There is also a product called spiral-o which is a nice-looking metal spine that fits in the common comb binding hole pattern (more info here).
Each kind of spine comes in many diameters, and you need to choose the right diameter for the thickness of your document. The vendors’ sites will have reference charts to help you choose a diameter.
In addition, the popular twin-loop wire comes in 2 varieties, 2:1 pitch and 3:1 pitch. The smaller 3:1 pitch is used for smaller documents, but the two sizes do overlap at around 1/2" document thickness, at least according to some reference charts.
As far as I can tell, you can just cut any of these spine types to the length you want. You don’t have to stock each length you may be interested in using, just the diameters and colors. However, the plastic spiral binding apparently requires a special tool to put the right bend at the cut, to keep it from working loose.
Machines
To make a book you need to do a couple of things.
- Punch the pages/covers in the right pattern.
- Manipulate the spine to hold the pages together.
To finish the bind, a wire spine needs to be squeezed shut. A coil is threaded through. A comb needs to be pulled open, pages fed in, and then you let the comb contract.
A “binding machine” may do just closure, or also do punching. It may support one hole pattern or several. And lastly, it may offer you control over which holes are punched via individually disengageable dies. This can be very helpful if you want to work with odd-sized pages, or if you want to make non-standard spines like this:
The punch action on a machine can be manual or electric, with electric obviously costing more. For a manual machine you are looking at a max punch of about 20 sheets of 20 lb paper, with many machines offering somewhat less capacity.
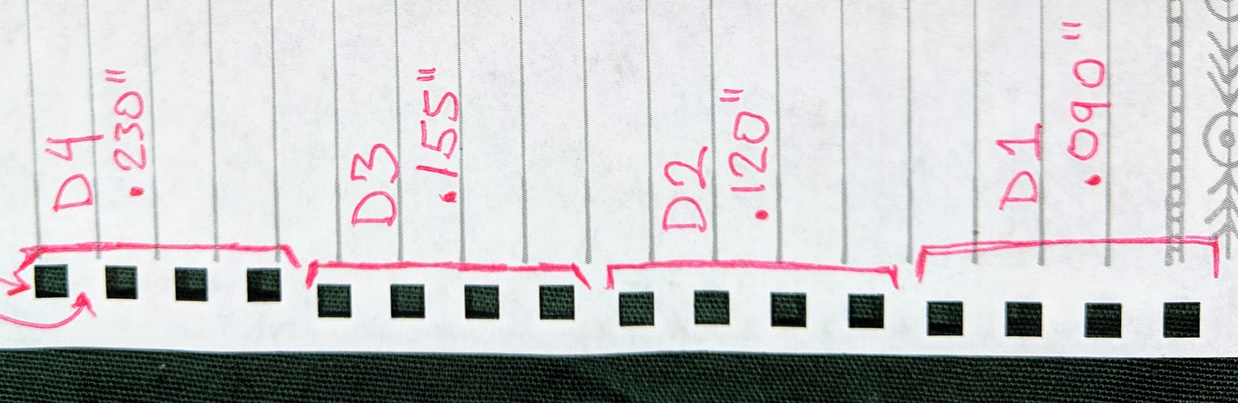
Lastly, a machine may offer you the ability to punch the holes closer or farther from the edge of the paper. In general the thicker your document, the farther in the holes go. I am not sure this is a critical feature, but it is at least nice to have.
Here’s an image of the 4 depth settings on my machine, with 3:1 wire holes.
(When I buy tools I almost always overbuy because I value flexibility, and this time was no exception. I got a machine that can do spiral, comb, and both 2:1/3:1 wire, with individually disengageable dies. Much much cheaper machines are available if you don’t insist on doing everything. )
Materials
Paper
I am interested in doing smaller-than-letter journals, half-letter or smaller if I can find them. The best affordable paper I have found so far is this off-white 24 lb half-sheet.
https://smile.amazon.com/gp/product/B011CD05SU
You can buy pre-punched sheets from the machine/spine vendors, but they don’t seem to come in colors, and are expensive.
If anyone has a good source for other colors and sub-letter sizes, please share!
Covers
Obviously we can use all our cool 1/8" laserable wood products for covers. You can also use chipboard. It is a good material for an inexpensive back cover. If you want to make a cheaper journal, it could be an OK front cover too.
Chipboard comes most often in natural paper brown, but you can also find black, which looks sharp. It also comes in a few thicknesses. (There may be more than these, but this is what I figured out for journals.)
30-point, AKA “thin,” is kind of flimsy.
50-point, AKA “medium,” makes for a great cover
80-100 point, AKA “heavy,” – well I didn’t even try it, because 50-point works well.
Spines
The good news is that wire spines can cost as little as $0.20 each. The bad news is that there is no way to get that kind of price on a small quantity. You need to buy 50-100 at a time. If you buy just a small quantity of a particular size and color via Amazon, you are paying a whole lot more per spine. And since the diameter of the spine matters it is hard to have a stockpile of sizes and colors.
If anyone finds an inexpensive way to get an assortment of sizes and colors, please share!
Files
I will try to keep this section updated with links to files in other threads. Bear with me, I am still catching up with past posts. (While we have many journal/notebook projects I’m only planning on compiling links to files which support these standards: Comb, 2:1 wire, 3:1 wire, 4:1 spiral.)
My Files
Comb Binding Half Letter 14 rectangular holes.zip (695 Bytes)
2-to-1 wire binding half letter 17 rectangular holes.zip (760 Bytes)
3-to-1 wire binding half letter 25 rectangular holes.zip (715 Bytes)
Other Peoples’ Files