Greetings -
So @samantha.em.young wanted a unique Aura idea, and I want to make an Aura friendly, colorful flower thing, for the wall. I liked the process in my ‘Galaxy Project’, and I have an idea, so let’s get to it…
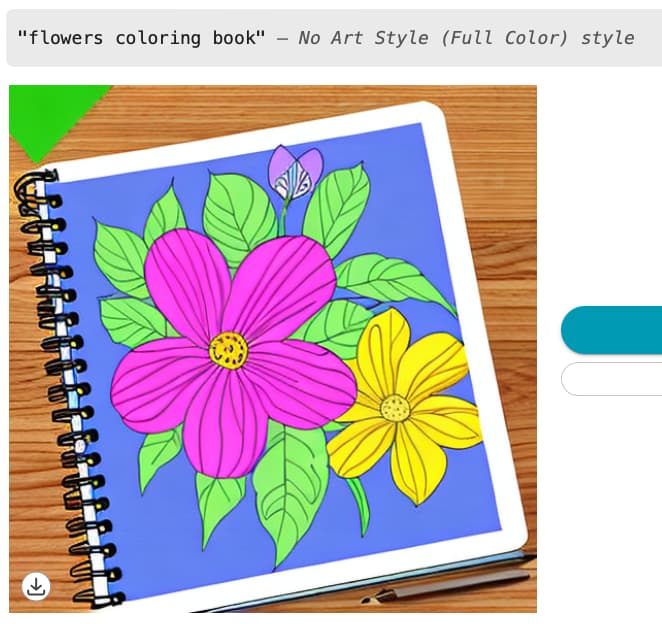
First, let’s get some flower design inspiration from Magic Canvas - I like this one.
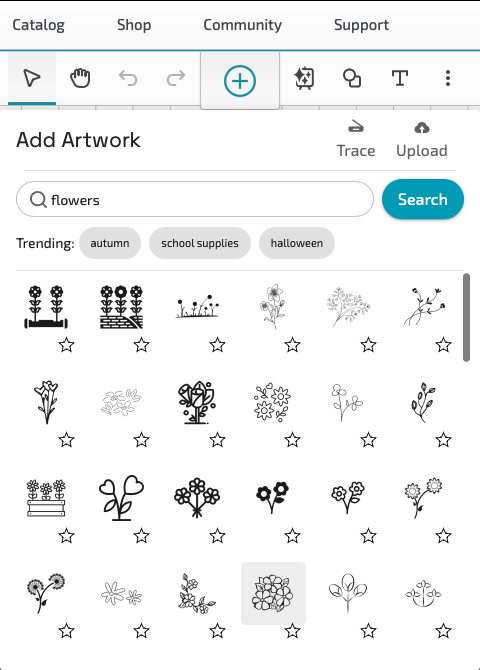
I’m not going to try and trace or draw the lines. I’m going to cheat and grab a similar looking vector file from the Premium ‘Add Artwork’ -
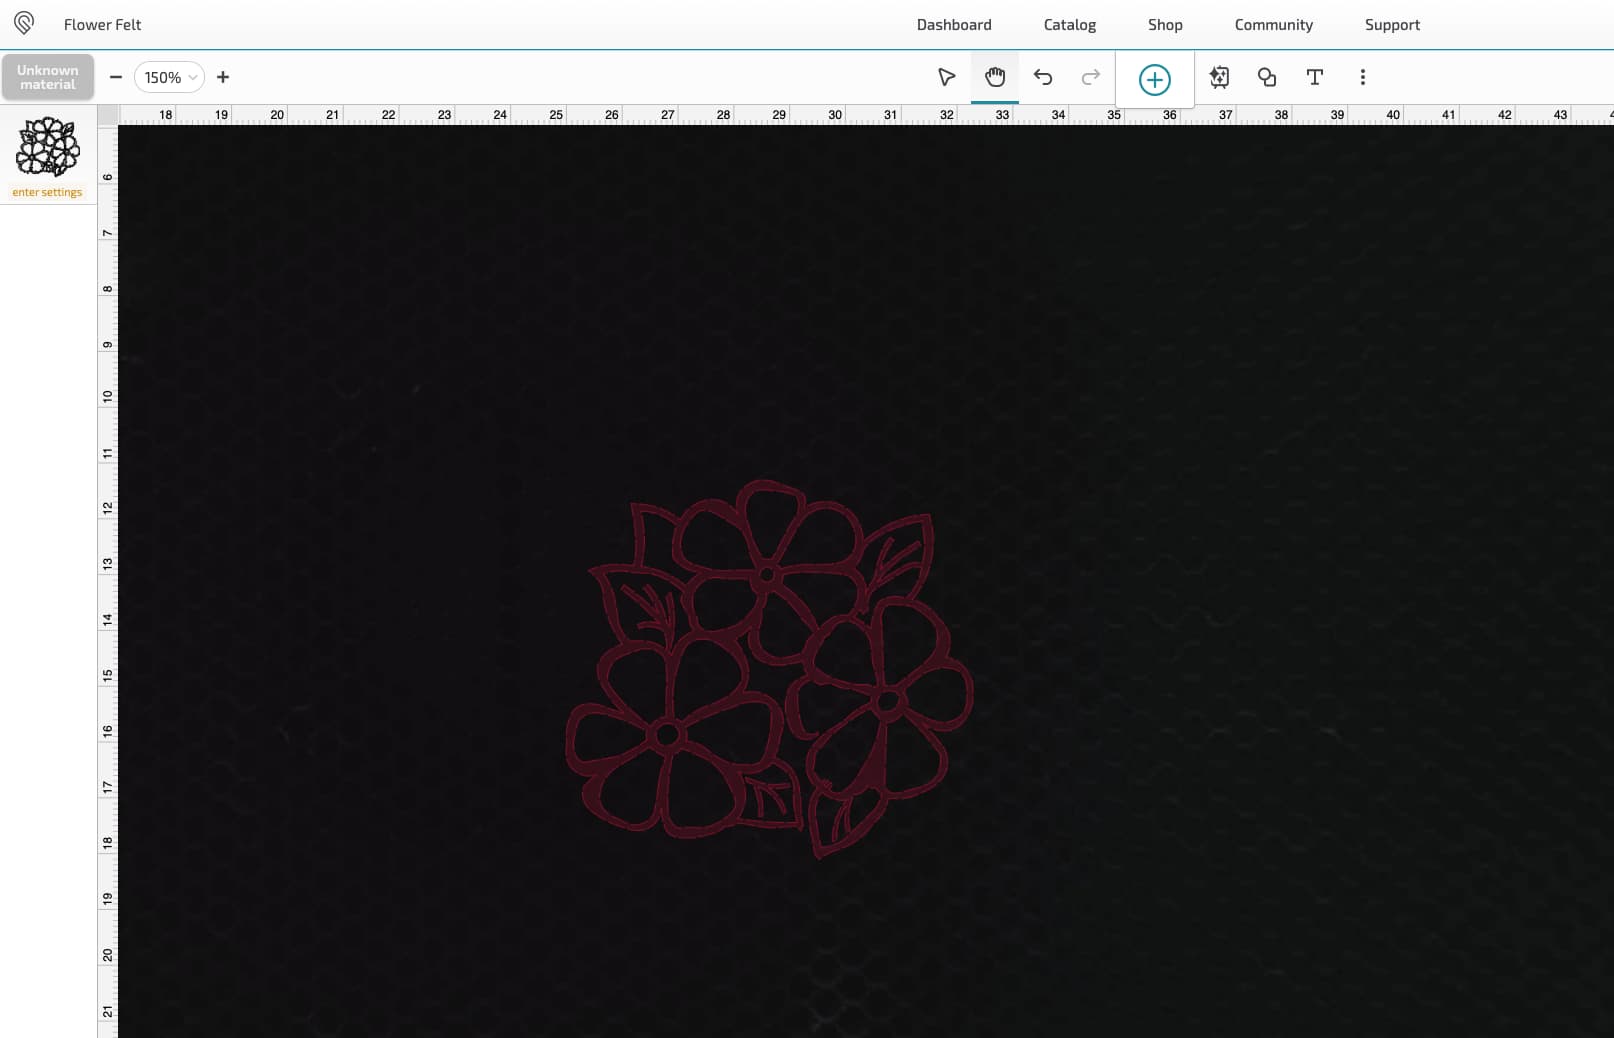
That’ll do for a start -
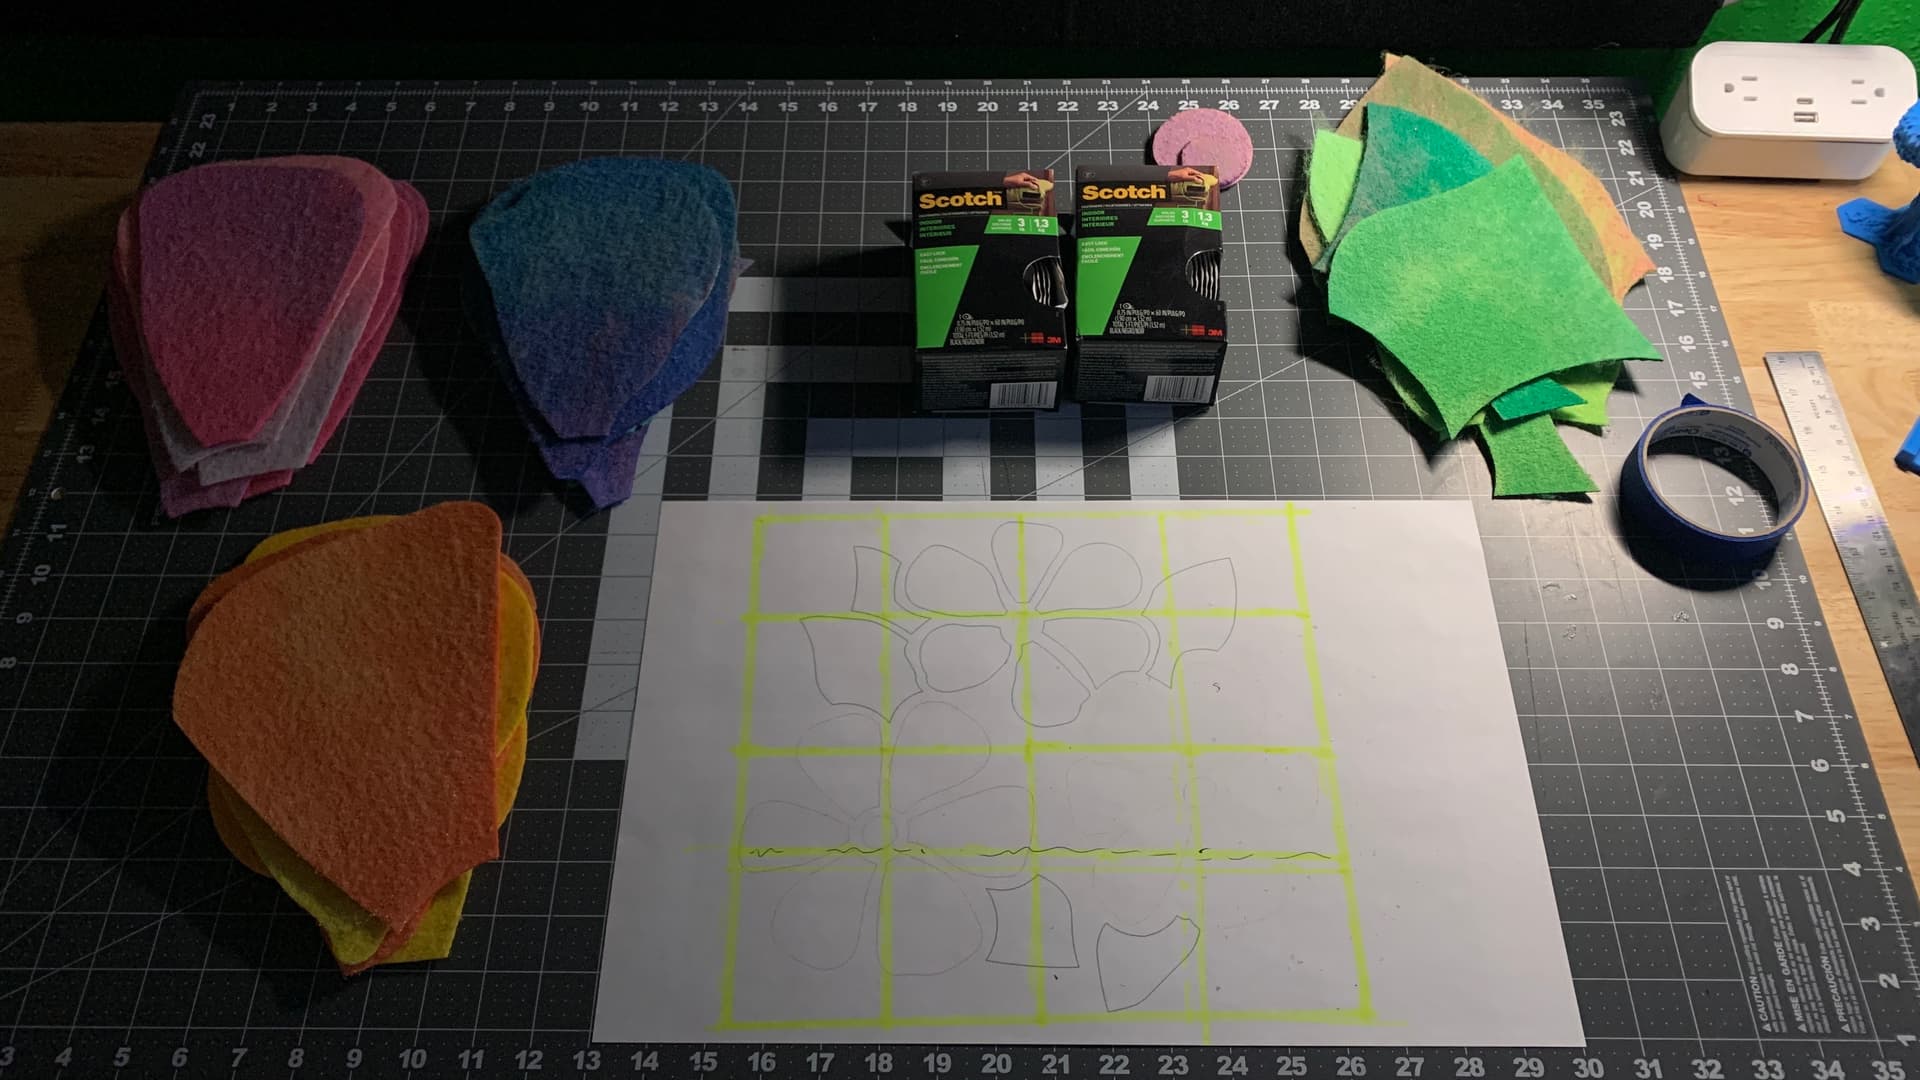
But before I just start cutting, I’m going to clean up the pieces a little, and separate them in Lightburn, but you can use whatever program you use.
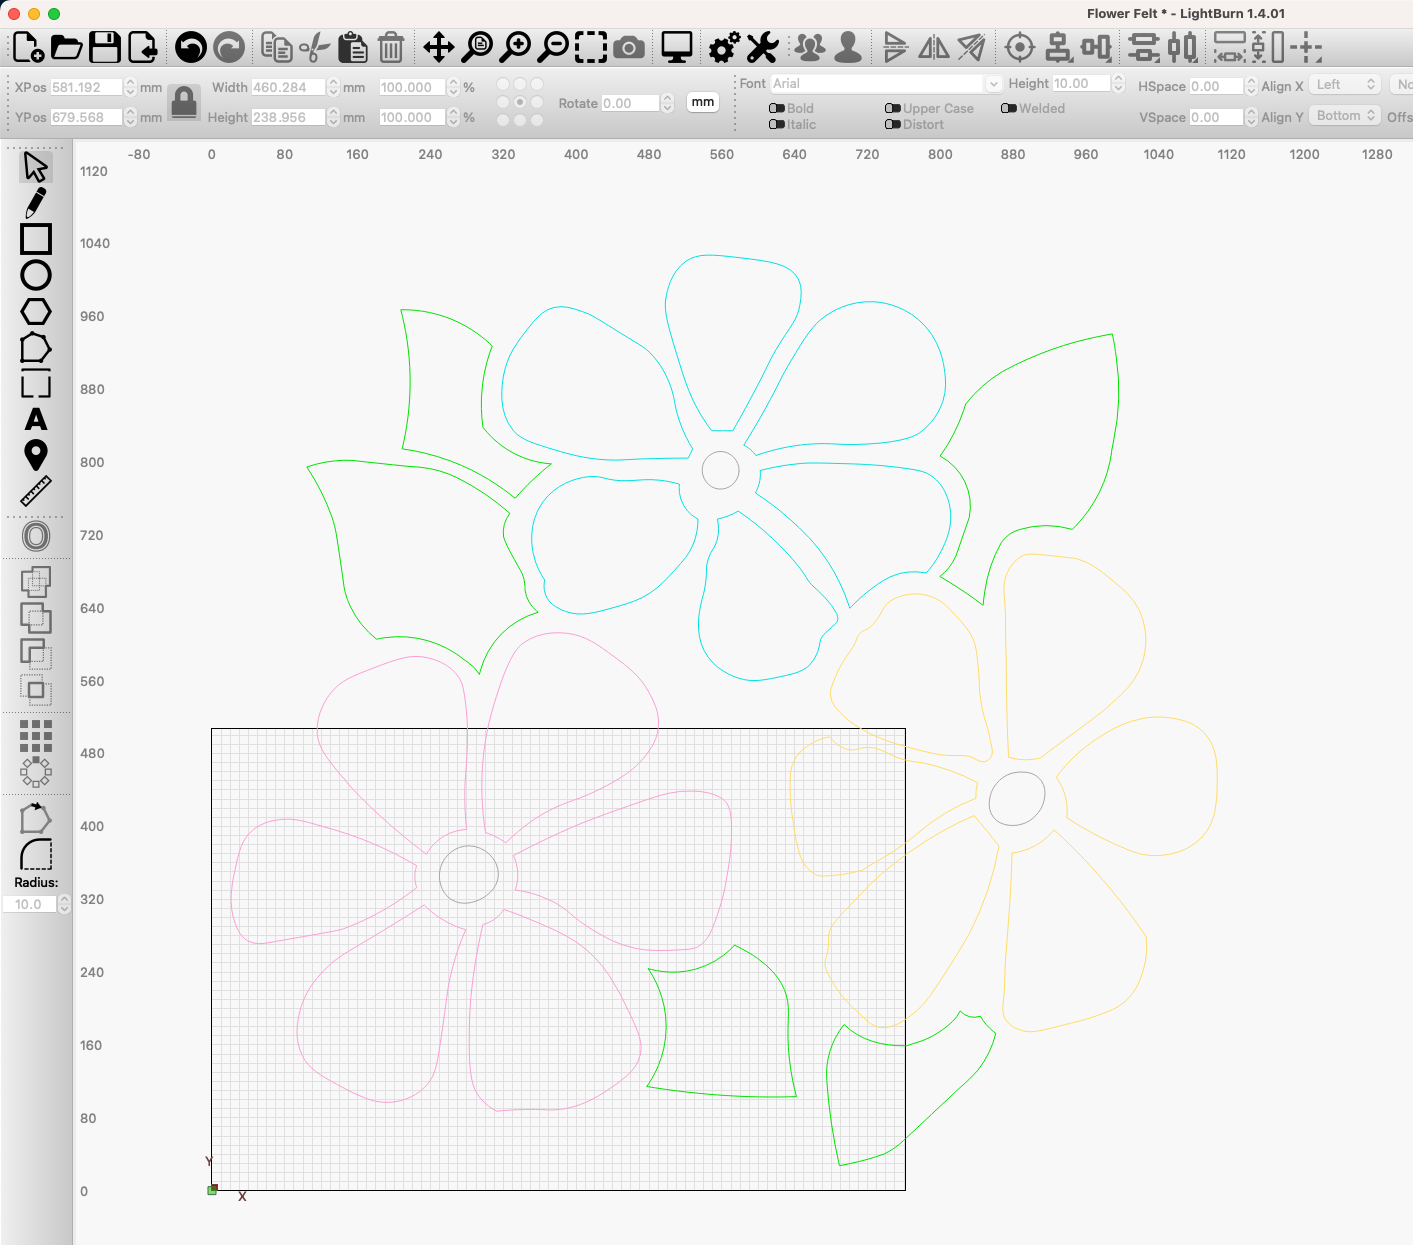
This also helps me visualize it as I’m making it, by printing a copy to have on hand.
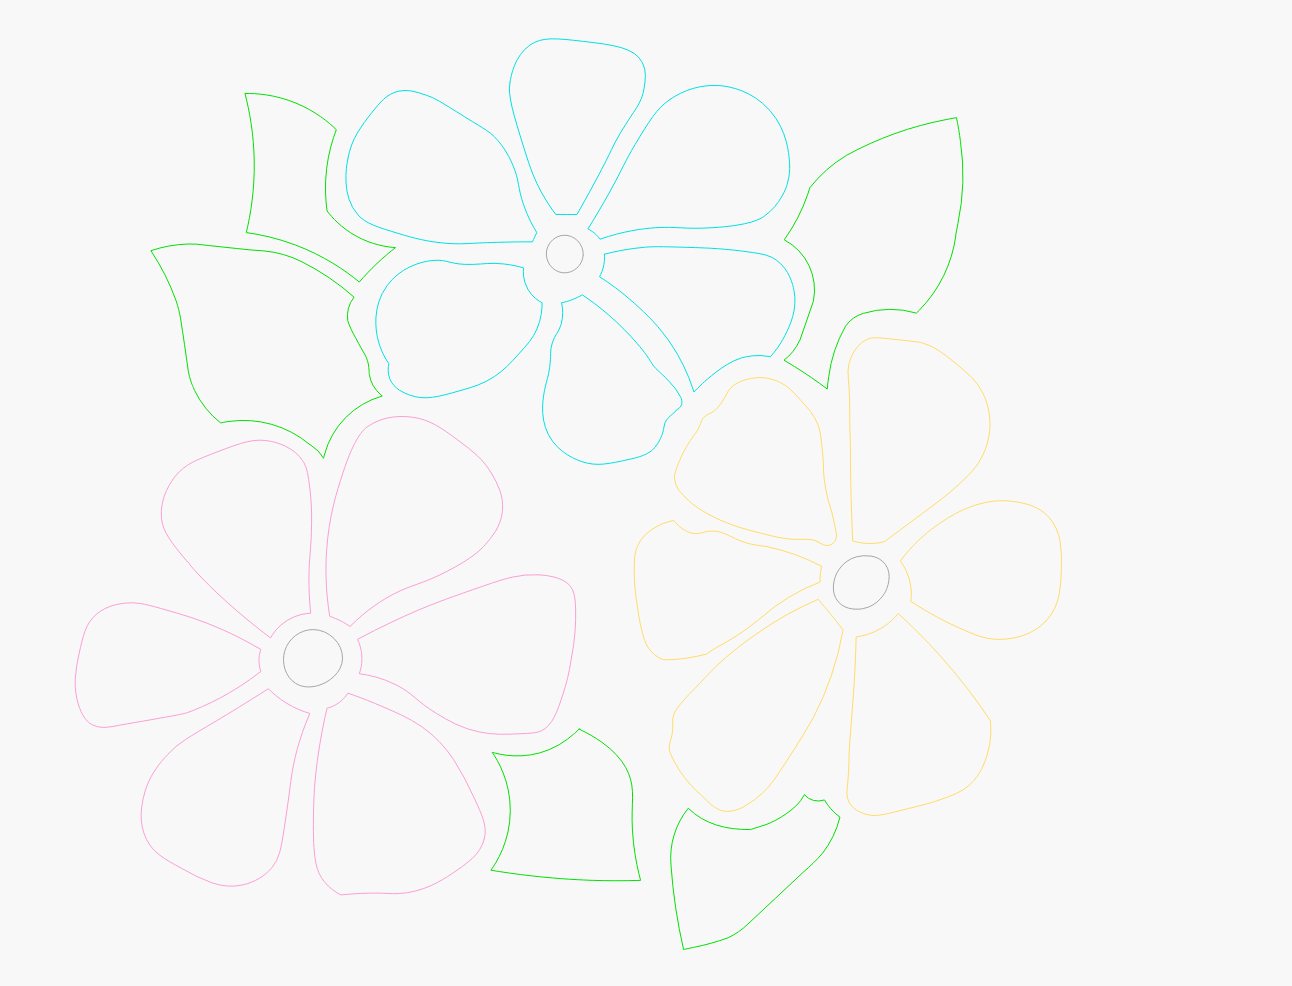
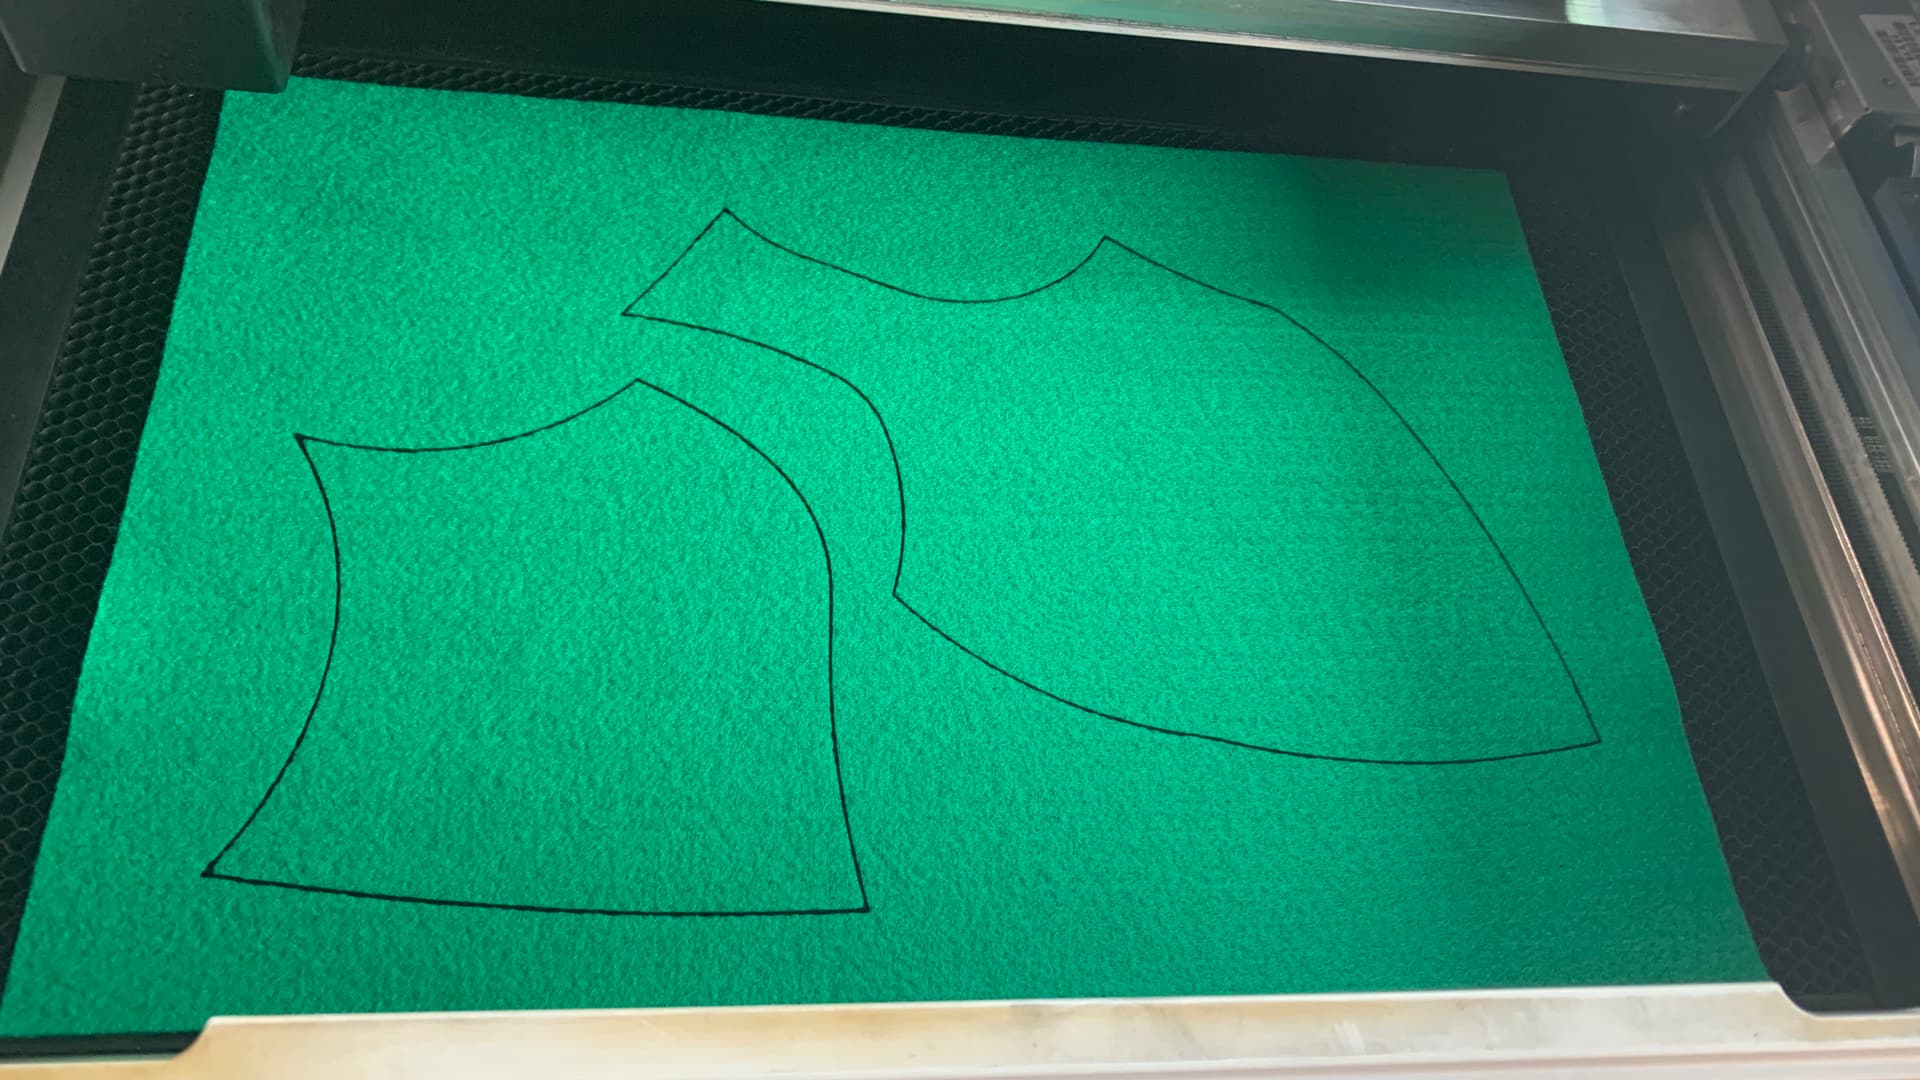
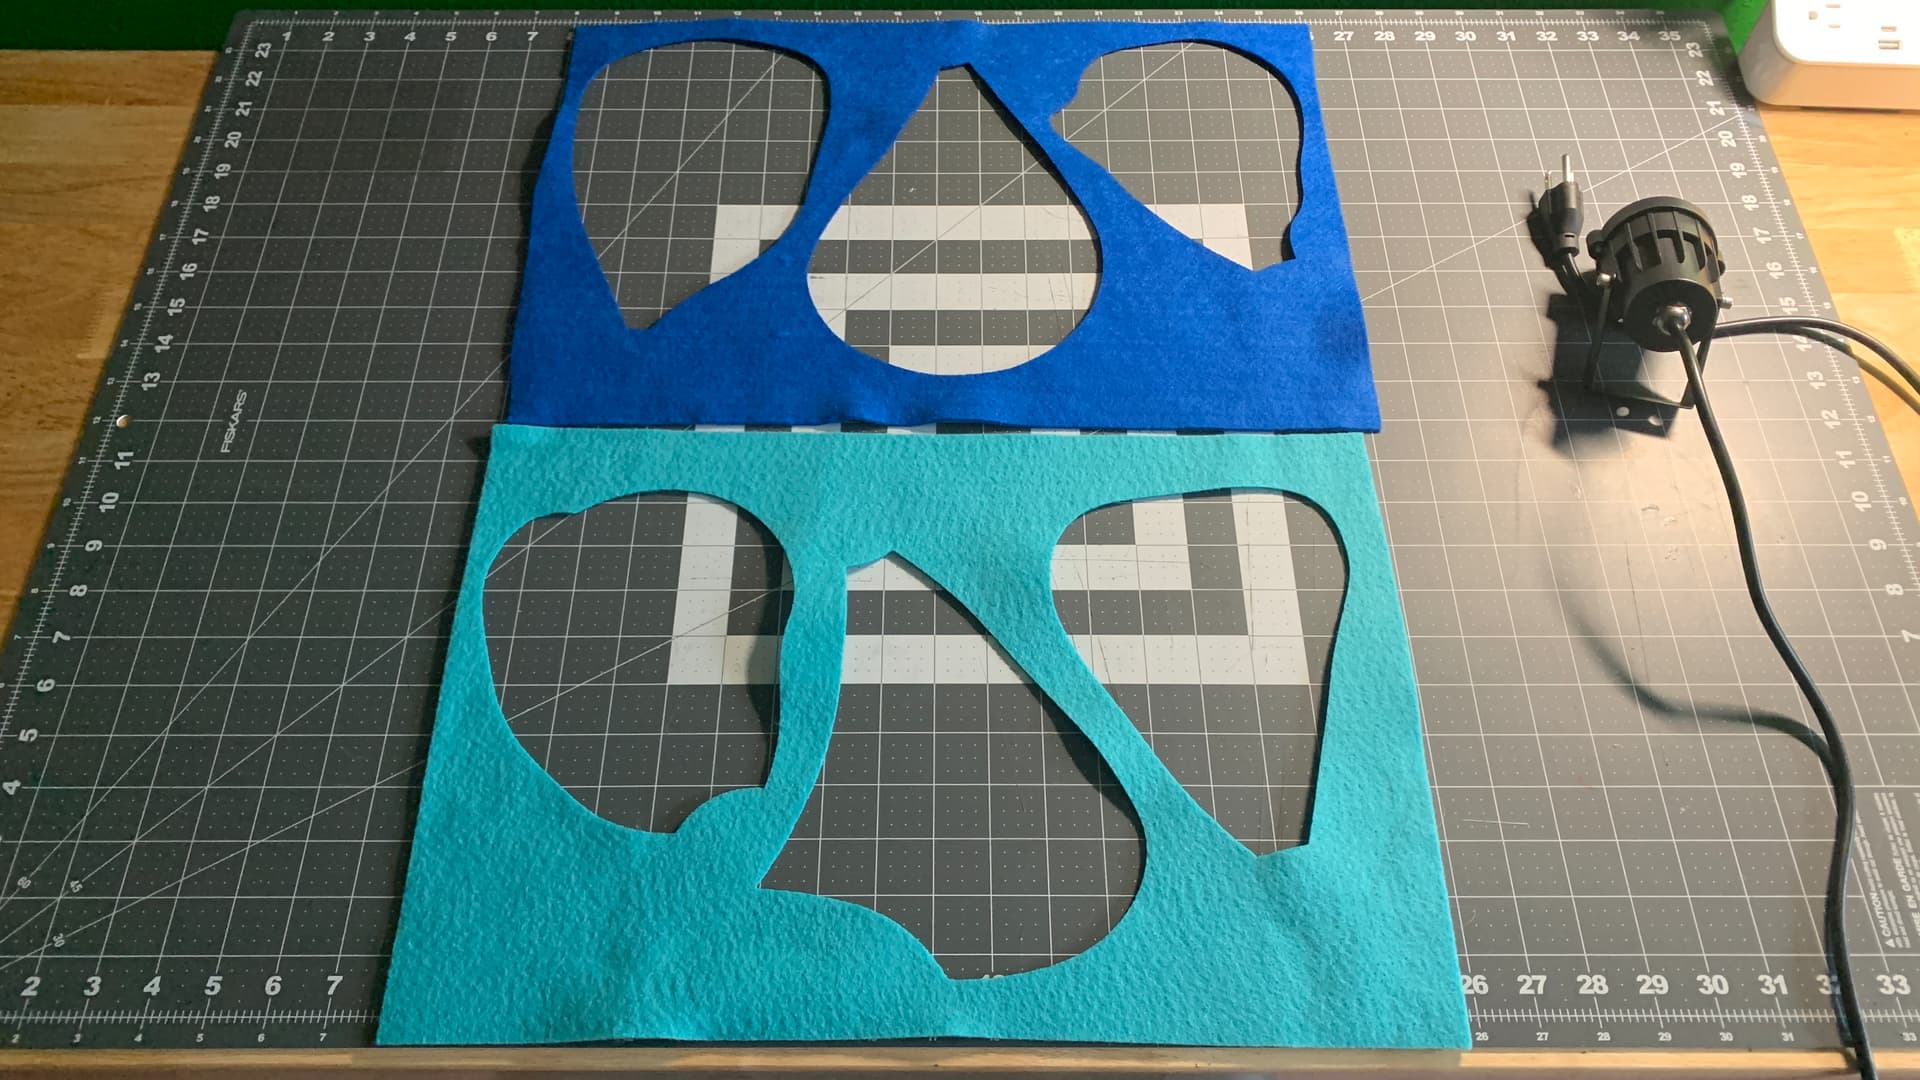
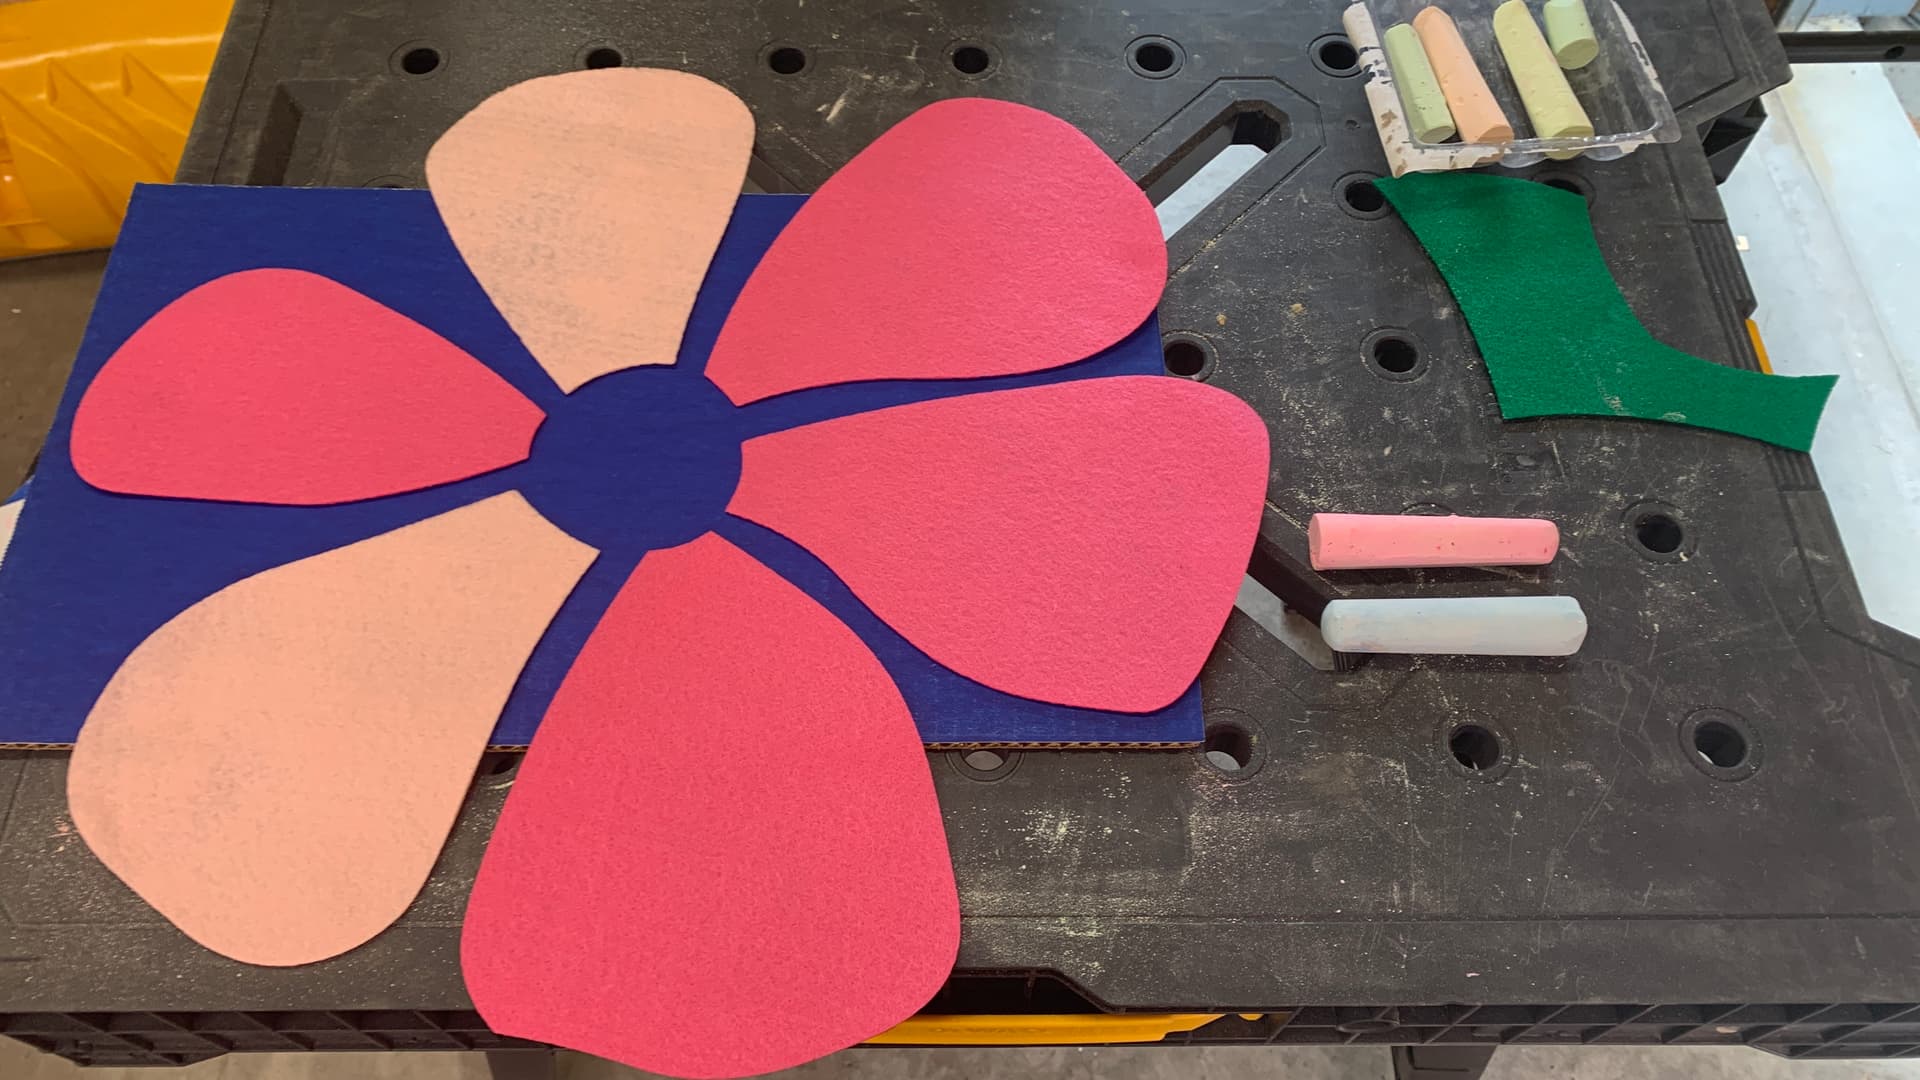
Cool. Export back to SVG and drag into the Glowforge window - And separate the pieces by color. Each of the flowers, the leaves, and the centers.
Green (leaves) first -

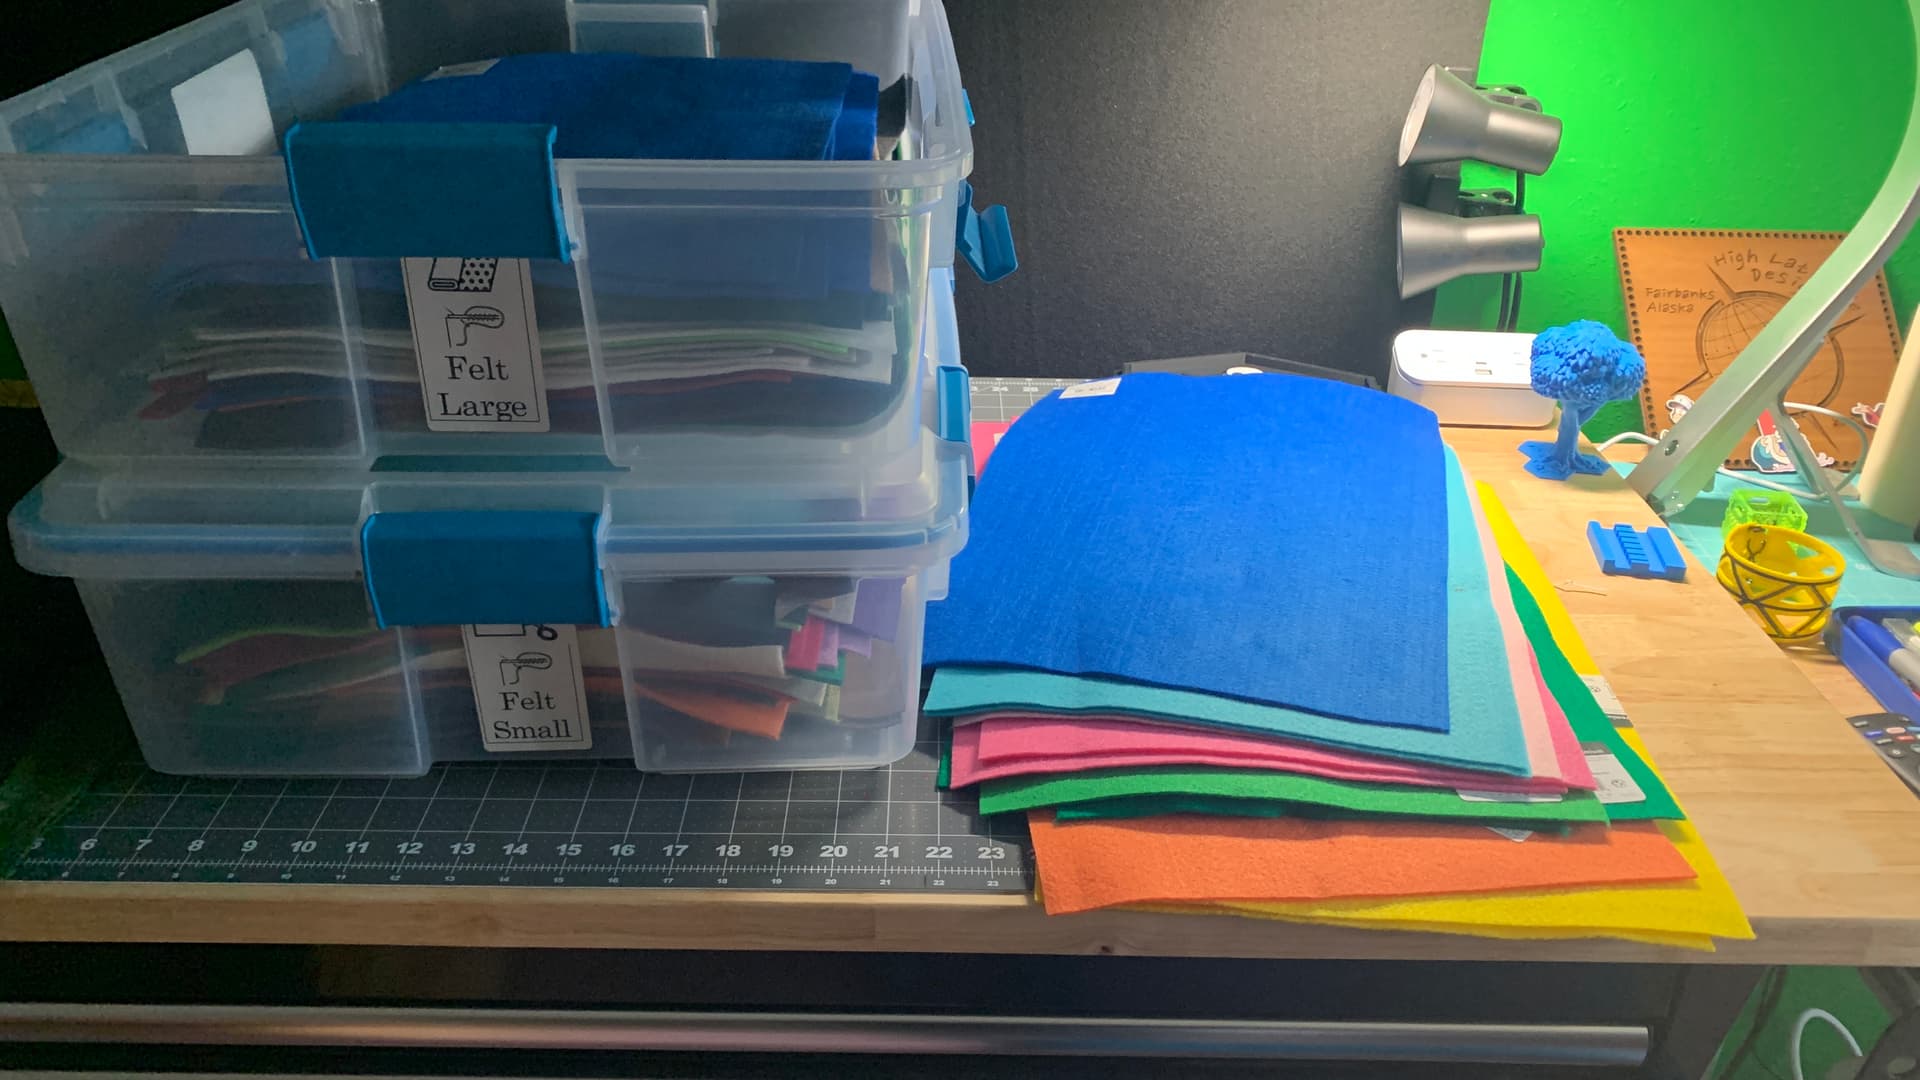
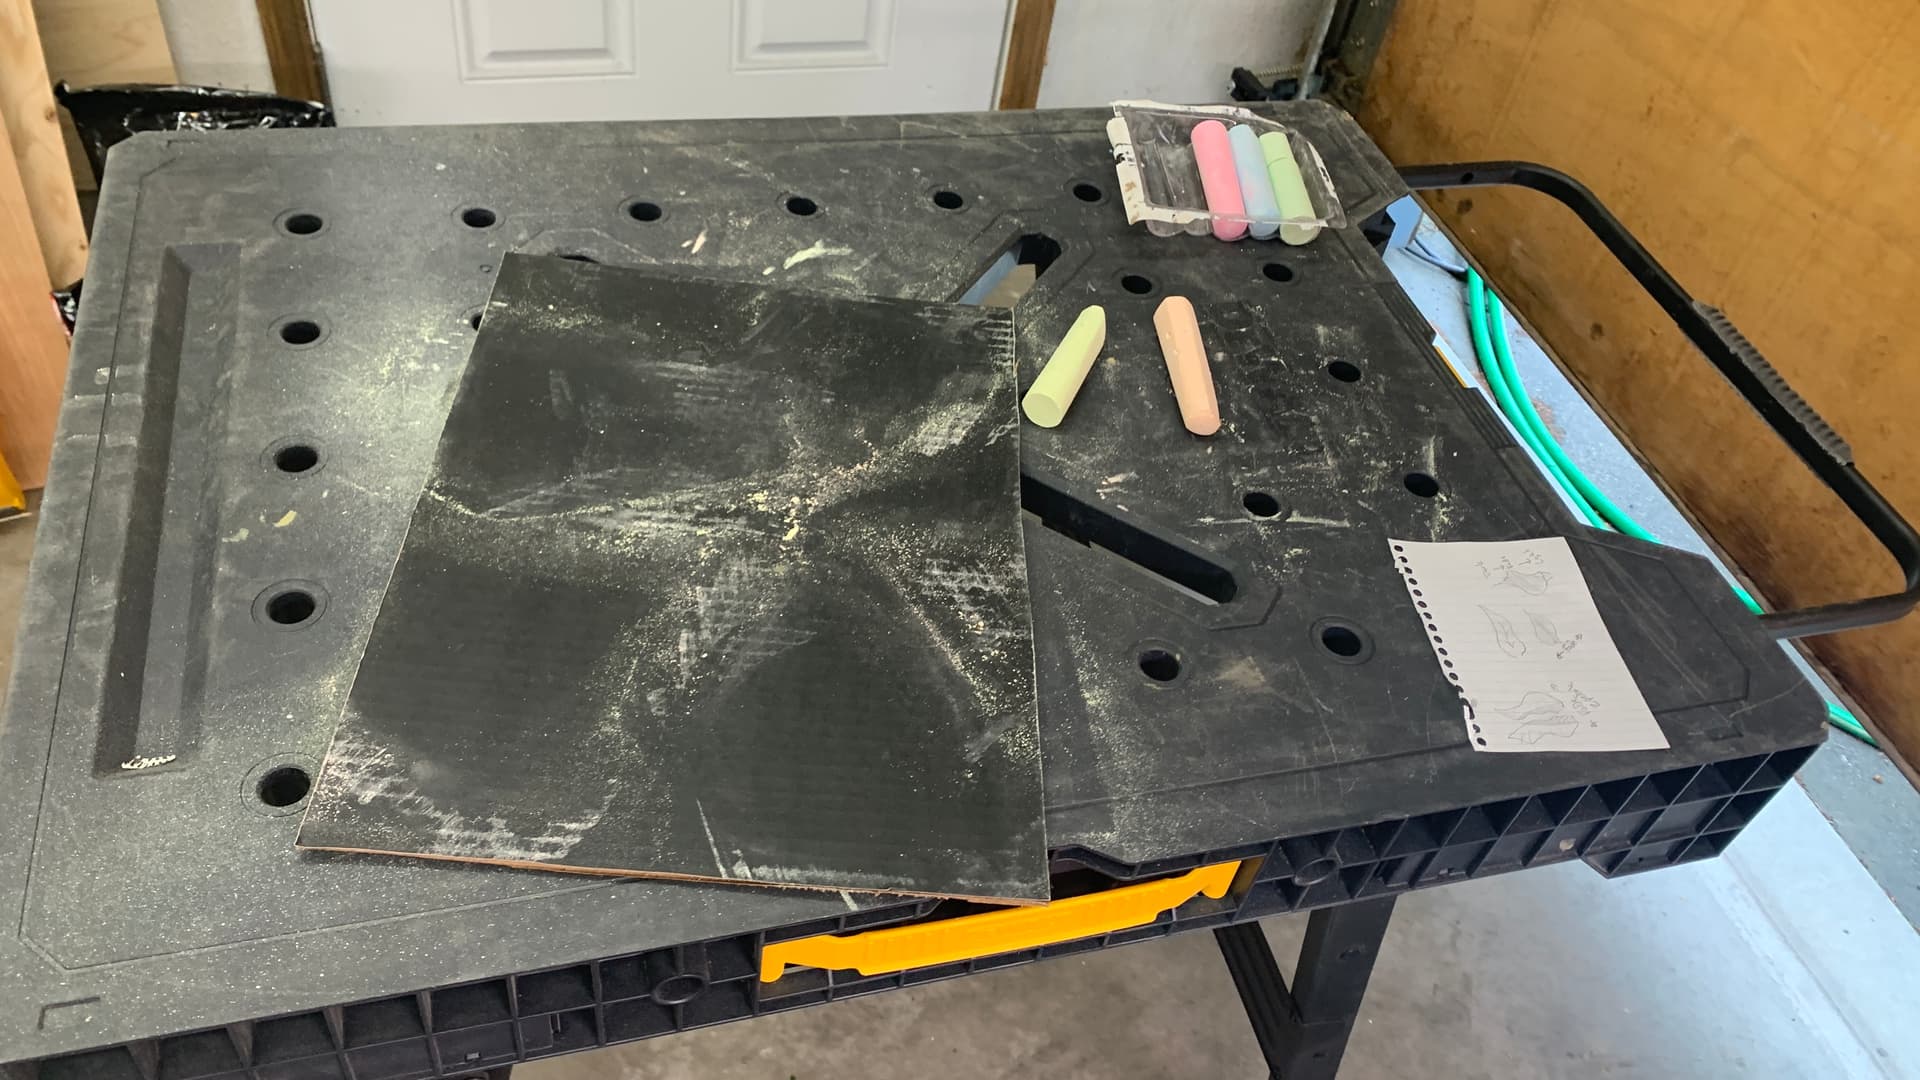
For the material, I’m going with felt. I just love cutting it, it’s so fast and easy. Let’s see if I have enough on hand - Check - ![]()
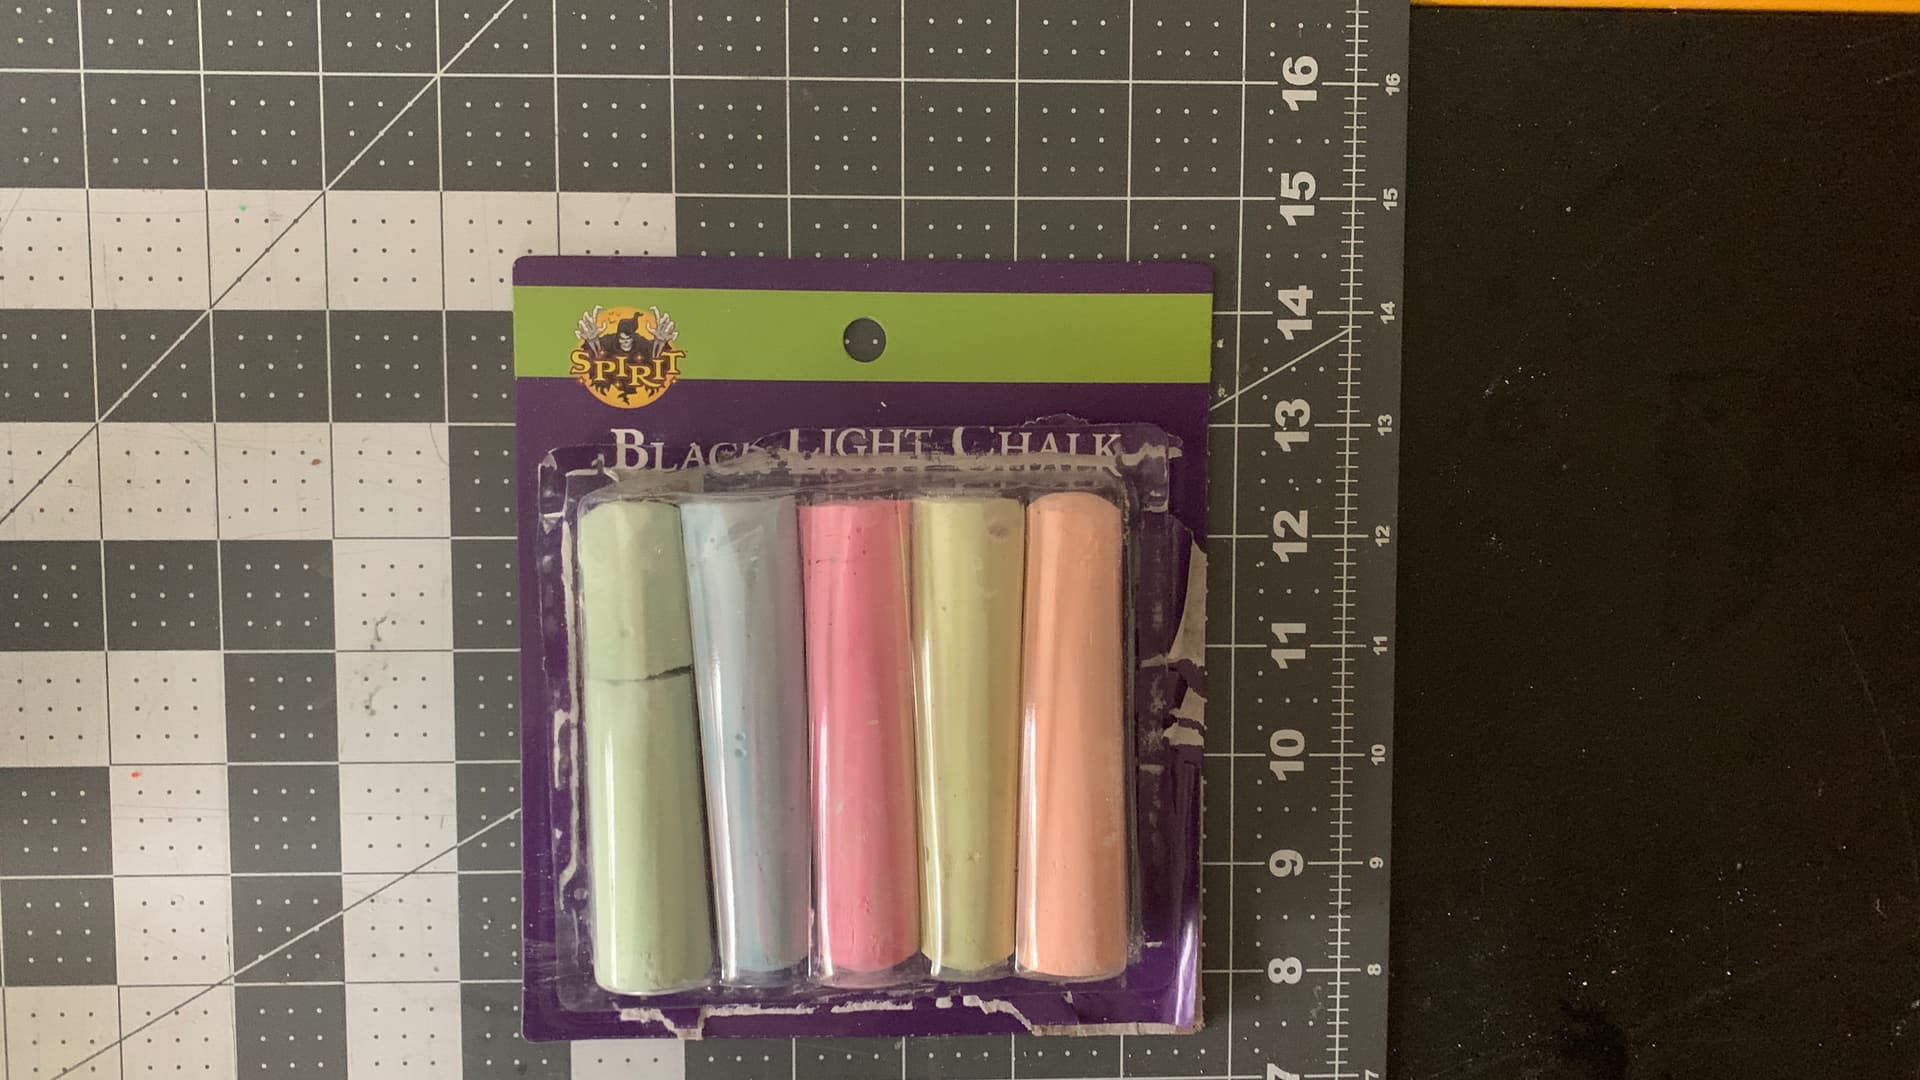
How to make it black light fluoresce? I thought about acrylic blacklight paint, but I want the piece to be about 40" square - 1m. Which would be a ton of paint and a giant mess. Not to mention, I’m terrible at it. But, I found some Blacklight chalk at Spirit of Halloween last week.
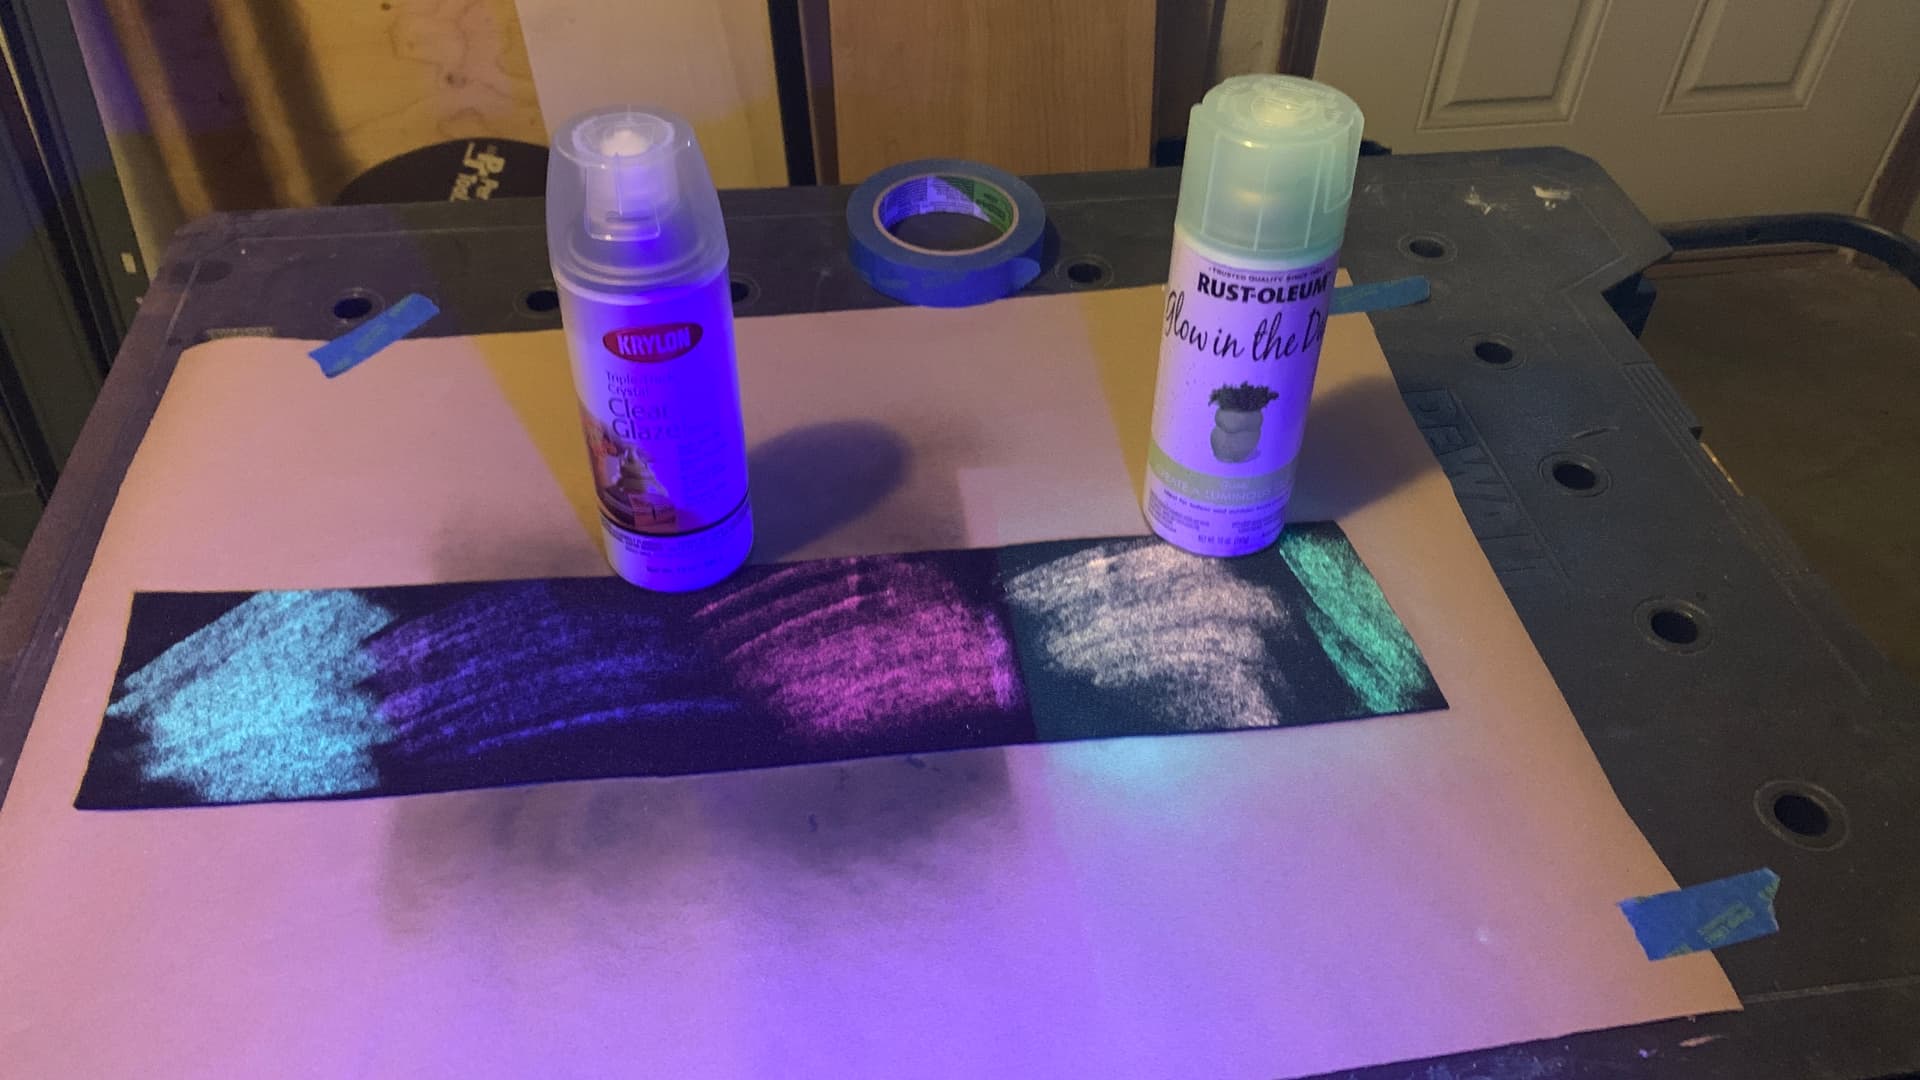
This could be interesting. So I did test, knowing there would be tons of chalk dust, I wanted to spray a clear coat over it. I tried the old glow-in-the-dark cover paint, and some thick acrylic, I bought by mistake.
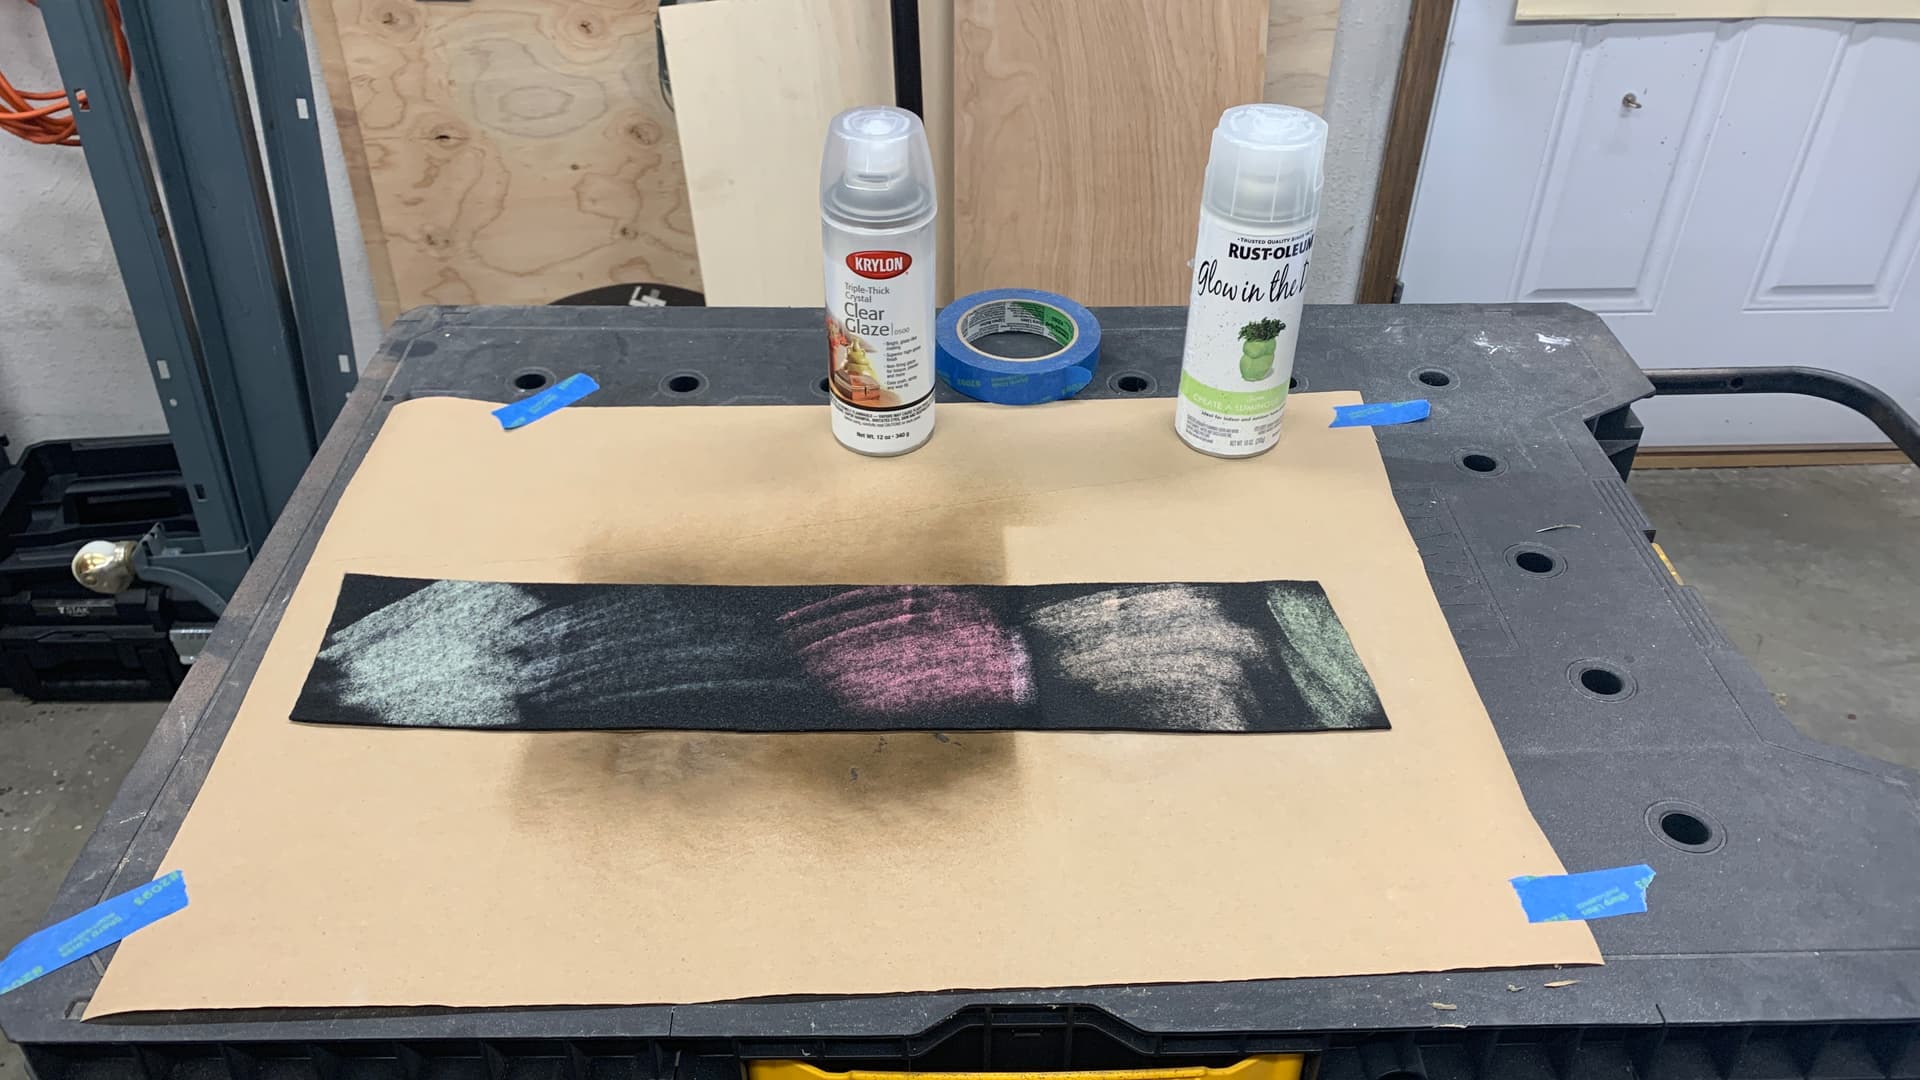
So far, I’m not impressed. But this gets a whole lot better, so stay with me. ![]() And trust the process.
And trust the process.
The glow in the dark is ok, but in the general light it just looks bad, and covers the color of the chalk. But the Clear Glaze, really makes the color pop, in regular light, and blacklight. So ya, clear winner.
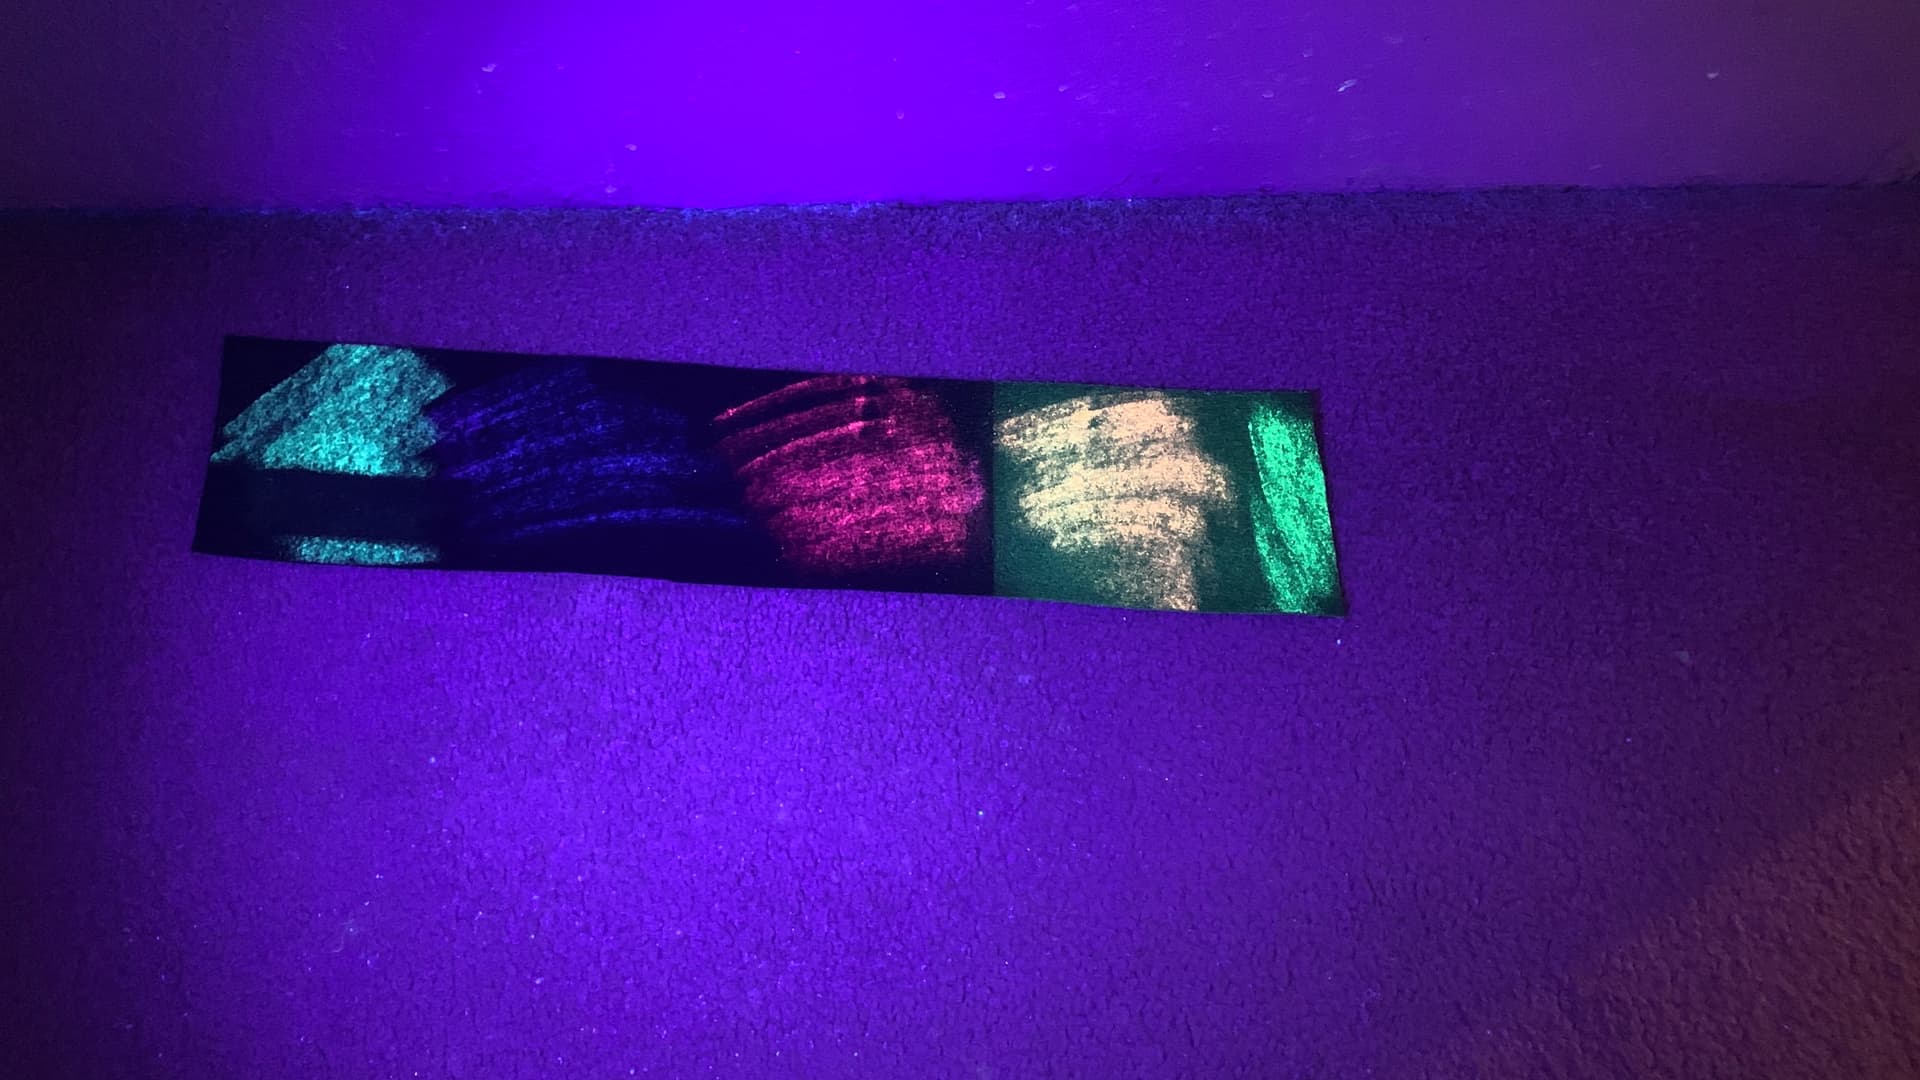
And now the vacuum test. I swiped the shop vac hose across the bottom of the felt strip to check if the overcoats were holding the chalk in place. As I don’t want this dusting up my house. Far left was uncoated. And ya, as you would expect. It also ‘smeared’ the orange that was glow in the dark covered. Weird. I’m going with the clear glaze anyway. moving on…
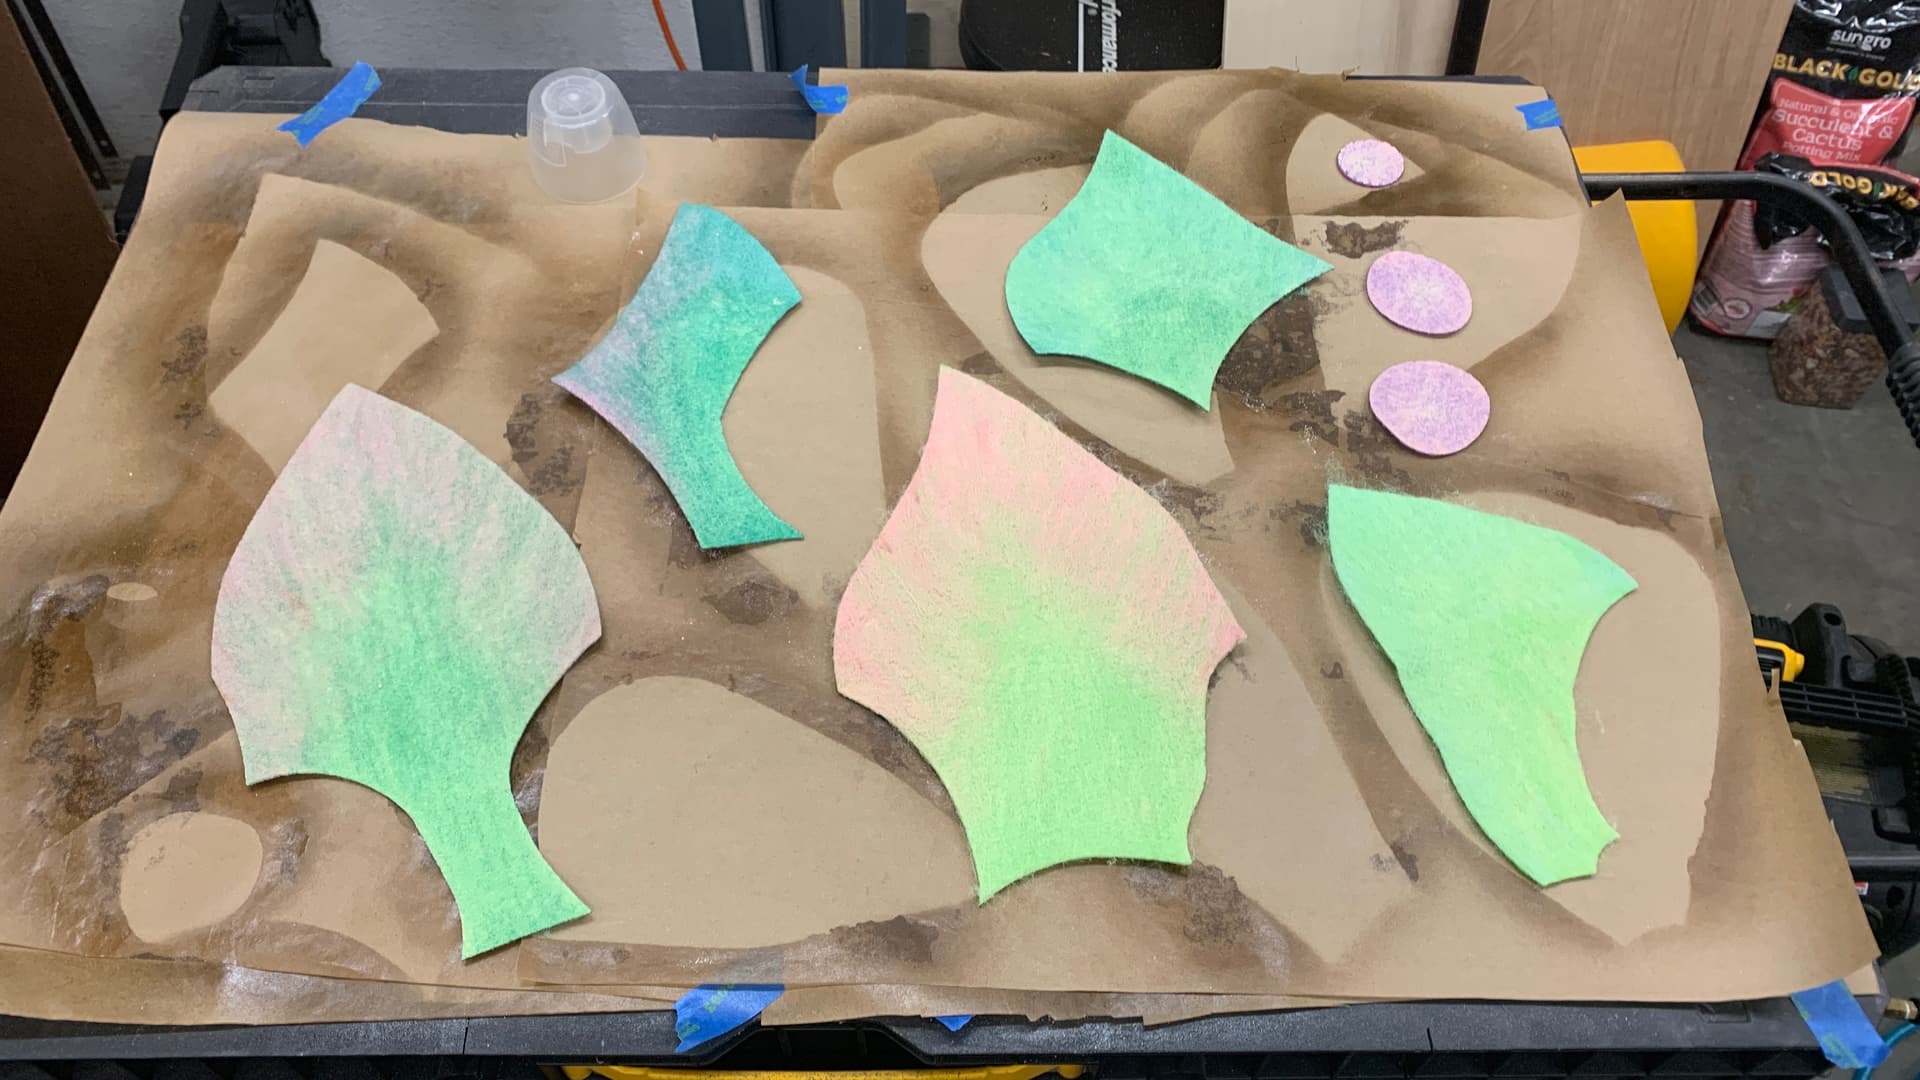
I first tried ‘drawing’ on the felt with the chalk, using the first green leaf cuts.
I drew veins, and shaded with lighter color chalk.
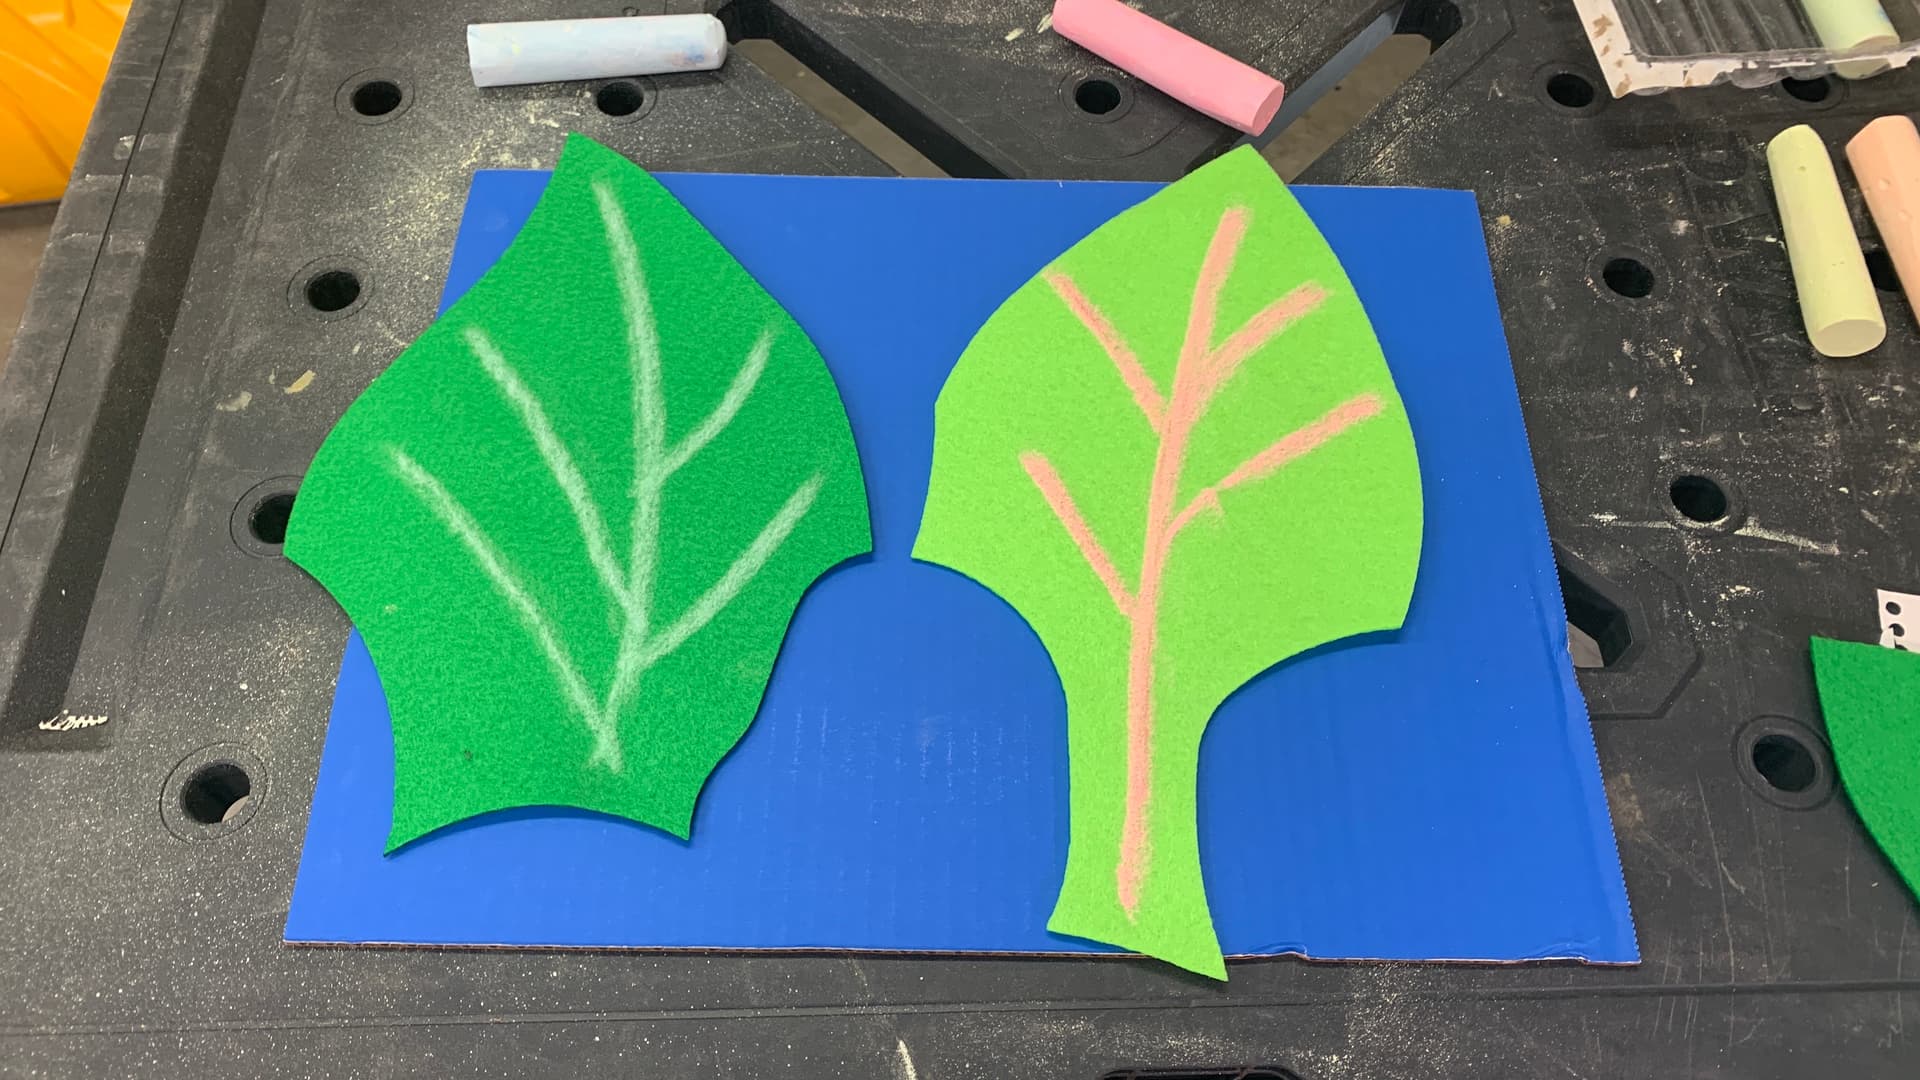
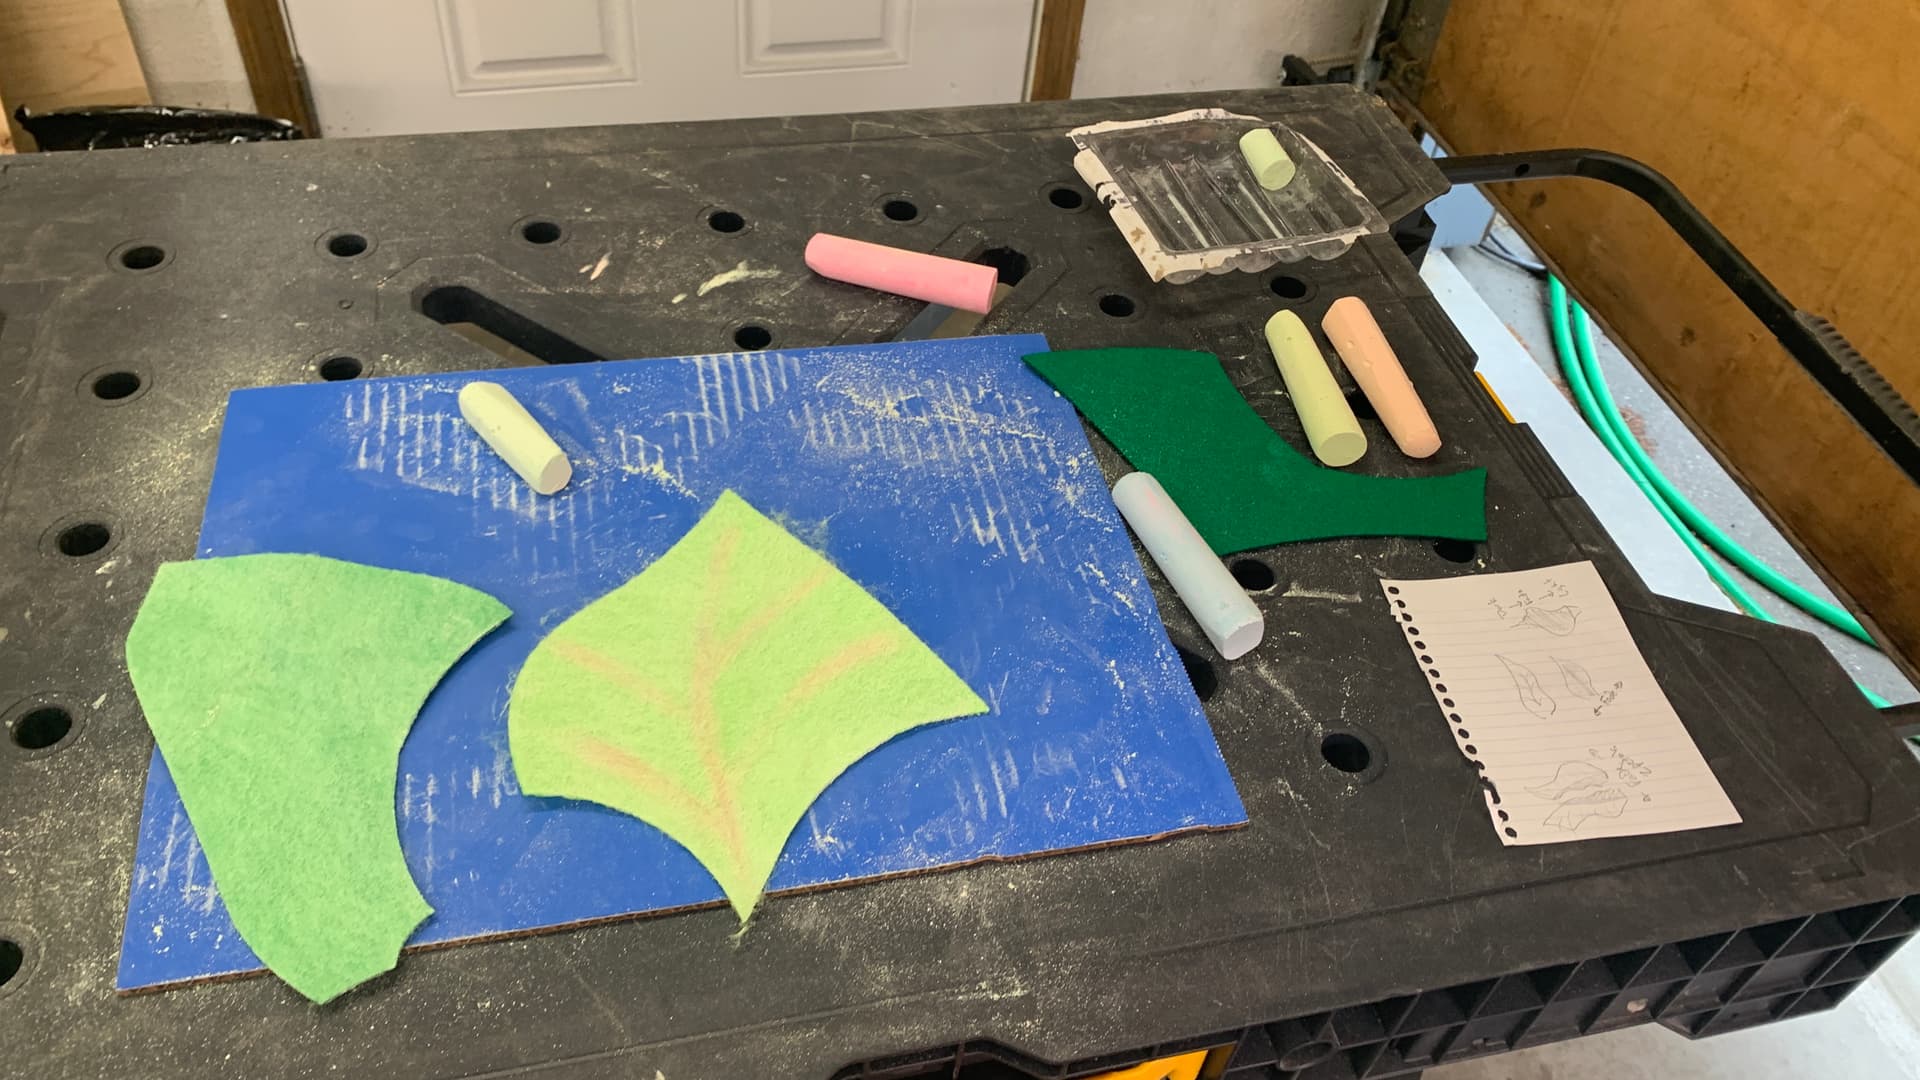
Then gave it a thick clear coat. I immediately didn’t like the veining, or the dark green color, and decided to redo the green pieces. So might as well try one (final) Glow-in-the-dark test coat, and the clear, before I commit to the rest.
As expected, interesting, but using the tip of the chalk doesn’t look good, and the Glow-in-the-dark cover spray sucks.
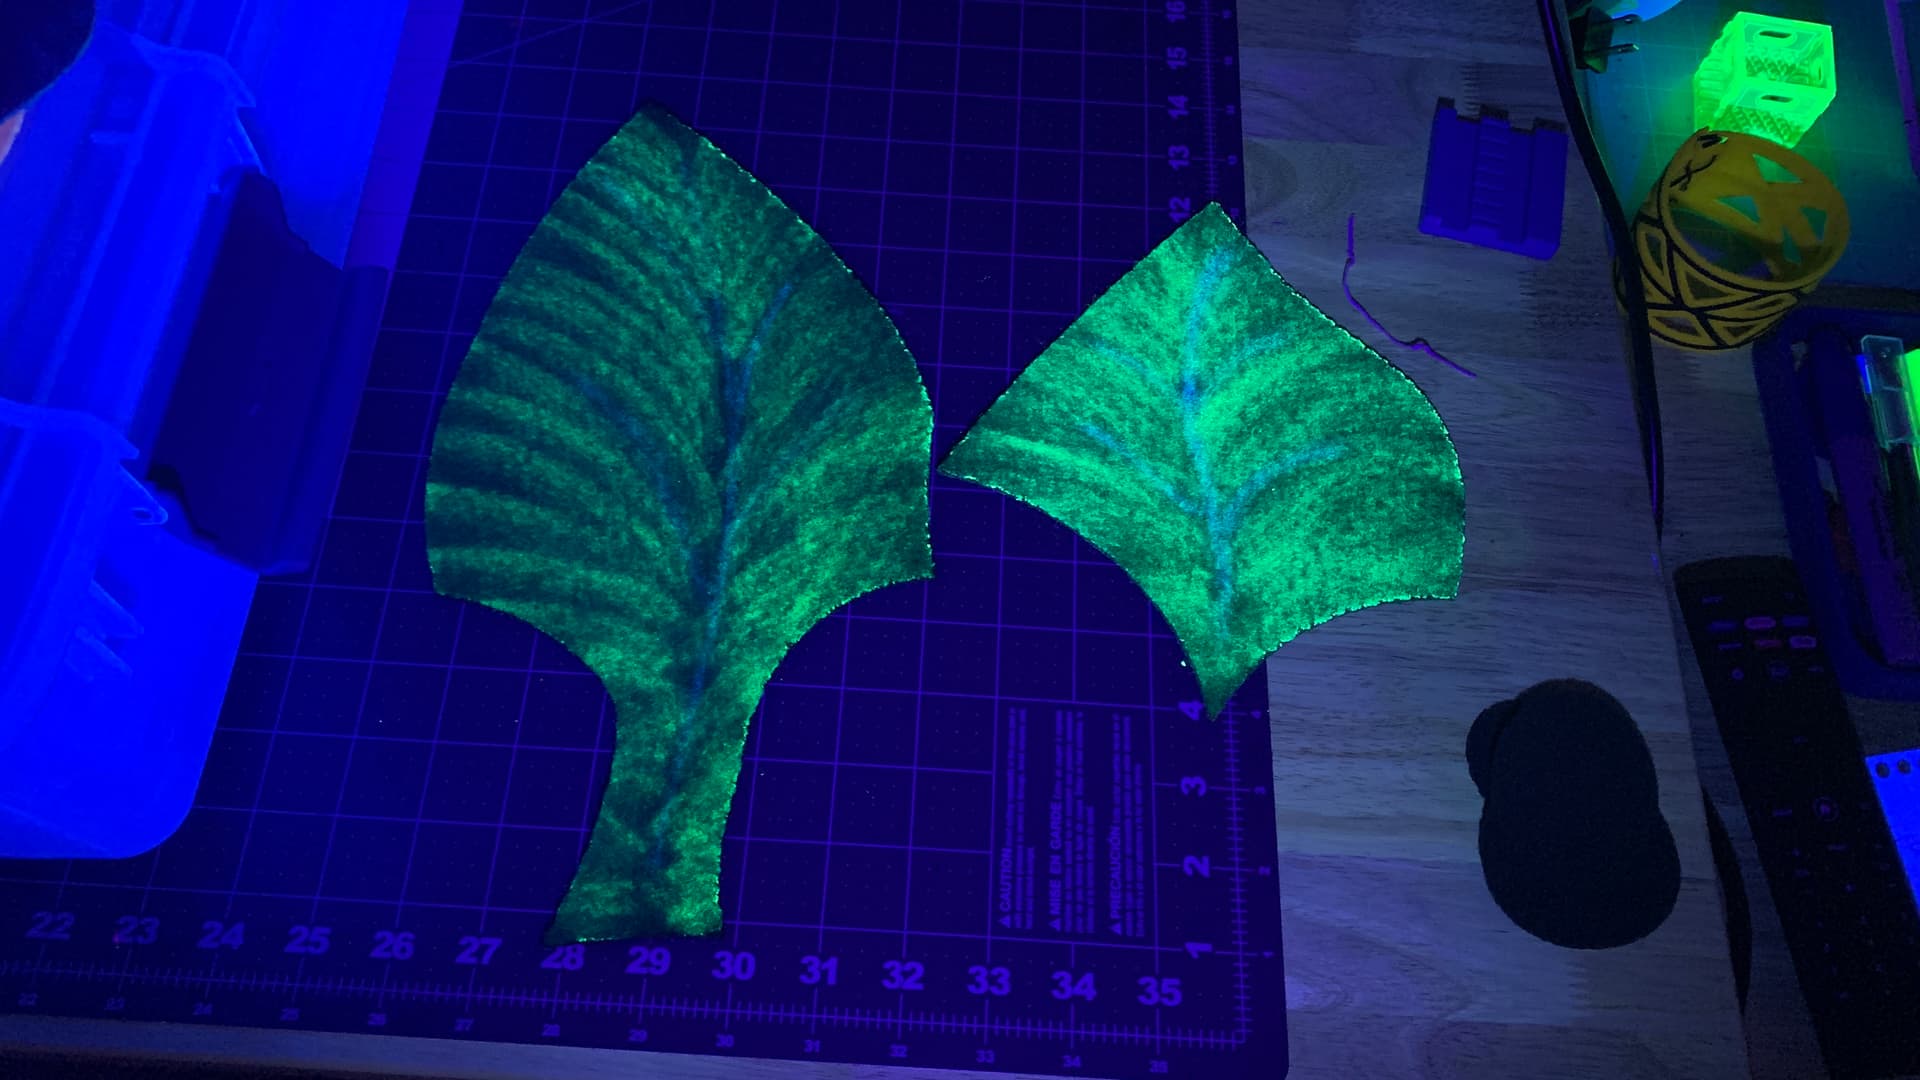
But the ‘shading’ using the side of the chalk worked great. And the thick acrylic overcoat is nice. So let’s get the rest of the pieces cut, and redo the green ones.
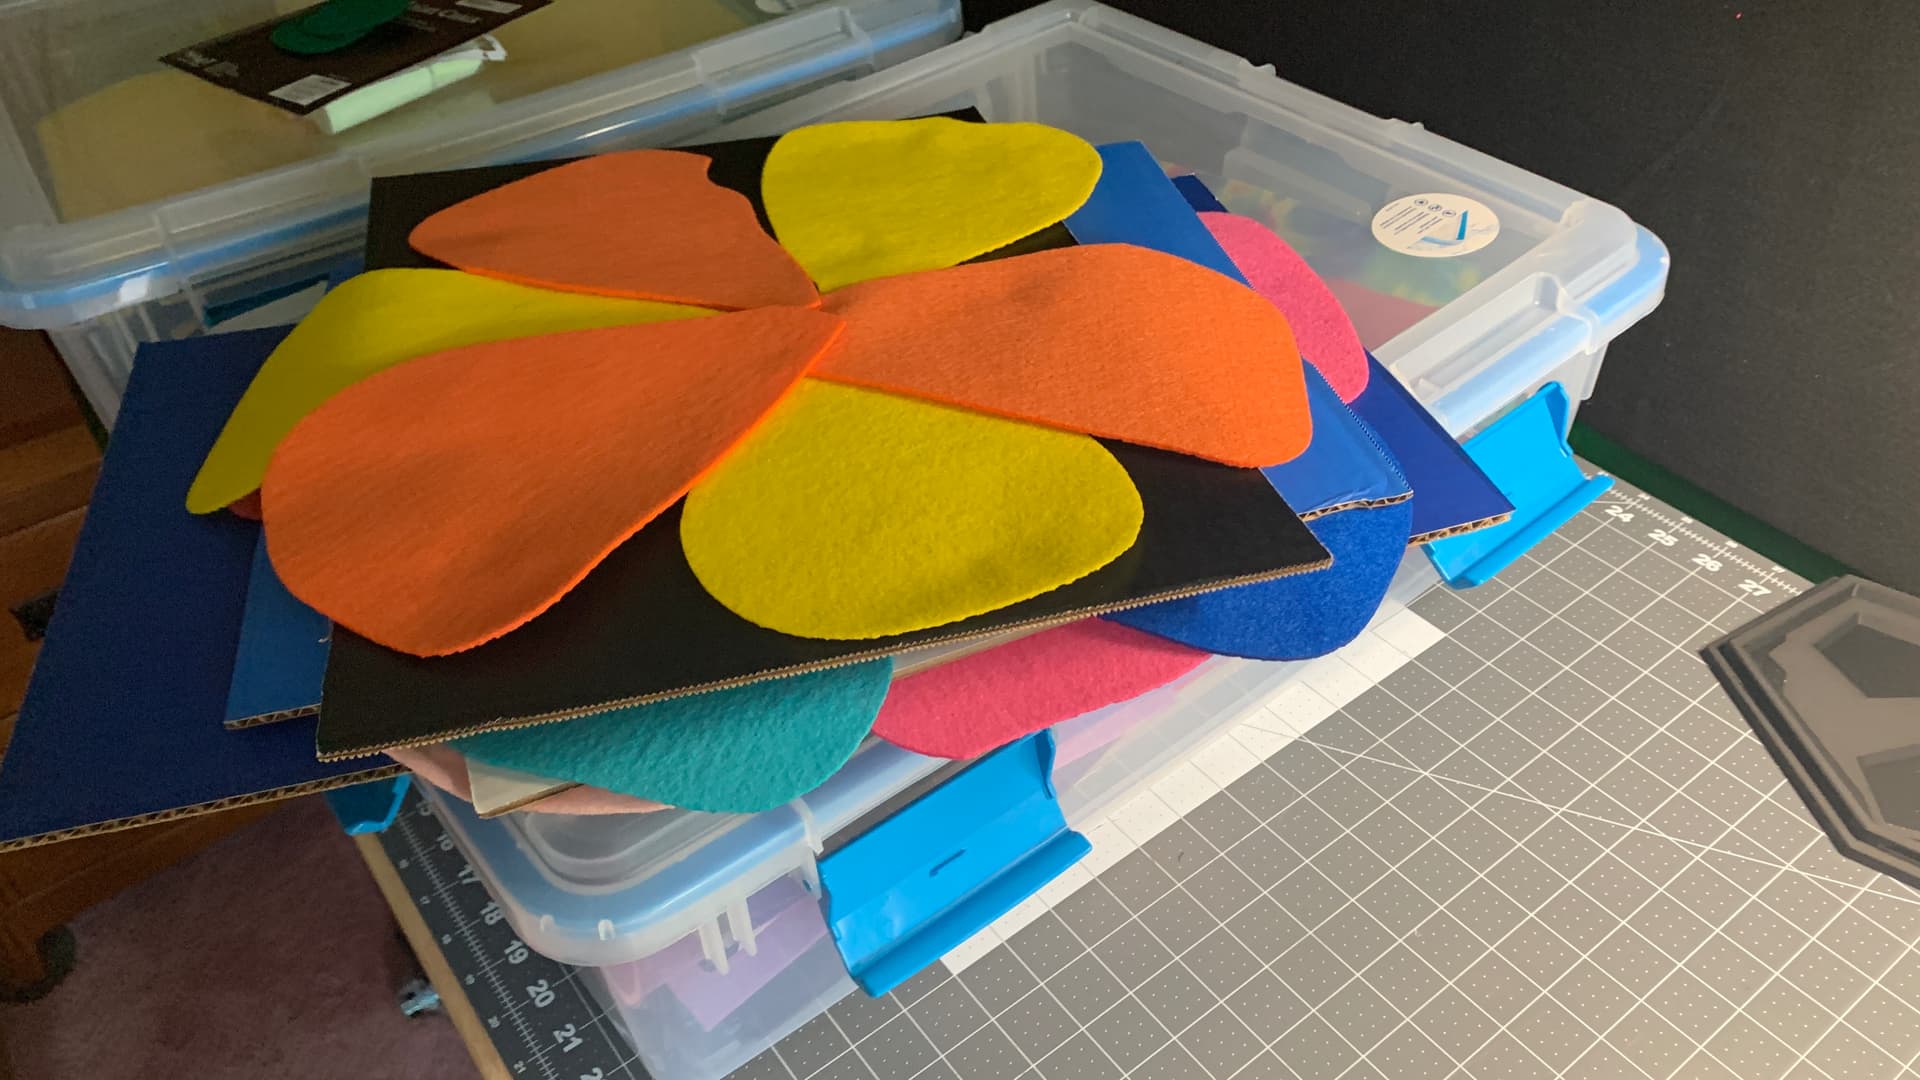
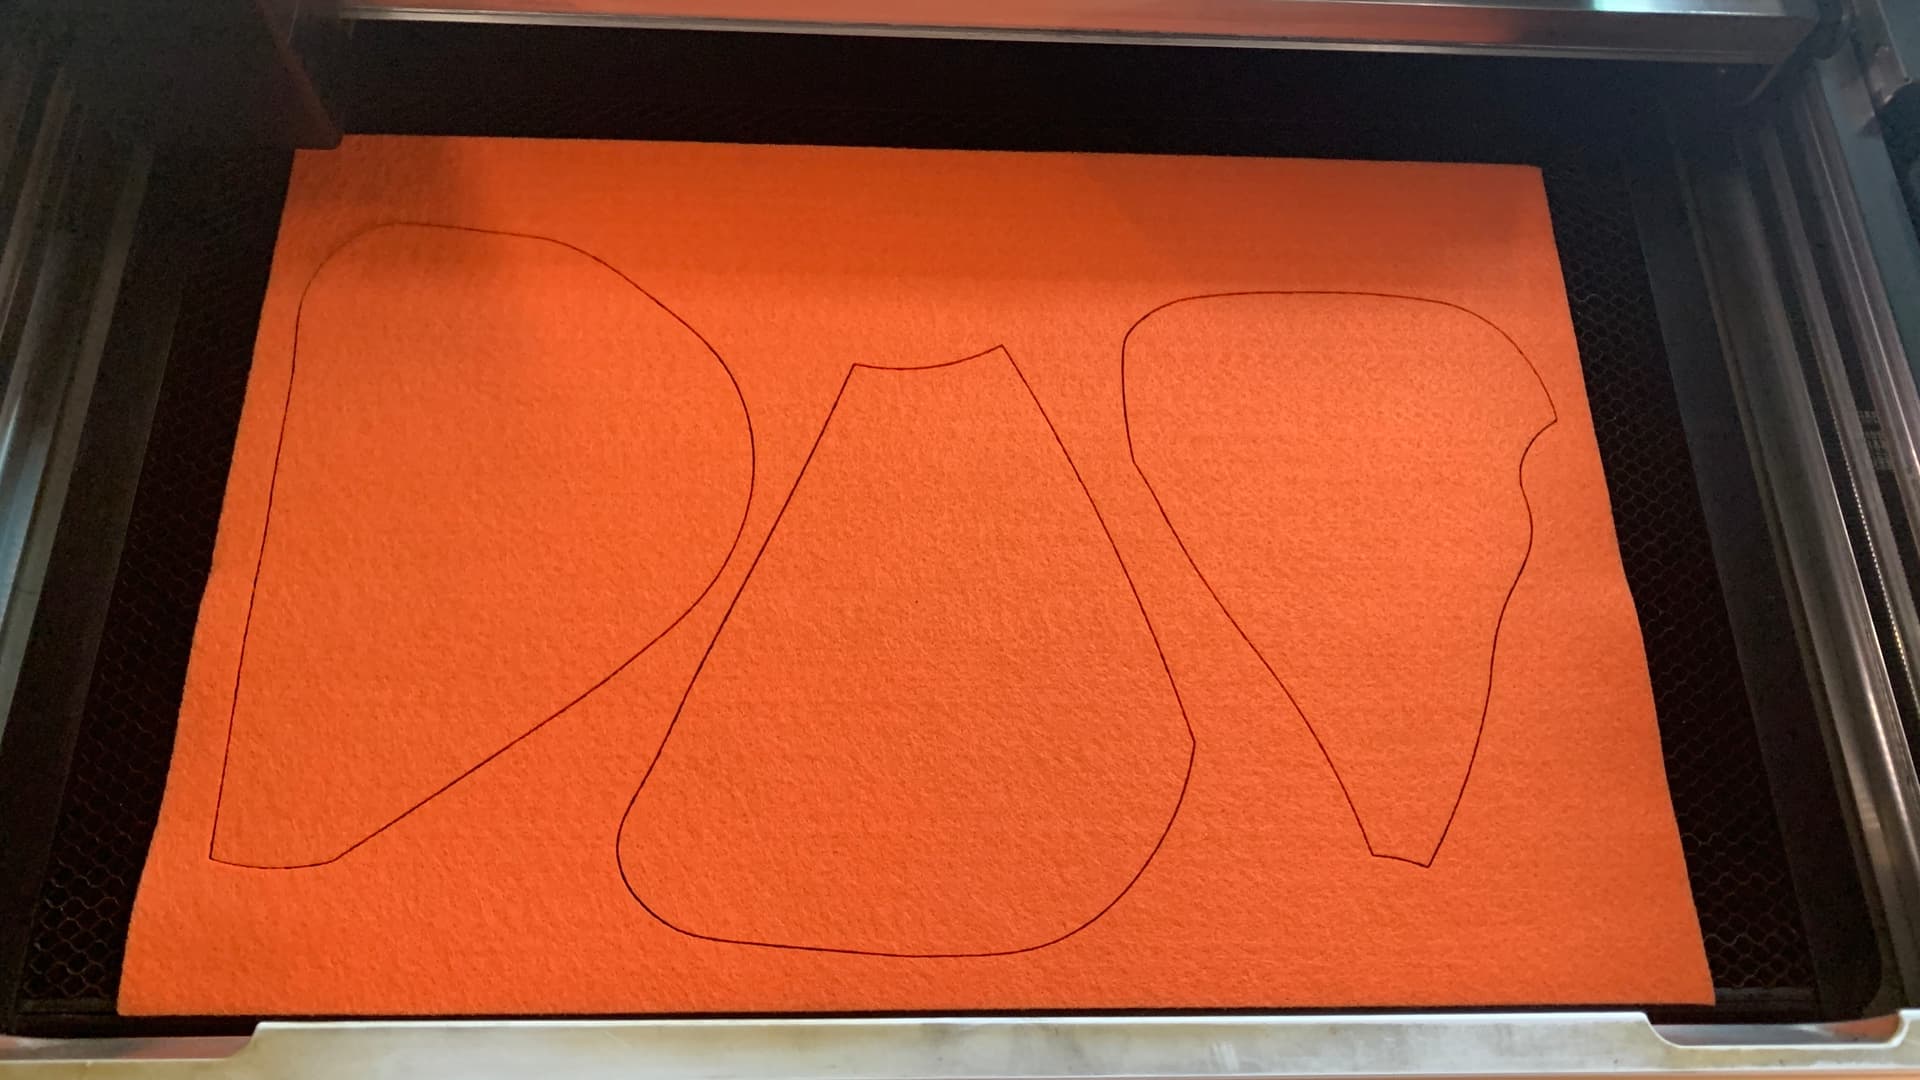
Thing about felt, it cuts super fast.
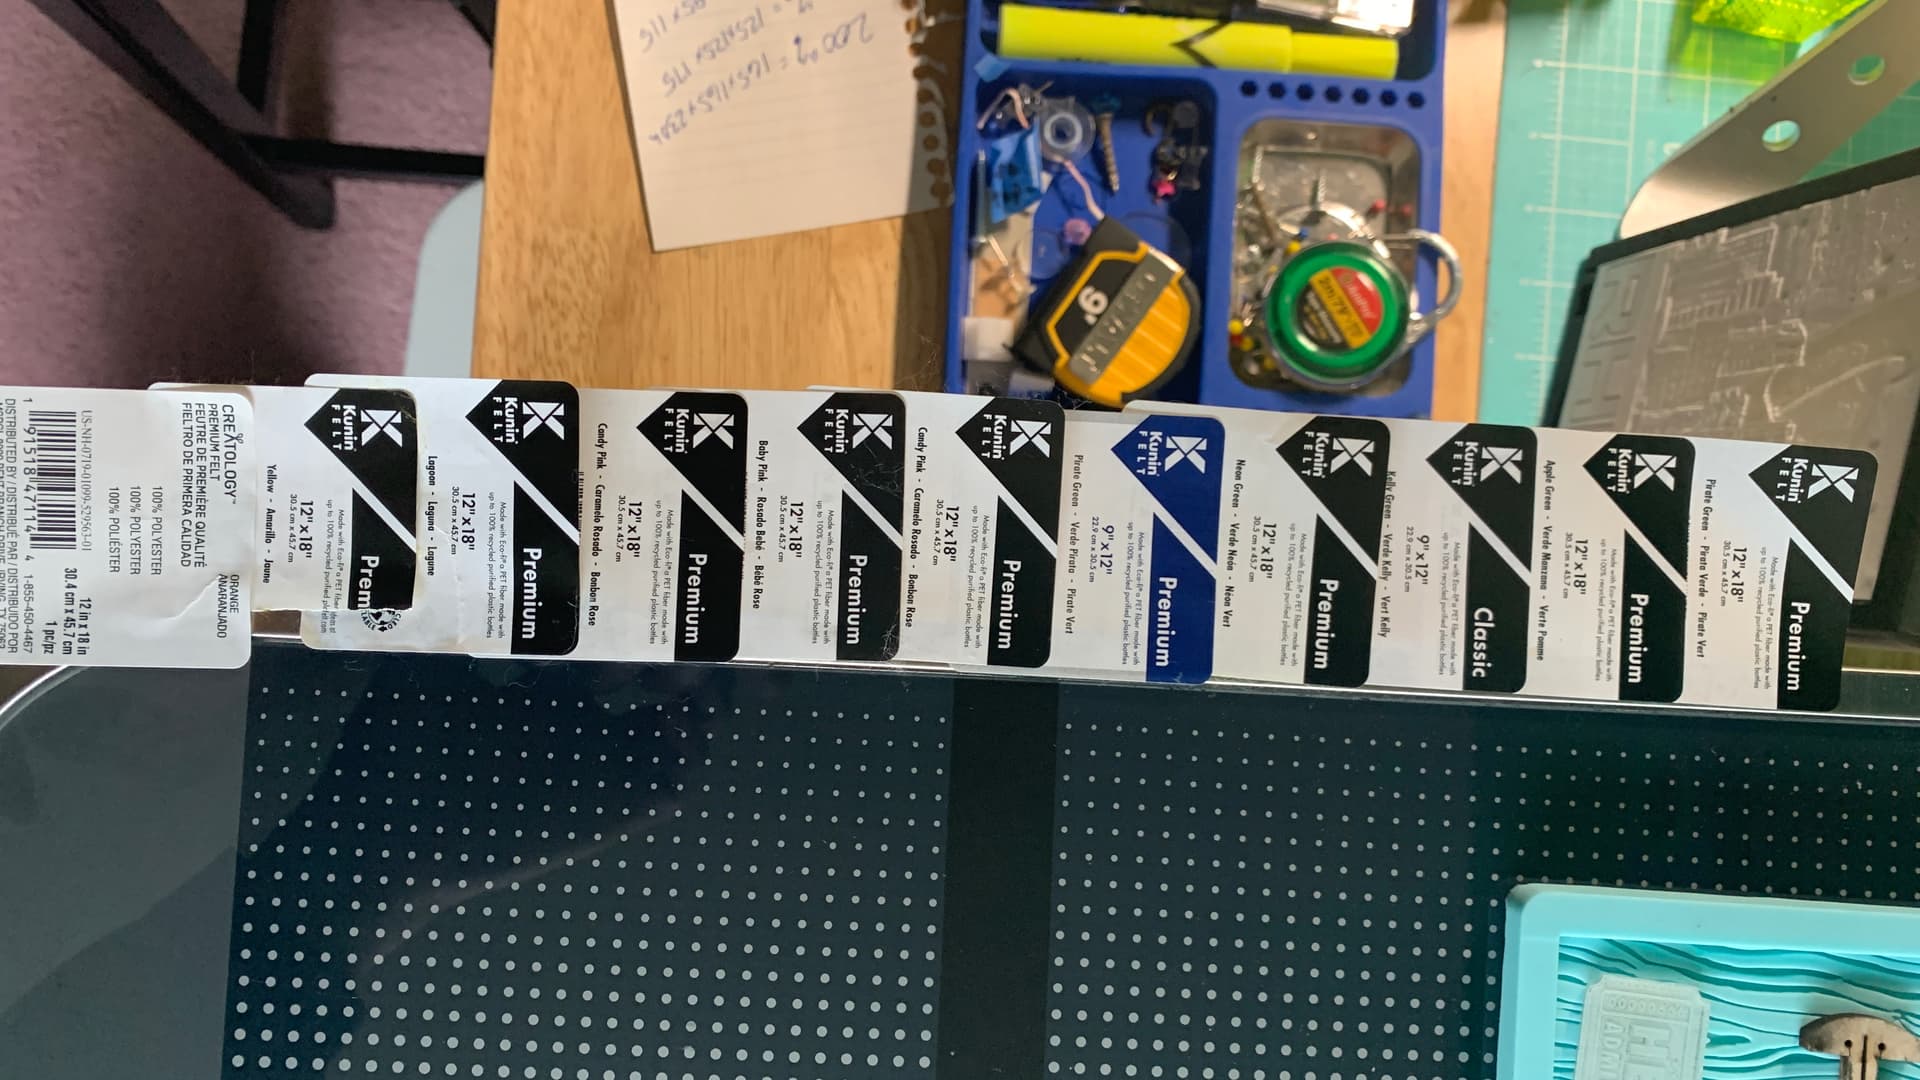
And it’s pretty cheap, thankfully. I obviously keep a lot of felt on hand. I’ve found that having in stock atleast two each (12x18) of primary and secondary colors, and 2-3 ea of the smaller (9x12) ones, covers about any project. I keep track of which I use in a project, take a picture, then I have a restocking list for my next trip to Joanns.
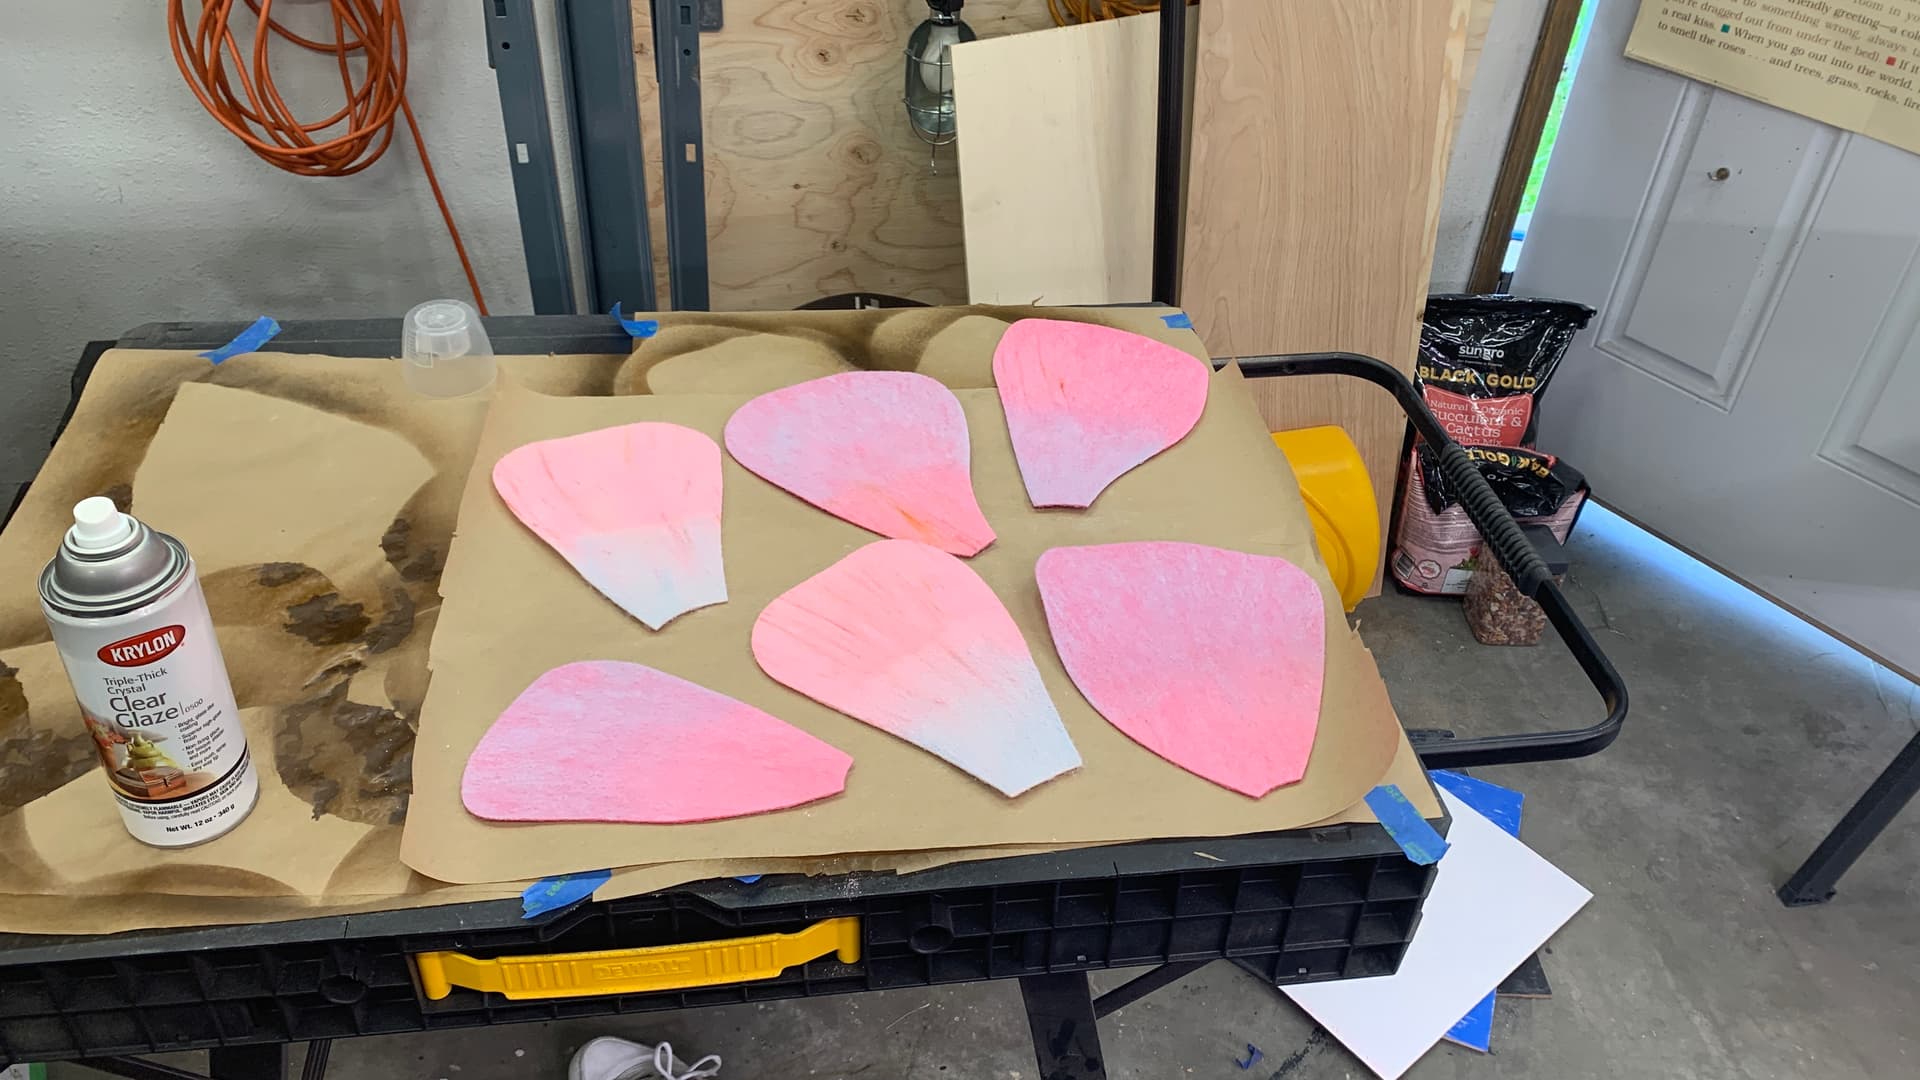
Anyway, back to it. I drew a few different ways flower petals are shaded, just from a google search of flowers.
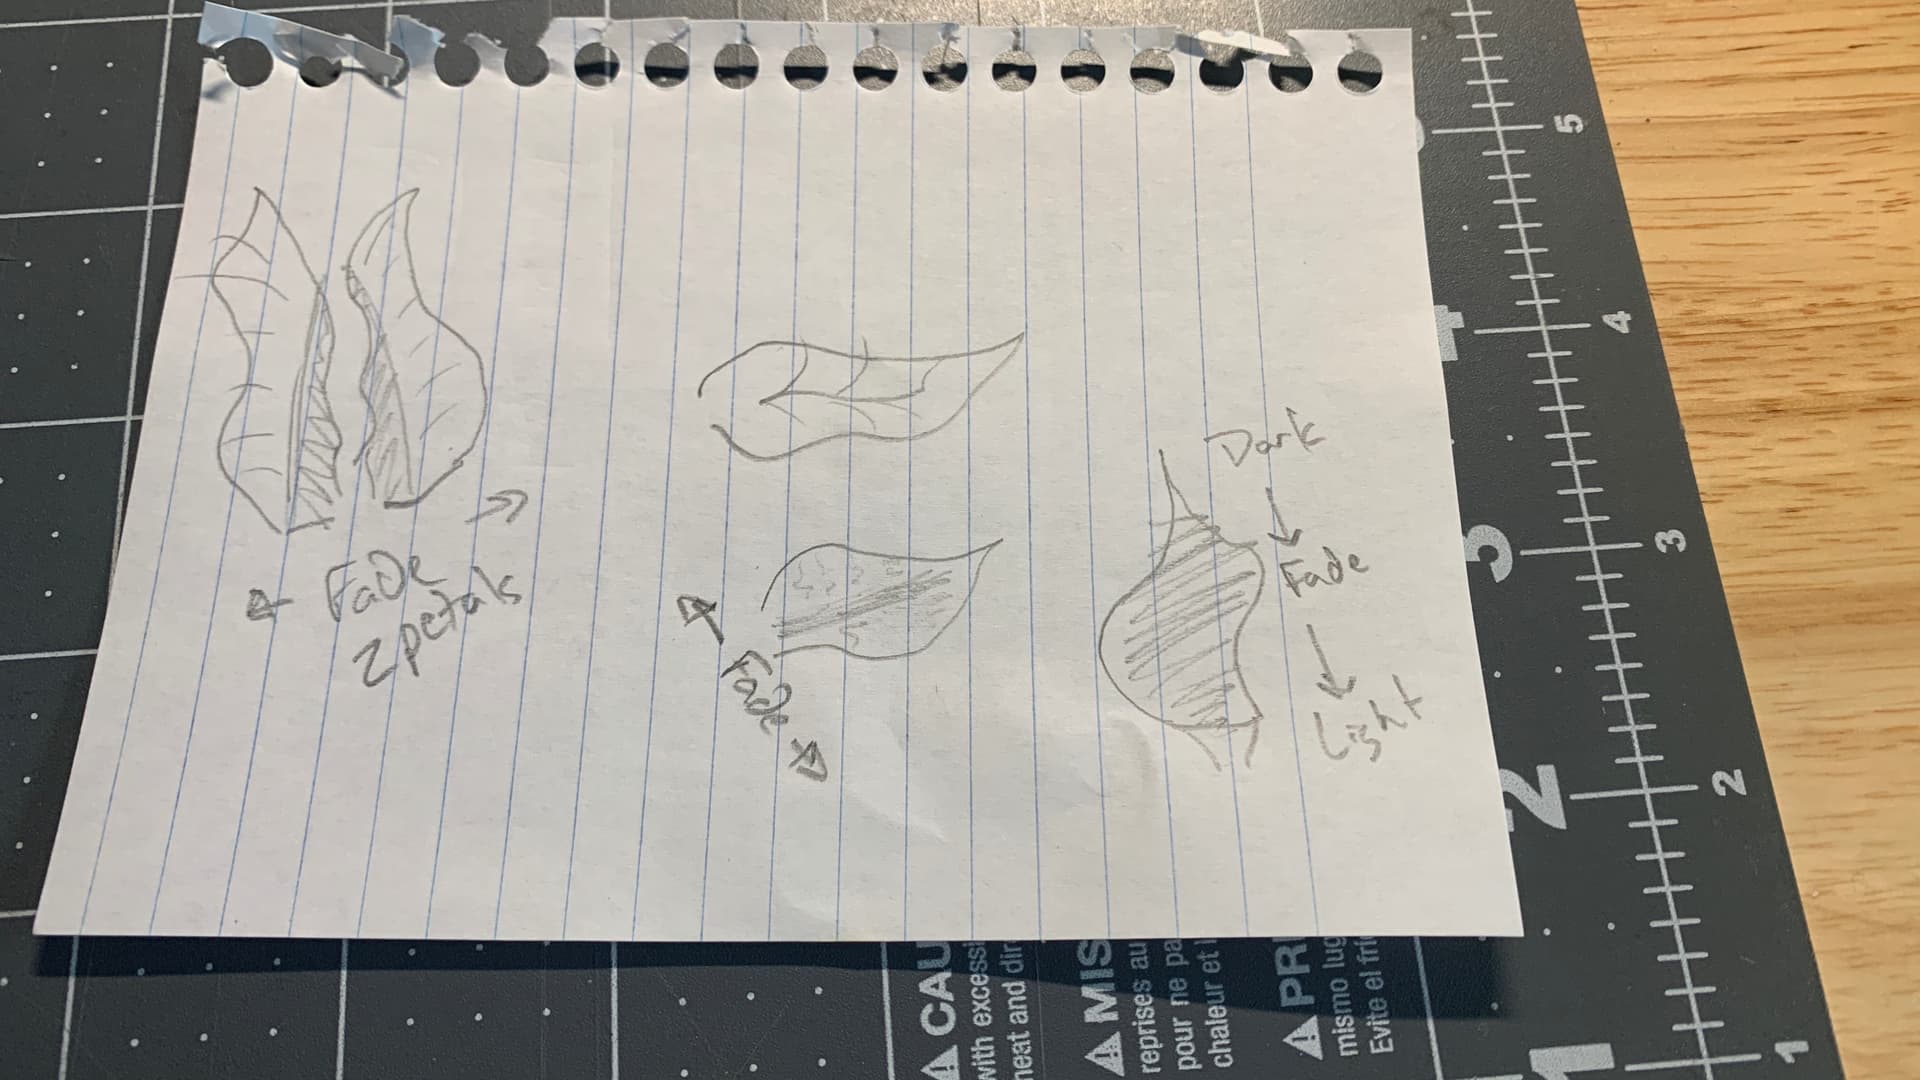
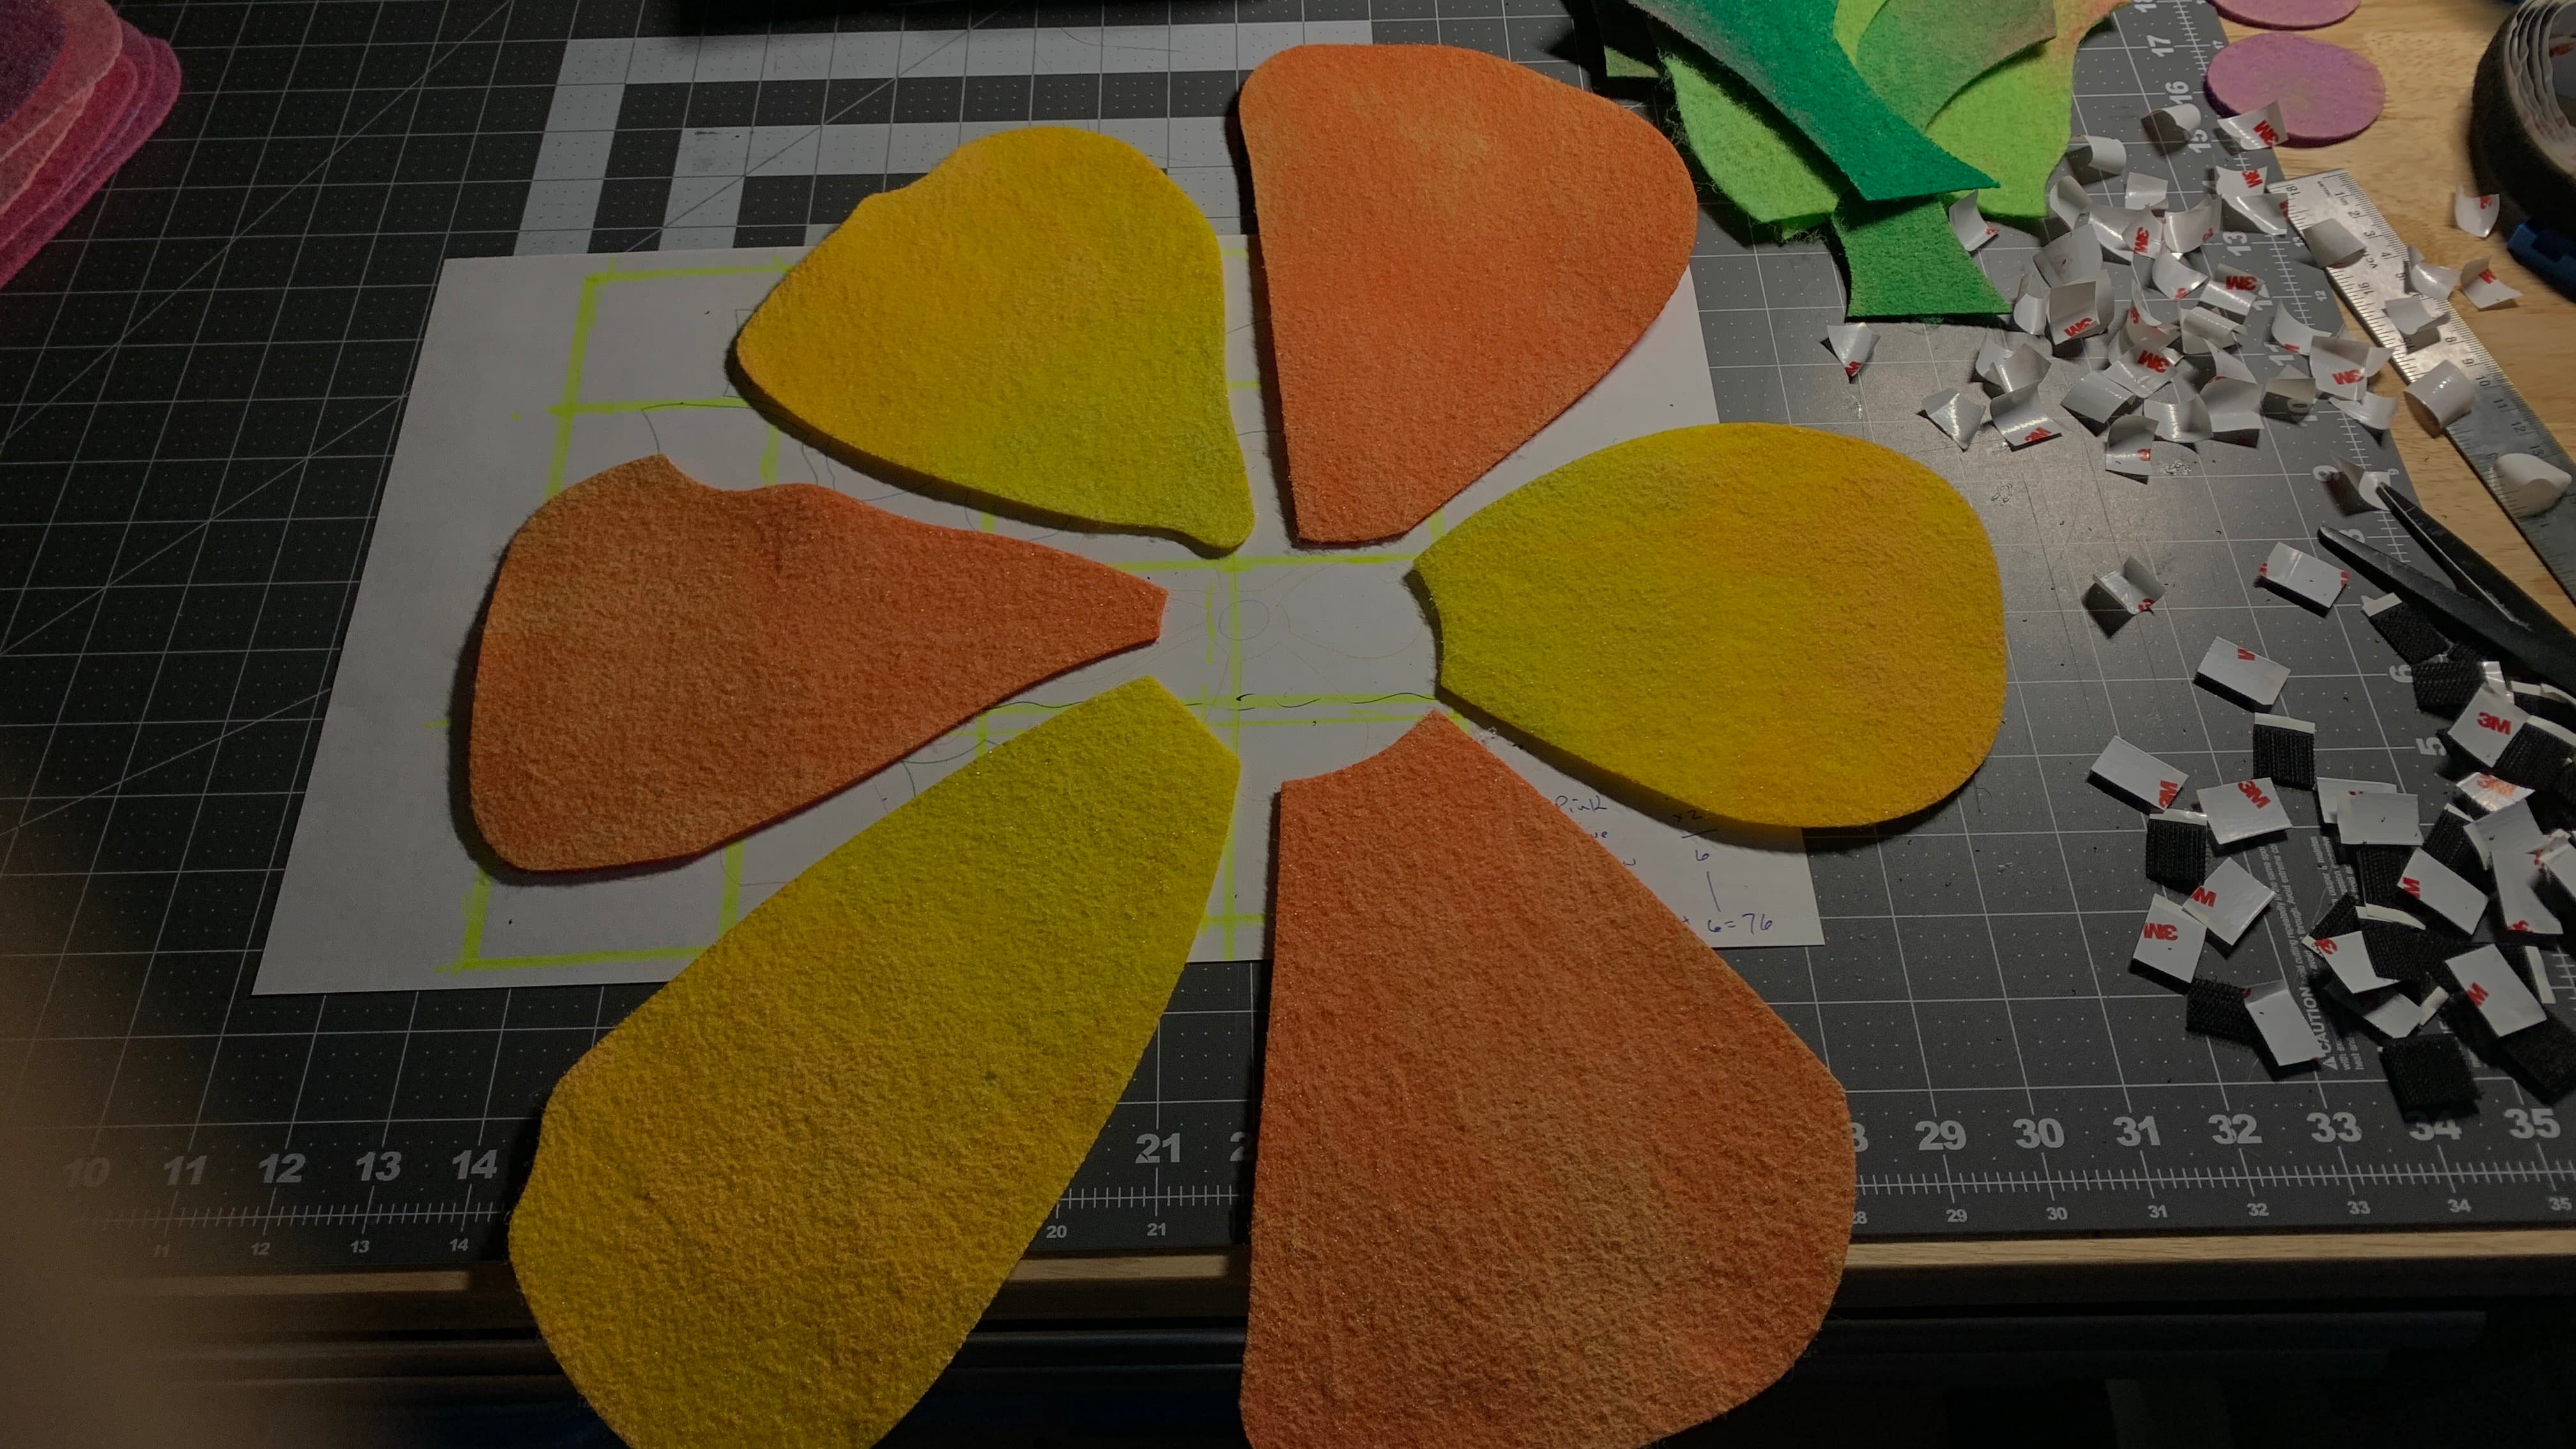
I want to try a couple of these. First up, the Yellow/Orange flower. I wanted to alternate the base petal color between the two, and shade them oppositely, yellow in the center, to darken out to orange. I didn’t get a pic doing it, but this is right after, so I could remember what colors of chalk I used on what color of fabrics, just in case I want to recreate later, or it blows and I want to avoid. ![]()
And the result.
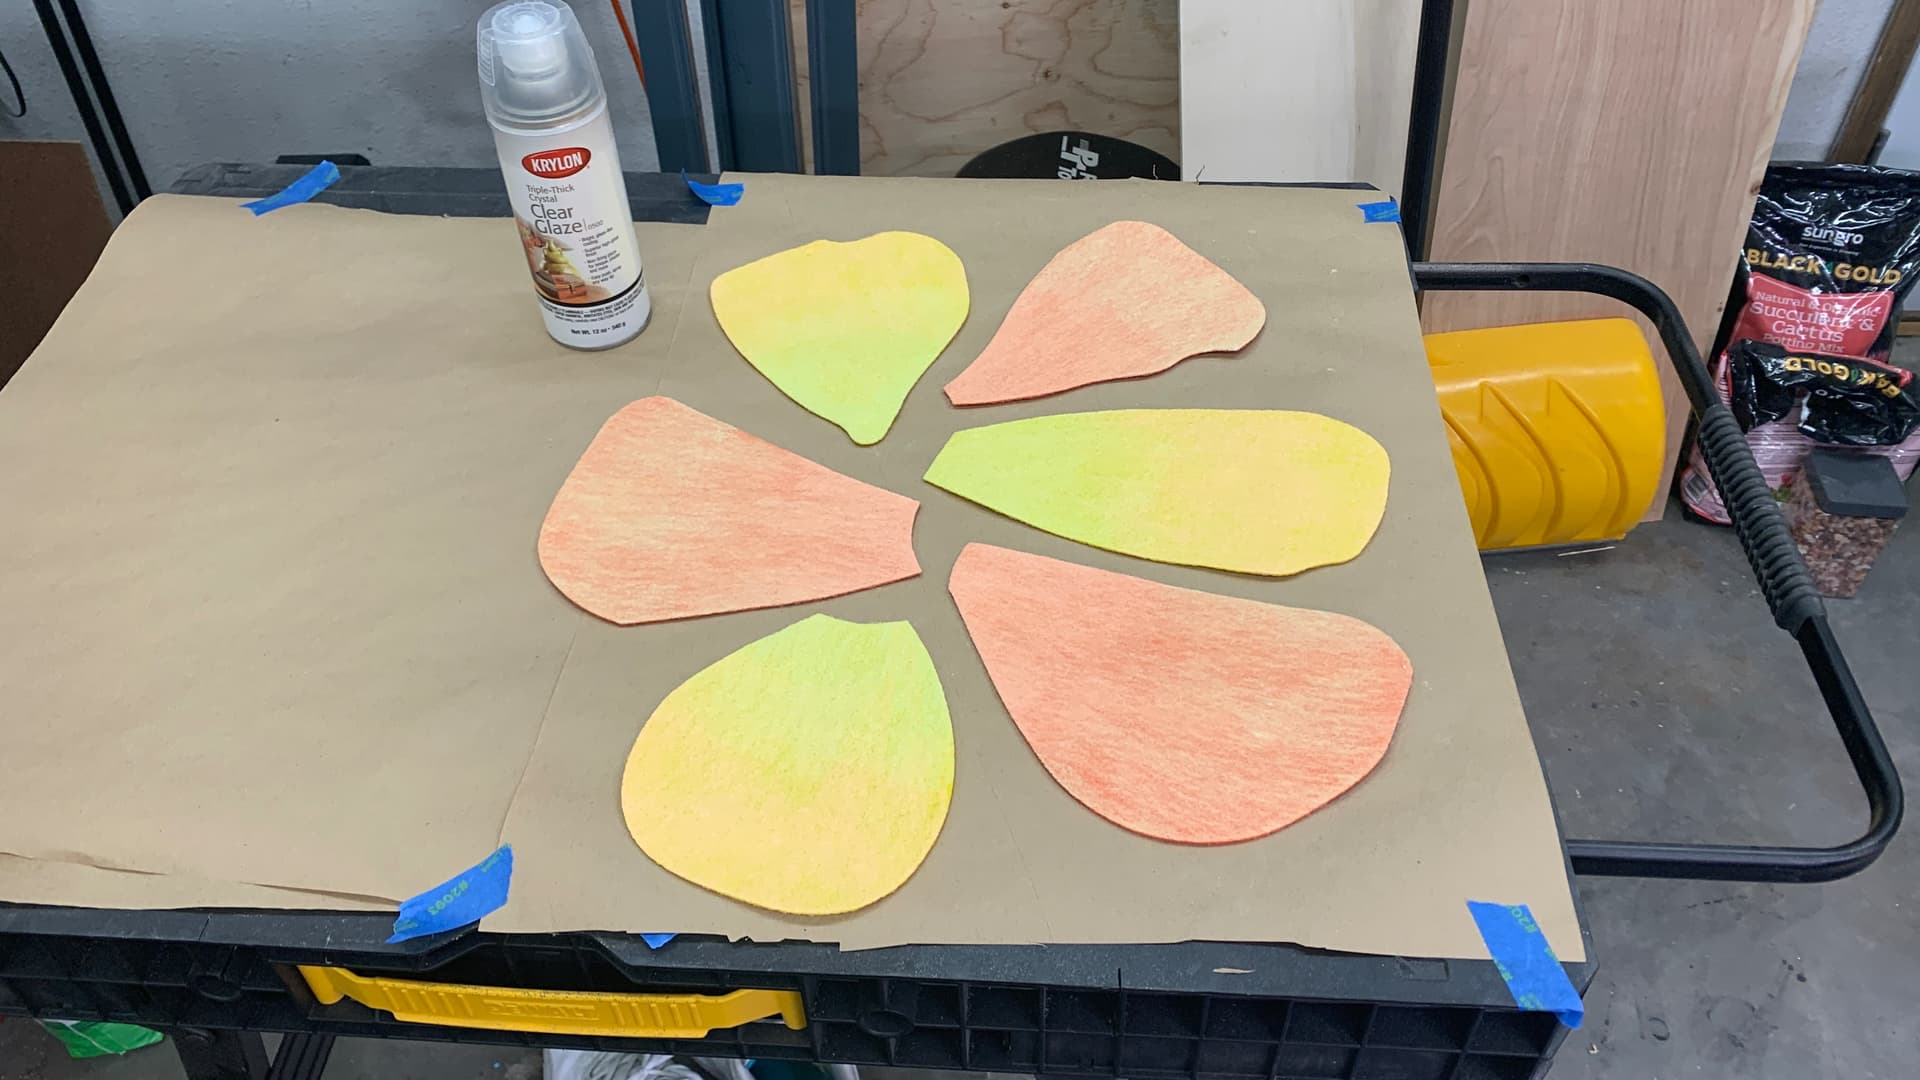
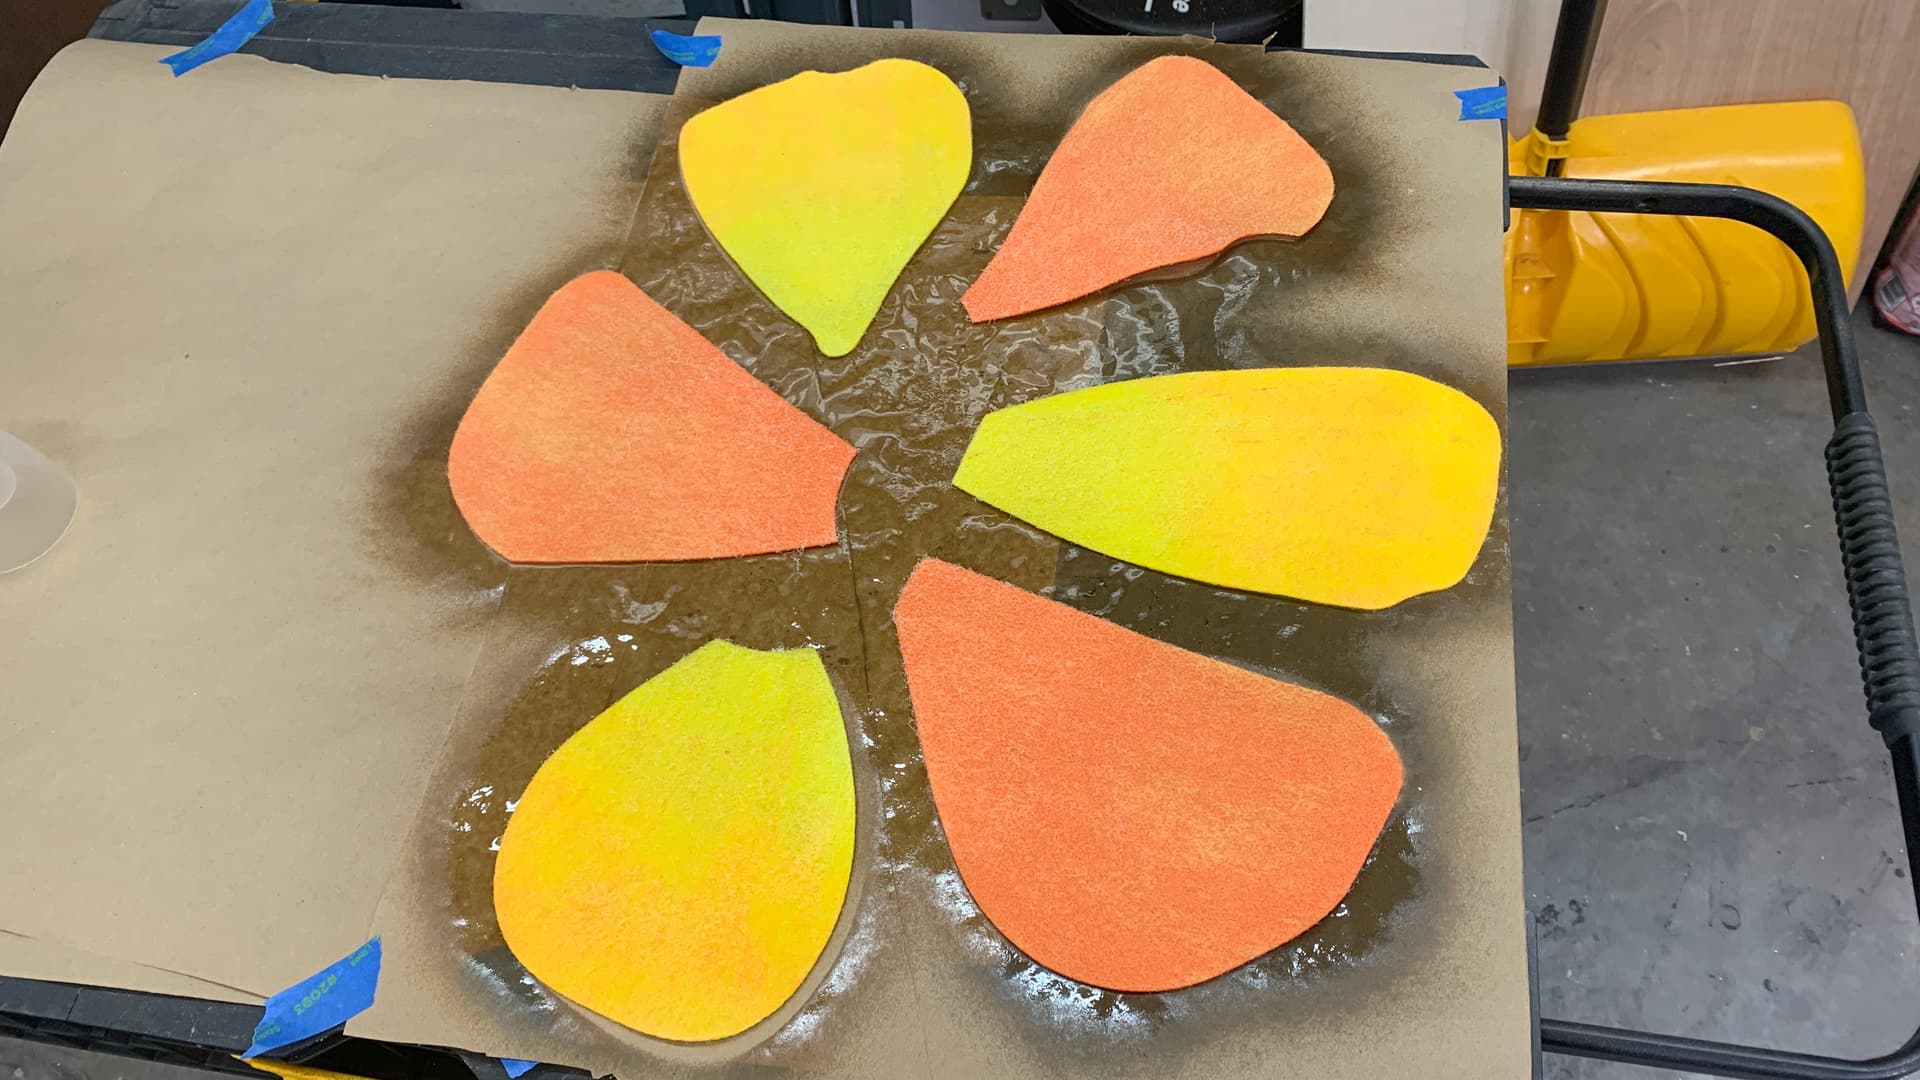
Unimpressive, but let’s hit it with some clear coat. Nicer, although not popping yet. But I was using yellow and orange chalk, so I think the end result will be stronger.
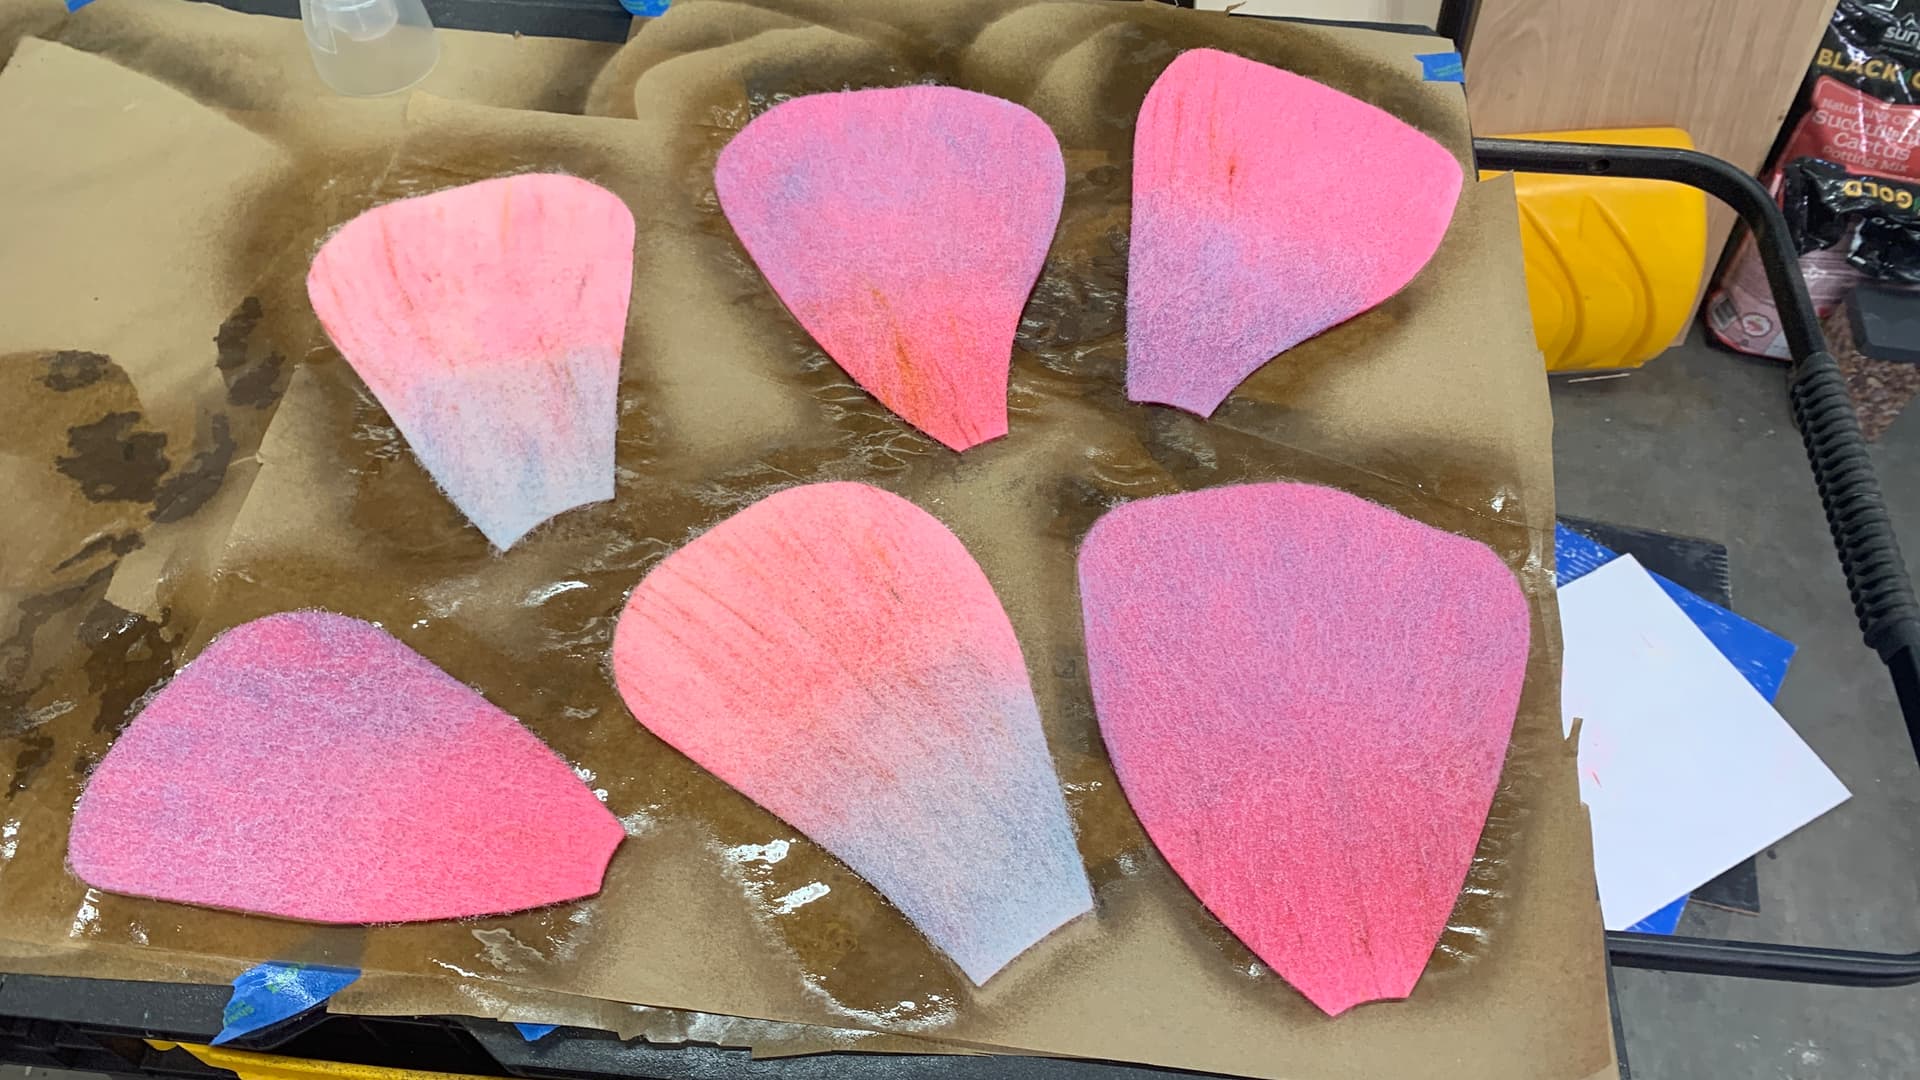
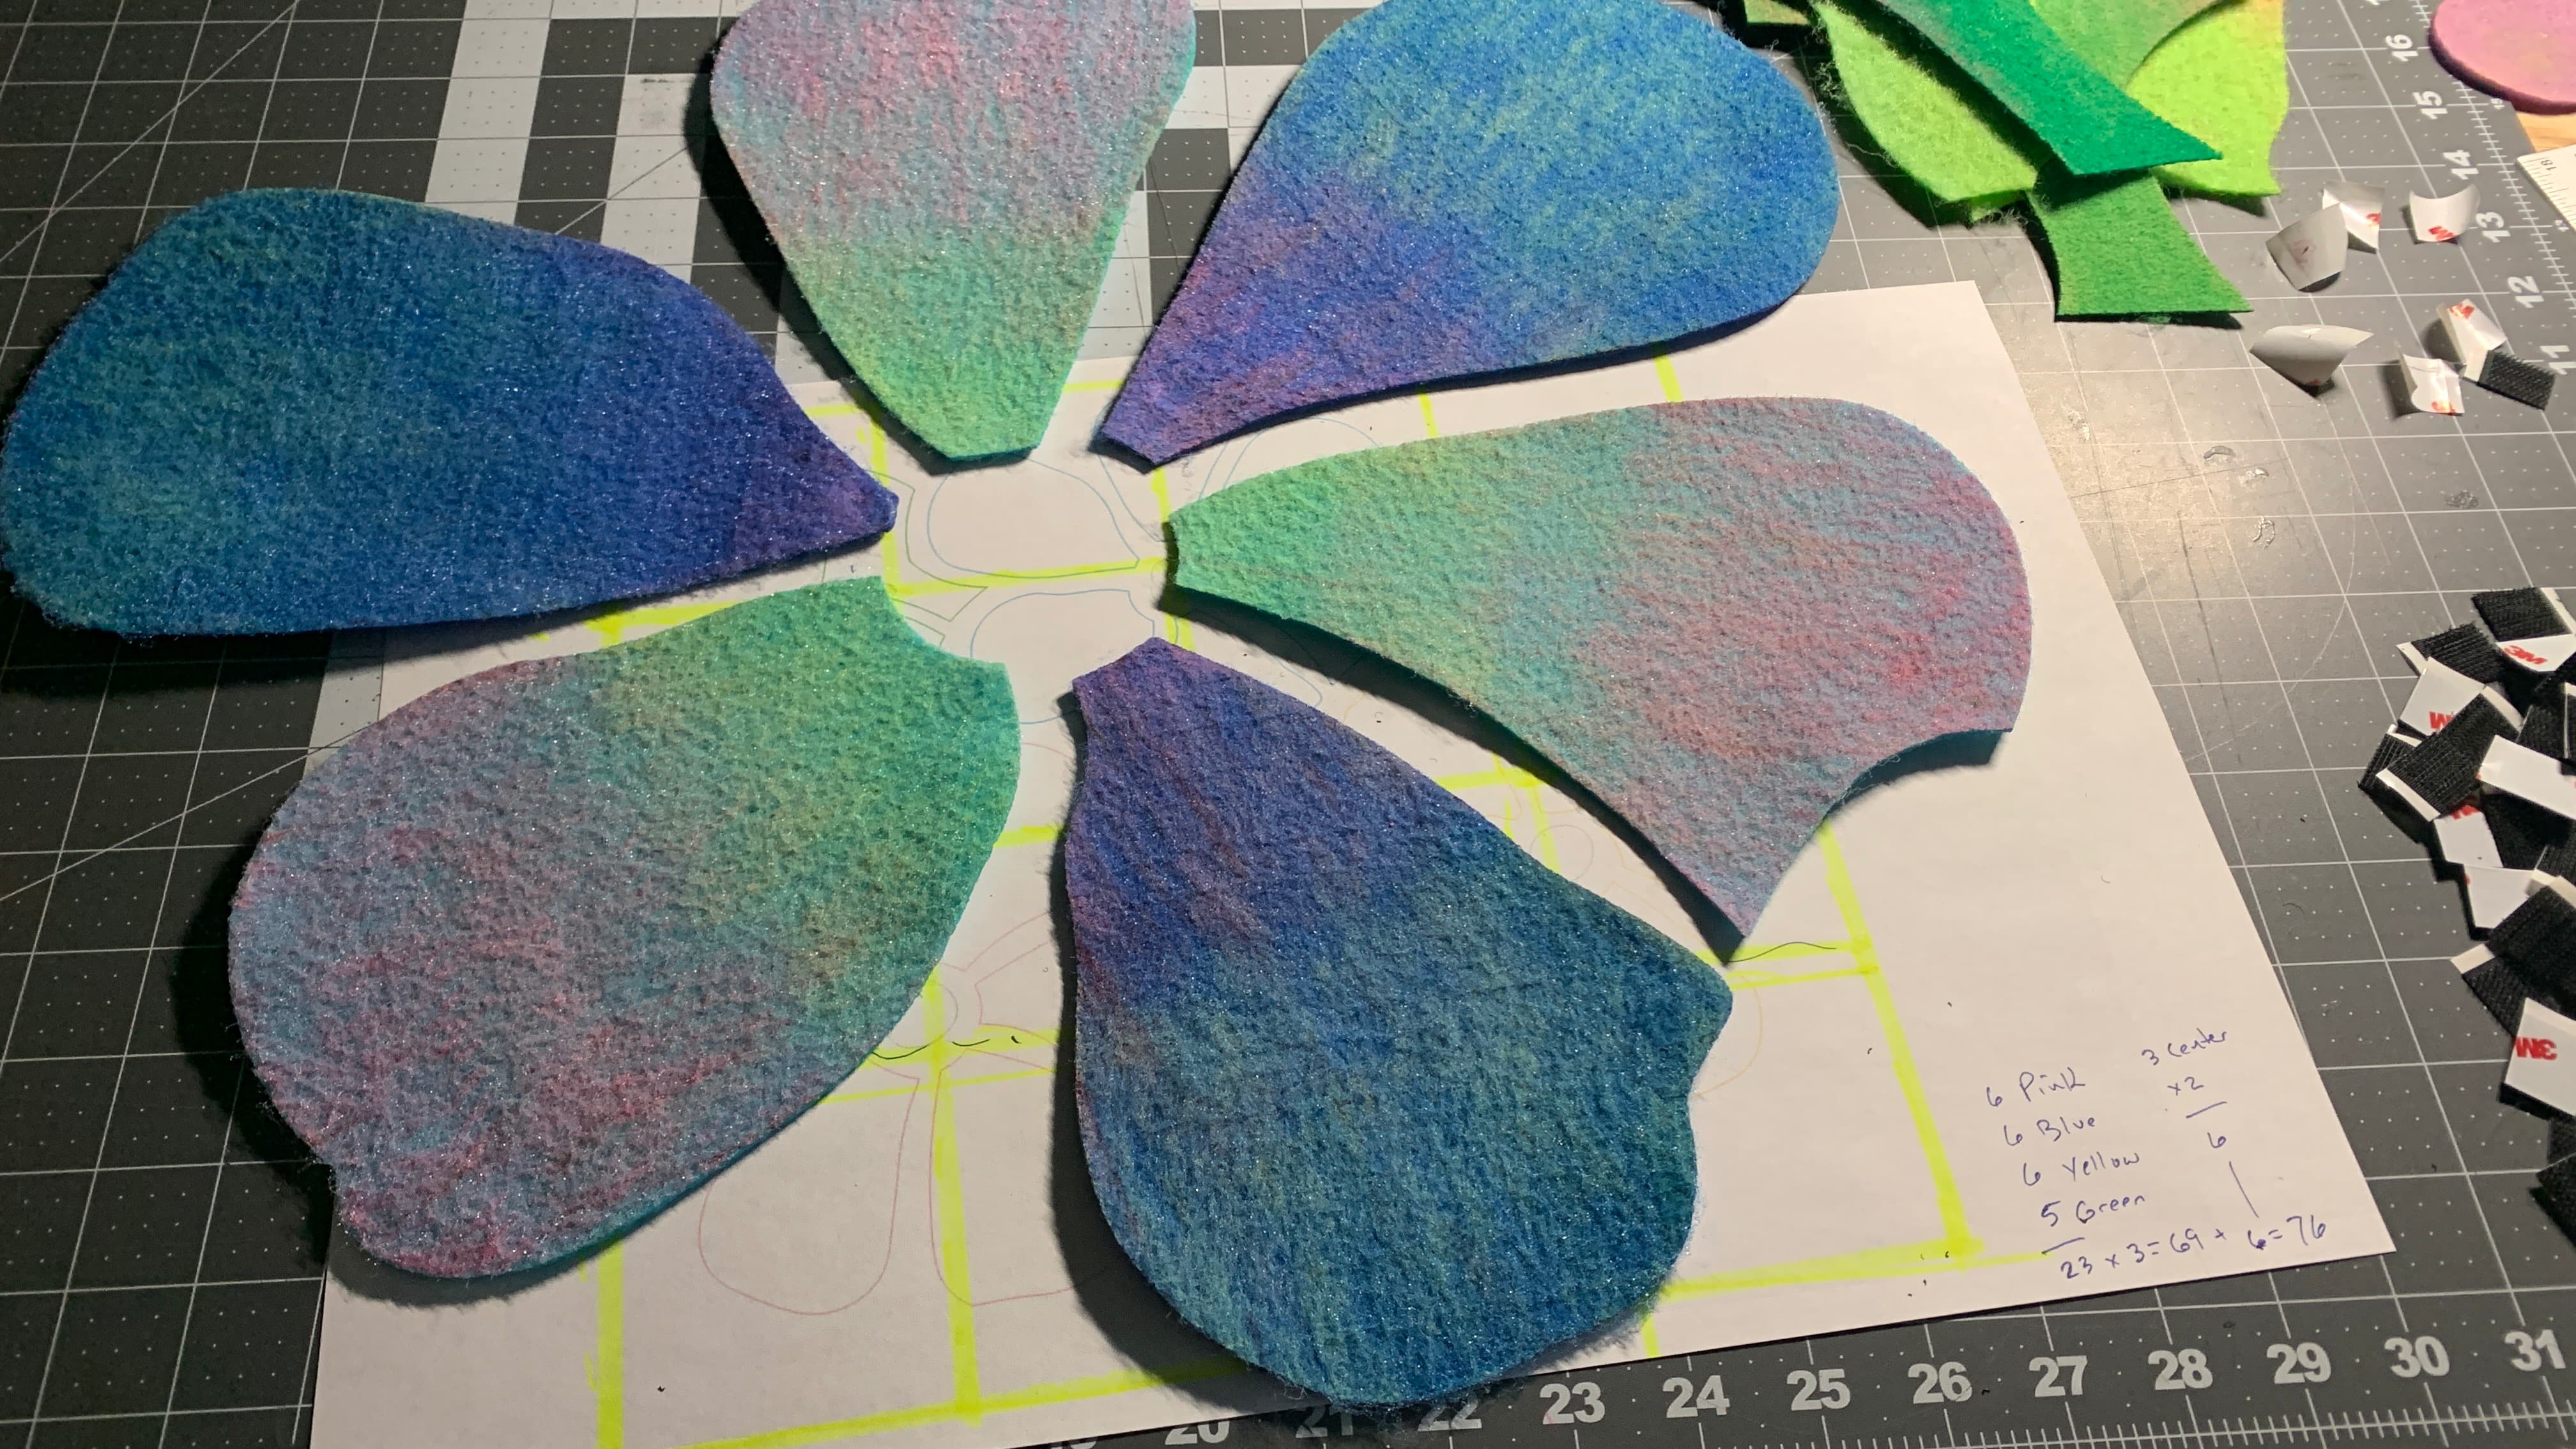
On to the blue flowers. I’m using two shades of blue felt.
And alternating fading the red and yellow chalk, from center outward. I’m using the side of the chalk and laying it in heavy.
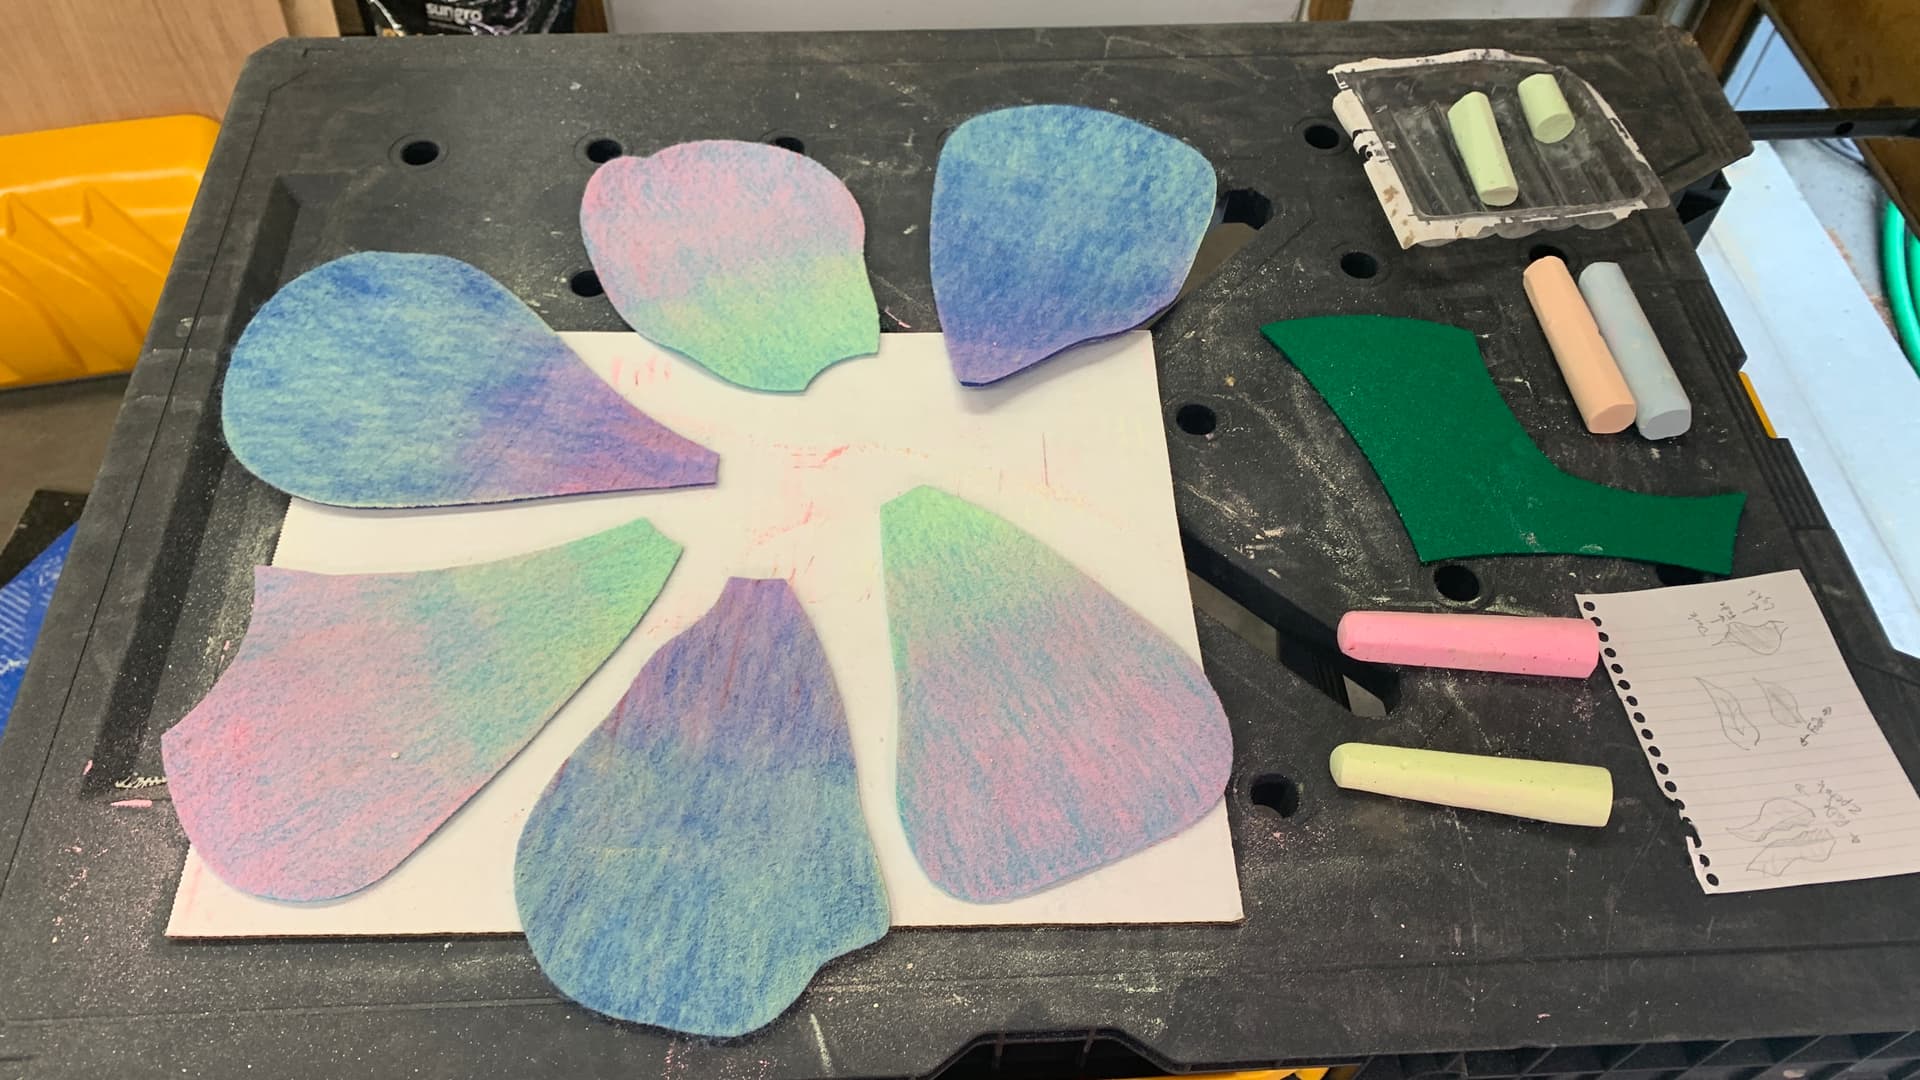
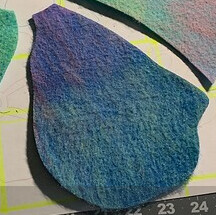
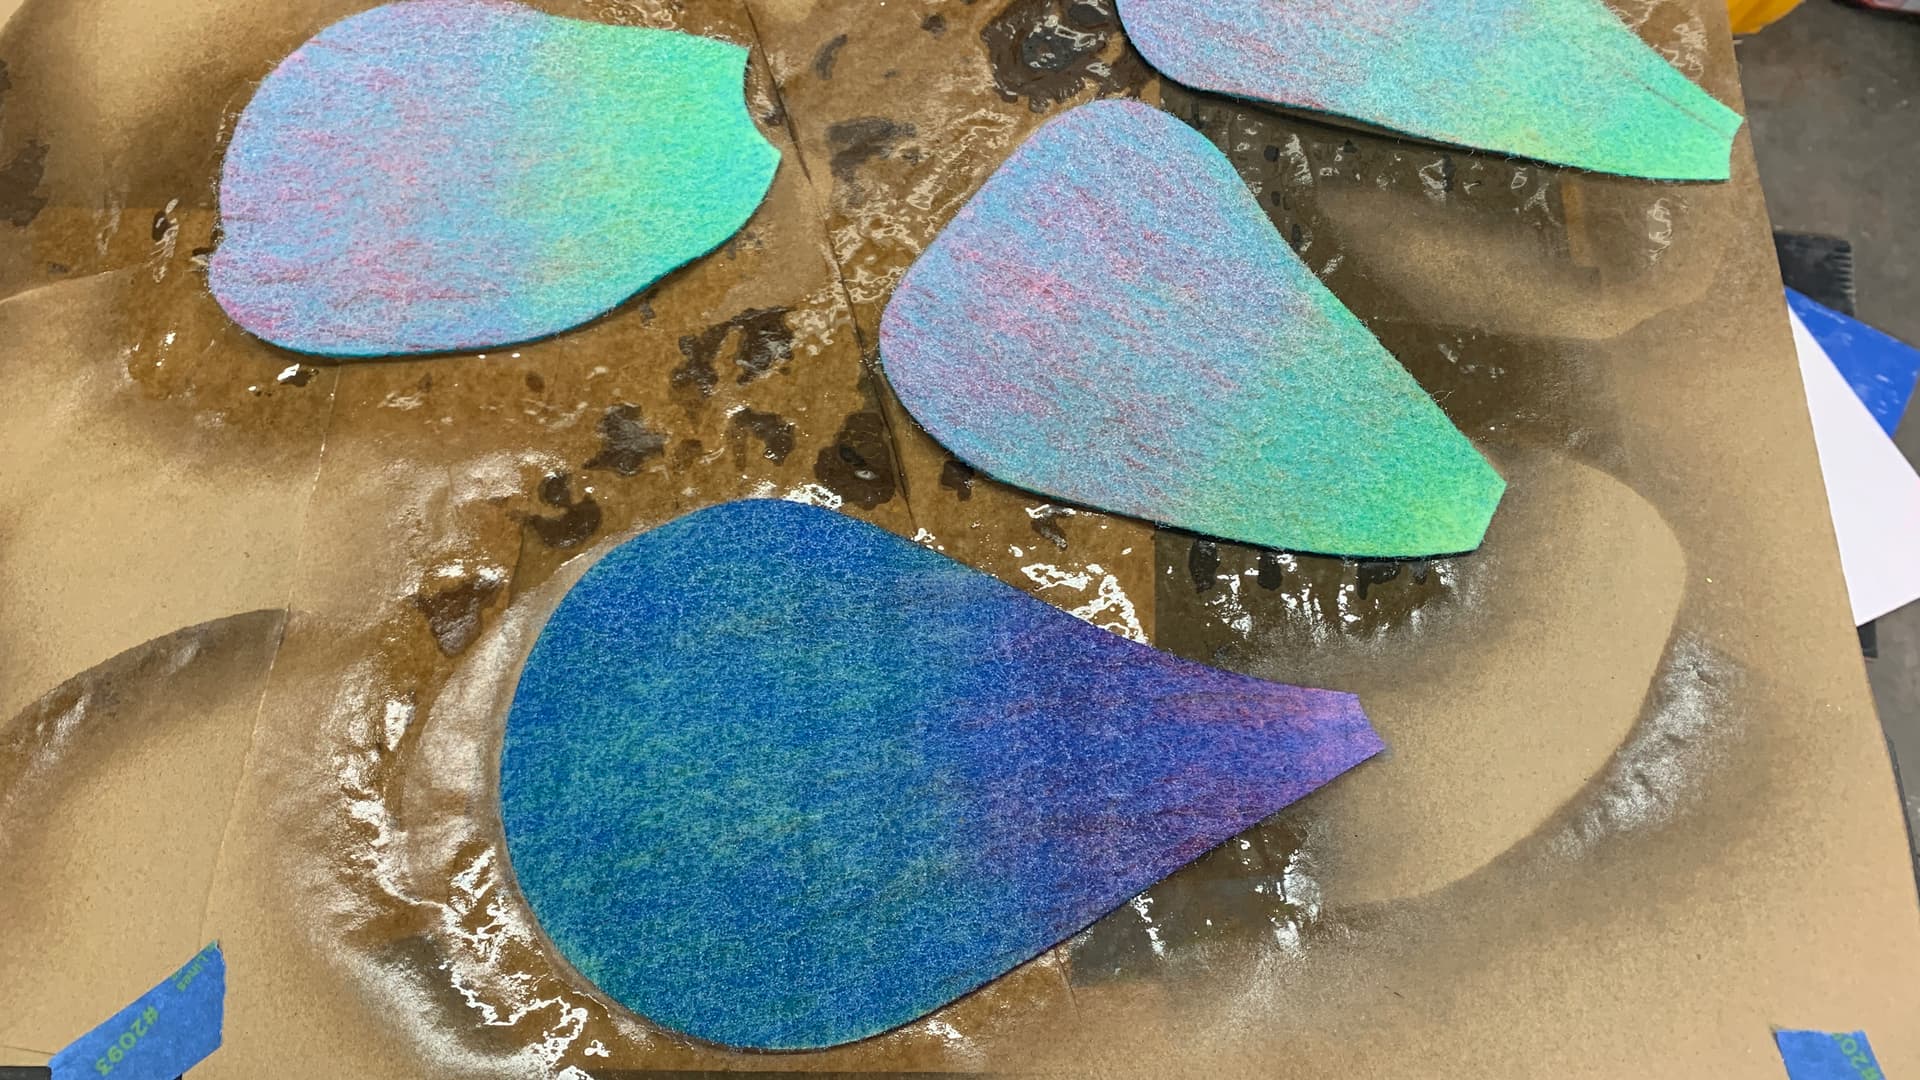
Wow, ya, that’s what I’m looking for. How about with clear coat over it.
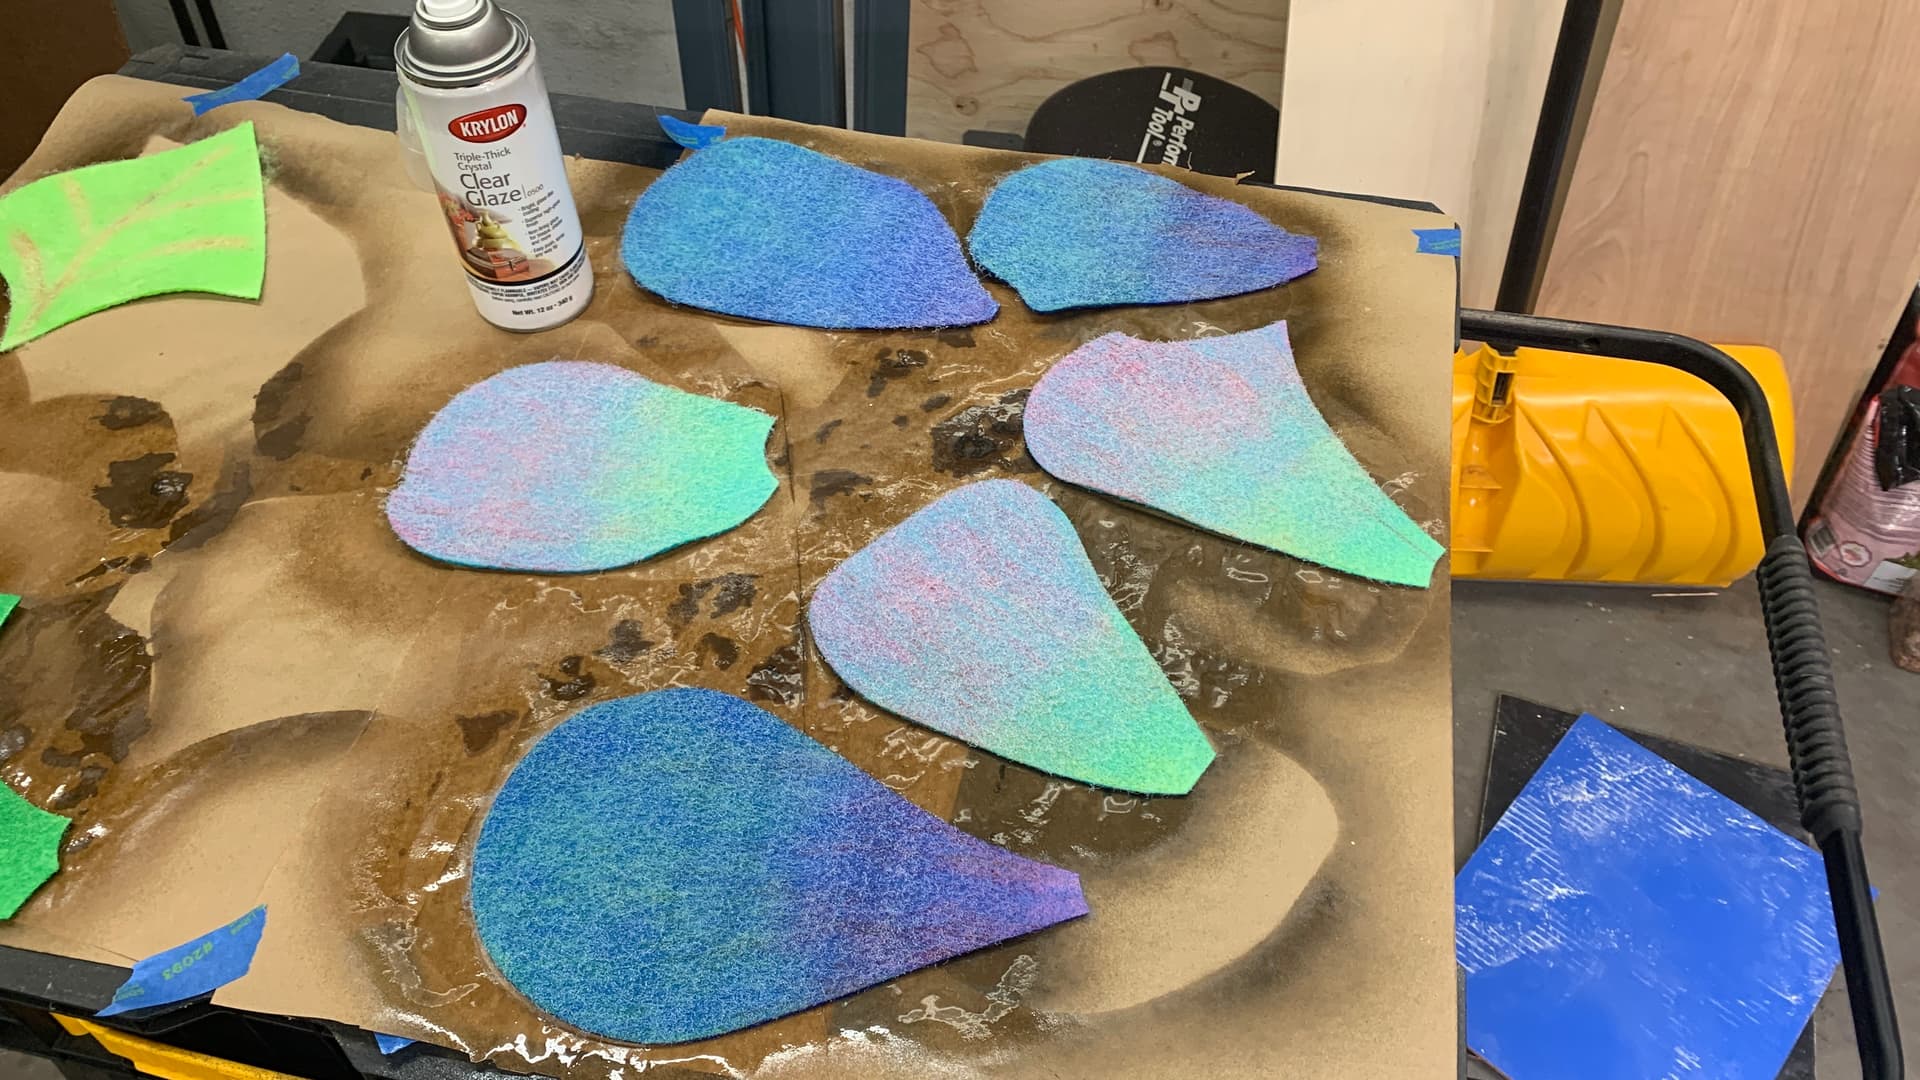
I gave it just one, heavy coat, and Ya, these are totally unique, and stunning.
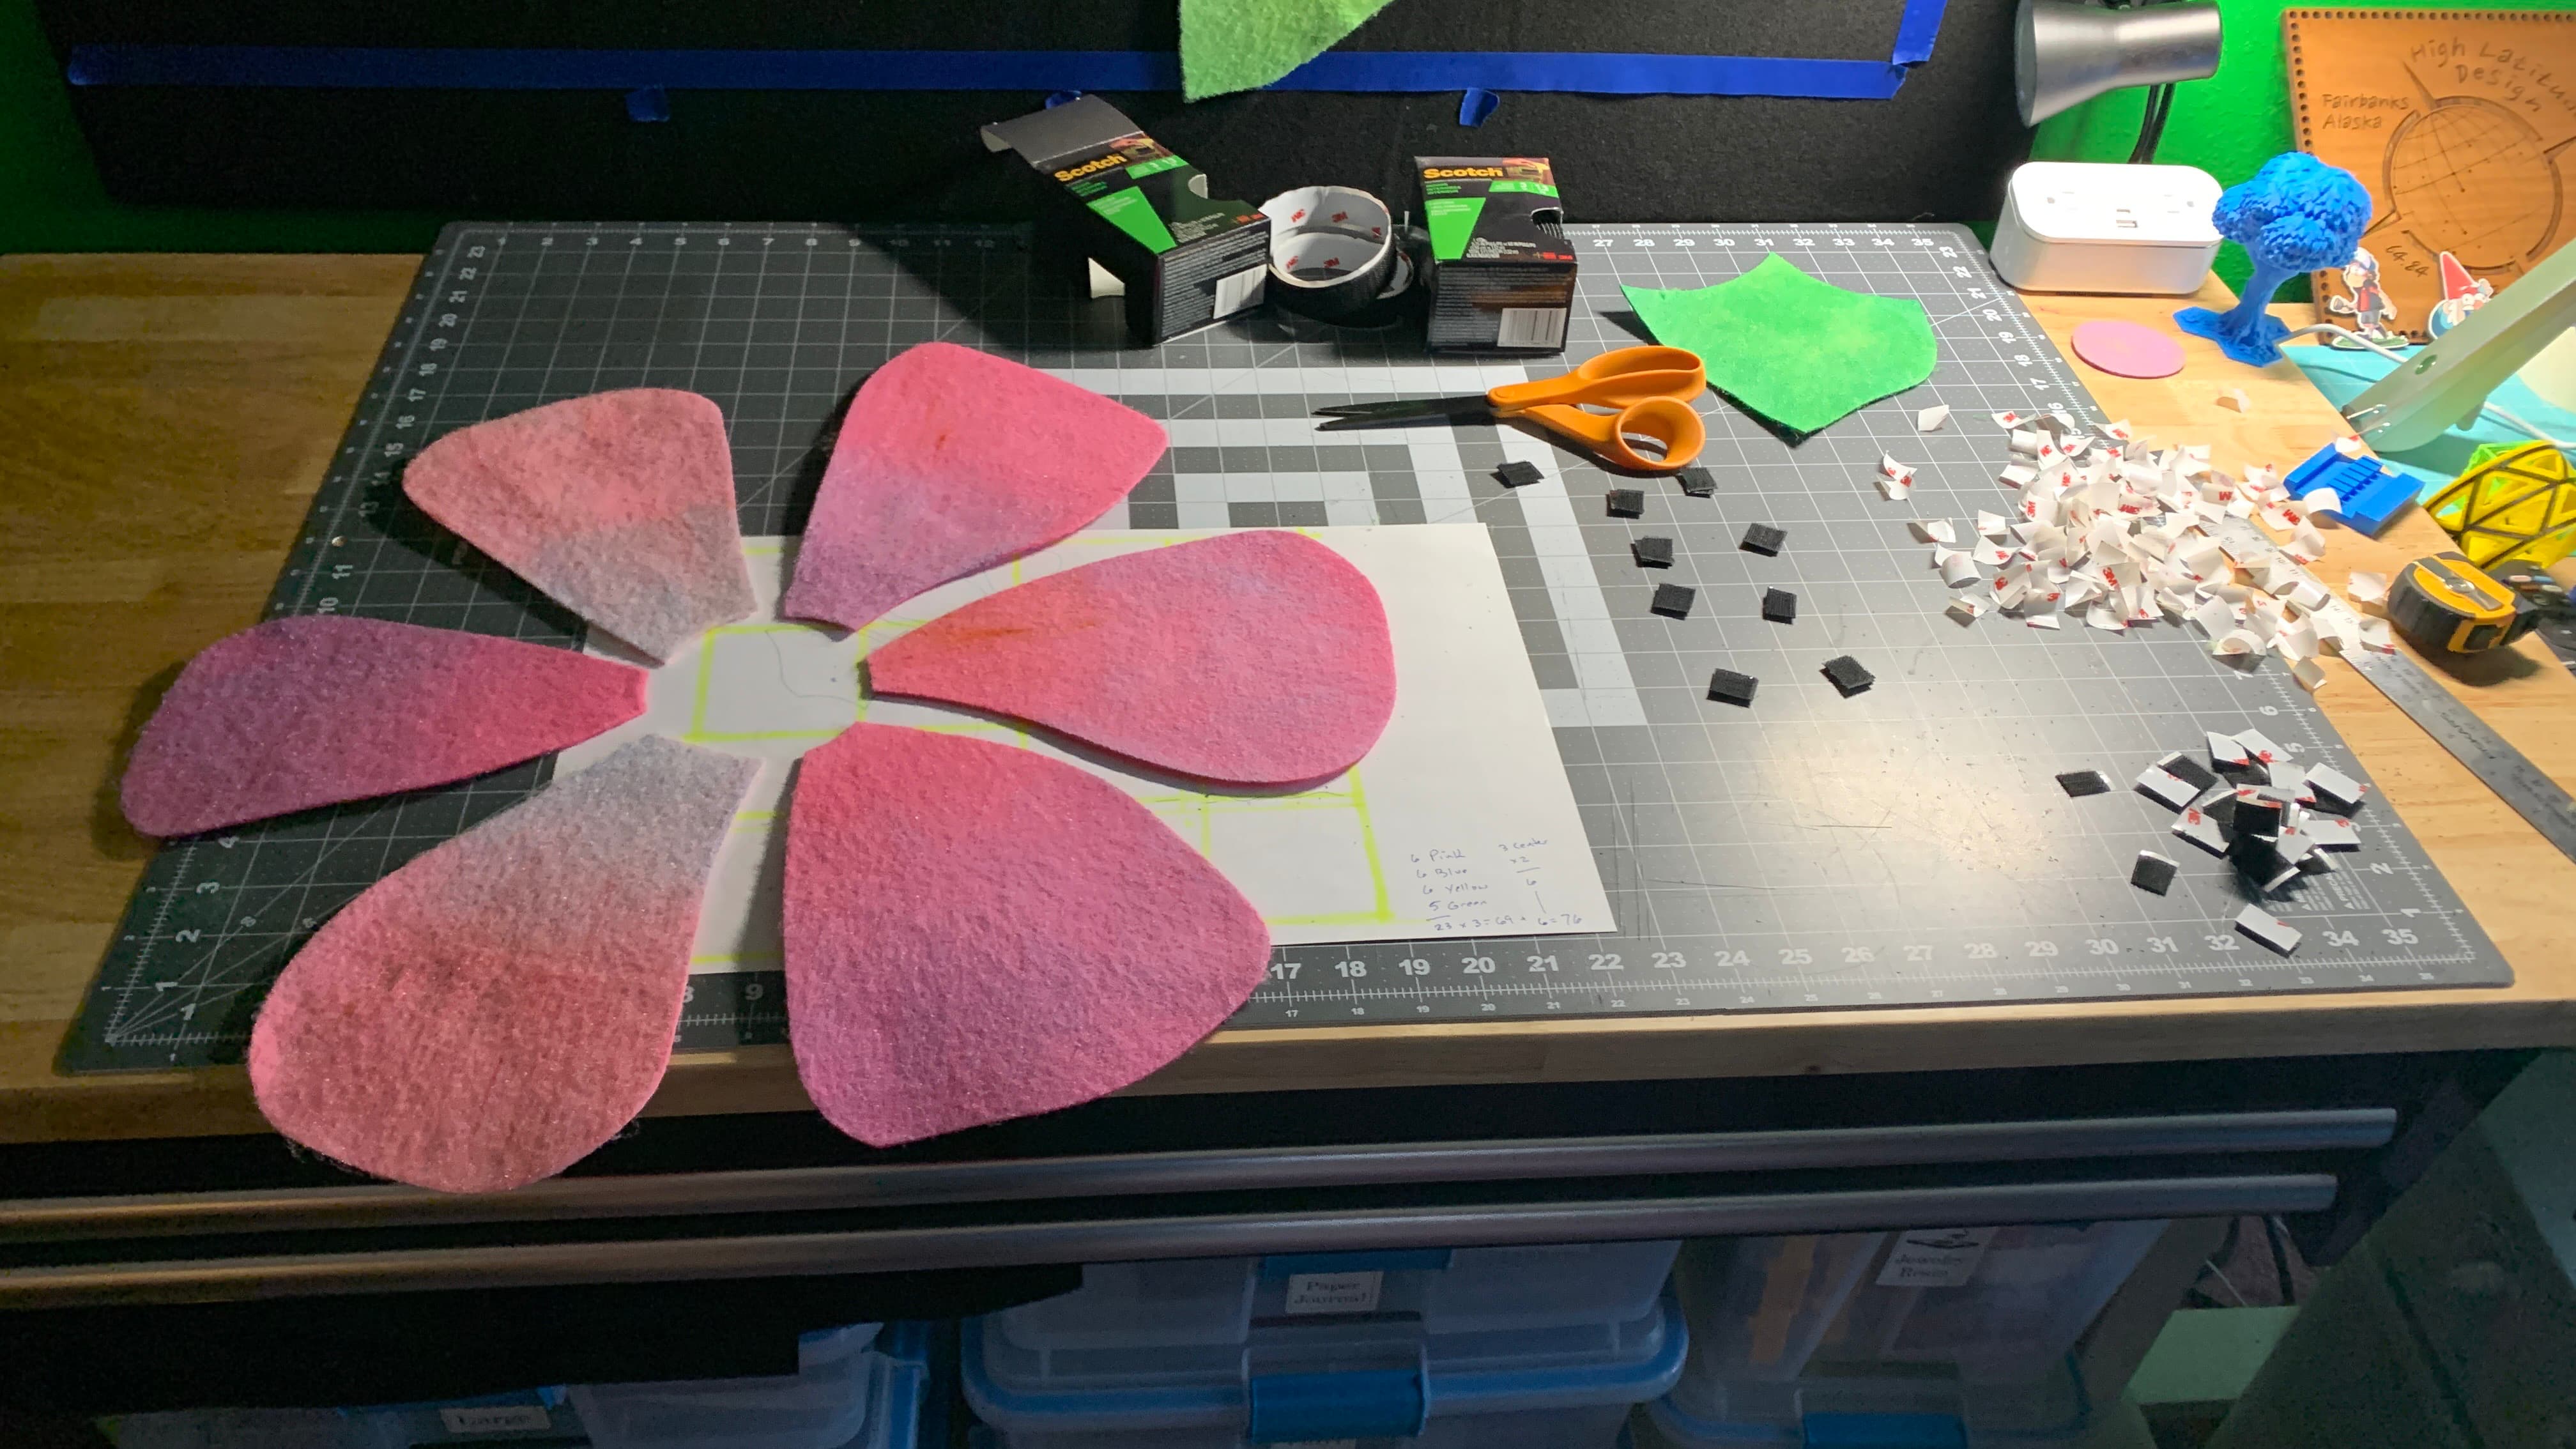
On to the pink flower - Again, two versions of pink, and I’m fading center outward, with alternating Blue and Red Chalk.
Shut up. These are beautiful, even before the clear coat.

Oh man, this could be really good…
Yup, I’m dumbfounded. And this is still a little wet.
When they dry they have a beautiful, soft, fading look & feel to them. And they are stiff(ish). but wrinkle up a little around the edges. I still haven’t figured out how to mount them. But I’m think about it.

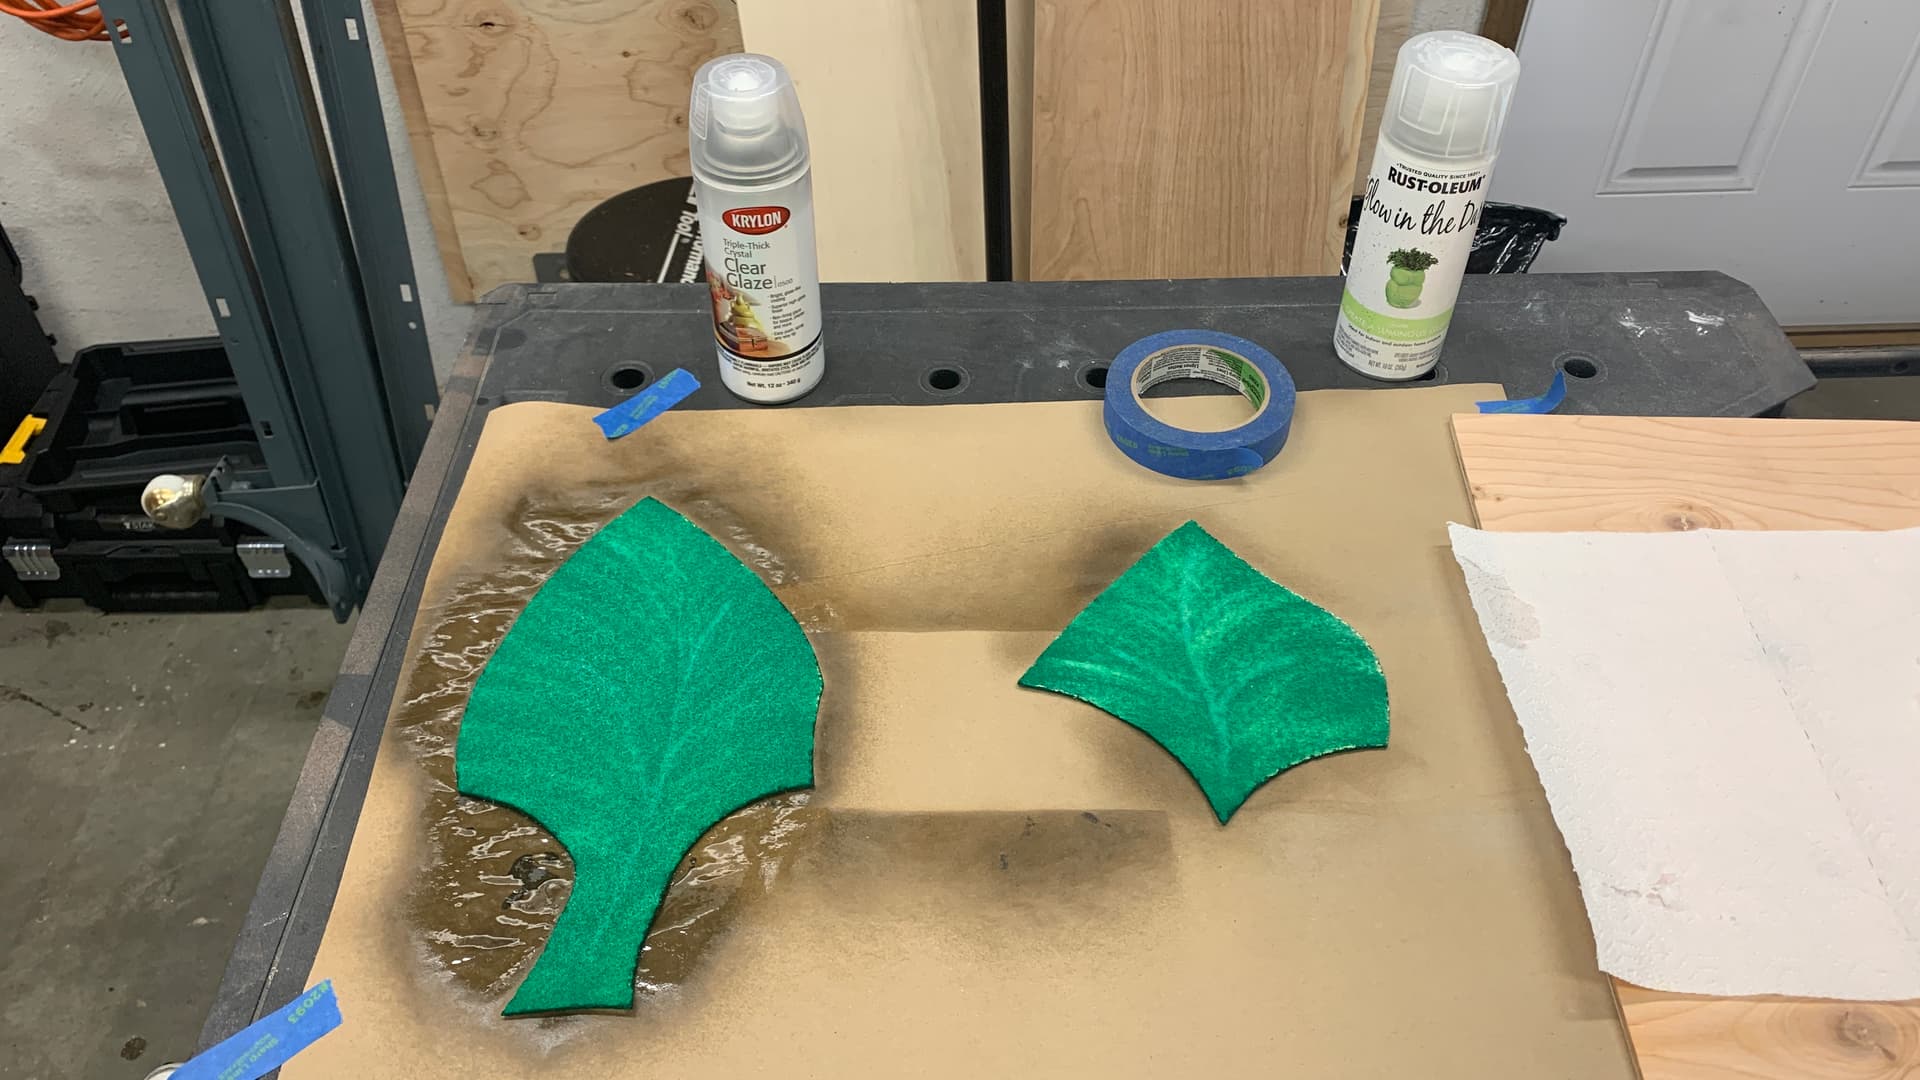
And of course, I need to redo the green ones, with lighter colored felt. Alternate fading some blue/yellow and some red/yellow. Boom -
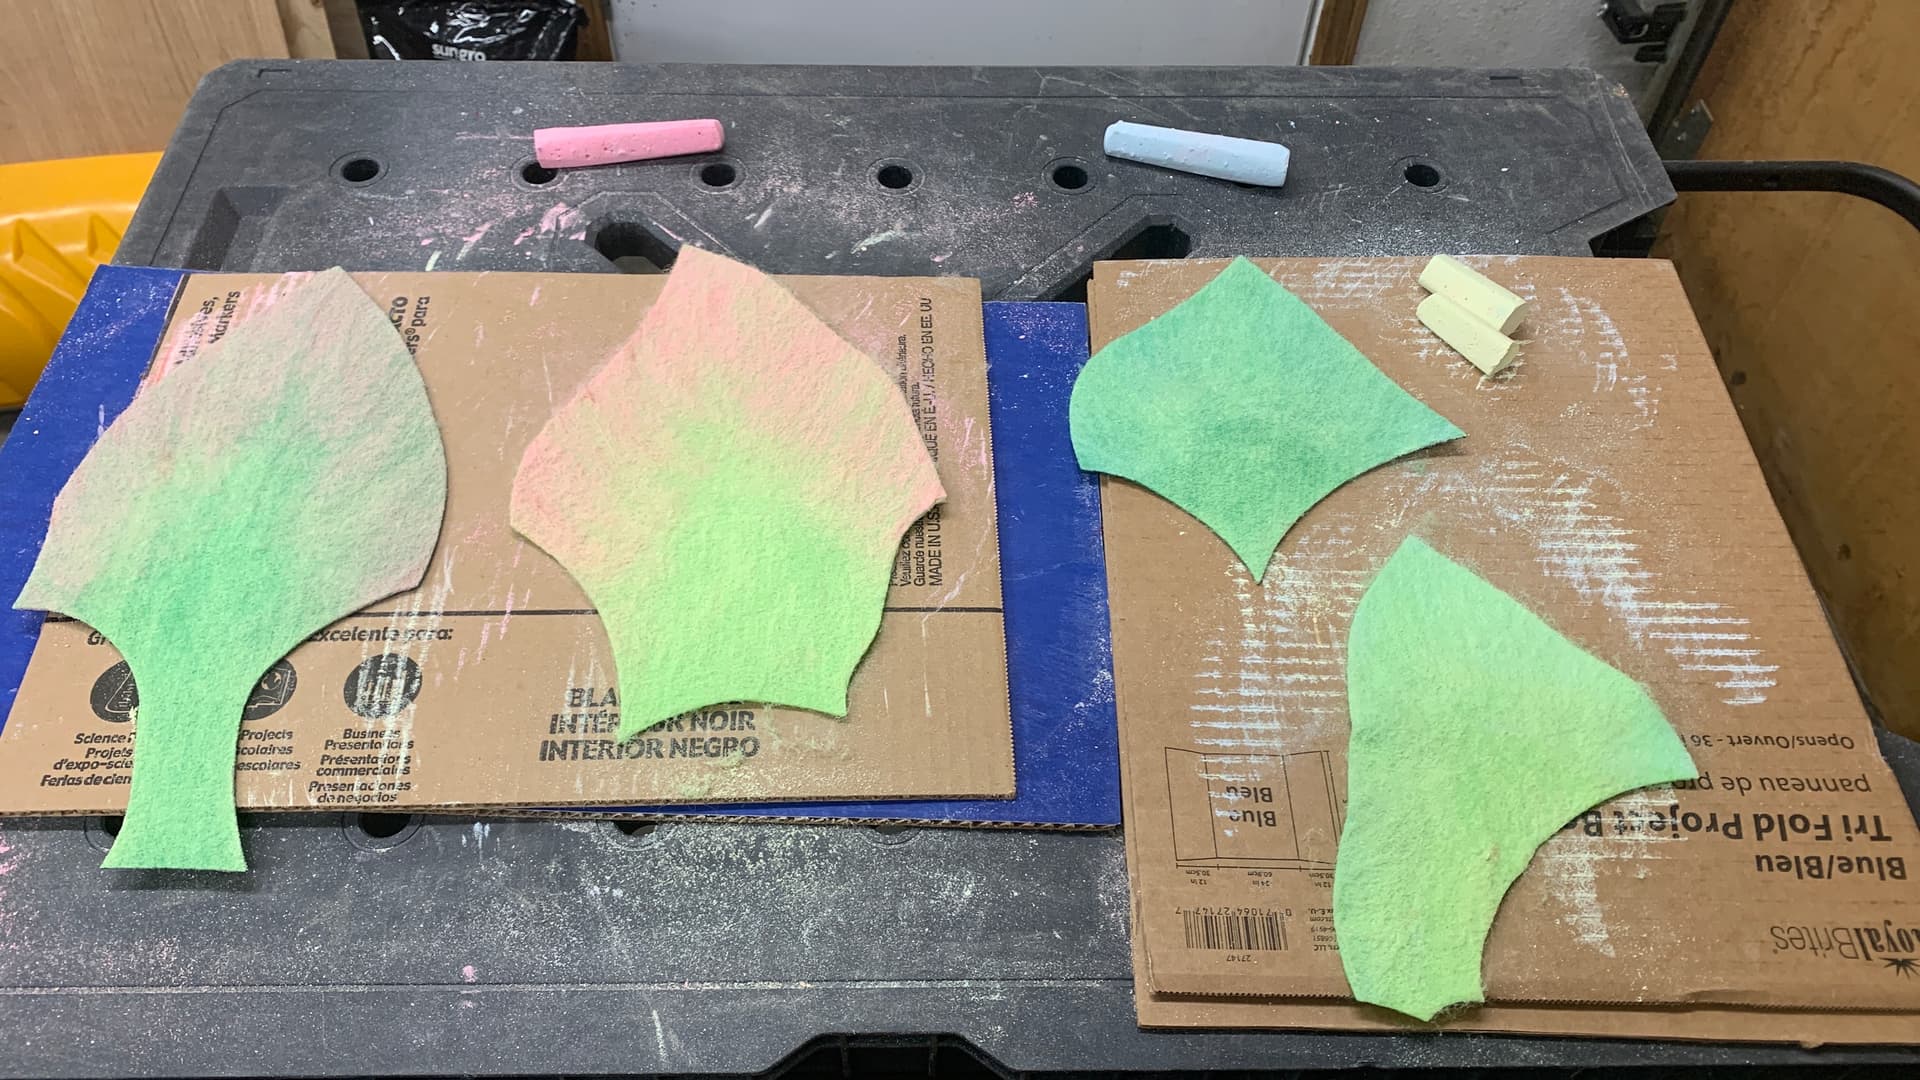
And some new violet centers. The originals were dark green and not good. This is much better. ![]()
To quote a favorite YouTuber - Let us Spray.
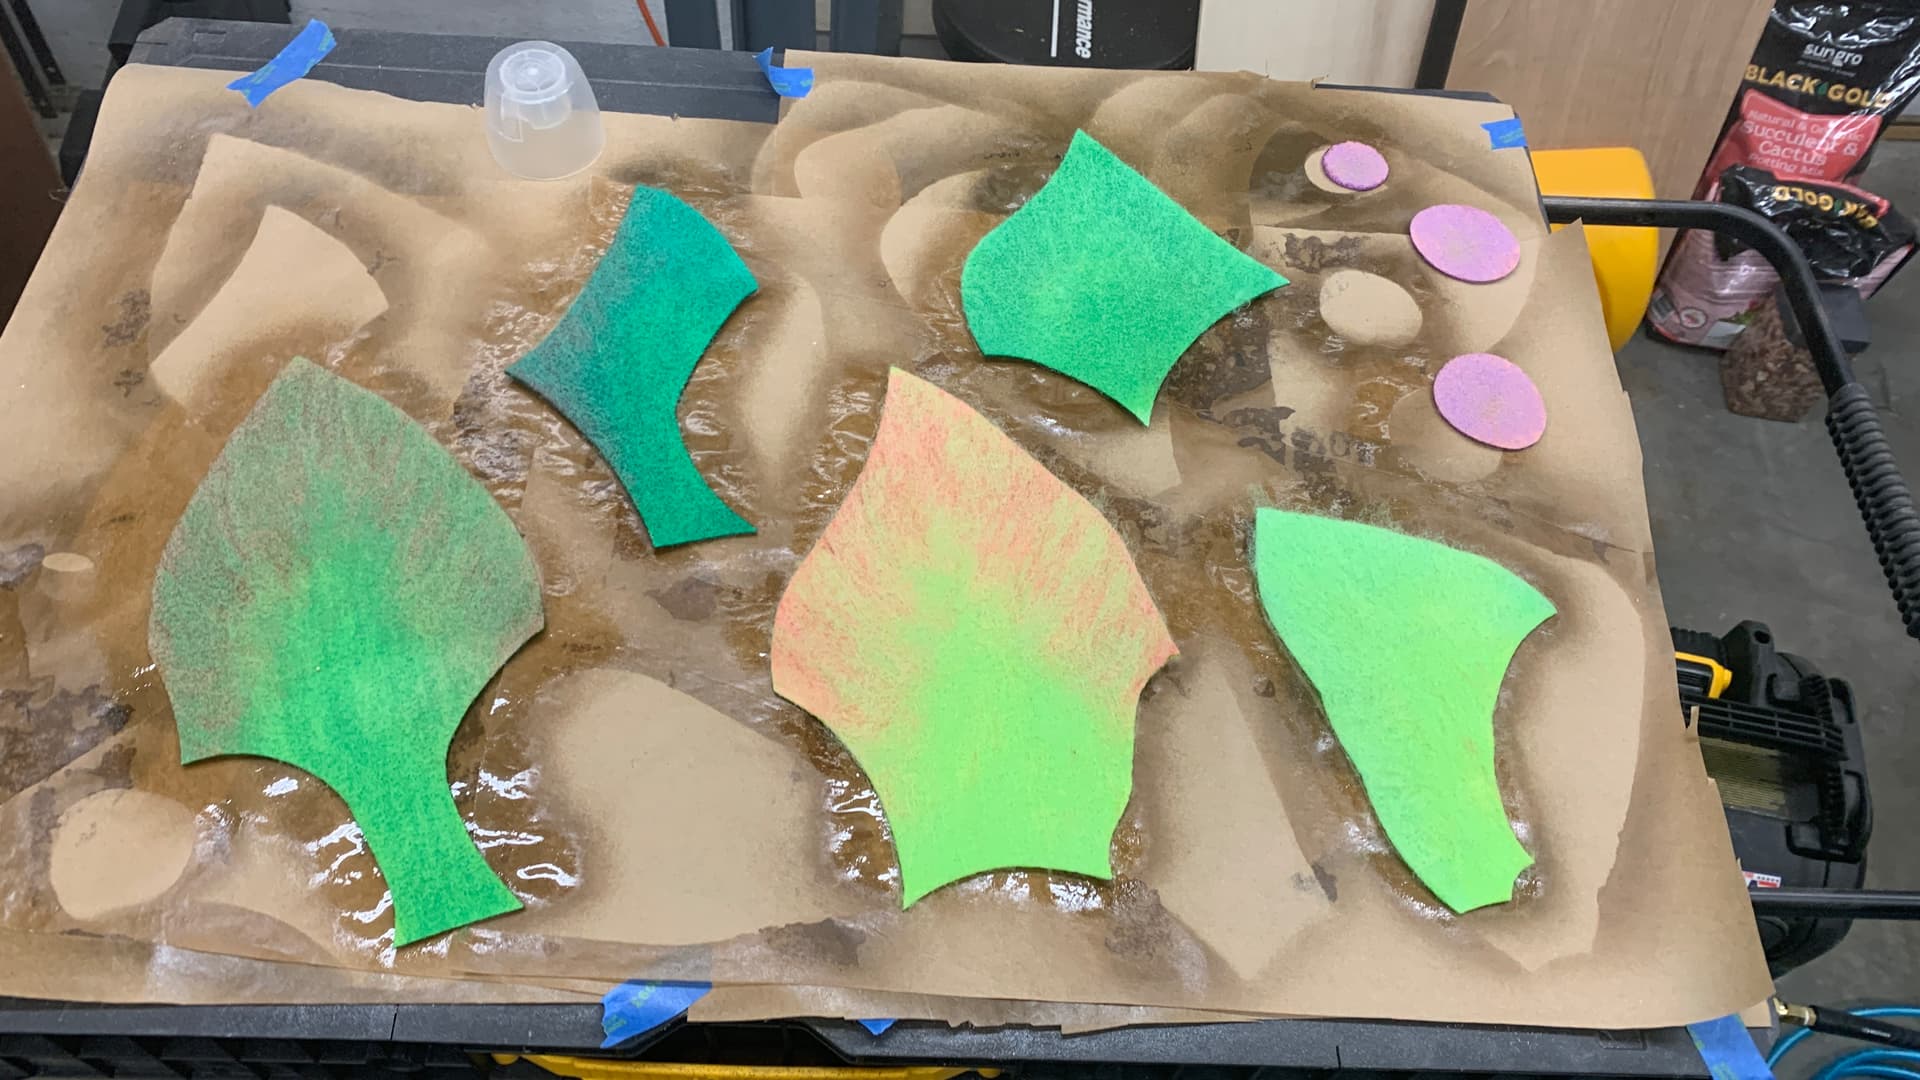
This is going to be sweet. I’m letting these dry overnight, cause that ‘Triple Thick Crystal Clear Glaze’, sprayed on liberally, is going to take a while to dry.
Mean time, let’s assess the damage -
I think that’s 15 sheets of felt +/-. I try to restock at Joanns - every couple months they do a BOGO sale just before the next shipment comes in. But even at the full price of $3 per sheet (average), it’s still less than $50. Plus half a can of clear coat, and some $8 sidewalk chalk. Not bad.
Phew - Are you still with me? It’s about to get good, hang in there…
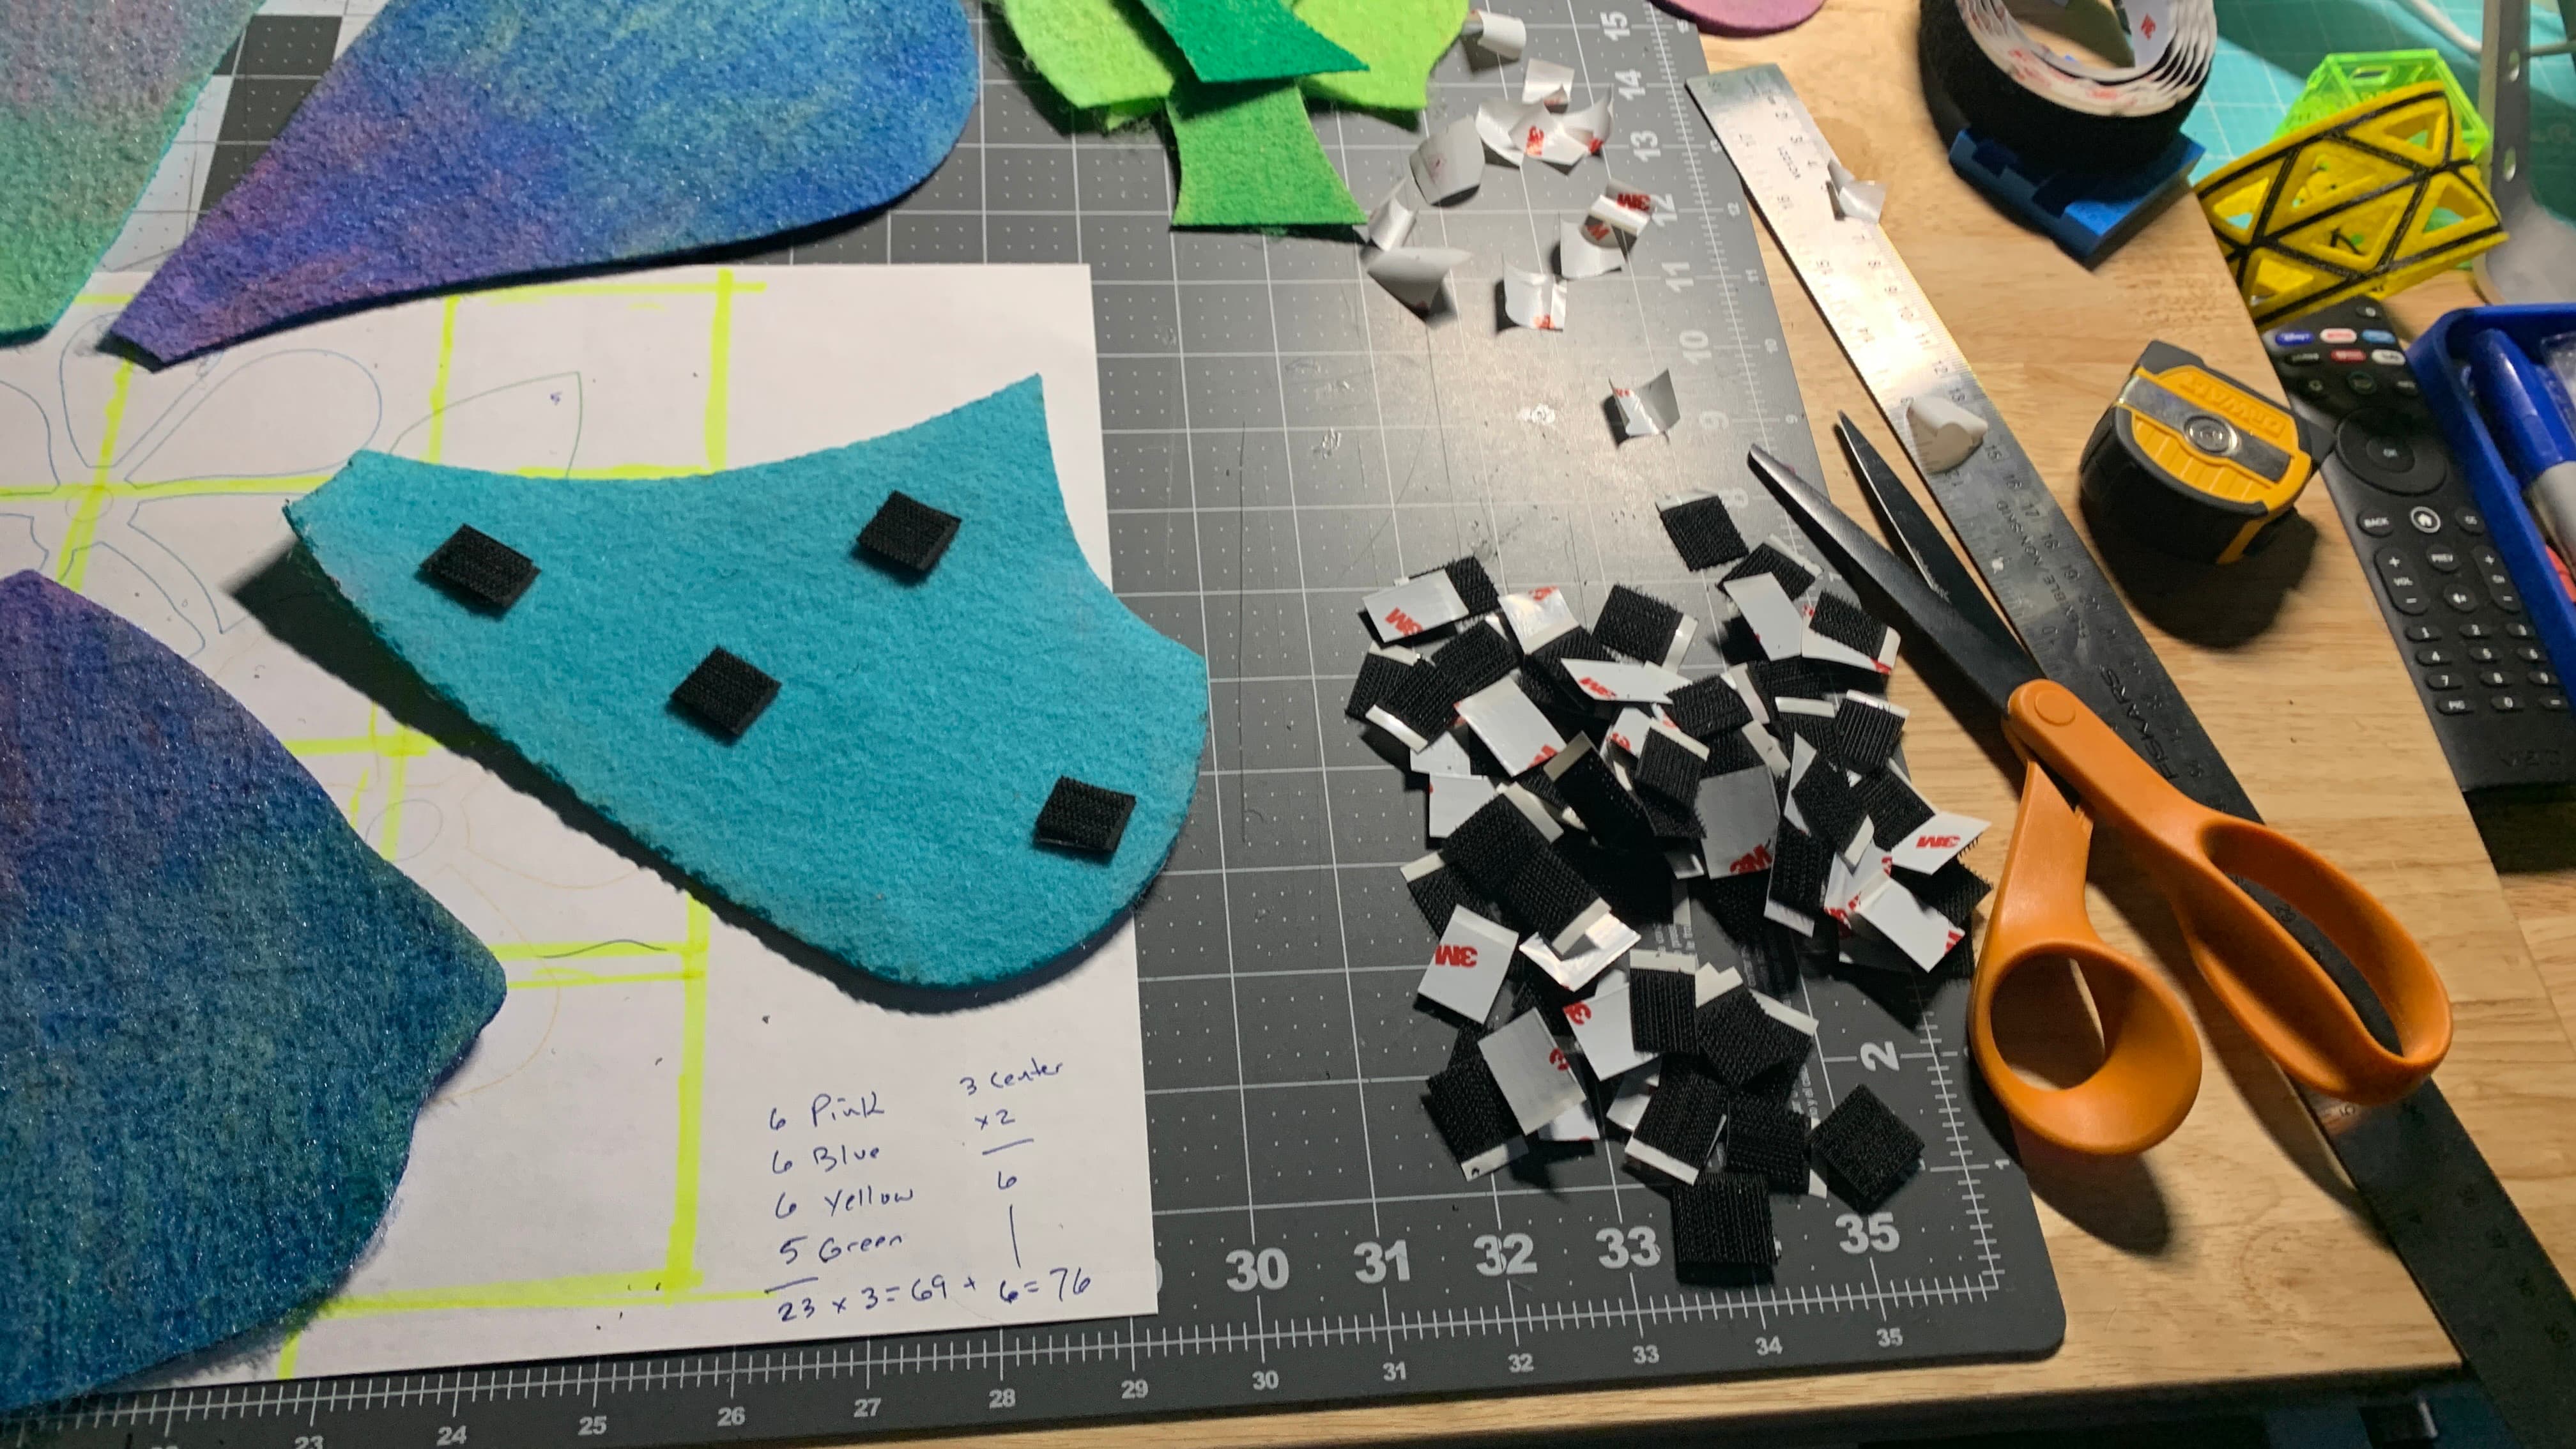
It’s the next day, so let’s figure out how to mount these pieces. I would also note, with my air compressor, I blew off the back of each piece, which got rid of a bunch of loose chalk dust before bringing them into the house.
Now, My first inclination is to glue them onto something. I would probably use black foam core if I had a sheet that big. But, I do have a 48" sheet of felt-on-plywood over my assembly desk from a previous felt project. And I could double velcro the pieces on.
That works for me. I’m gridding out the wall fabric, and the drawing, so I know roughly where to put the pieces as I get started.
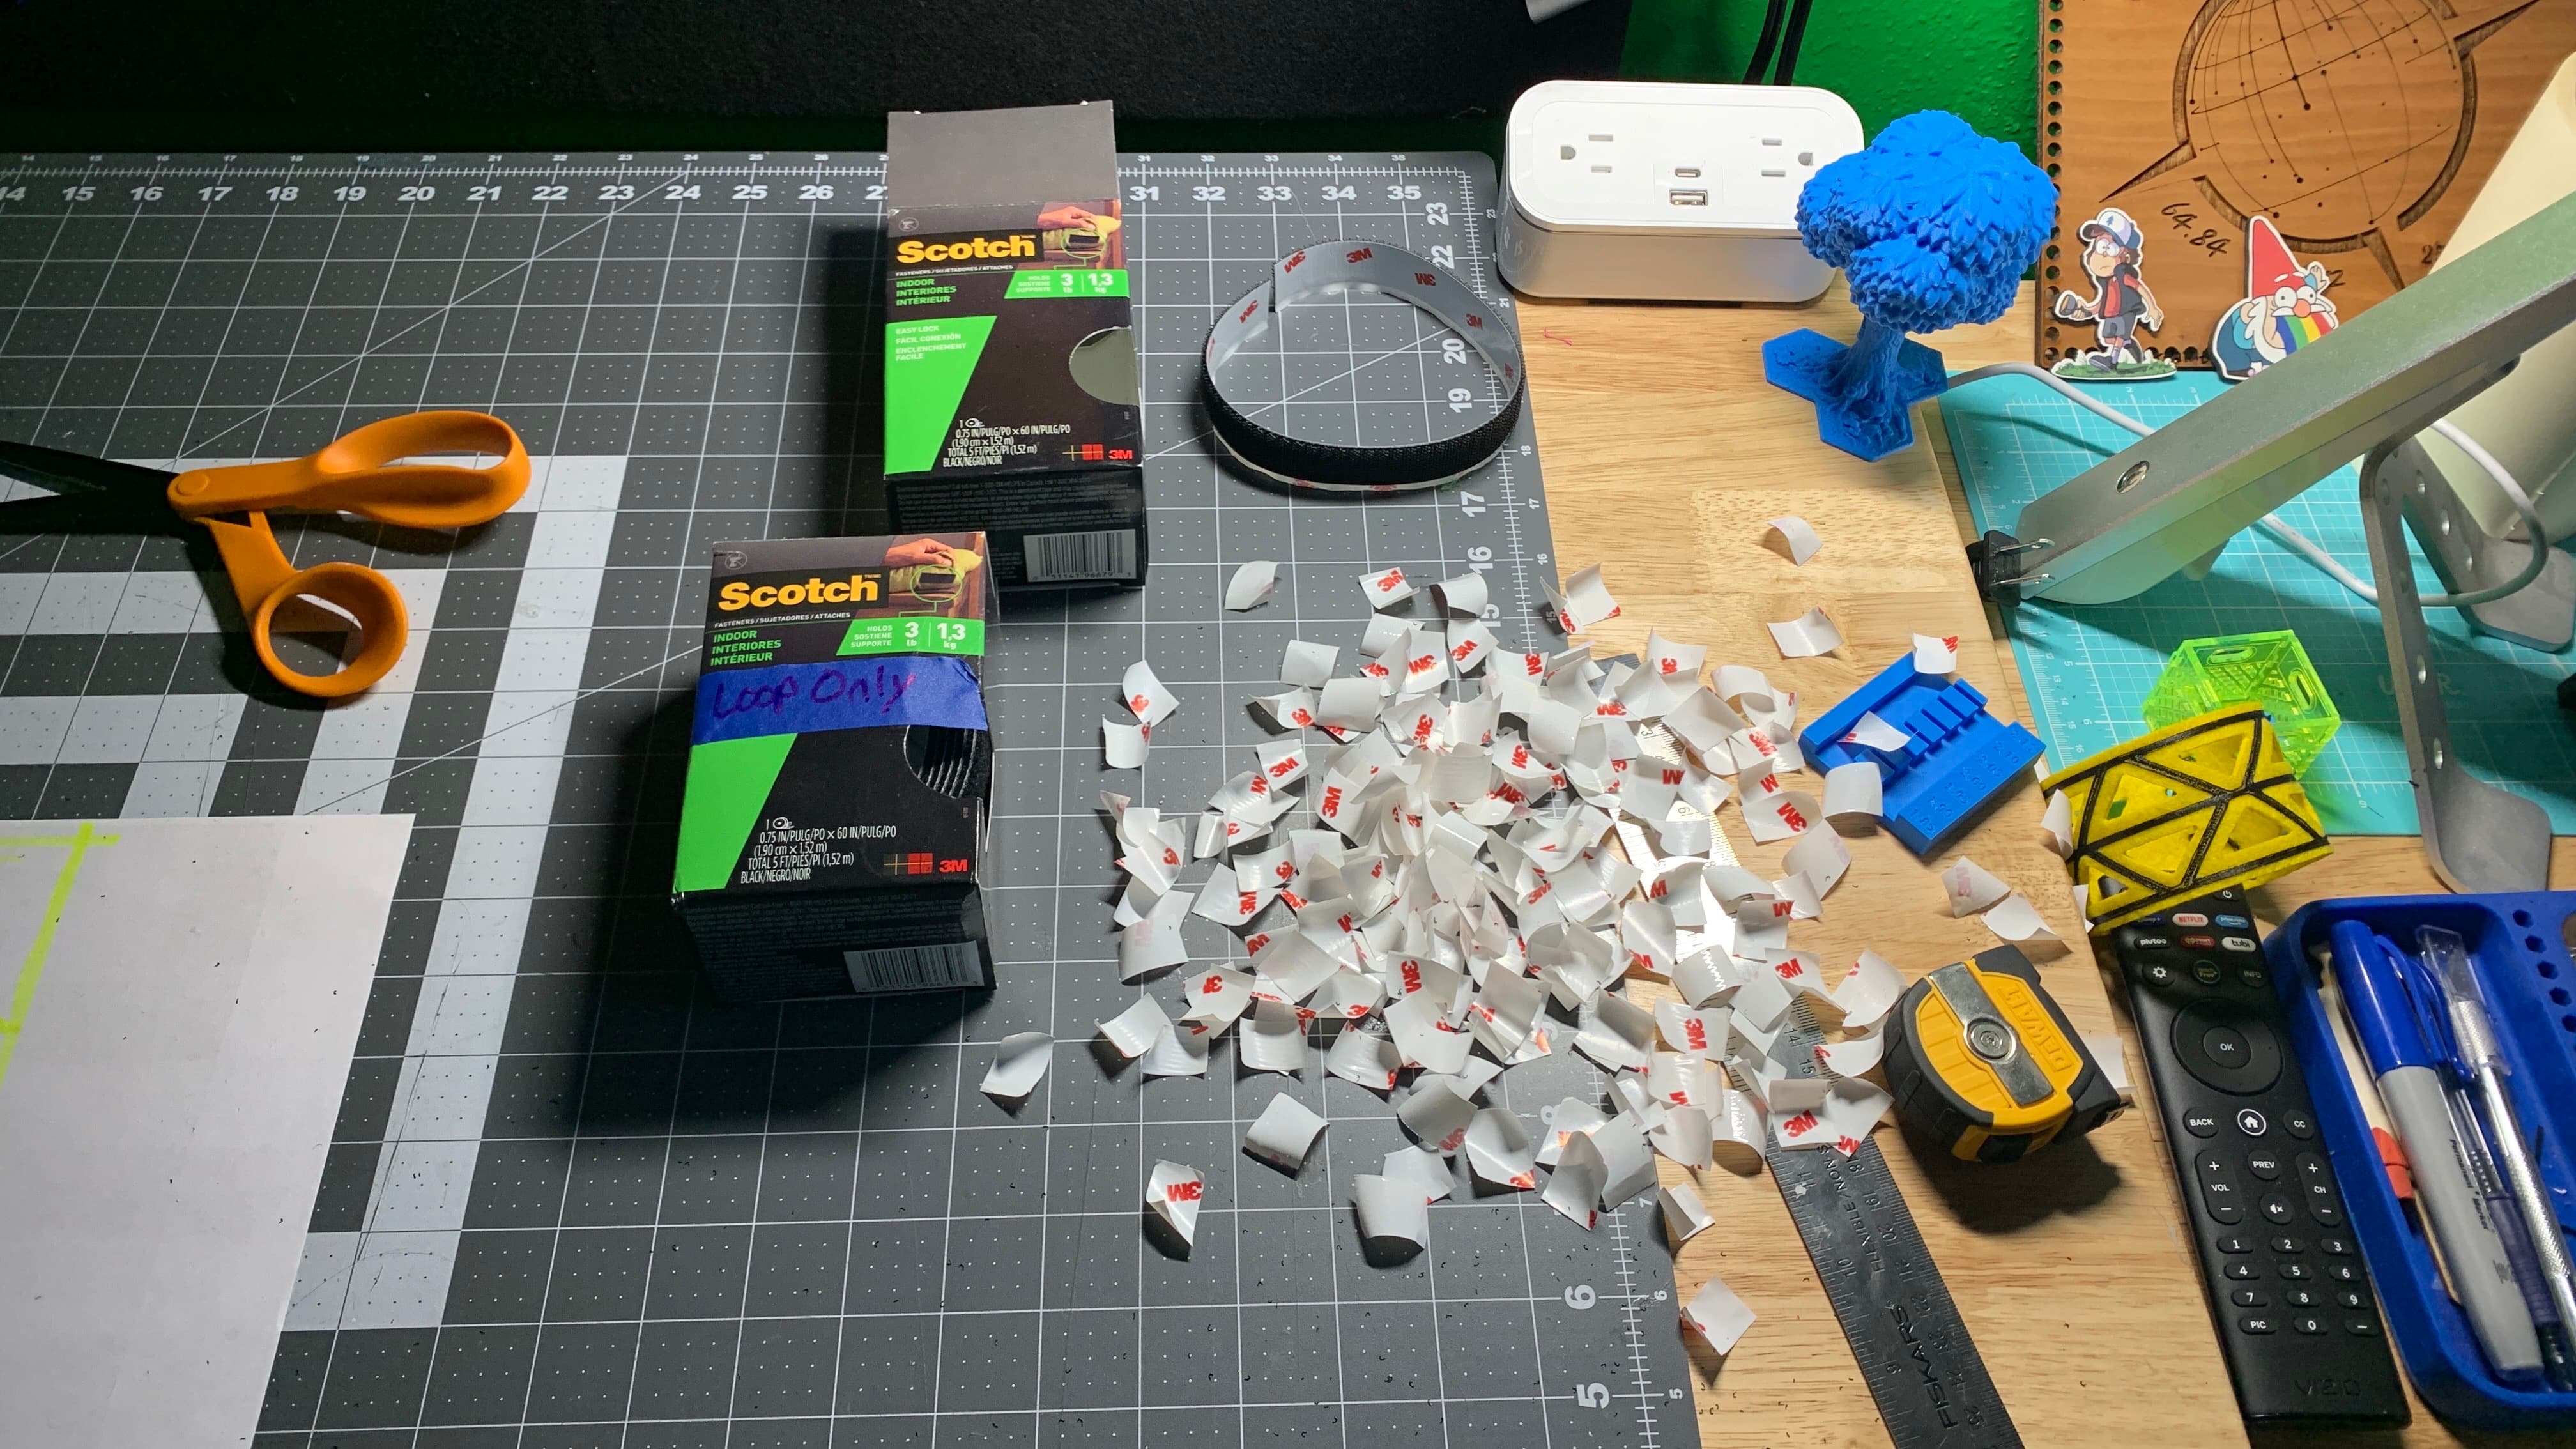
I’m cutting just the ‘Hook’ side of velcro strips into pieces. I’ll stick them back to back so the felt flower petals should stick well to the felt wall board. Test with a failed green piece.
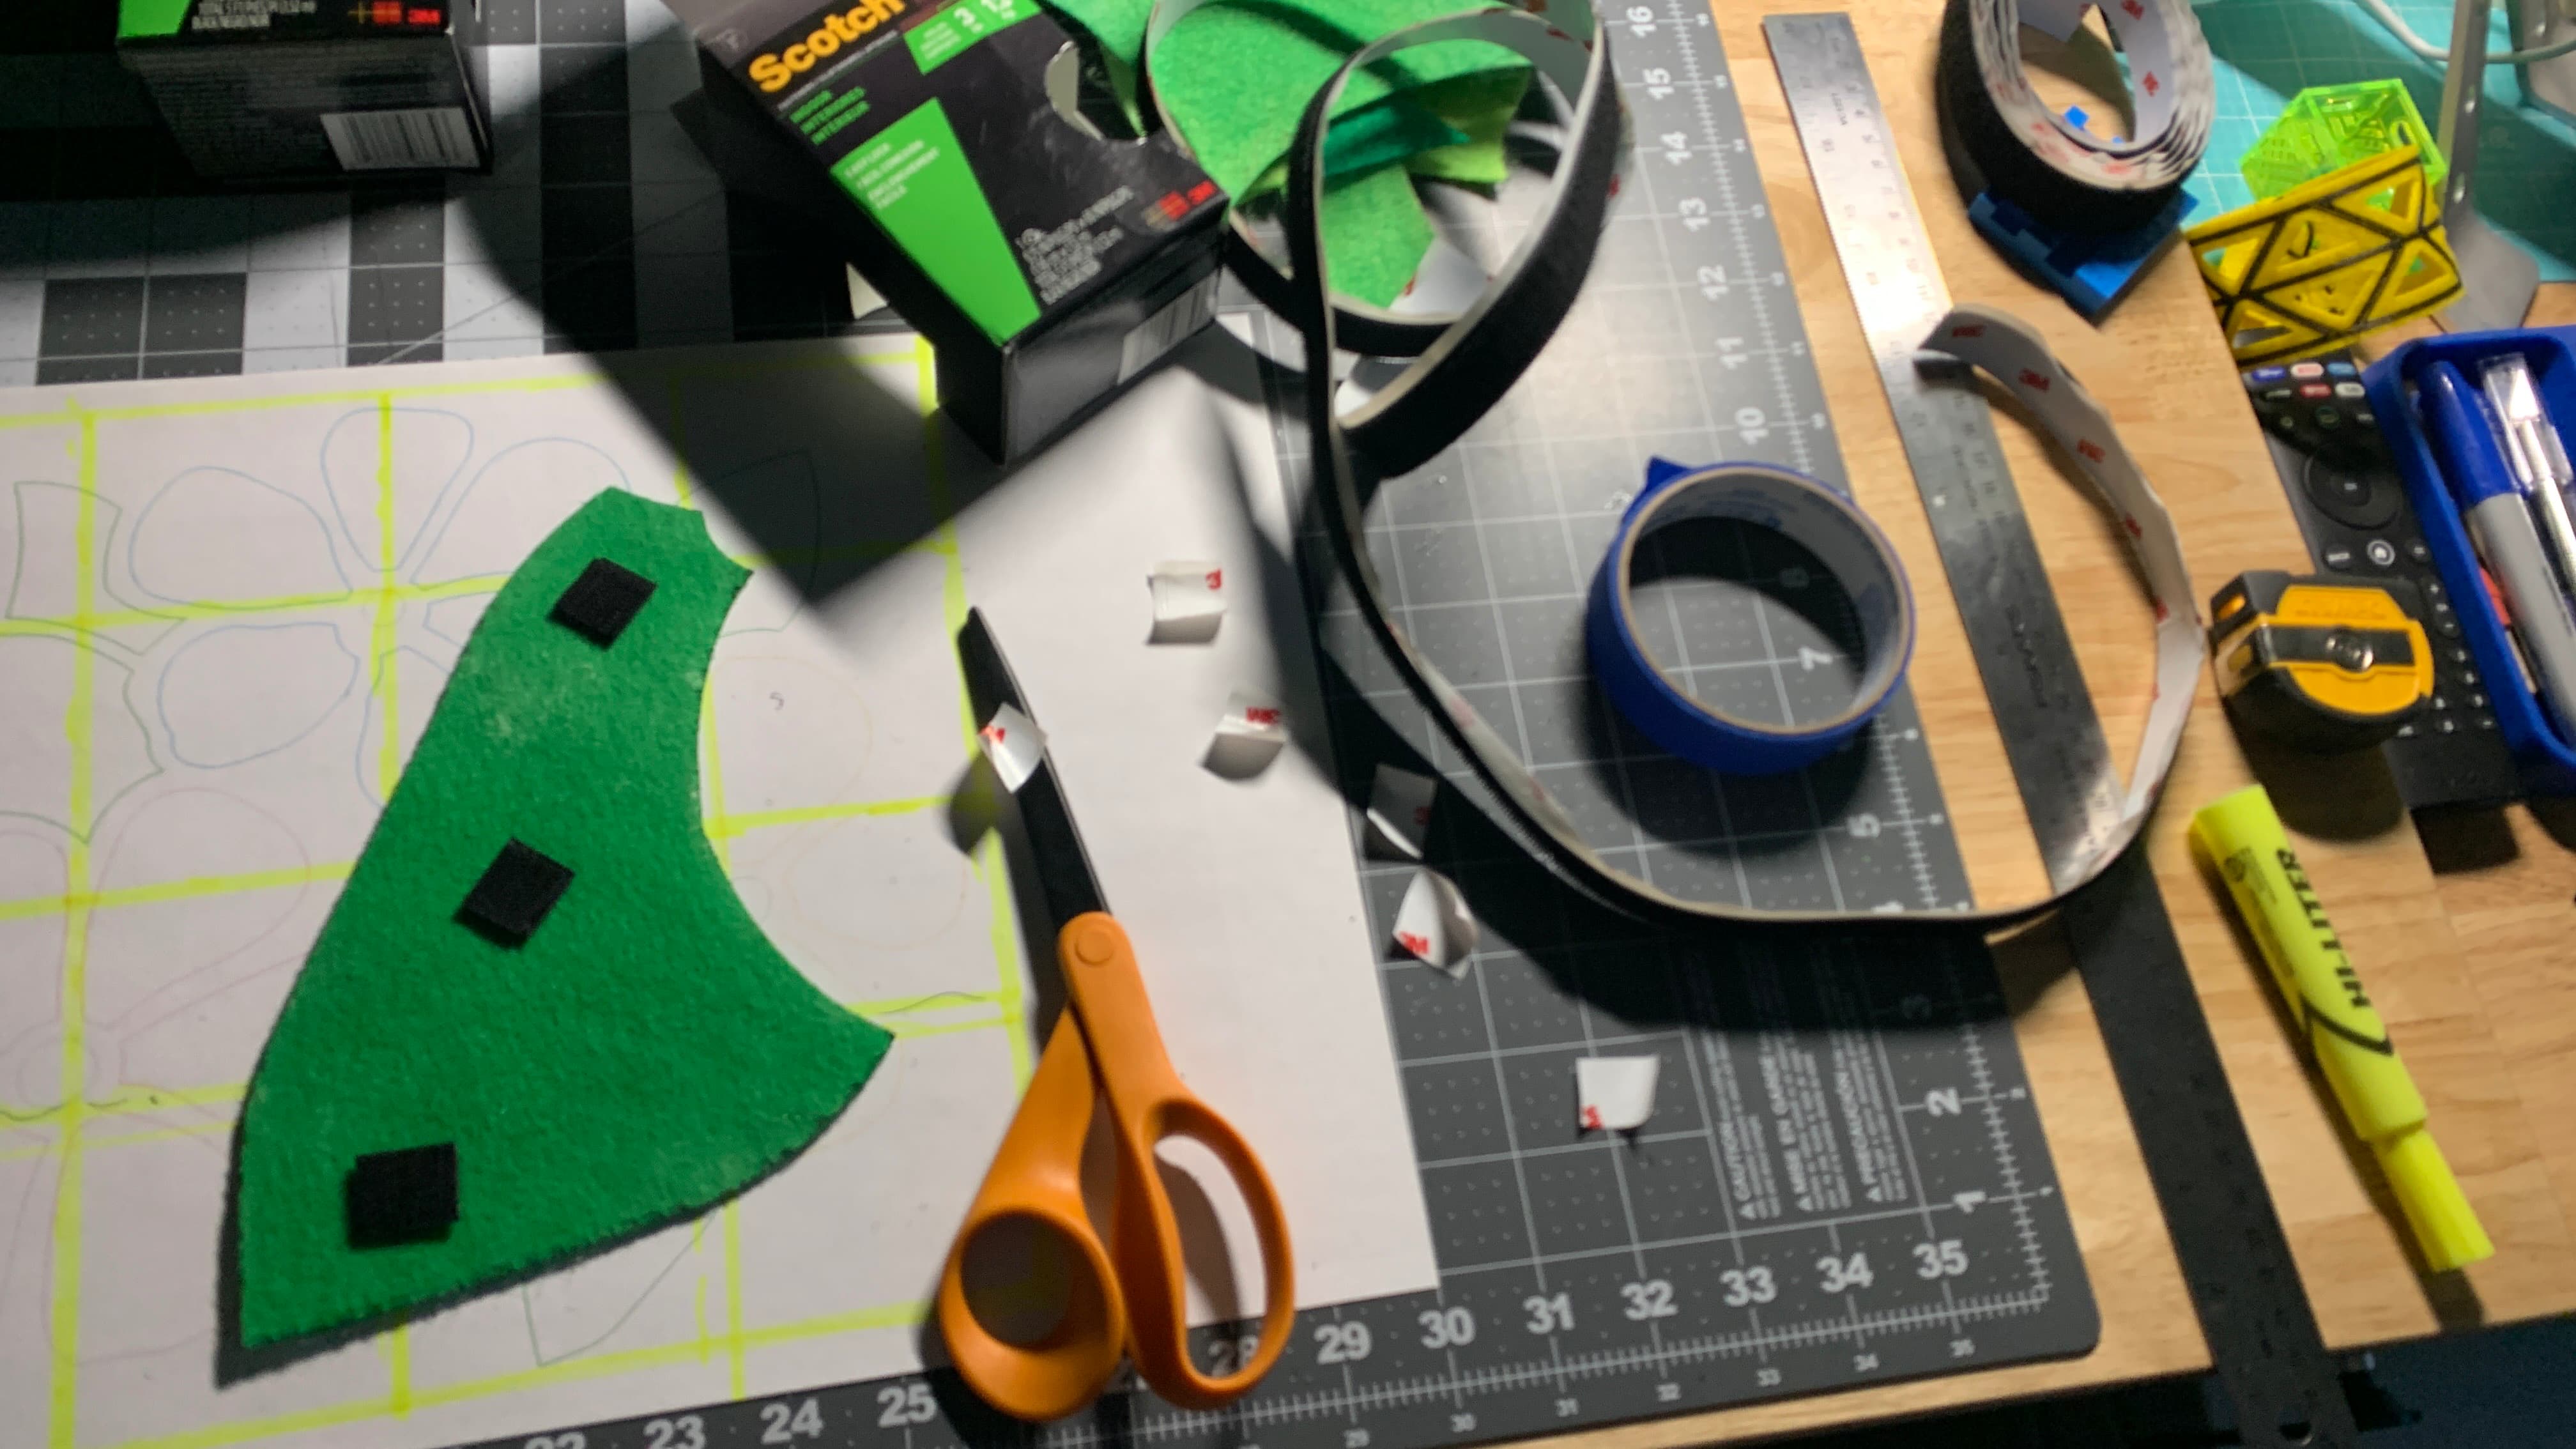
Yup, sticks well.
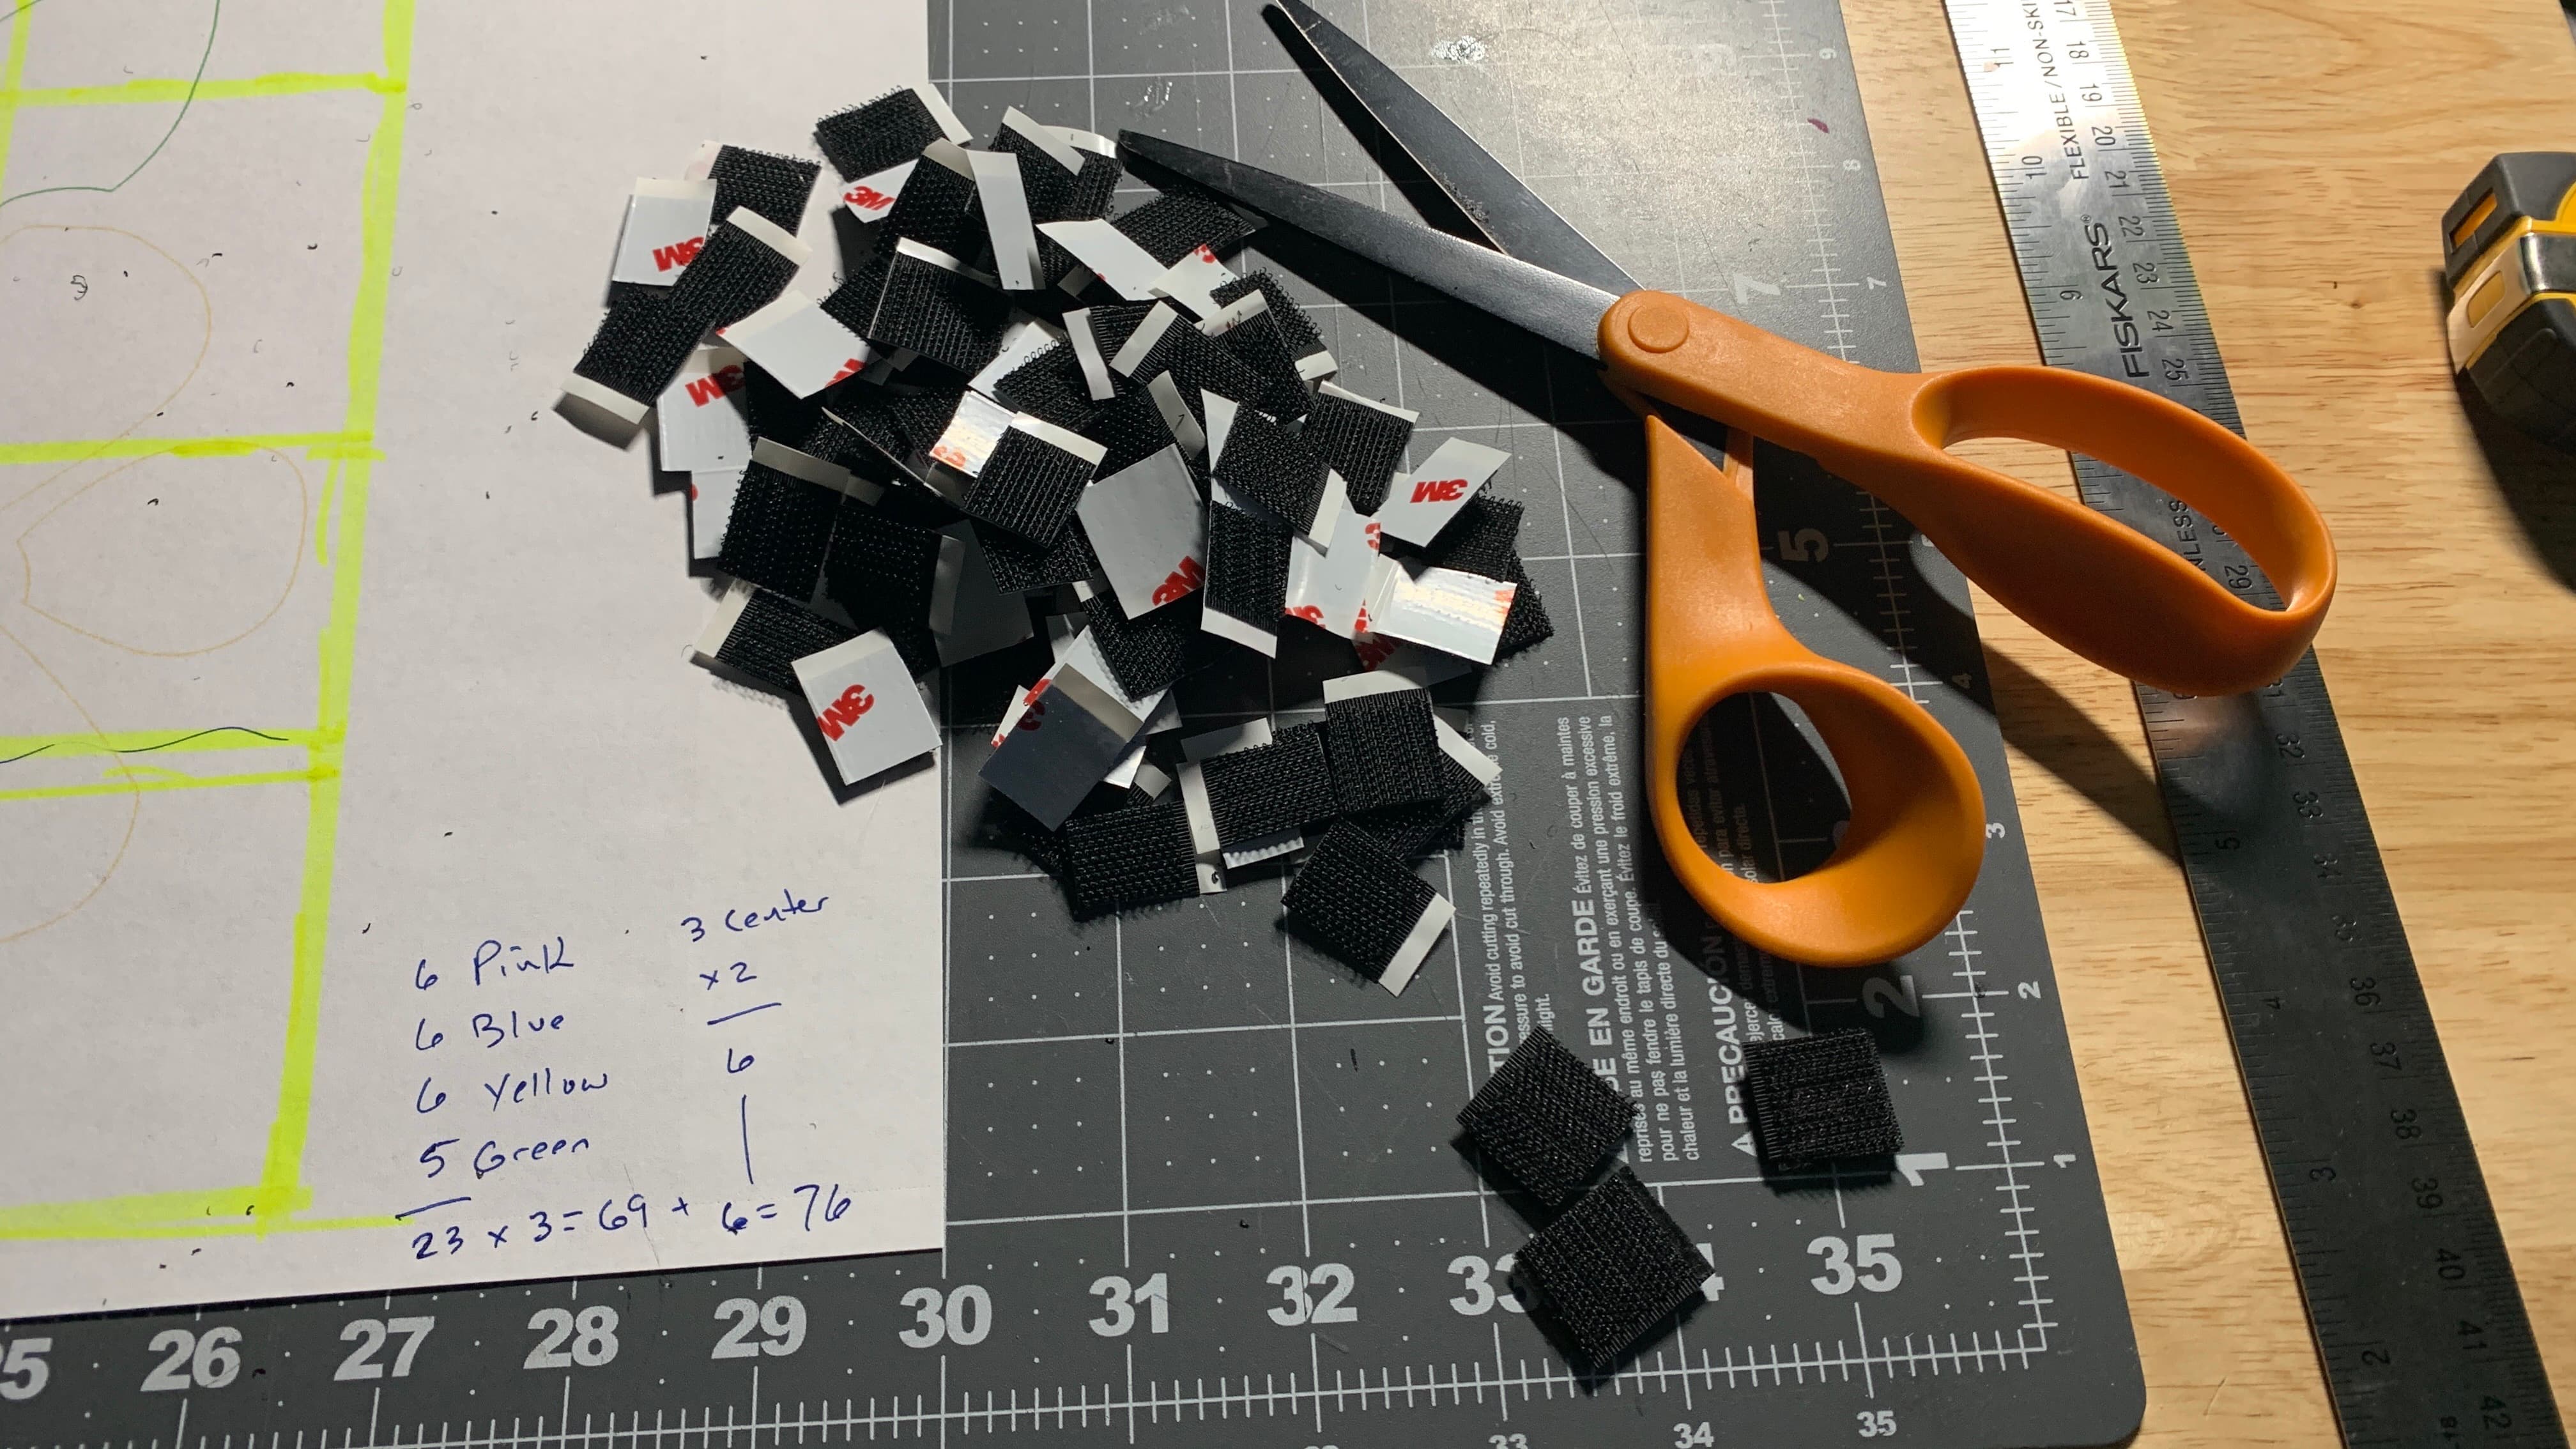
Let’s see, three or four squares of velcro, (2 sided) per flower piece, times 26 pieces. Ya, glad I’ve got two full boxes of velcro on hand. That’s a lot like 180 cut pieces. We’ll start with 100 and see how it goes.
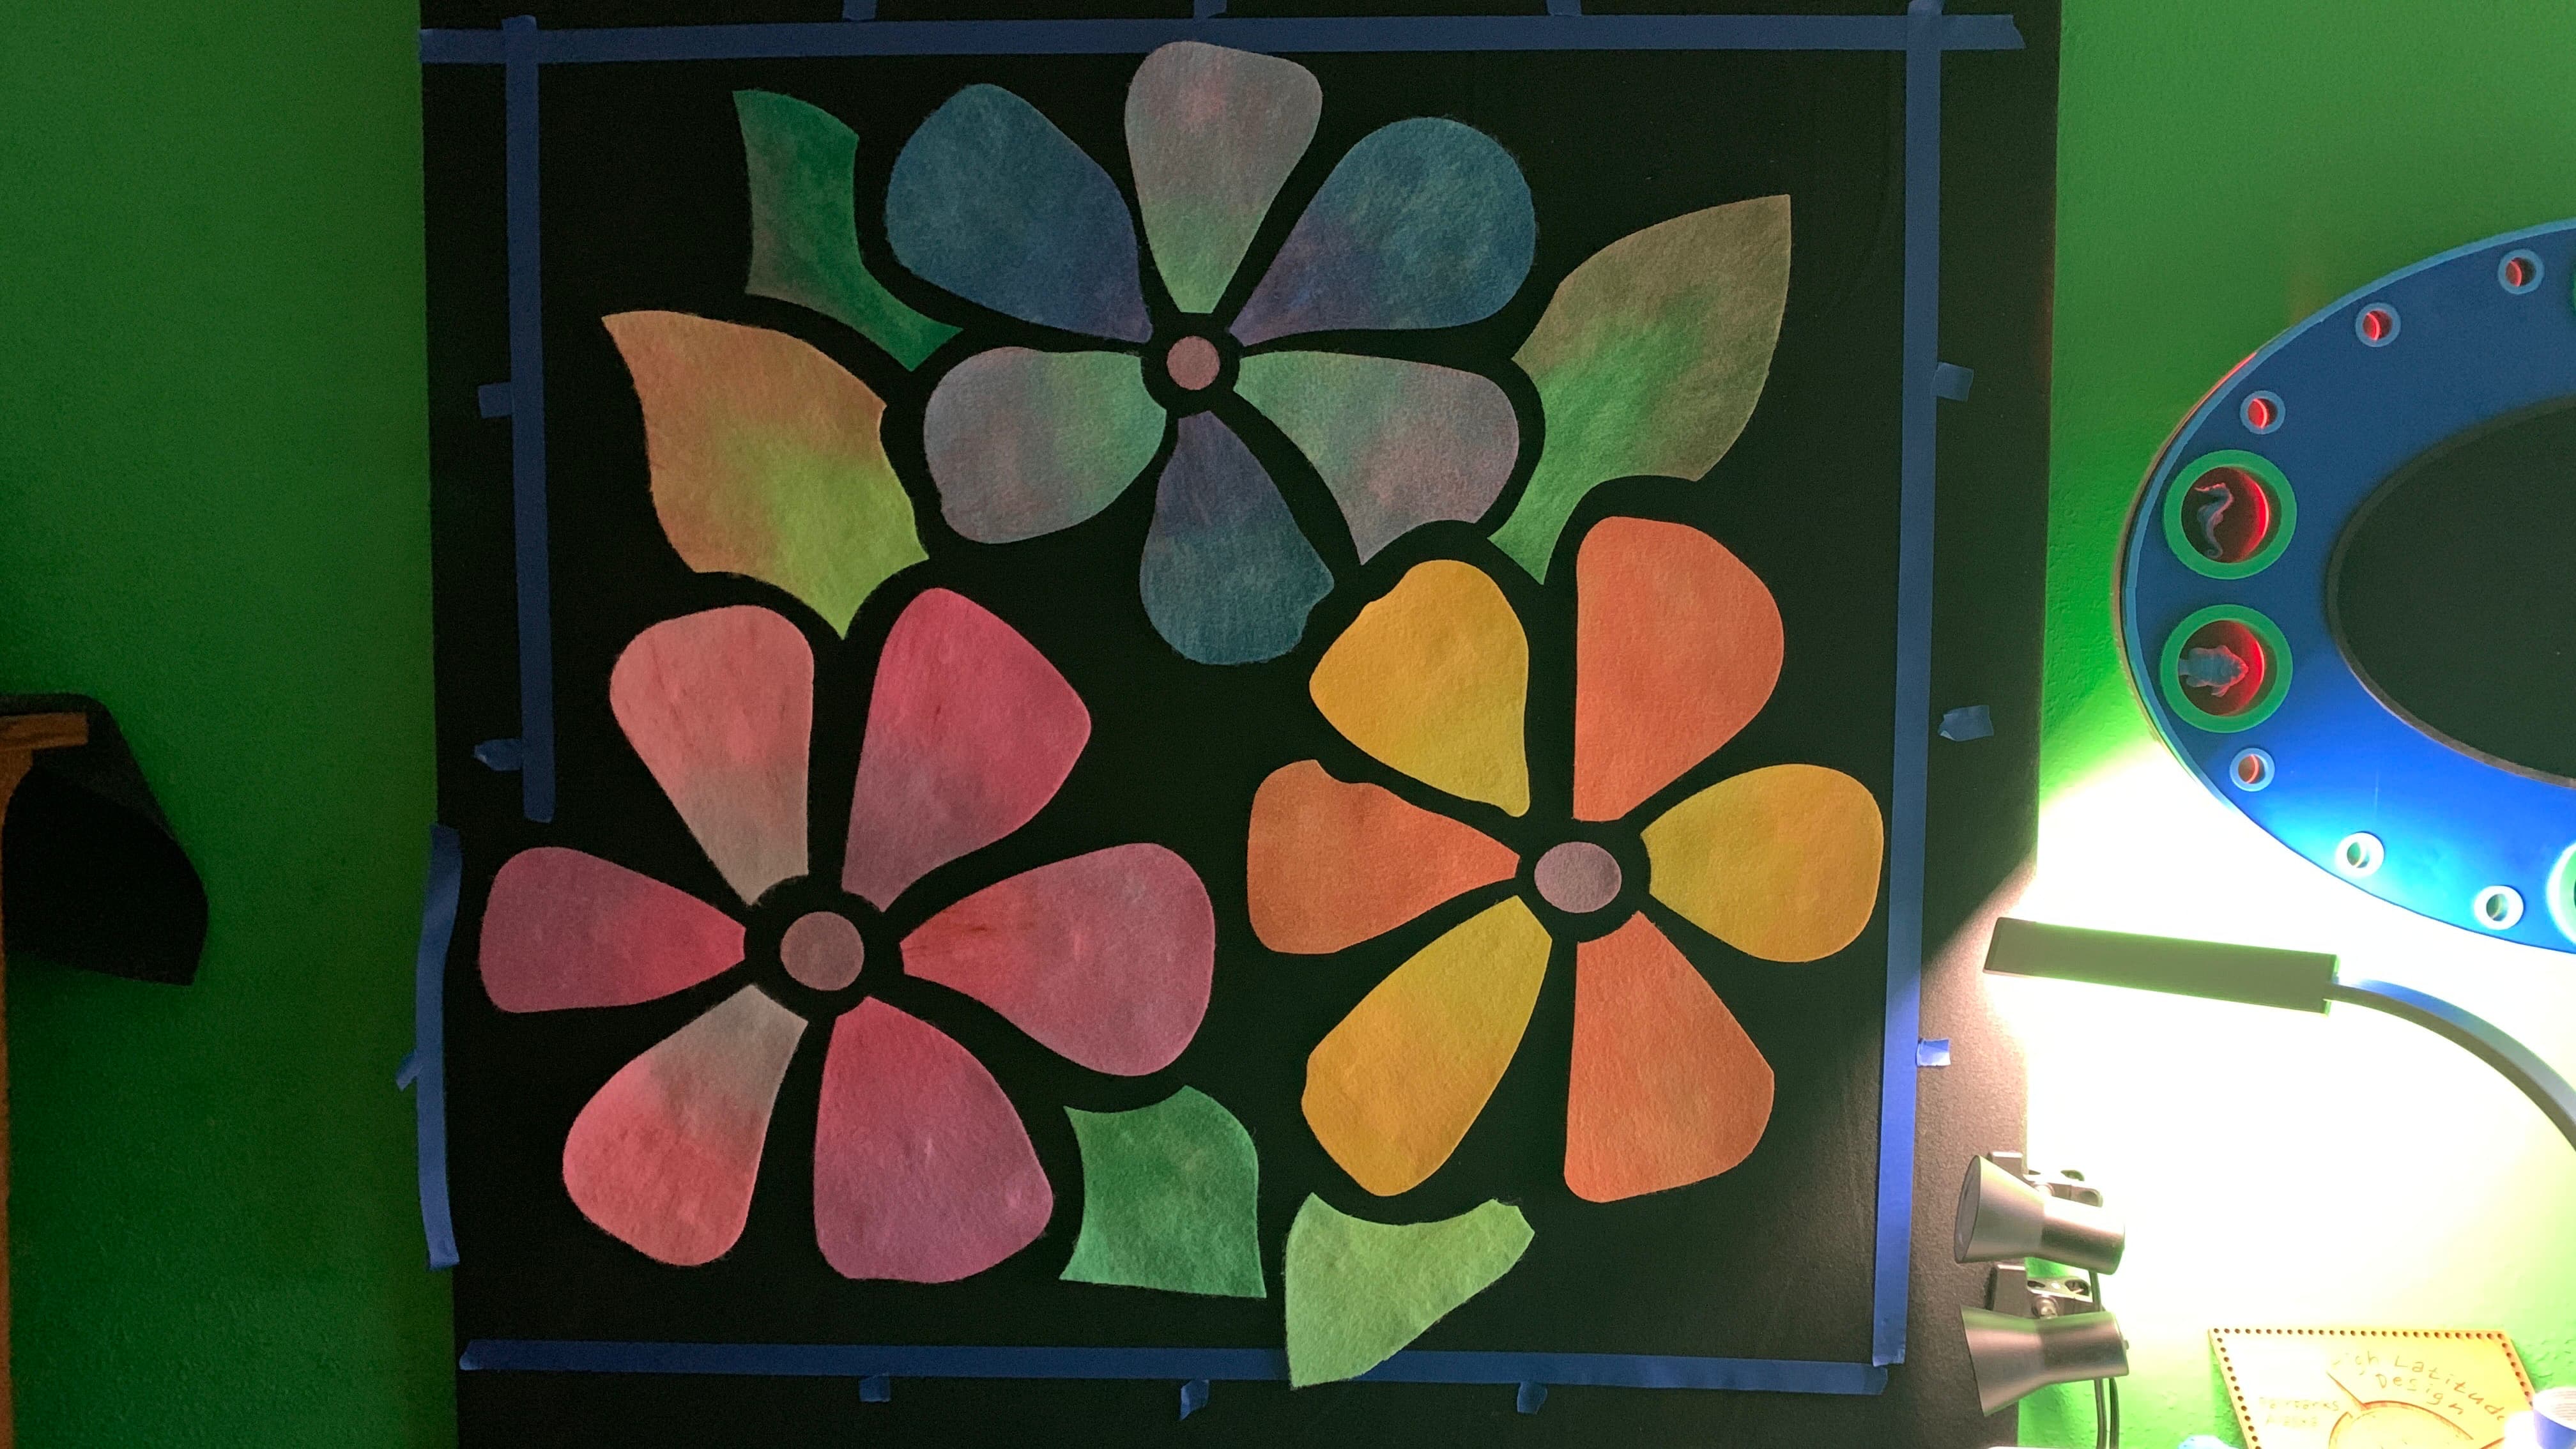
Blue flower first - I’m doing the layout to arrange the pieces first, according to the paper I printed.
Velcro and repeat
Oh, ya. This is going to atleast meet my expectation…
Orange/Yellow next -
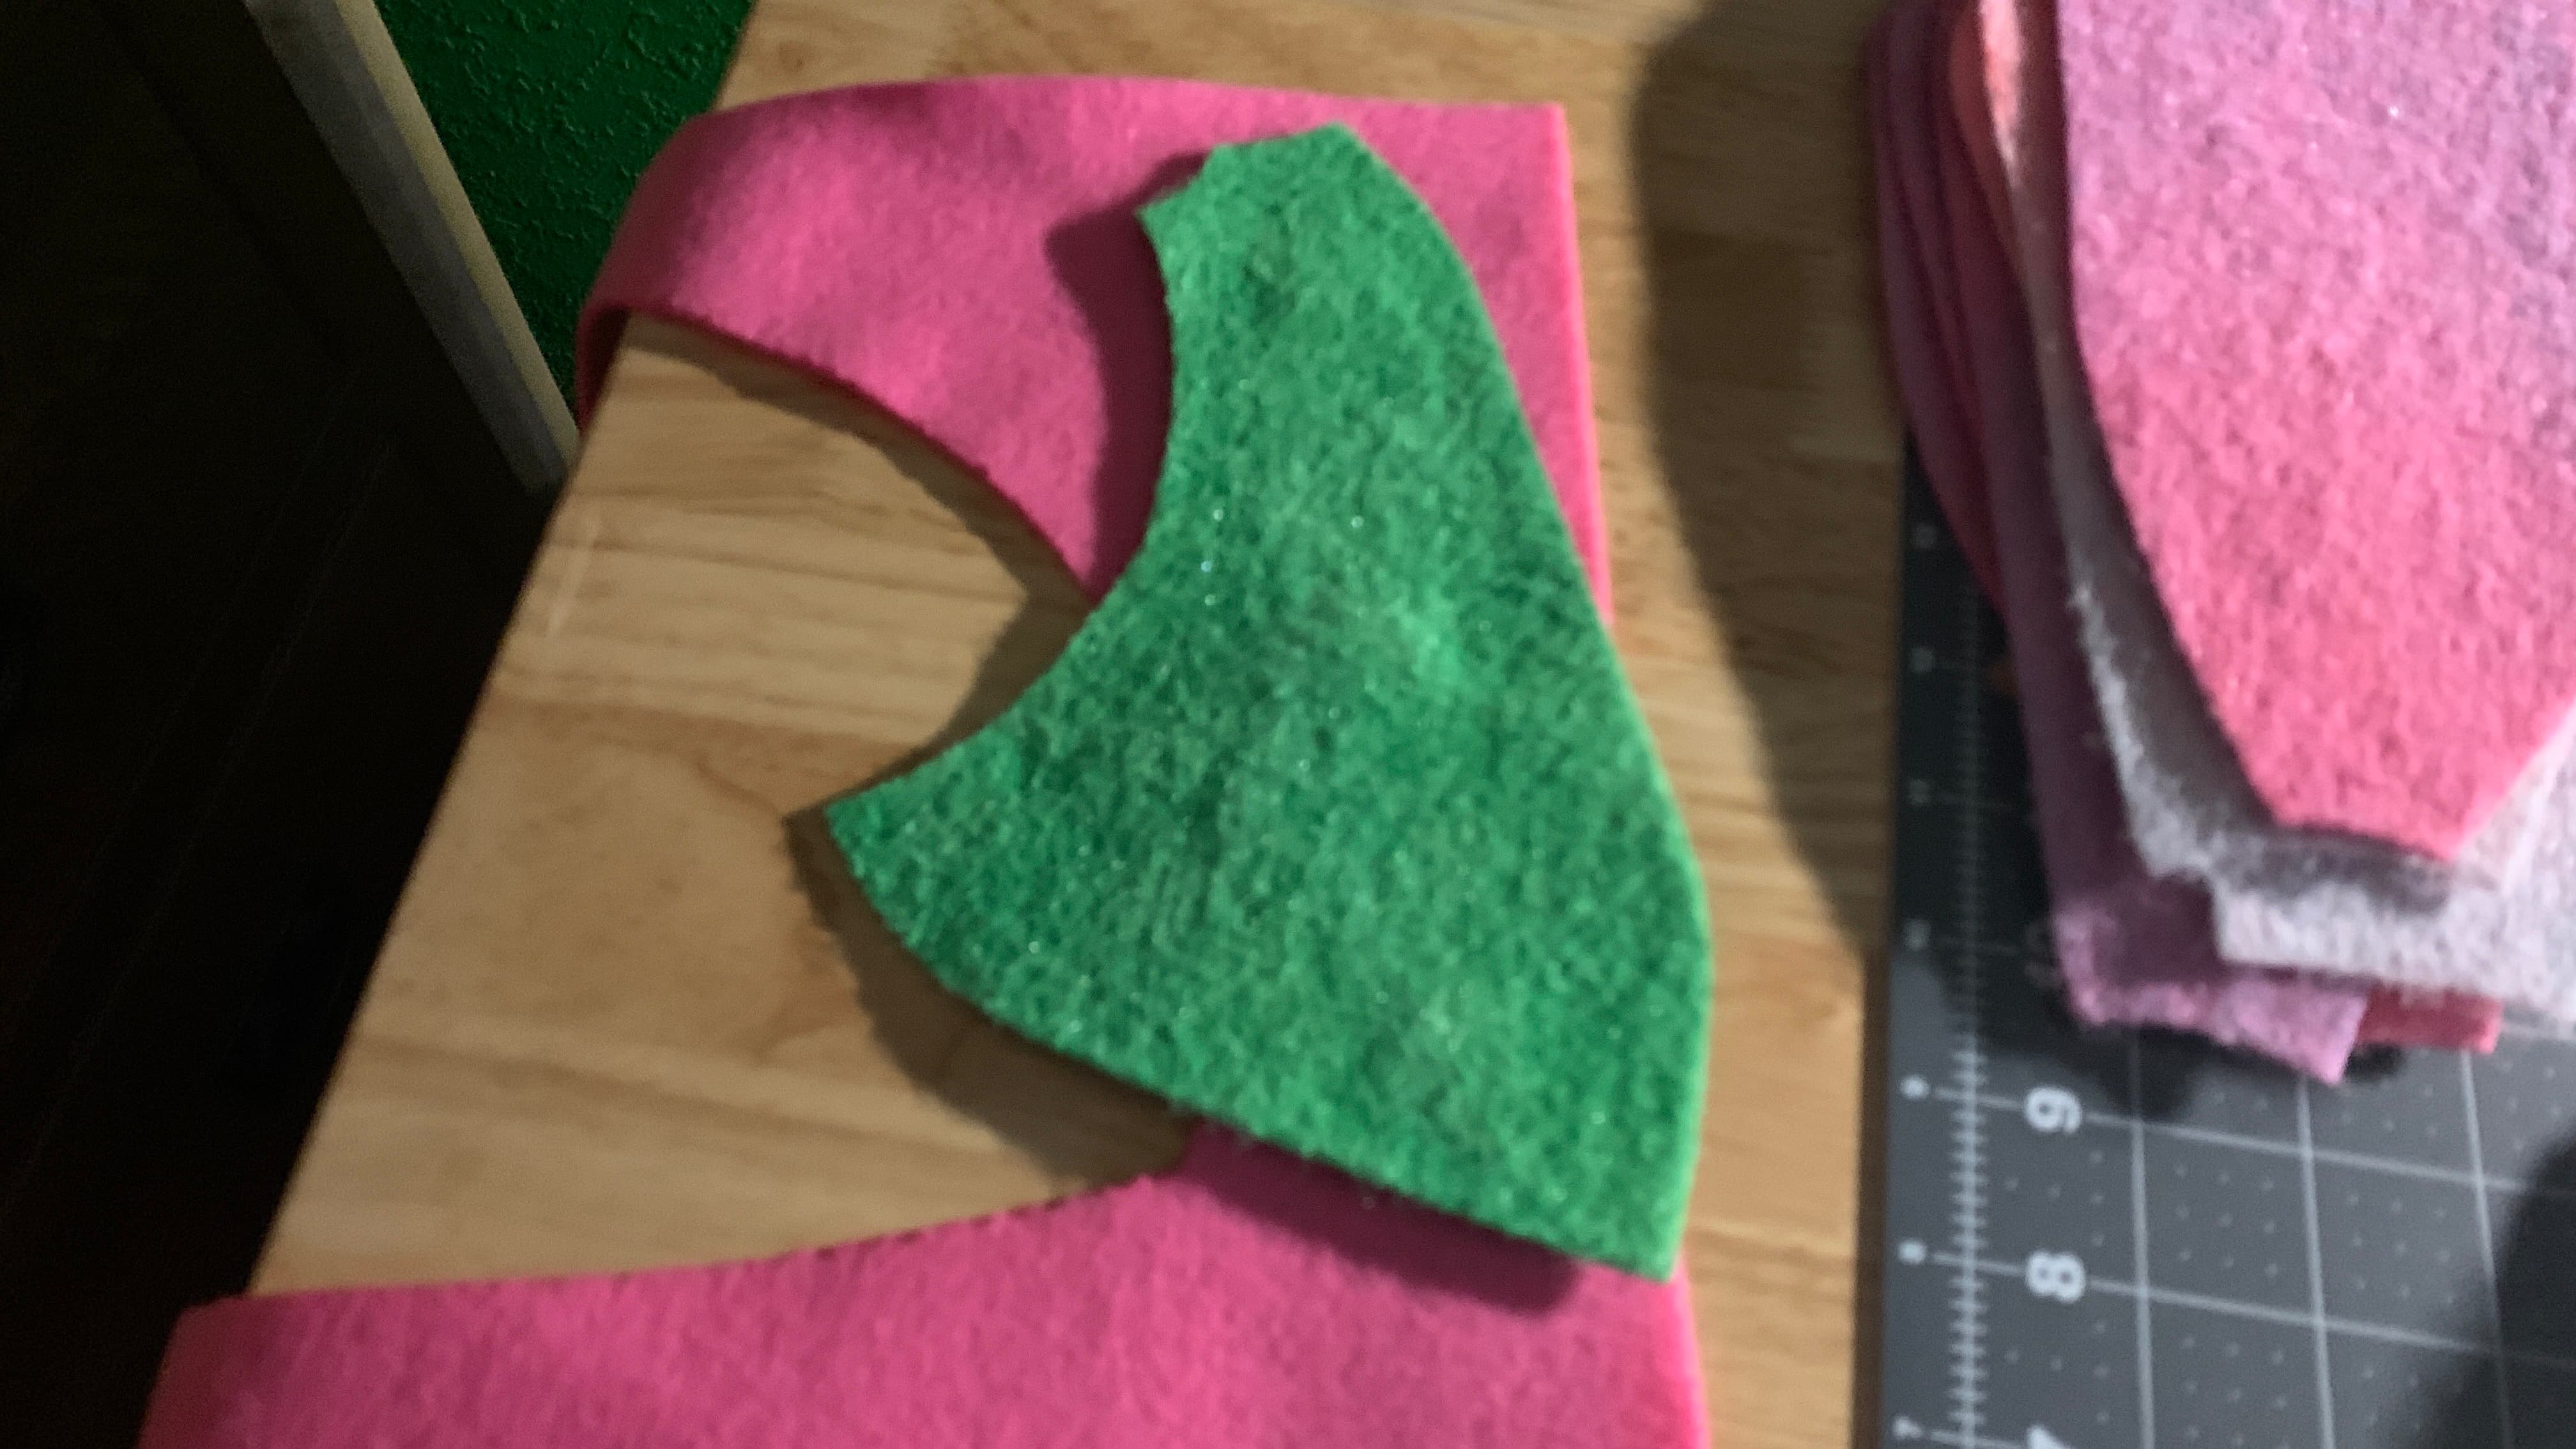
And pop in the green leaf in-between.
Oh ya. And I was worried the spray paint would curl and warp the edges (originally thinking I was going to glue them flat to something.) But it added just a little waviness for an organic feel. Wonderful.
On to the Pink, and cutting a bunch more squares… ![]()
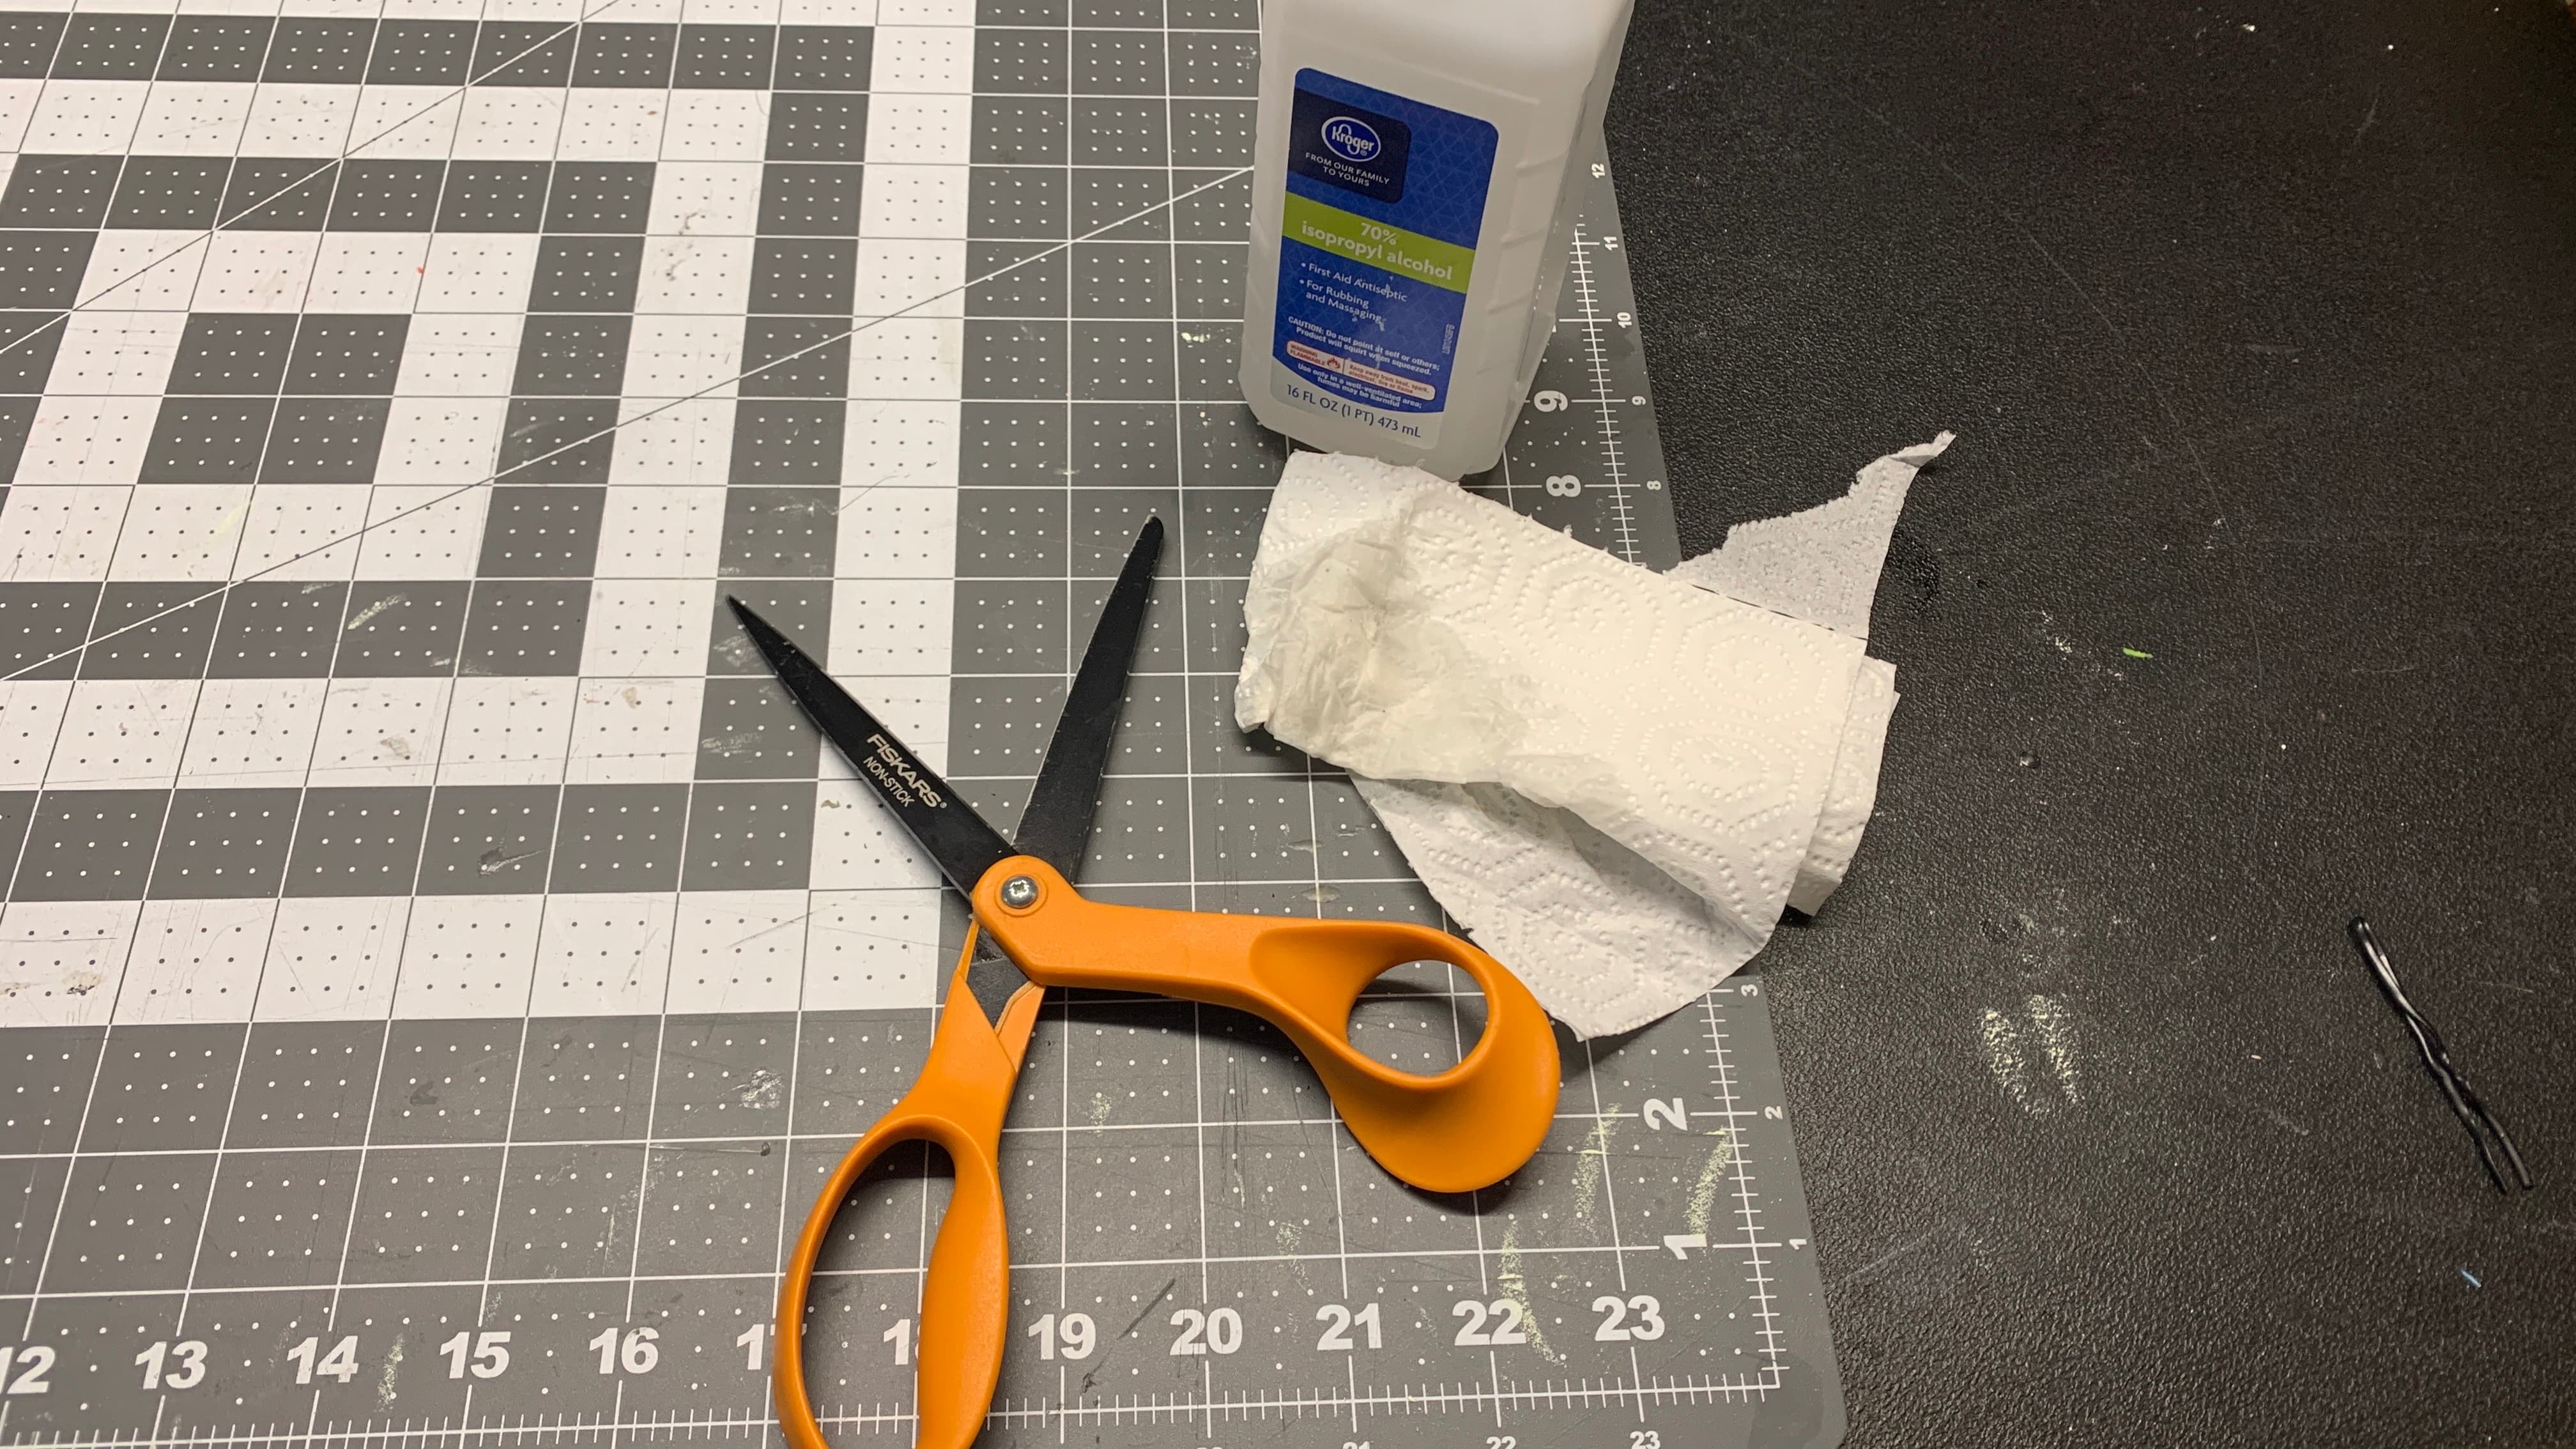
For the record, the scissors say non-stick. But ya, they’re gooped up with velcro adhesive. But nothing a little IPA can’t fix. The Isopropyl kind… ![]()
Another nice thing. The felt pieces, before you put the velcro on, do stick well enough to the felt board to mock them up in place, and get the spacing good, before you velcro them.
Nearly 2 full boxes, or 120 inches of Velcro hook used. But I still have the ‘Loop’ side for some future project.
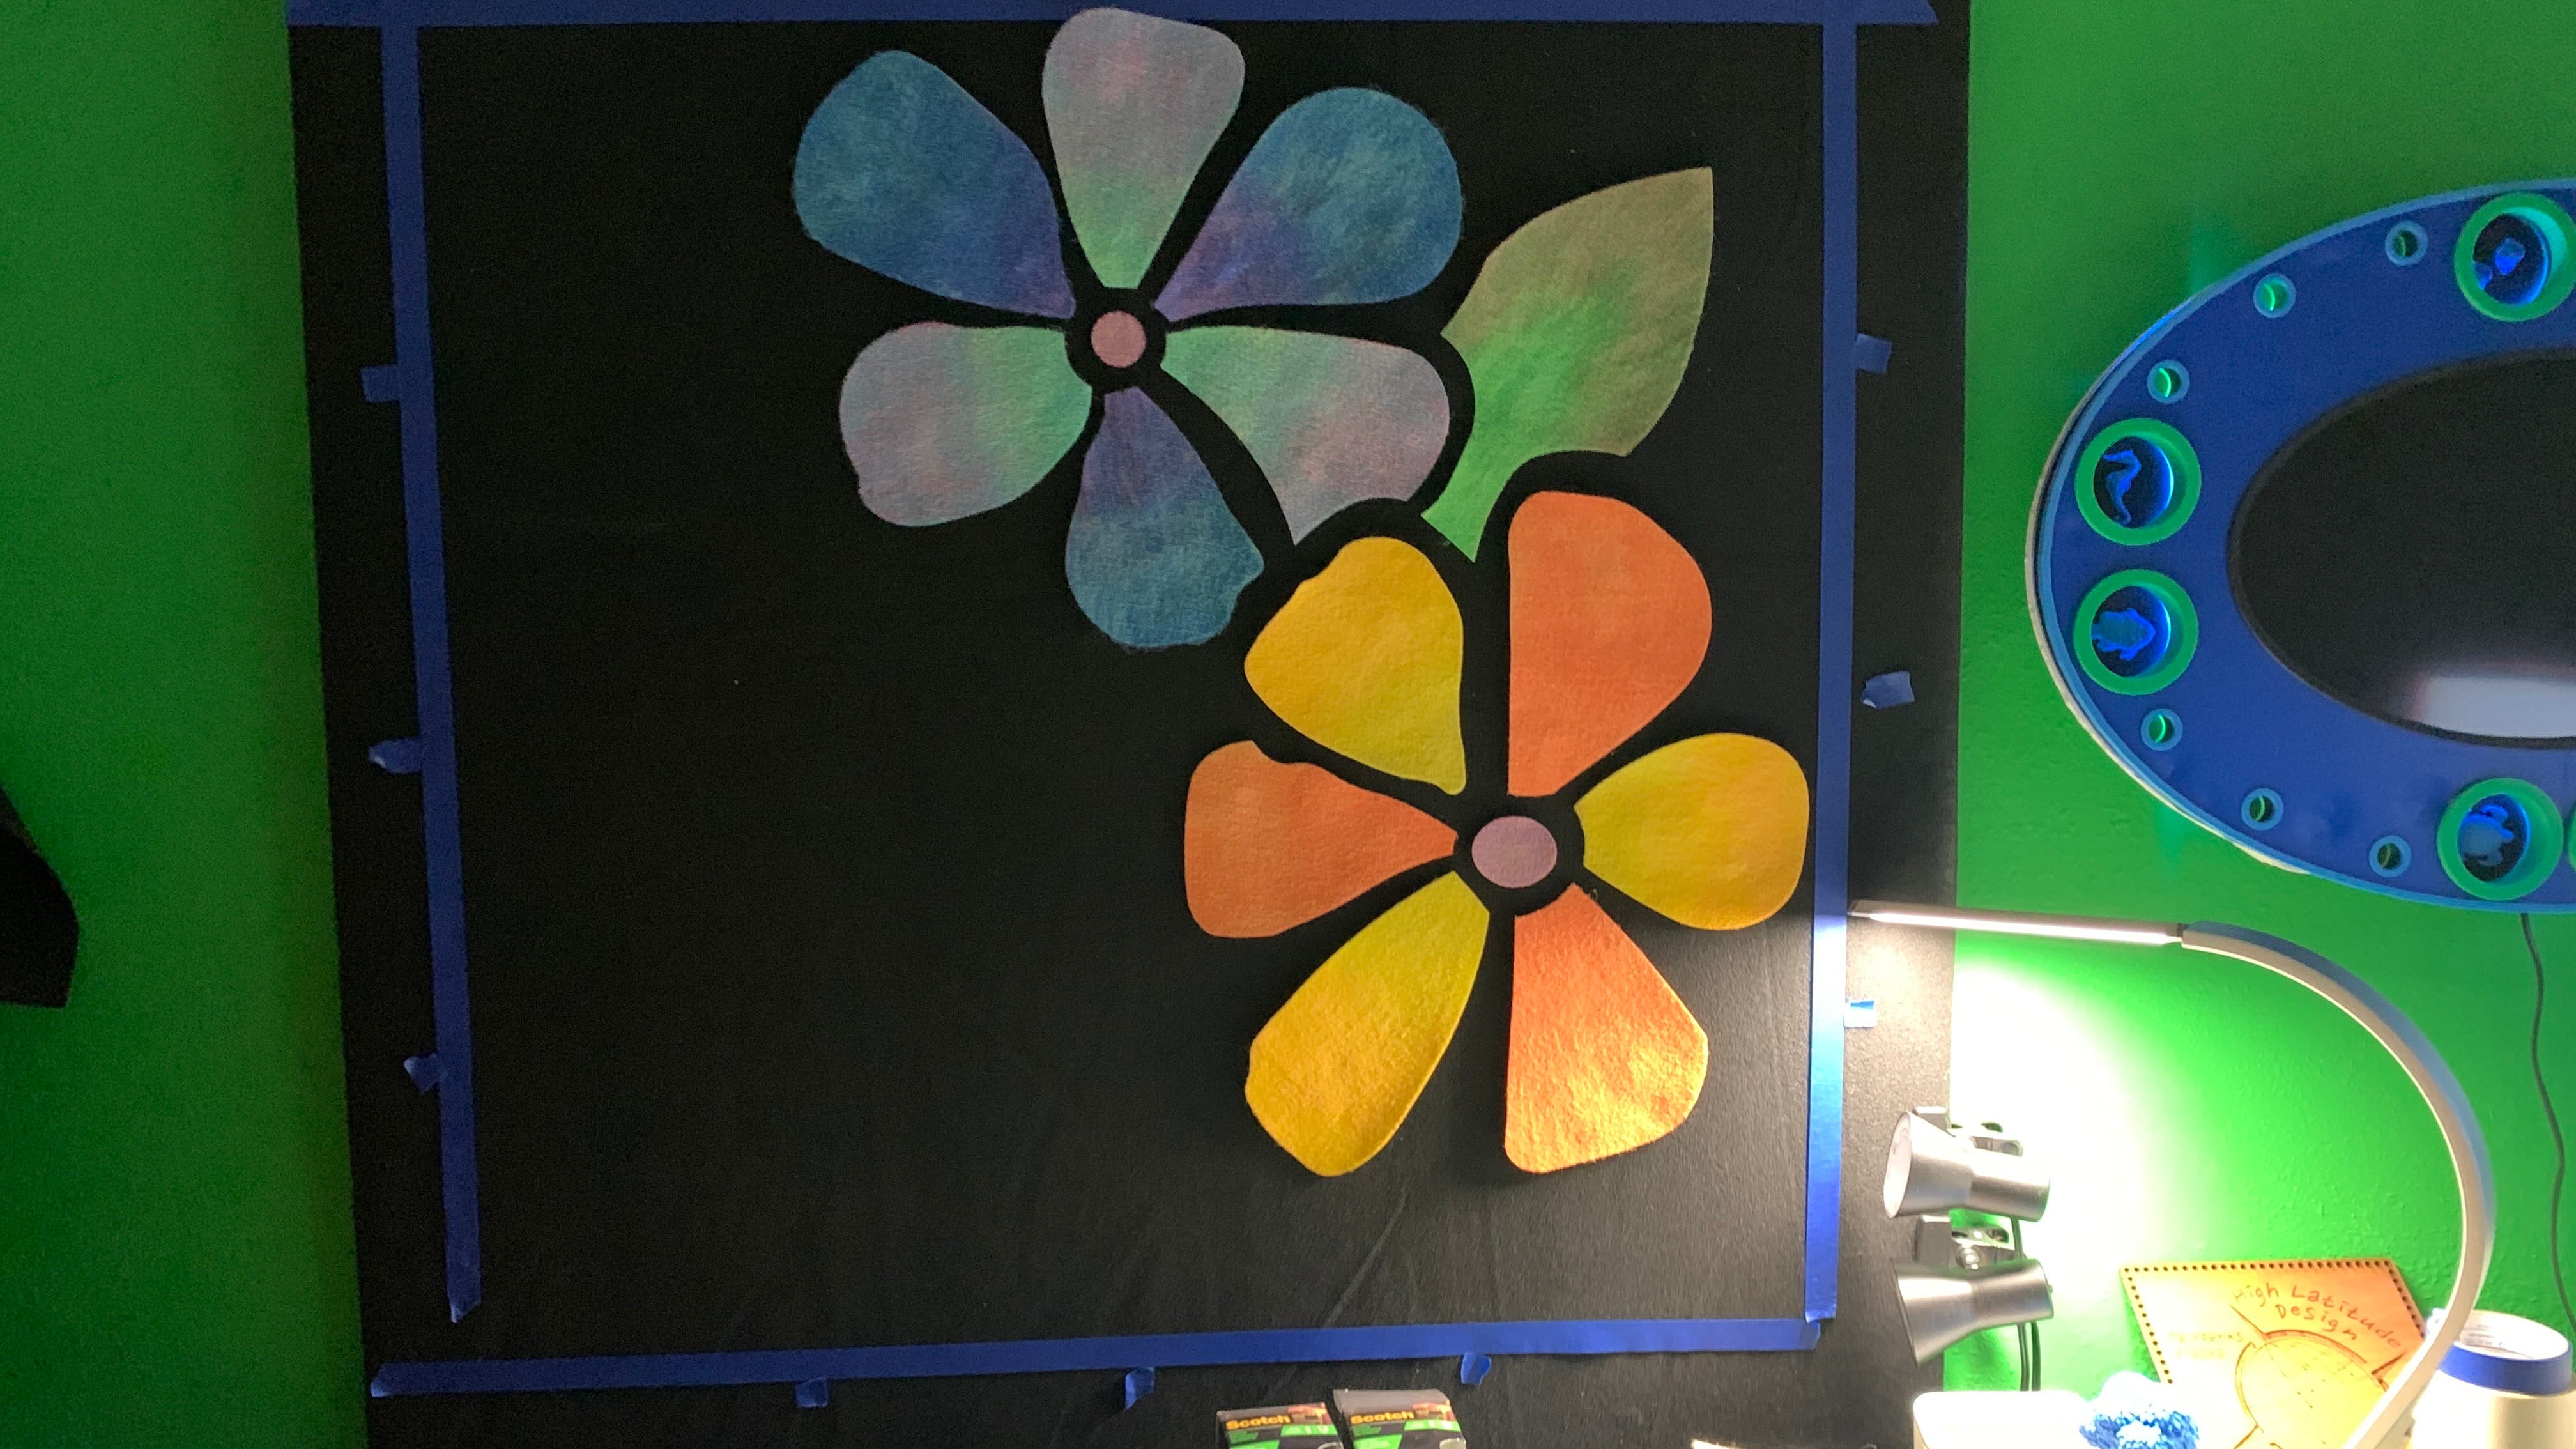
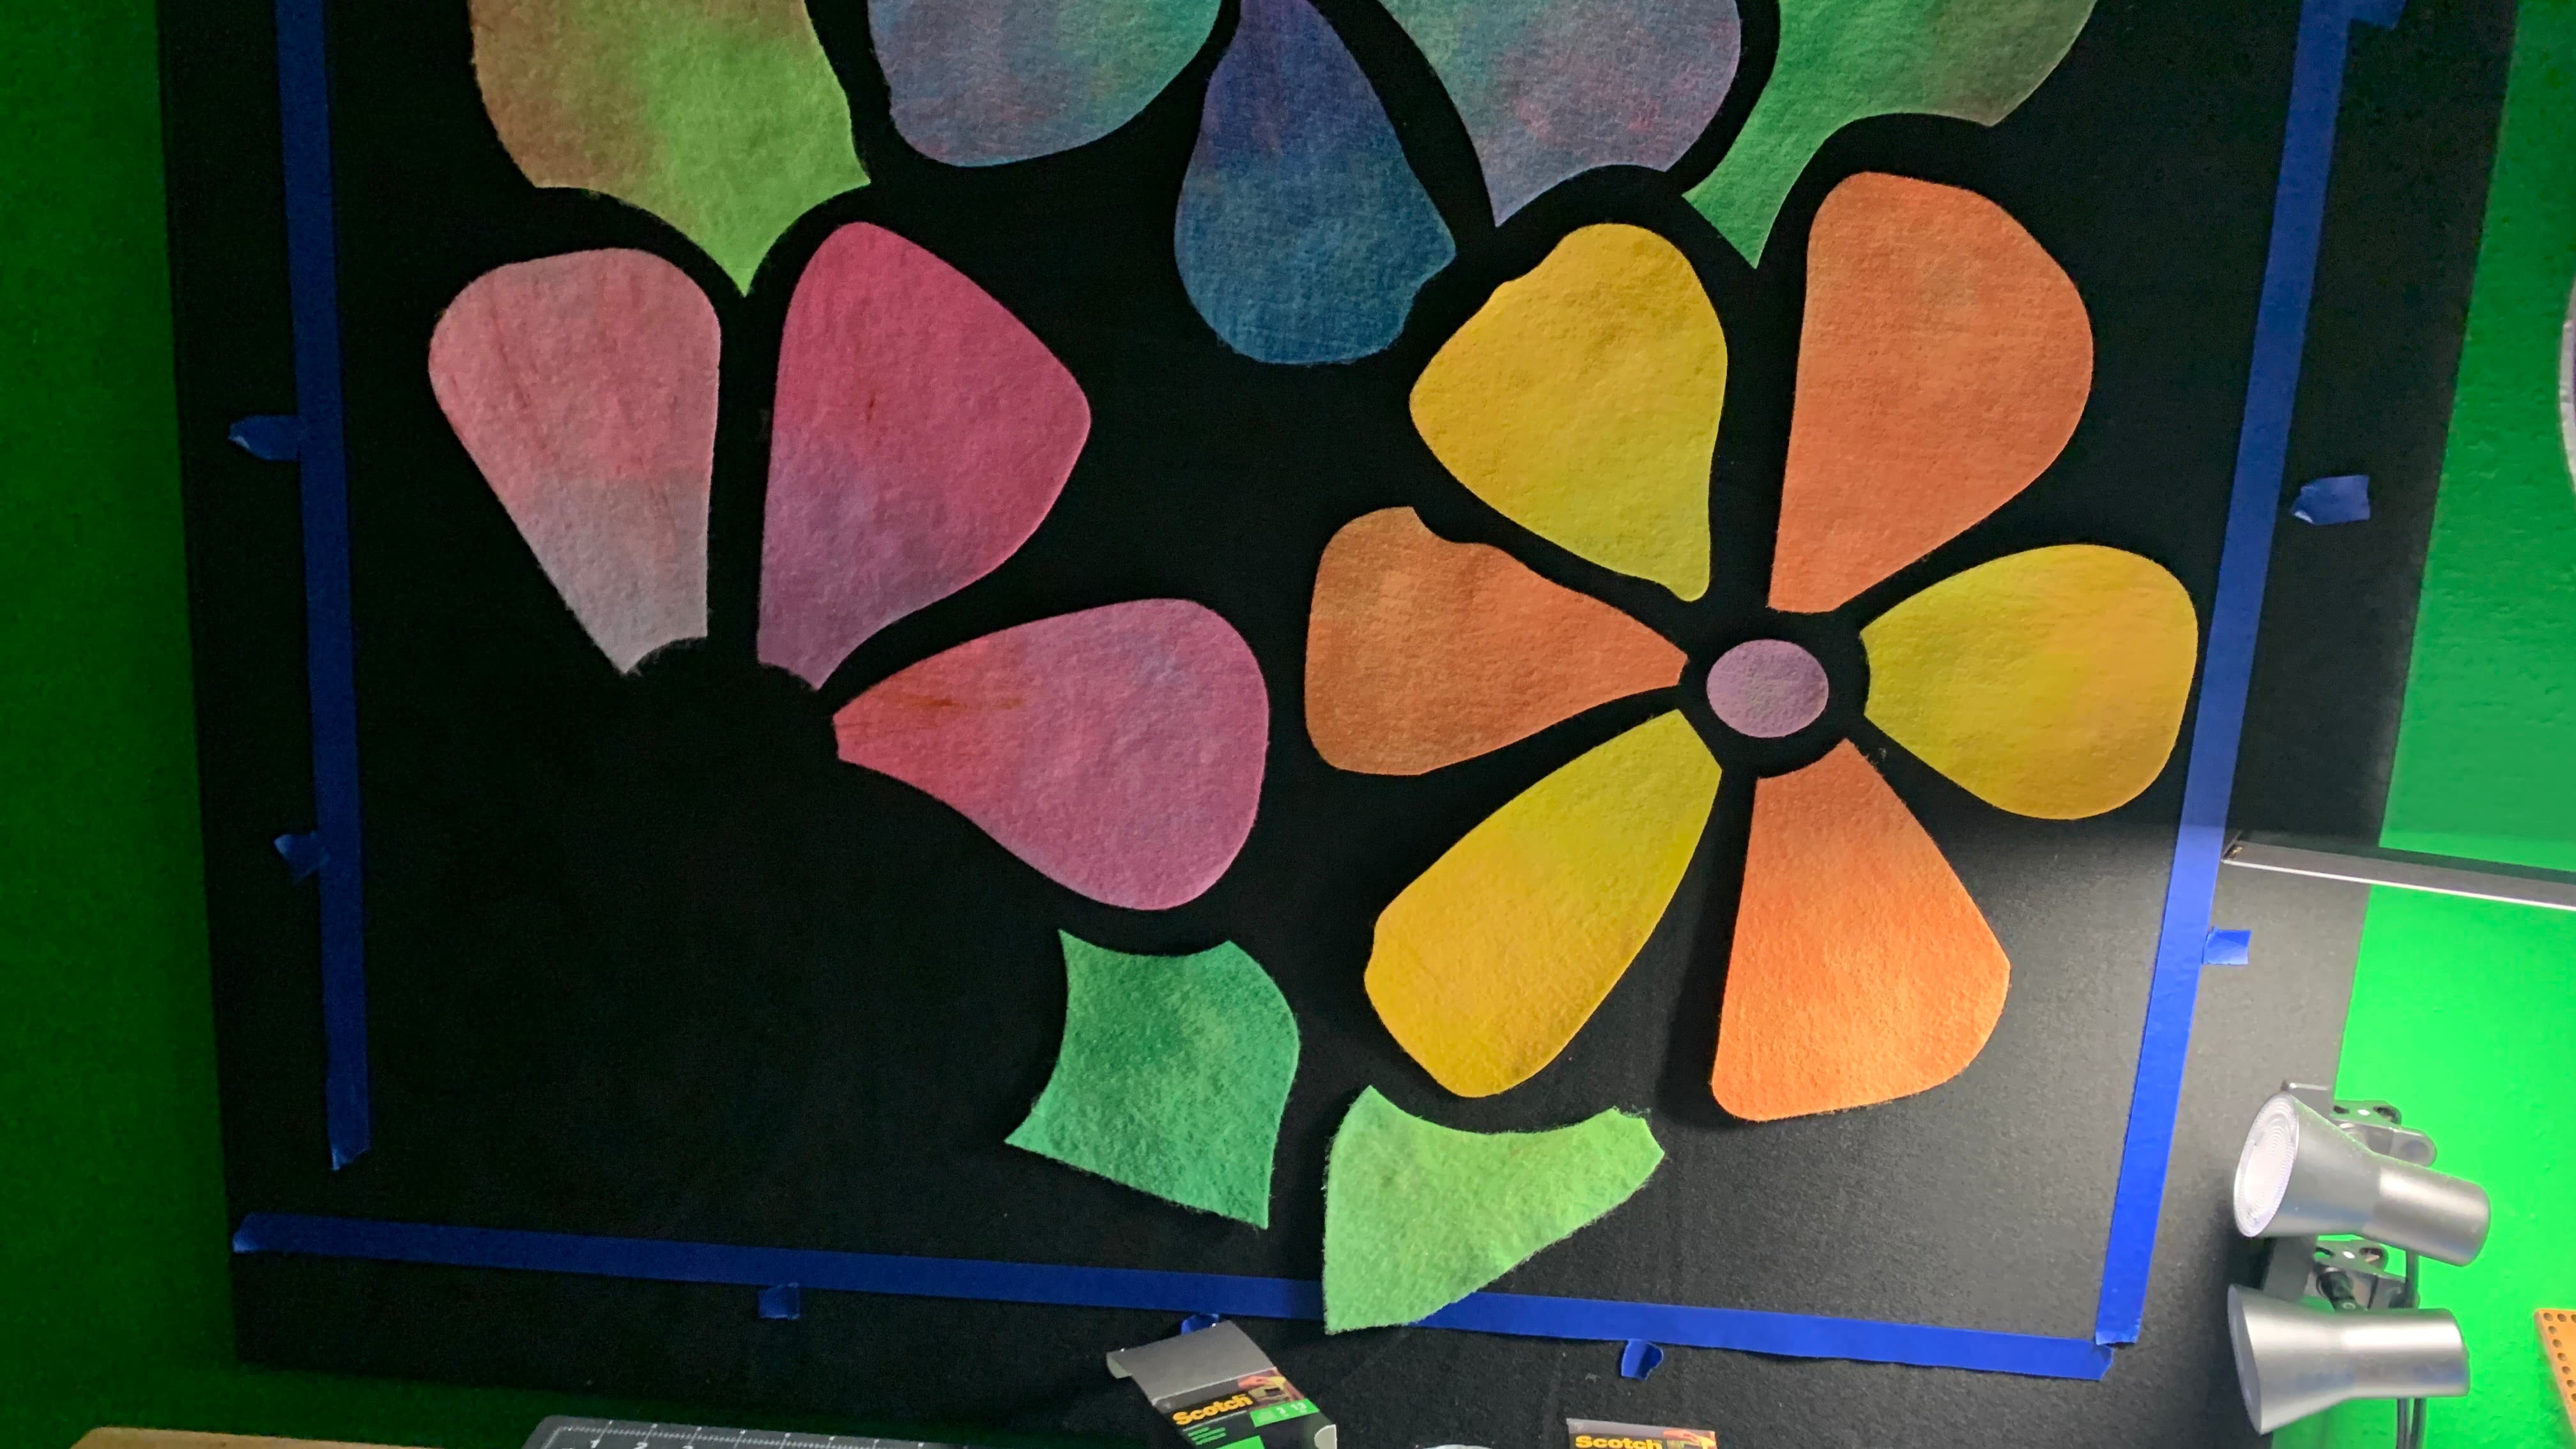
And finally, everything in place. You can kind of see where the velcro tabs are, in just the right light.
So I ‘fluffed’ the pieces a little and that mostly disappeared. Removed the tape grid and hit it with some overhead light. Shazamm!
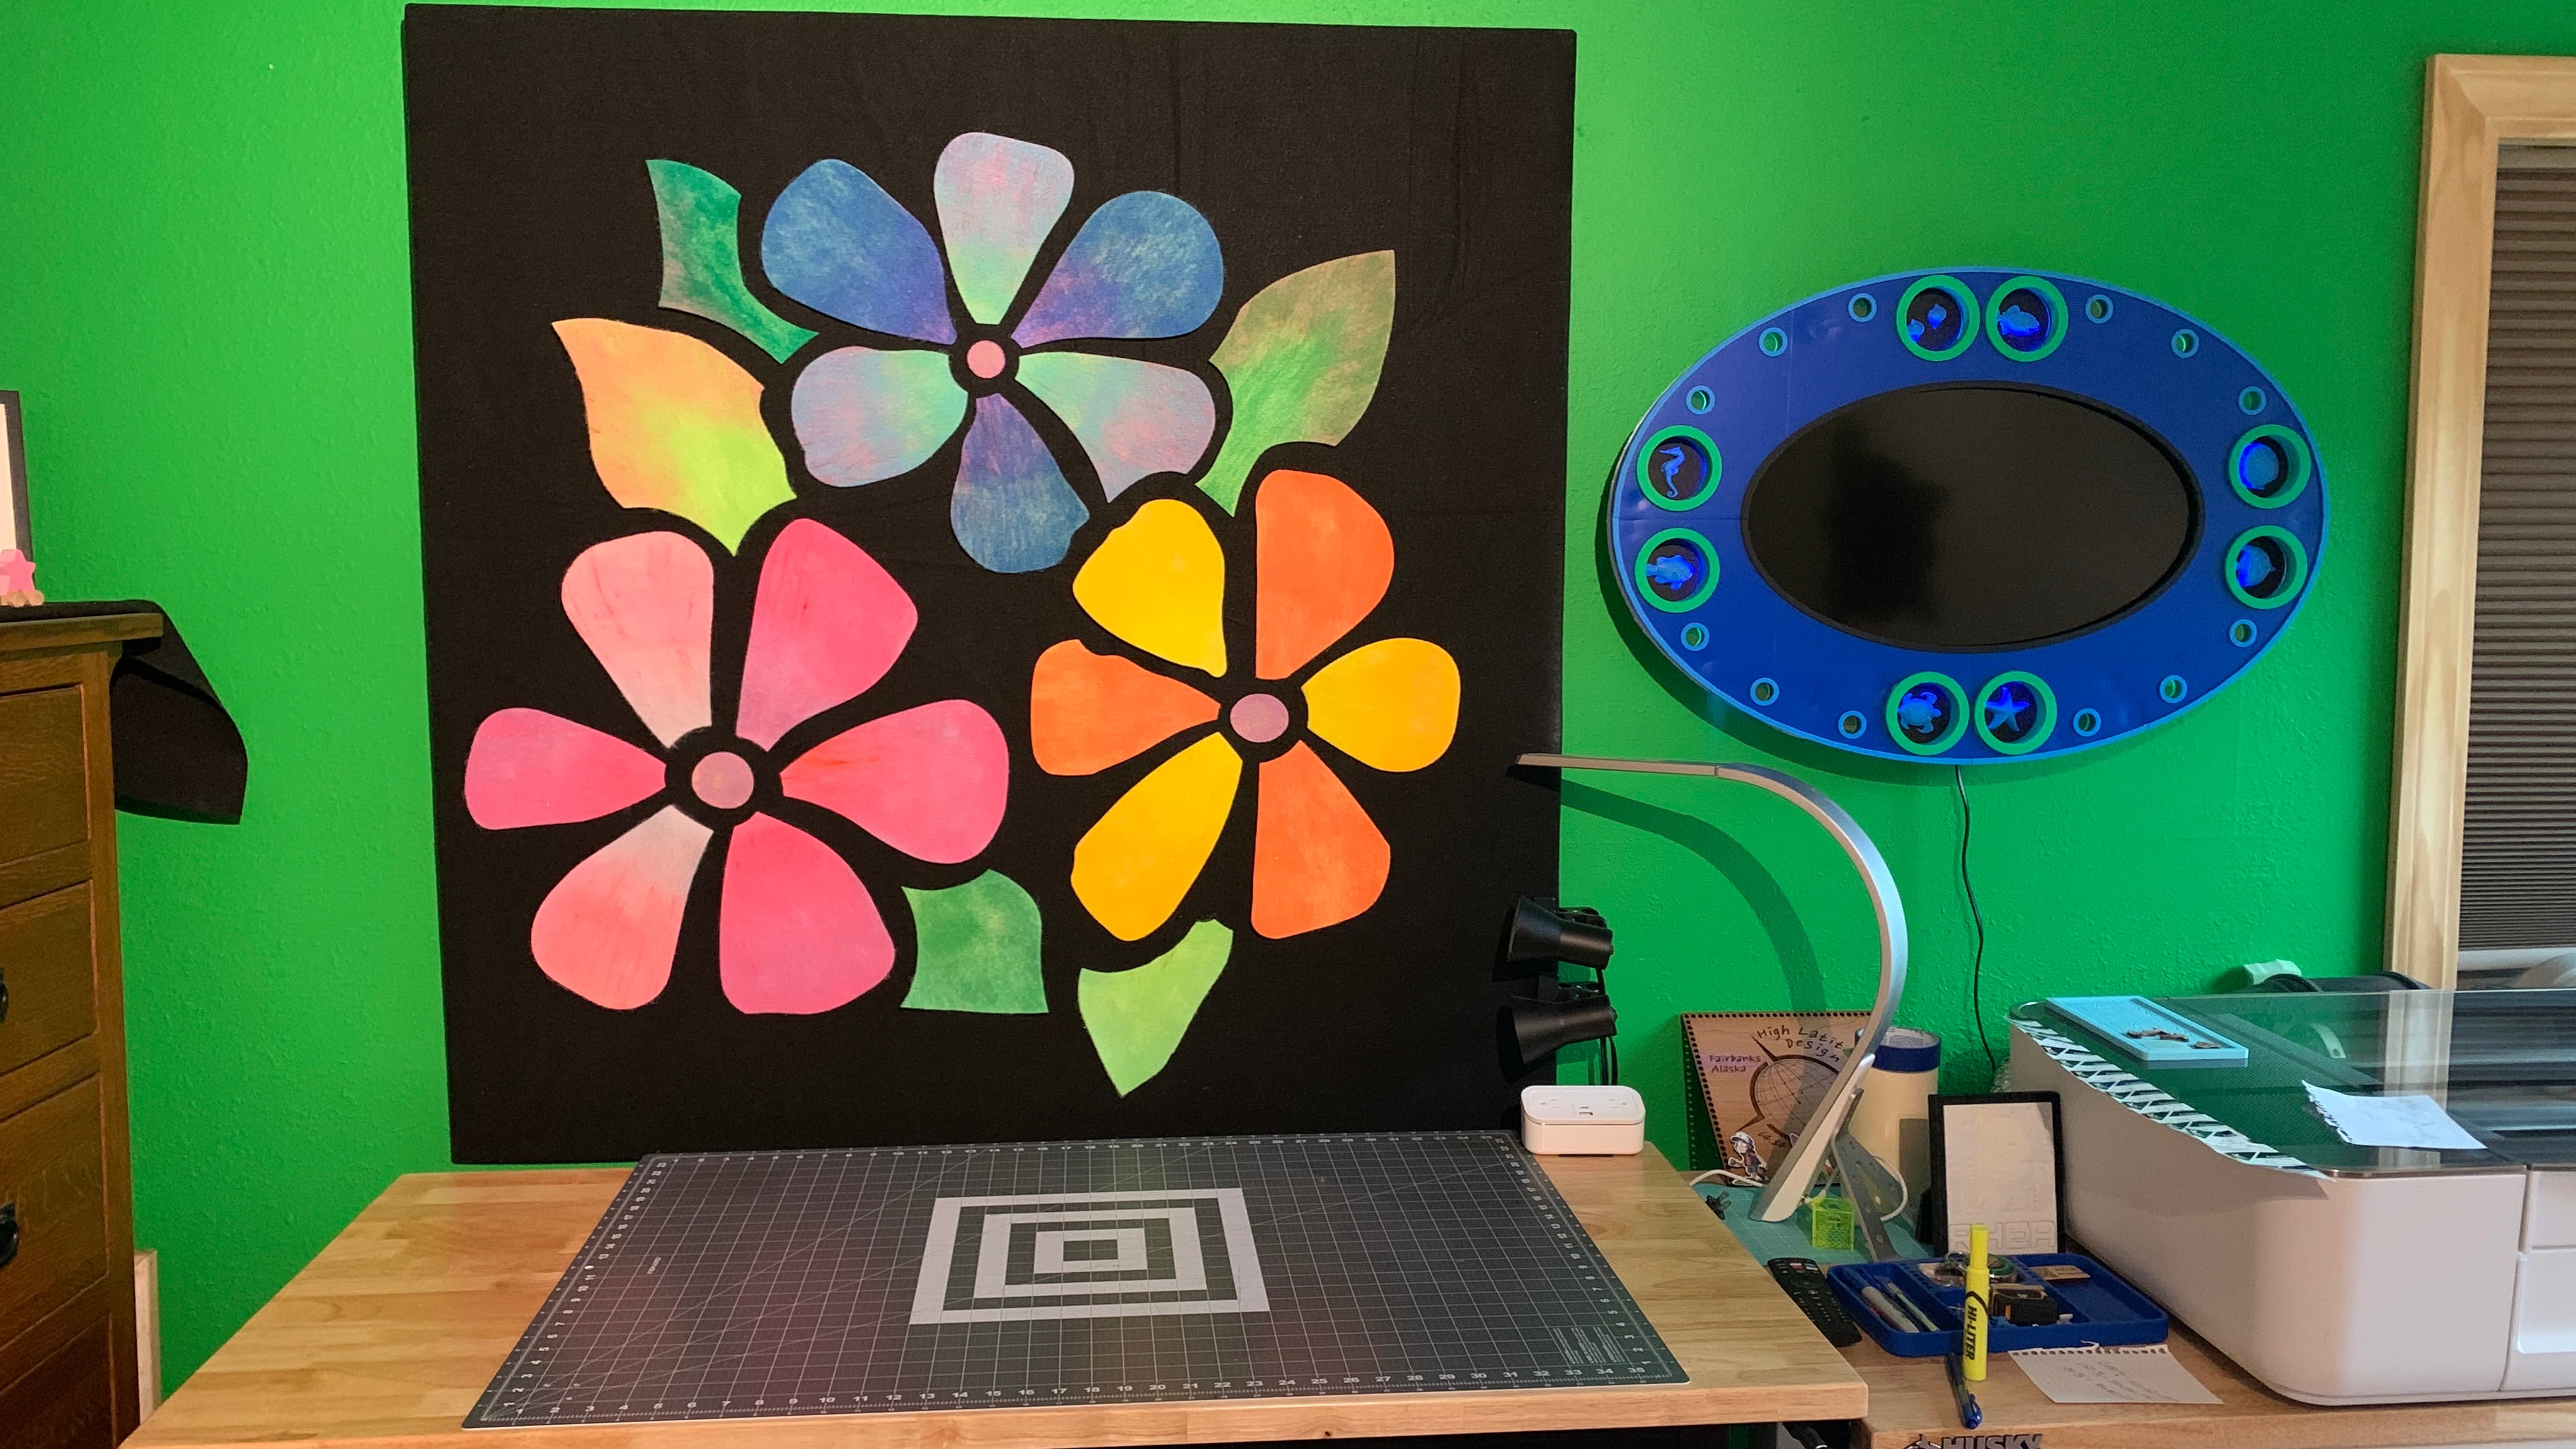
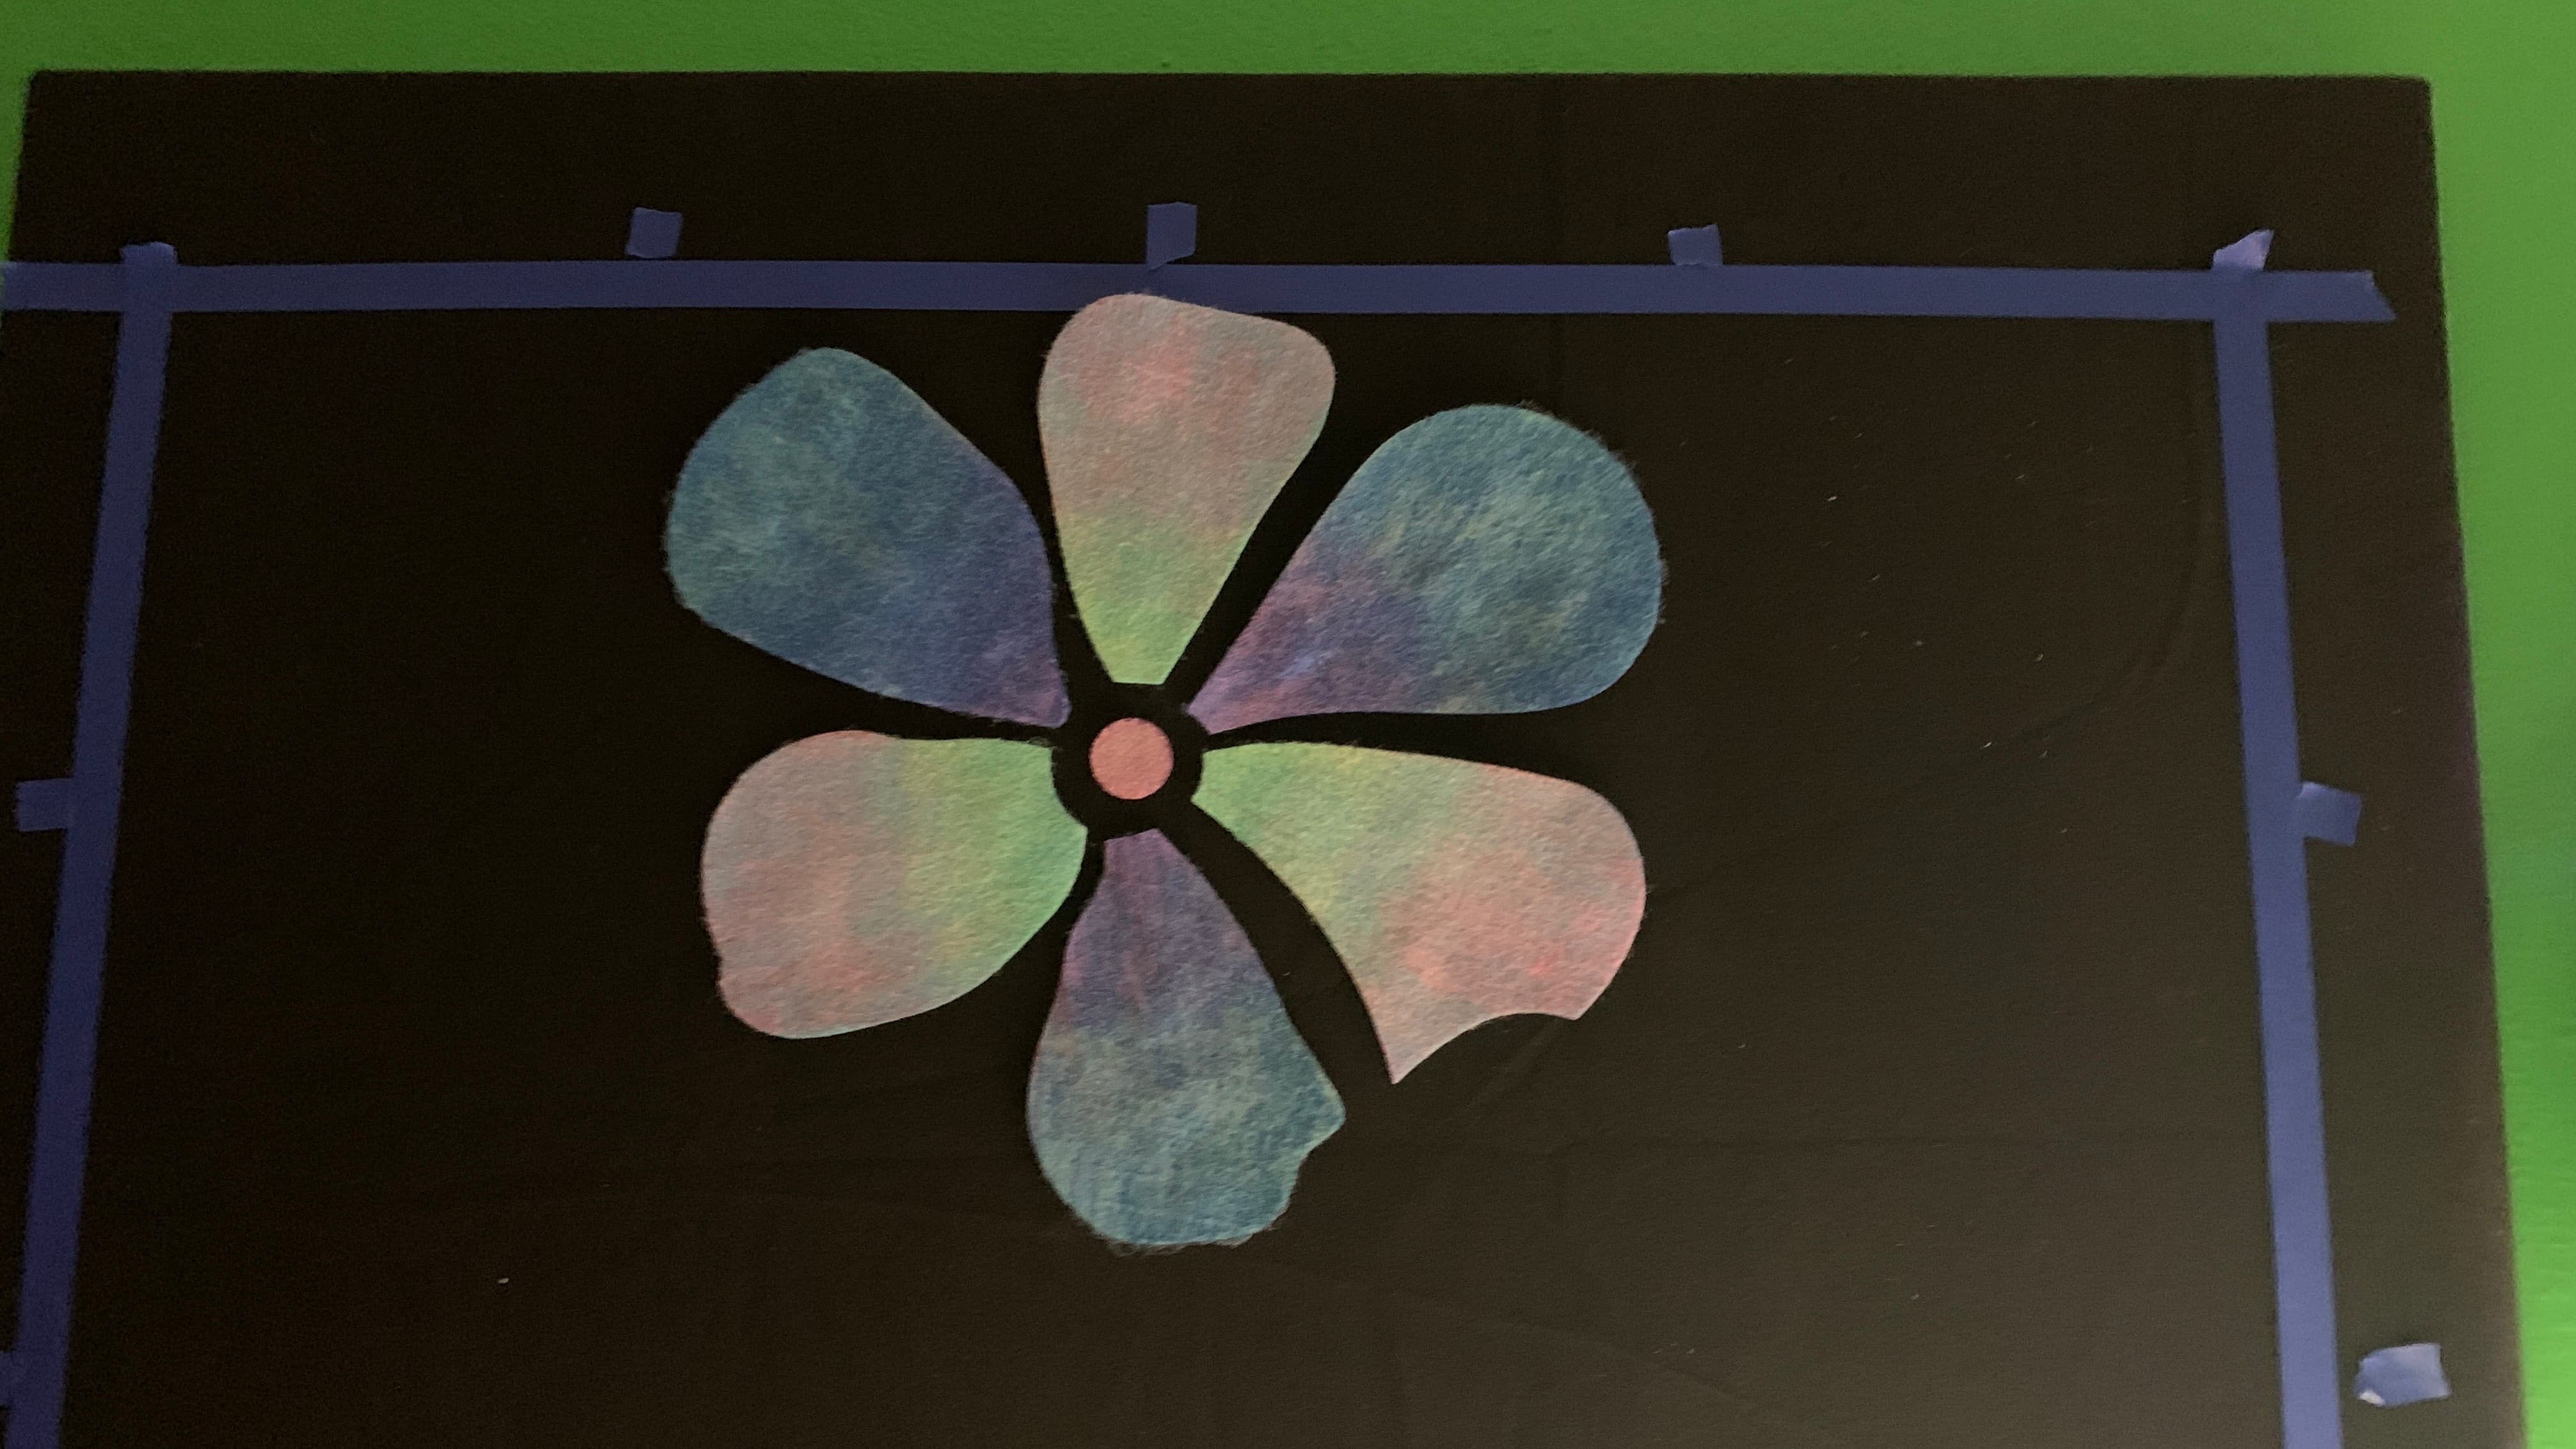
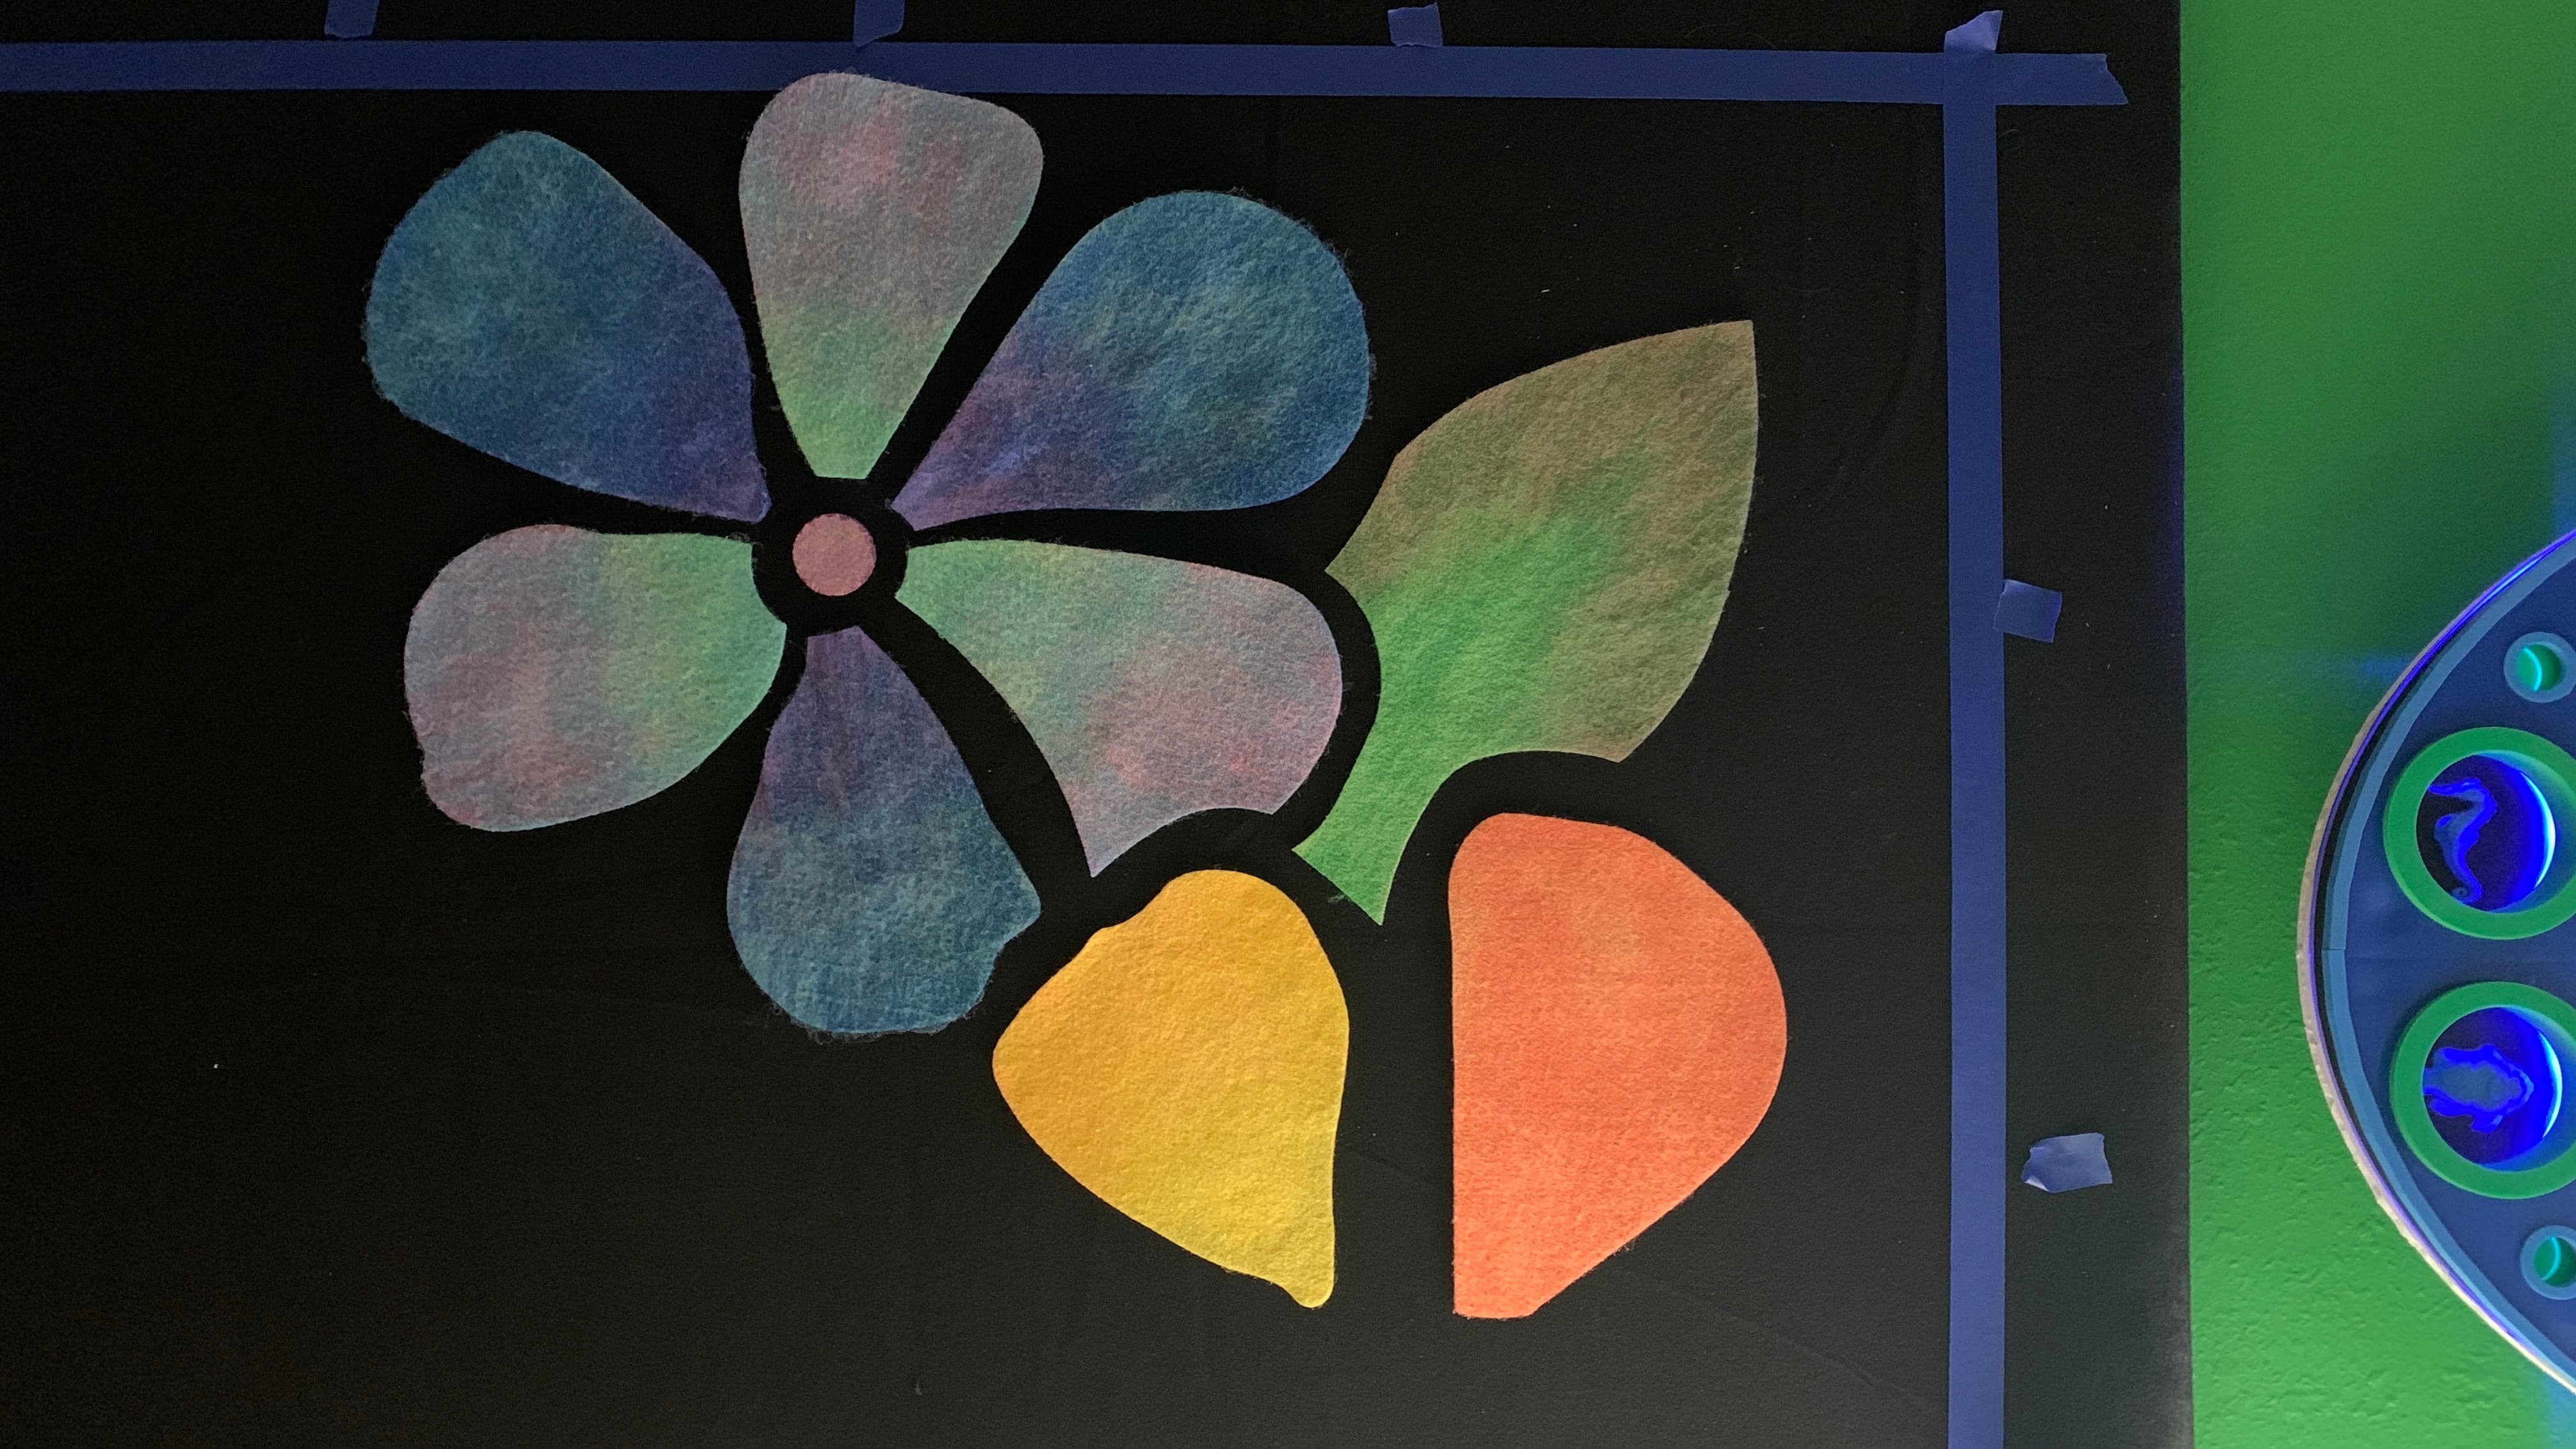
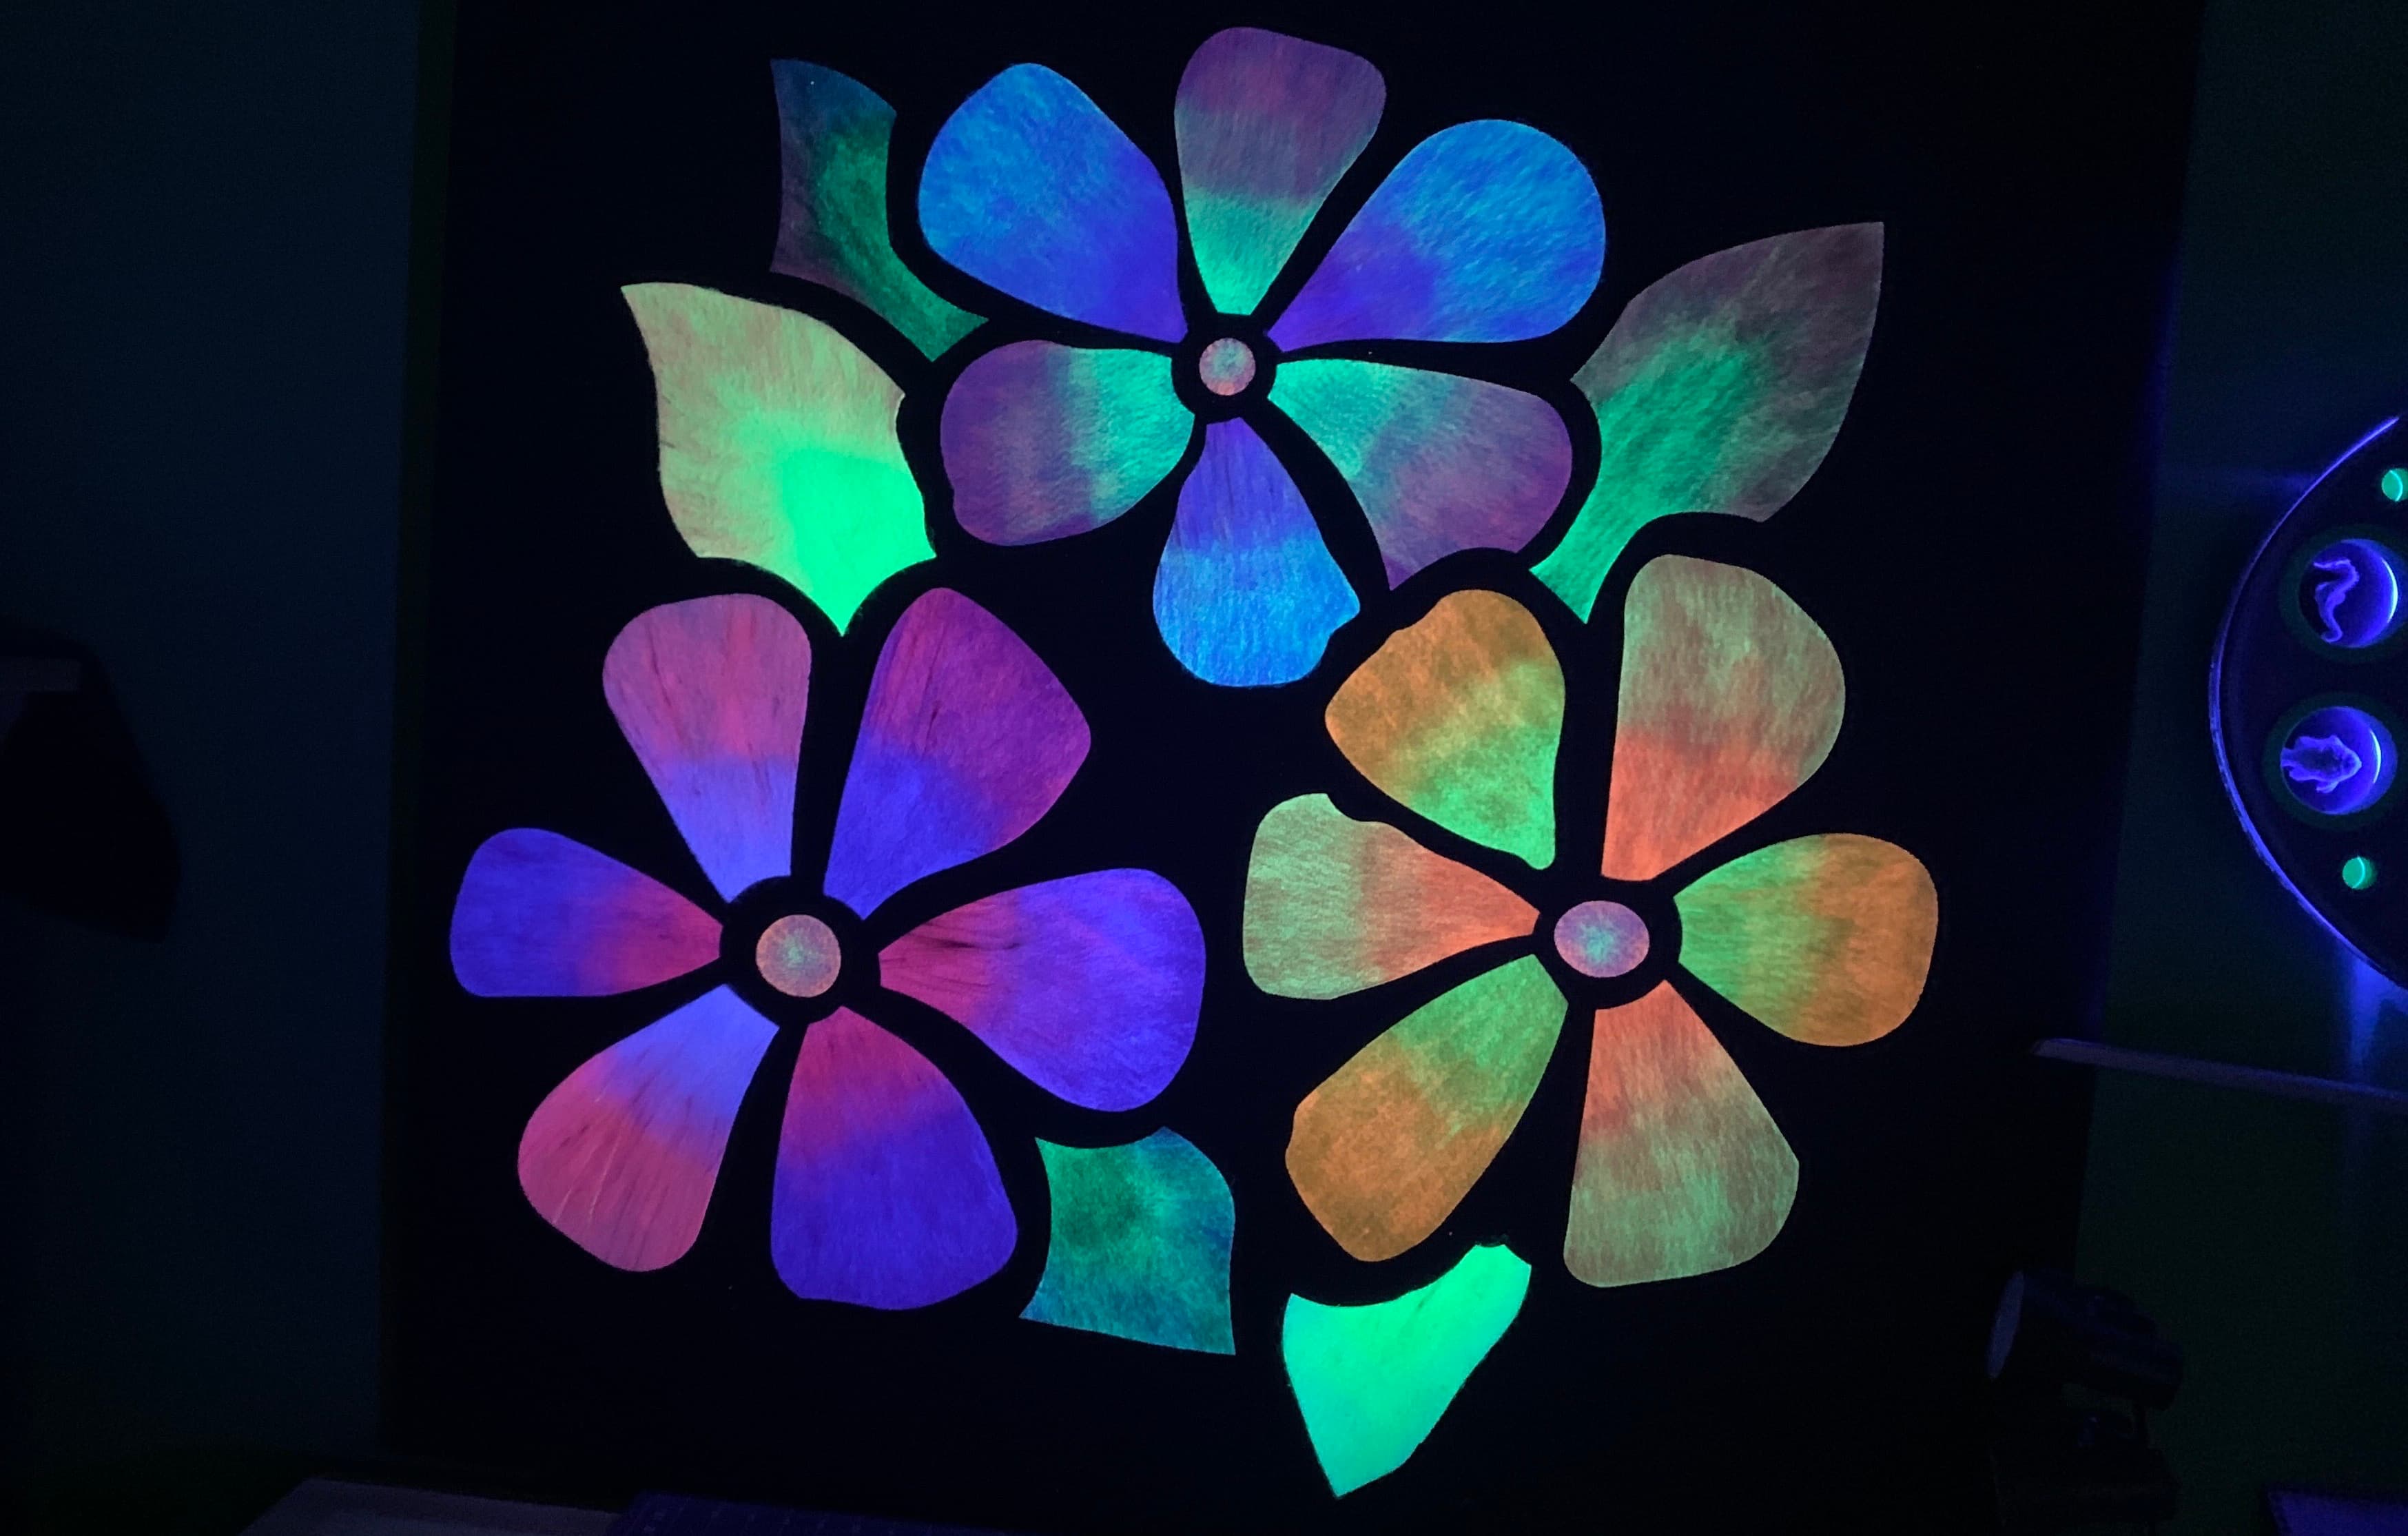
Absolutely beautiful. And when it’s Black Light time. Oh baby…
Super fun project, and easily doable in a weekend, even at this 40" square size.
Hope you enjoyed the process!
HL