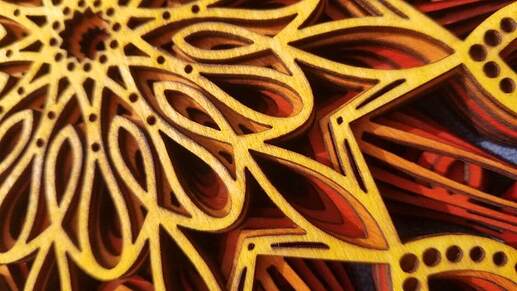
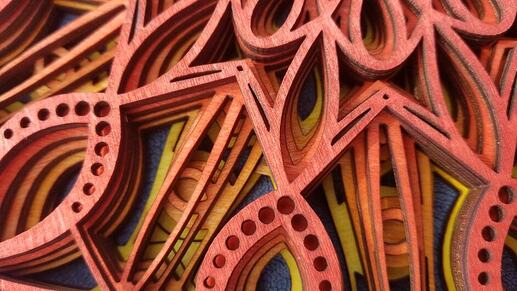
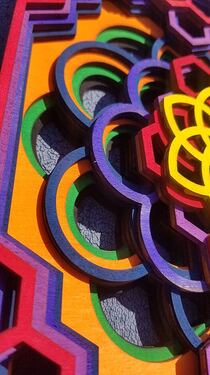
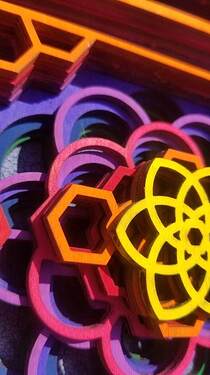
You inspired me to buy one on etsy, cut it out (twice), and then try some alcohol based stain on it. I started with yellow on the first layer, then added a few drops of red for each additional layer. I works better with the yellow in front but it works both ways.
More Images
turned out great  how many coats of stand did you do? I’m working with water based stains and was wondering how they compare. I find I need to apply at least 2 coats of my water based stains to get something acceptable.
basically one quick wash per color. I used Keda liquid dye. Amazon has a kit with 5 colors in it: red, blue, yellow, black, brown. I mixed the dye with some alcohol left over from making brandy ( the heads, aka: the stuff that comes out of the still first and is a bit nasty to drink). Roughly 70% alcohol. I collected this stuff for cleaning in the garage. It does wonders on the lid of the forge.
Anyway, with the dye added, it dried really quick as I was working in the sun and the alcohol does not hang out long with the sun beating on it. It think it all comes down to how much dye vs how much alcohol. I made the soup fairly thick by my standards. I did not measure the liquid but counted drops. started with 20 drops of yellow, added 5 drops of red for each layer, added 9 for the final layer as i noticed the color had not shifted as much on layer 4. I think the last coat of red might qualify as 2 coats since i was using it up and wanted the red to be strong.
Cool thx for the info, you have convinced me to give them a try
I assume you have these ones, but just wanted to check.
they sell a pre mixed version as well
the kit I bought was in small bottles. I think close to $50. Same brand though. I have had nothing but success with these. the black is my fave.
and no, i am not getting a kickback from amazon on this or any other links I have posted.
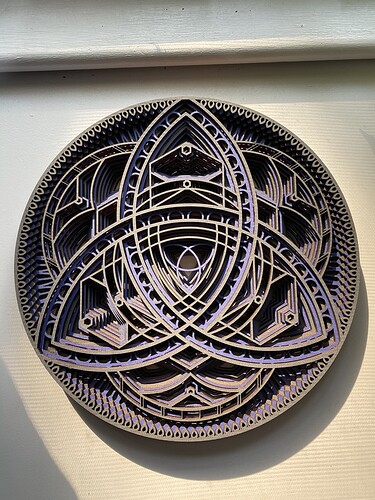
Nice result from the closeups, would like to see the whole thing… looks like your link to more photos is broken?
You never said, but I am guessing this is baltic birch plywood, yes?
Yes. Baltic birch. My goto material.
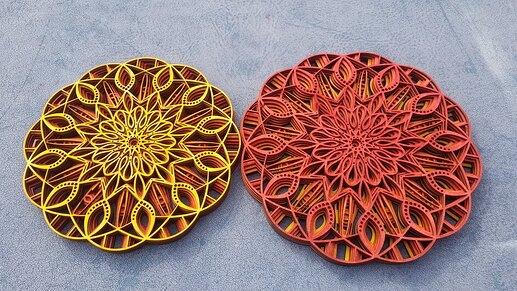
fixed the link. here is a shot of both. The larger one is about 9.5 inches in diameter
Yeah, the yellow-on-top really pops!
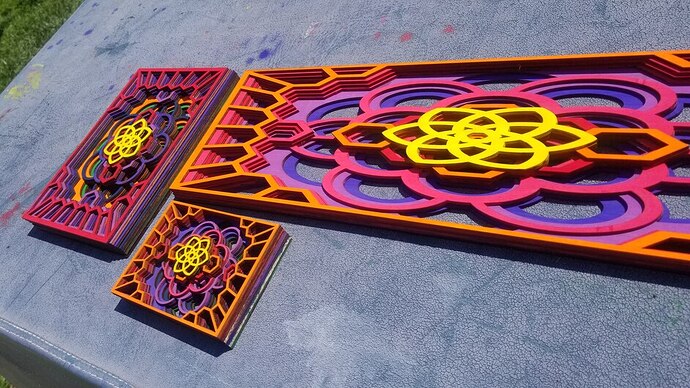
Made some additional mandalas with another purchased design from etsy. 3 versions, all the same design scaled for 1 sheet of 12 x 20, then 3 sheets of 12 x 20, then that one stretched to 3 sheets of 20 x 24 (using the pass through slot. All painted with unicorn spit watered down to be runny.
I am using this paper technique on the same wood you used for this for a triquetra mandala…I’m finding the settings on the glowforge to be tricky…did you just use one of the known settings ( for the first layer I tried using medium maple plywood settings) I’m still new to all this and still learning. But I’m wondering if this setting is too hot, it’s burning the wood through the paper and masking. Did you add you an uncertified material and if so would you mind sharing your settings for this?
The key to getting proper settings is testing. I have a method that I use all the time.
This is awesome thank you so much!! My current setting was making the laser peal up my making and burn some of the bb-plywood so it was breaking apart after…I went and got the suggested adhesive and it seems to be sticking much better this go round! I am using the the same textured paper and bb plywood that you used for this mandala but was using the preset settings for the medium maple plywood as it was the closet I could find. I’ll try this test and share later. Thanks again!
I look forward to seeing the final result, I hope you post pictures to MOAG when you’re done. 
#necrogame
I’d forgotten how beautiful these are, and all the different variations folks have posted in response. Totally worth bringing back to the forefront!
