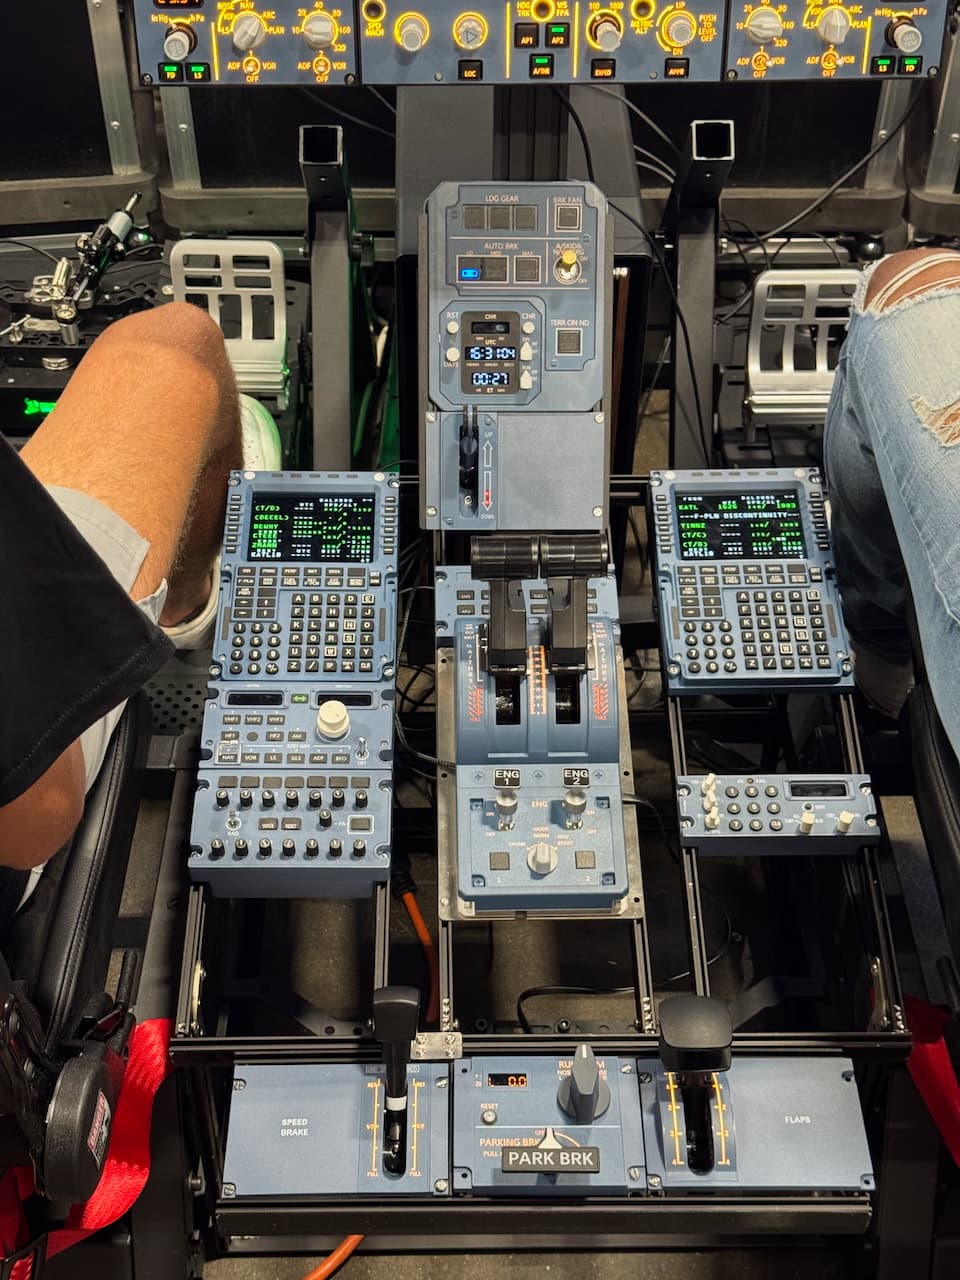
As I built out my home Sim-Pit, I decided to build an A320 (airbus), as despite my son flying the E-175 mountain edition, nobody really makes sim stuff for that plane other than the $20m simulator he gets to fly, but that’s a bit beyond my budget! (they make the plane for MSFS 2024, but not the hardware). But the A320 has amazing simulation hardware from WinWing which has shattered the prior flight sim hardware industry by making panels that used to cost thousands for a couple of hundred, with amazing fidelity. This spring I purchased a pair of the MCDUs (the flight control system for the airbus), the FCP and EFIS panels (the panels that control the autopilot, etc under the glare shield at the top). This spring they announced the remainder of the cockpit main controls and panels, including the throttle assembly, flaps, spoilers. I’ve been frantically making panels to mount all of those when they ship (turns out the center pedestal is just a 19” rack (score)! and I have 3D printed a panel to hold the pair of MCDUs (the mount is a huge slab of plastic! at 6U high) Their stuff is amazing as it uses just one USB-C cable to run the whole cockpit (no video cables!!!).
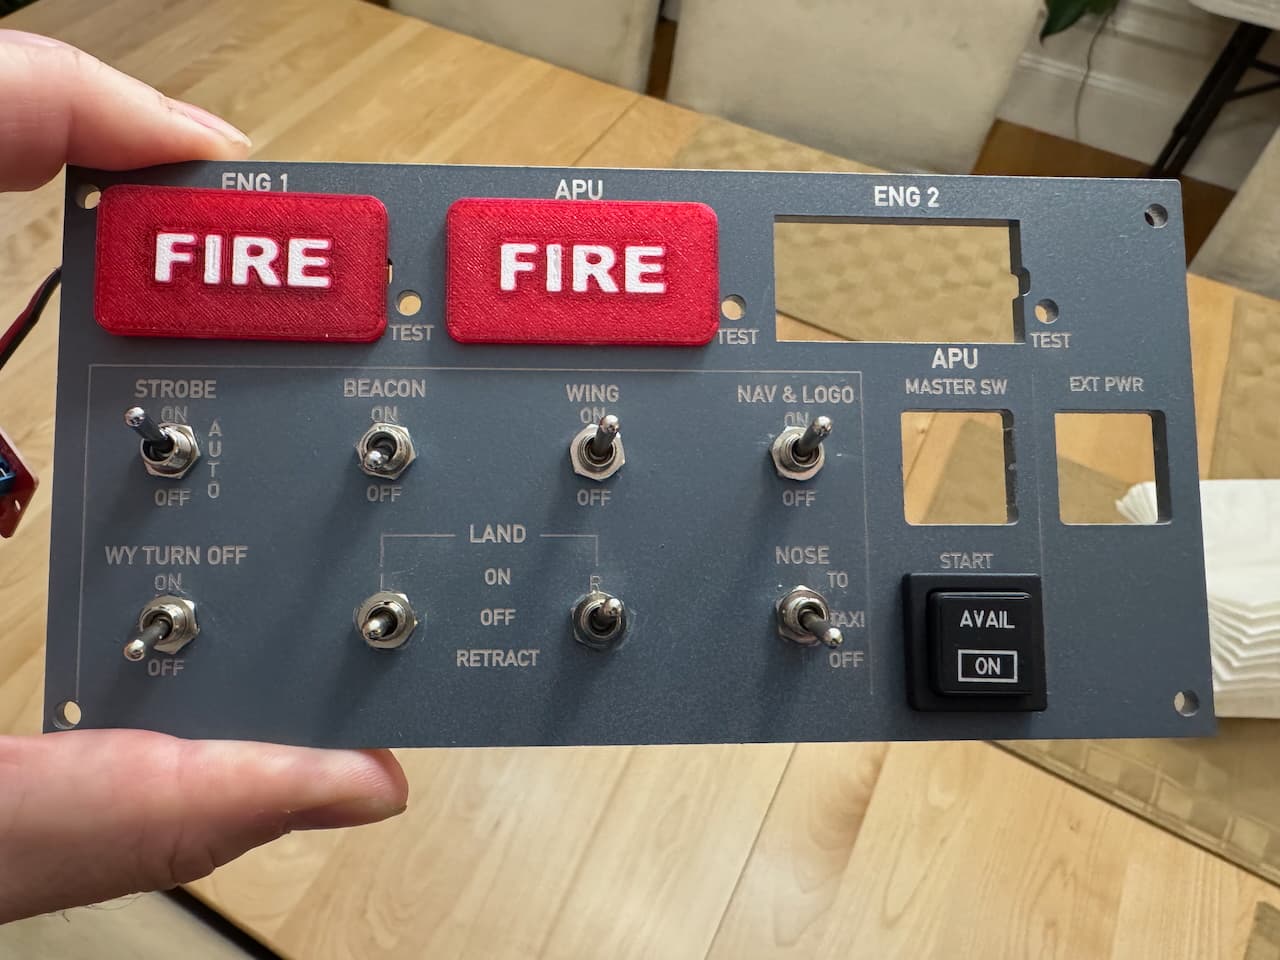
But one thing that super irked me was during the startup (I am sure a real A320 pilot would be horrified at my oversimplification) I have created my own startup checklist for the airbus (a mere 98 steps by simplifying things) but several key steps are on the overhead panel which is less fun to spin and get to in the sim. And that would be a huge build to build a real overhead panel. But I am willing to give up some realism and just create a box with the switches I need (yeah the air conditioning packs can manage themselves), so the key elements are the APU (small turbogenerator in the tail that you use to startup the plane), fire warning and extinguisher panel, and the external light controls. So these panels are complicated to build since they are backlit, and have several types of switches and lights. For backlighting I use 50% translucent white acrylic (the 3mm medium thickness) and you prime then paint the panel (in the correct Airbus blue-gray RAL spray paint) then laser off the paint (very low power setting). It looks amazing. However, you of course learn all the things you never thought about in actually physically mounting the switches etc, so many generations of panels, and now finally I have figured out that the panel needs to be 2 sheets stacked when assembled (only the front has the paint surface the back is purely for mounting switches). The “Kory” switches have 2 colors of LEDs in them and are engraved by a fiber laser (they look and feel amazing) from 737DIYSIM, and while I have built my own from his design, I admit I simply ordered these as is. The fire indicators are red and white PETG printed as a 2 color design on the Prusa XL (on the textured bed, they look amazing in real life and are brighter than they appear in the picture).
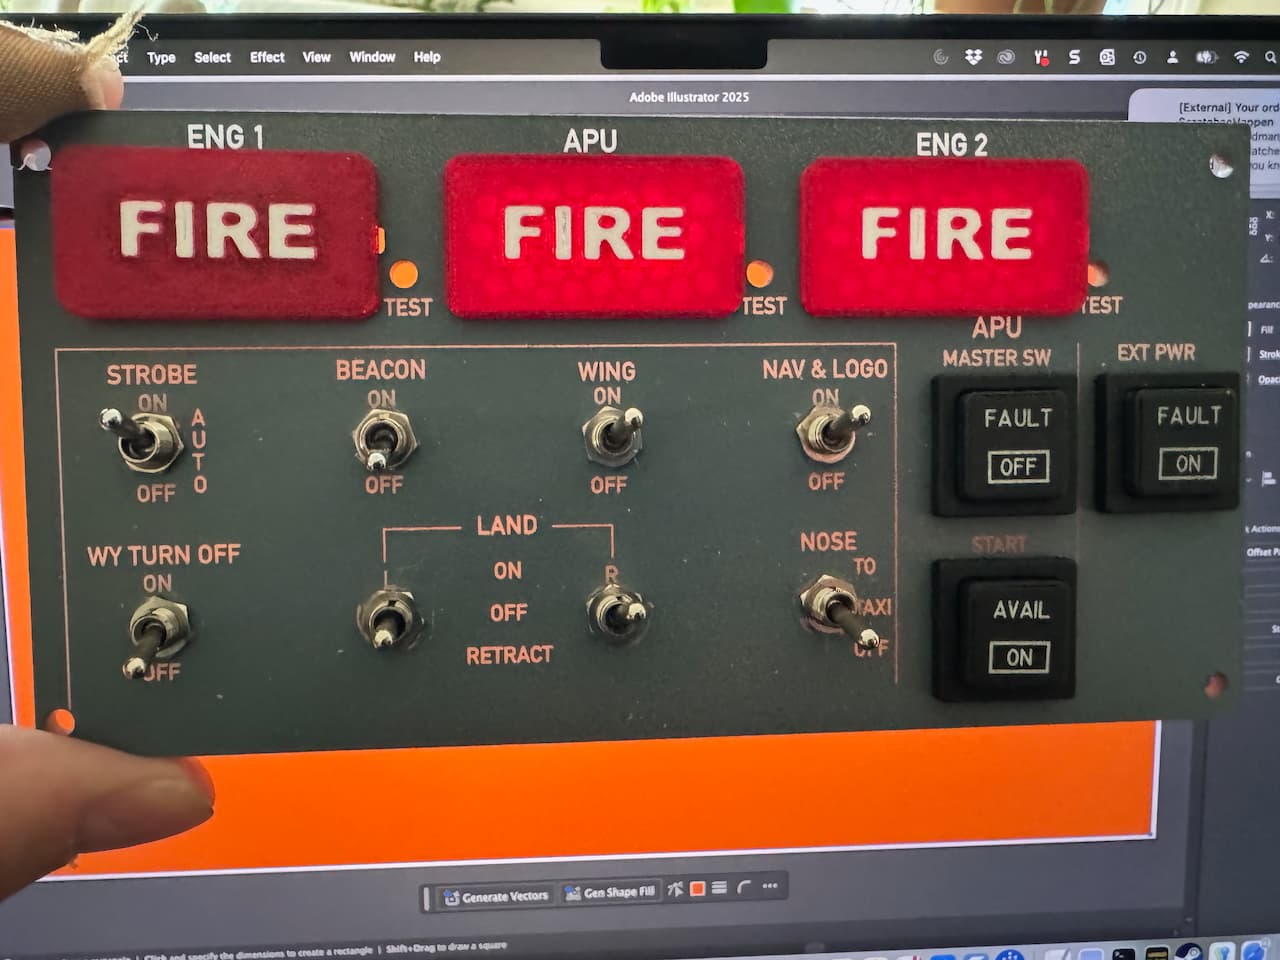
Second version simply in front of my laptop with the screen filed with orange. The real version is lit with 240x Orange LED strips and really pops, and I will share once done. The left fire indicator is complete and has the back box with the LEDS (really bright white 240 strip) while the others are just open in the back as need to fix some wiring.
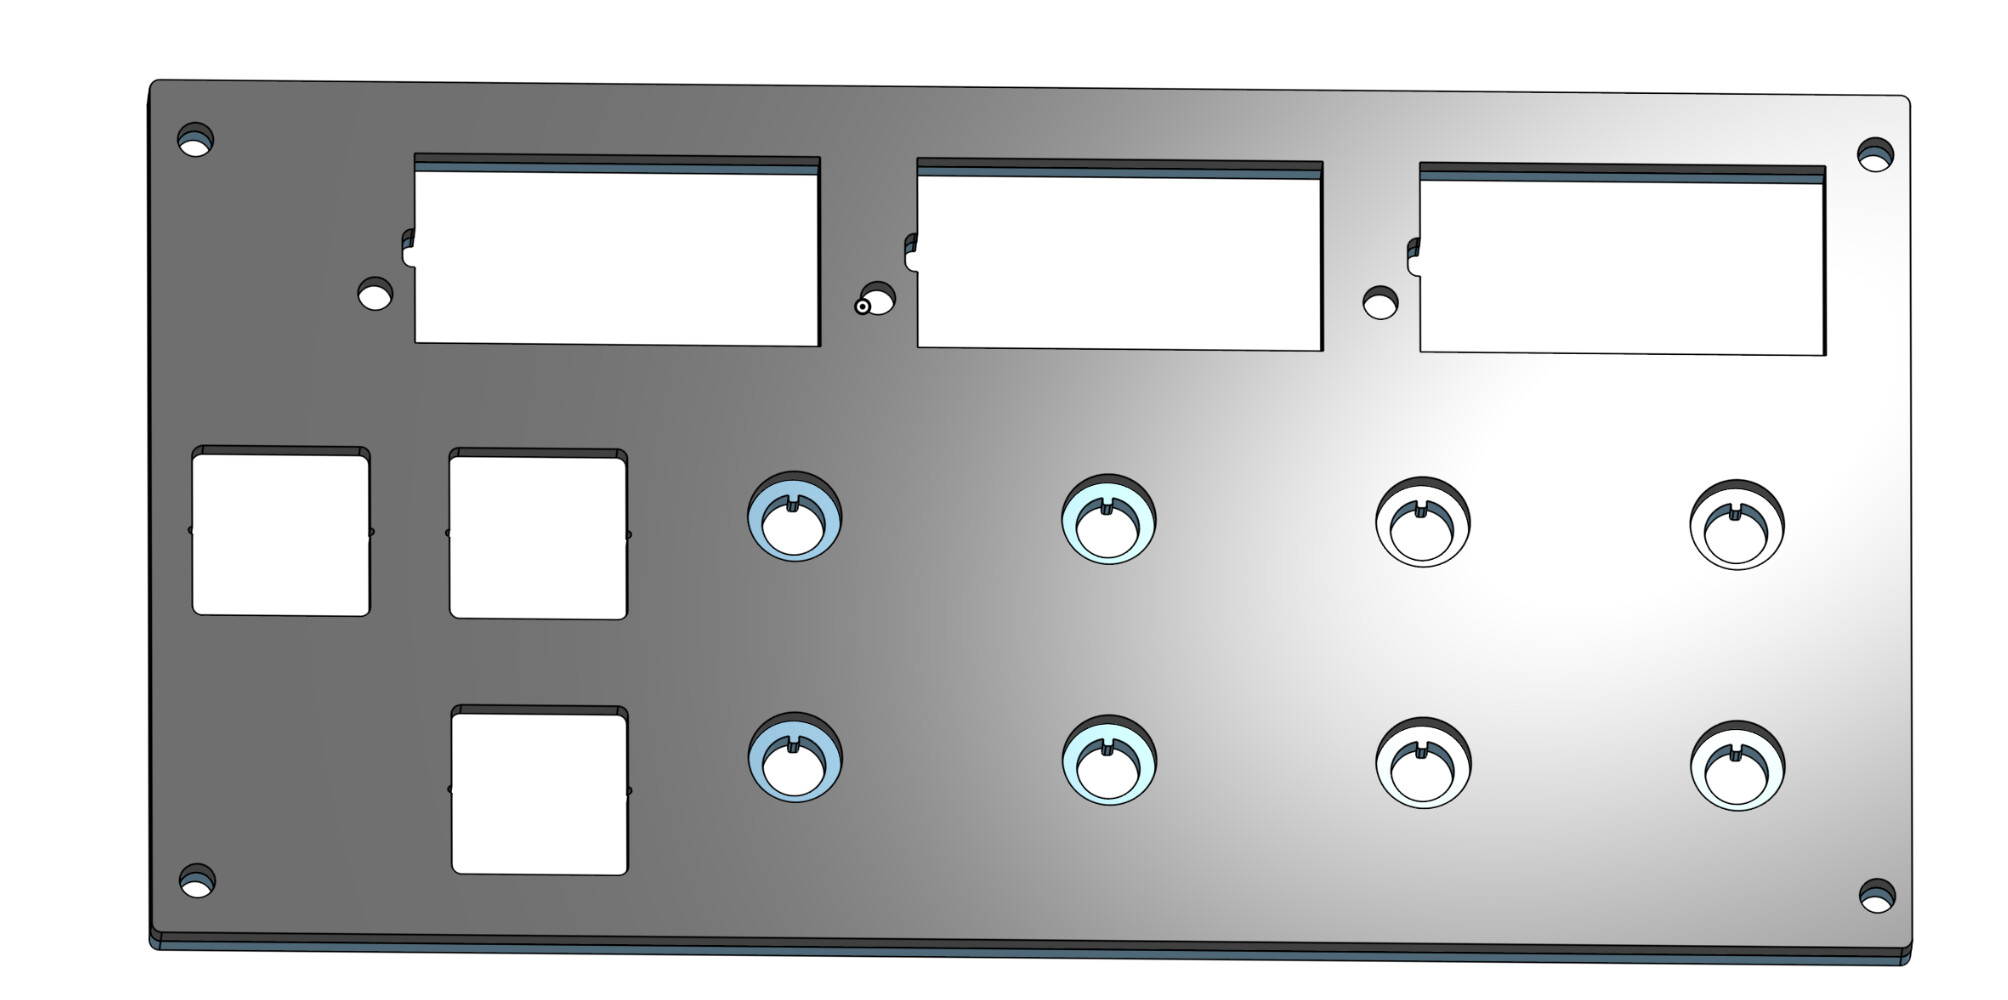
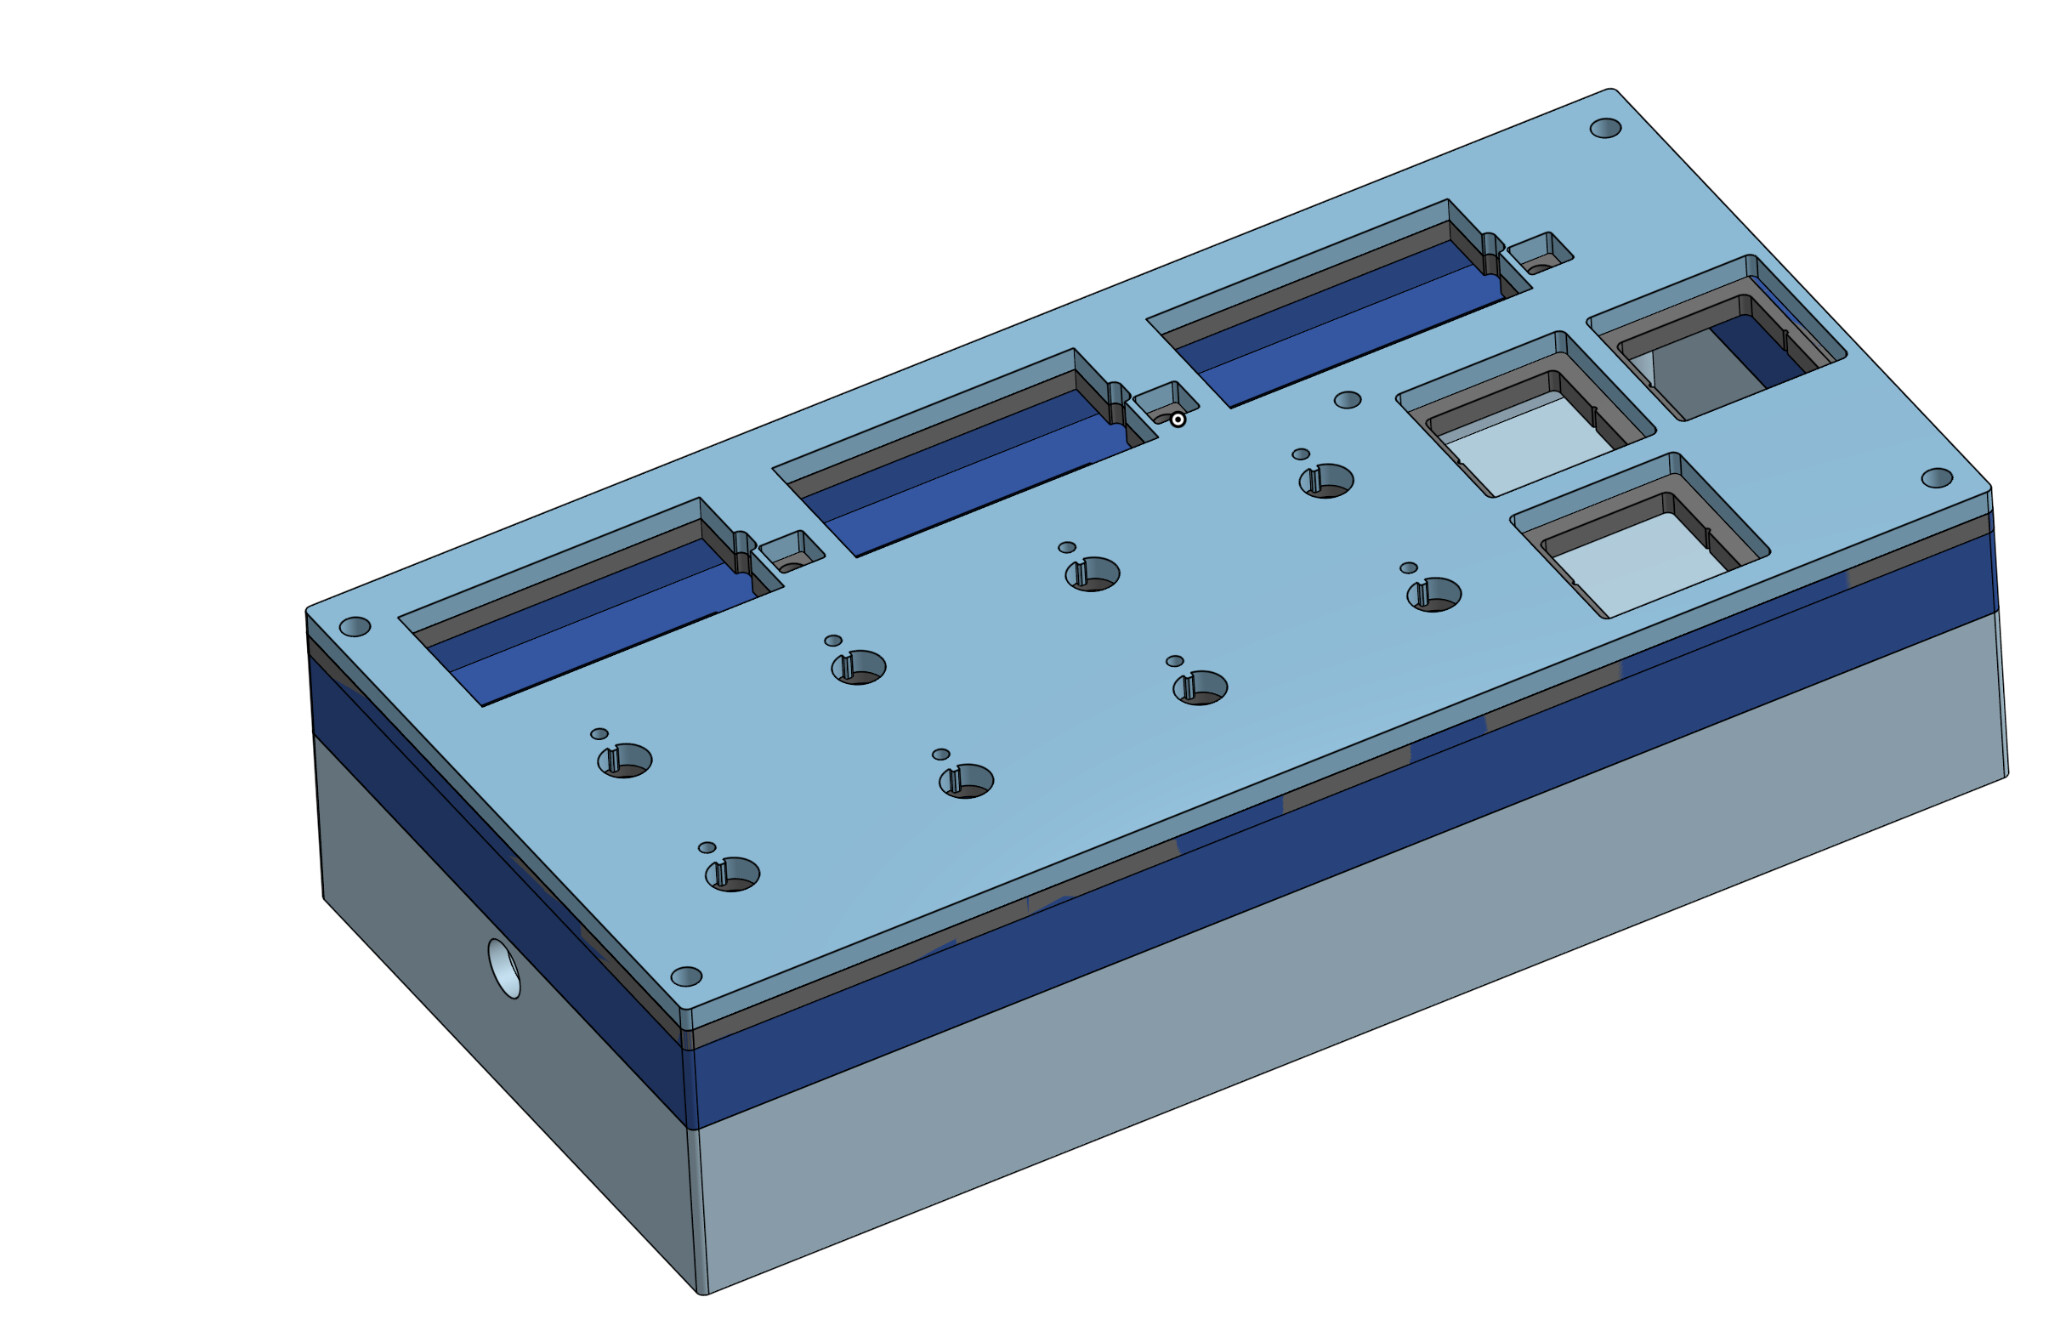
Next version
The next version is as mentioned 2 layers with the upper layer have much large cutouts so the washer and nut sit below the panel. They also have much better locating pin holes for the toggle switches (on-off-on or on-off) so they stay locked in the upright position).
It’s all from just making many, many failed designs and remembering why it failed. Real engineers know how to do it right the first time, but if you buy a big sheet of acrylic and are willing to waste a bunch of it, you can learn a lot!
BTW: For those looking for VERY specific spray paint colors (i.e. to match an existing piece of equipment, may I suggest scratches happen. Yes technically these are automotive touch up paints, but they have all the RAL colors (damn those Europeans for their metric dimensioned Pantone hating designs! ). For those curious the Airbus panel color is RAL 5014 (not the test paint I used in this photo above, that was from a separate project. The next version will be in the right colors…
love your idea for the snap fit acrylic box @Xabbess . It is on the top of my list to make. I have lots and lots of tiny craft items that need homes and if I can make them . . .
You sir, are a chronic overachiever, and I find your posts inspirational as I tell myself, “If I take the concepts Dr. Hennry did and divide by 20 or so I should be able to have something pretty cool.
I’m still wanting to take 2001, NASA punk, and The Expanse looks and mix them up in a bucket to make a “pit” that functions for doing production work.
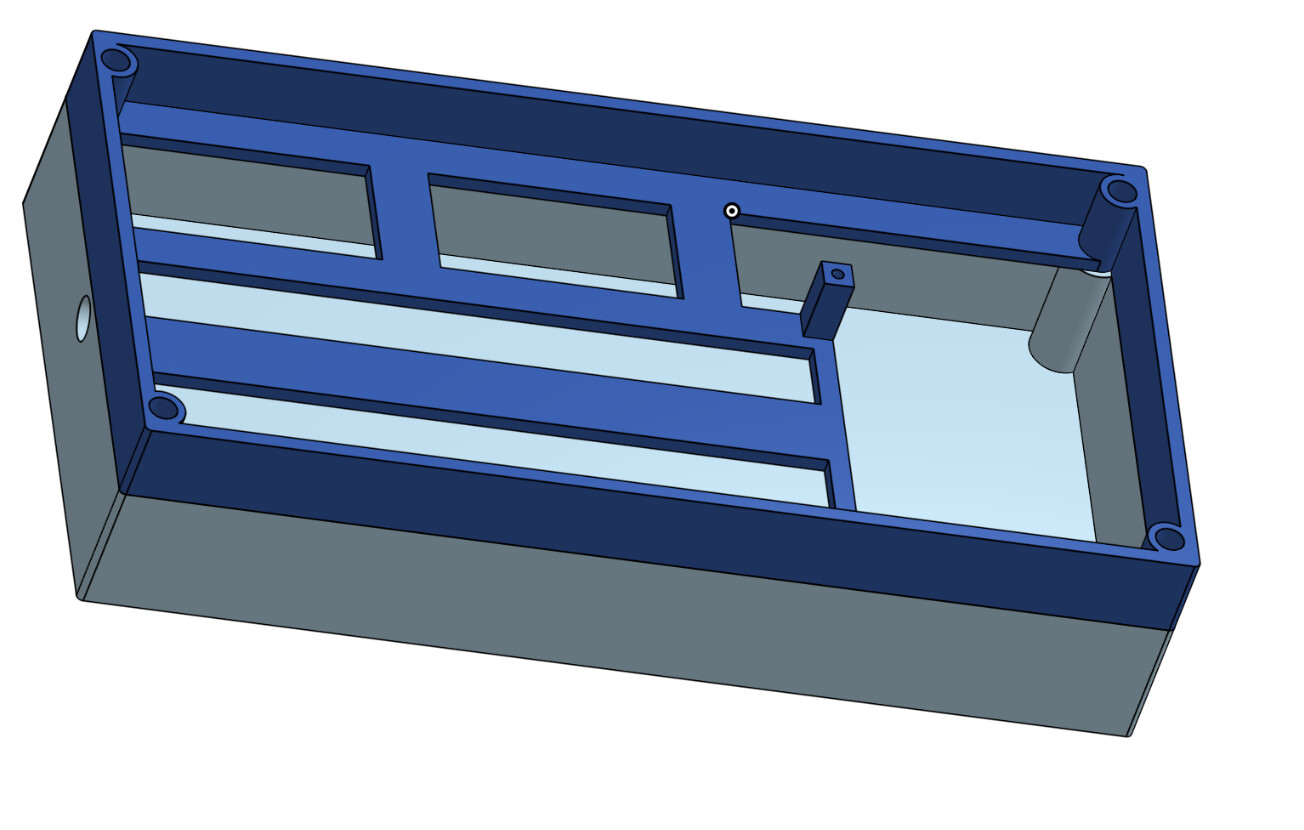
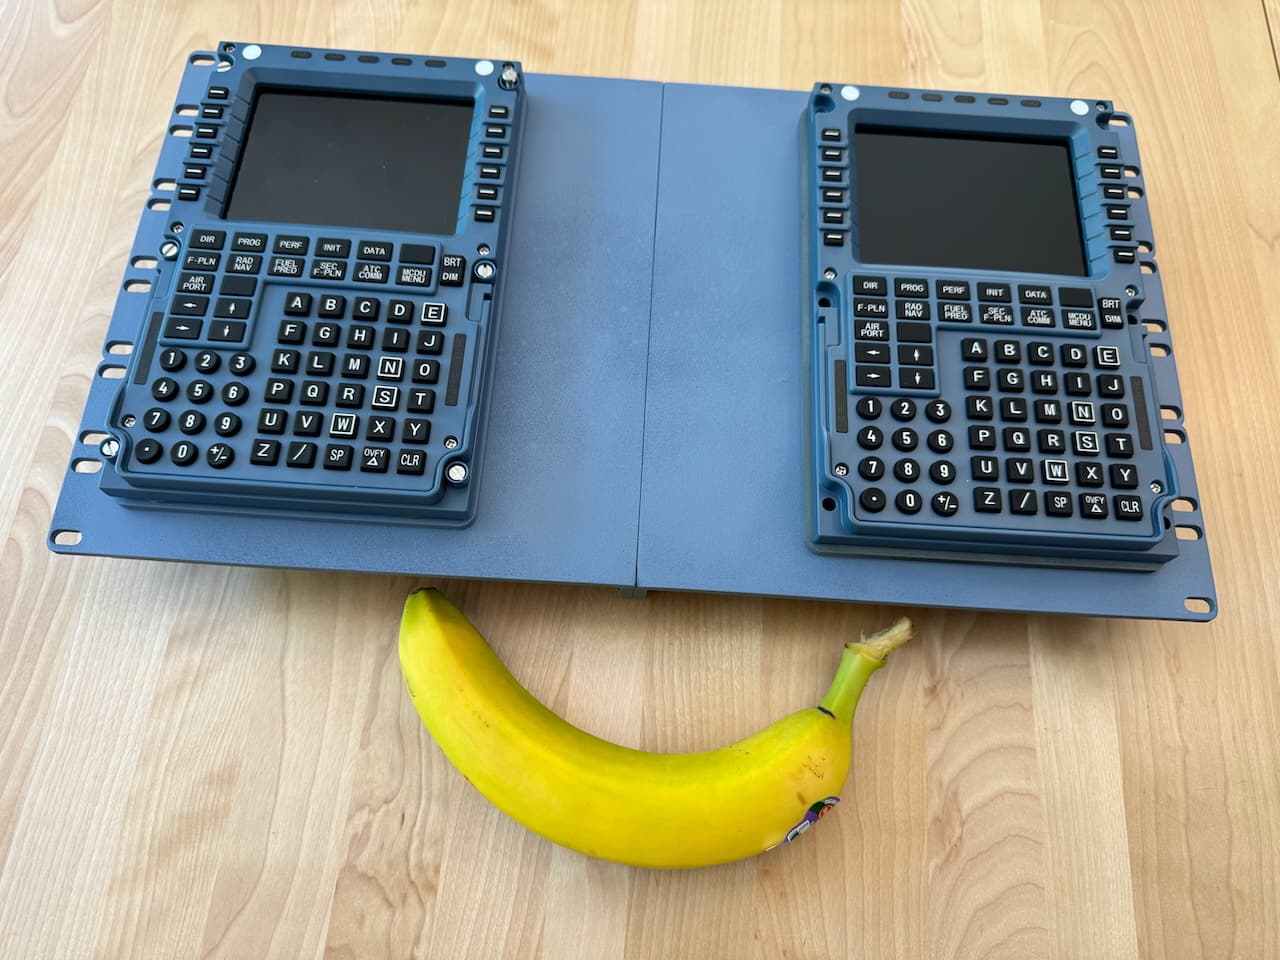
Just to put the scale of all this in perspective this is the 3D printed dual MCDU panel (that banana is not Airbus standard…). The panel is extremely rigid due to extensive ribbing on the back. I released the panel on Printables if anyone is interested. When I am done (this was a test panel, the final FO side is printing now, the Capt side’s paint is drying in the workshop) I will ding the panel up with some rubb n’ buff silver to make it look real…
Which is somewhat meta, since that’s essentially how the Expanse created their set, due to low budget. All the communicators, etc were just edge lit sheets of acrylic with little 3D printed holders for the base.
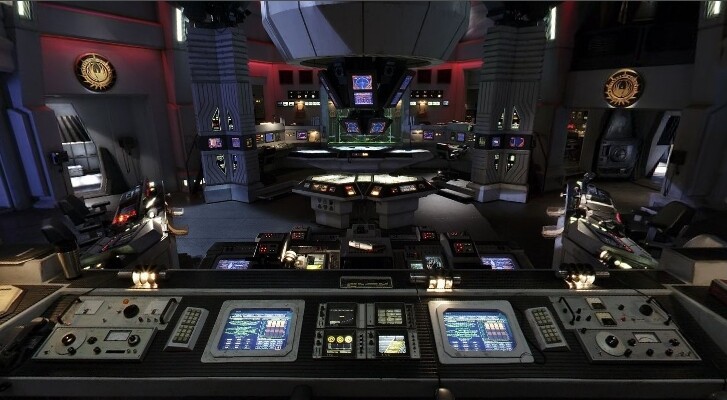
Although the most realistic set to me is still the remake of BSG, since they used surplus US Navy submarine gear so it had that chunky, contractor made indestructible hardware look, with tactile buttons.
And yes, you are so right, I need to add BSG to the mix. I always liked how all the action happened in CIC and not the bridge. Added a lot of realism for me. On the sub we just had Control that combined the function of a bridge and CIC but that was a lot smaller command than a Battle Star.
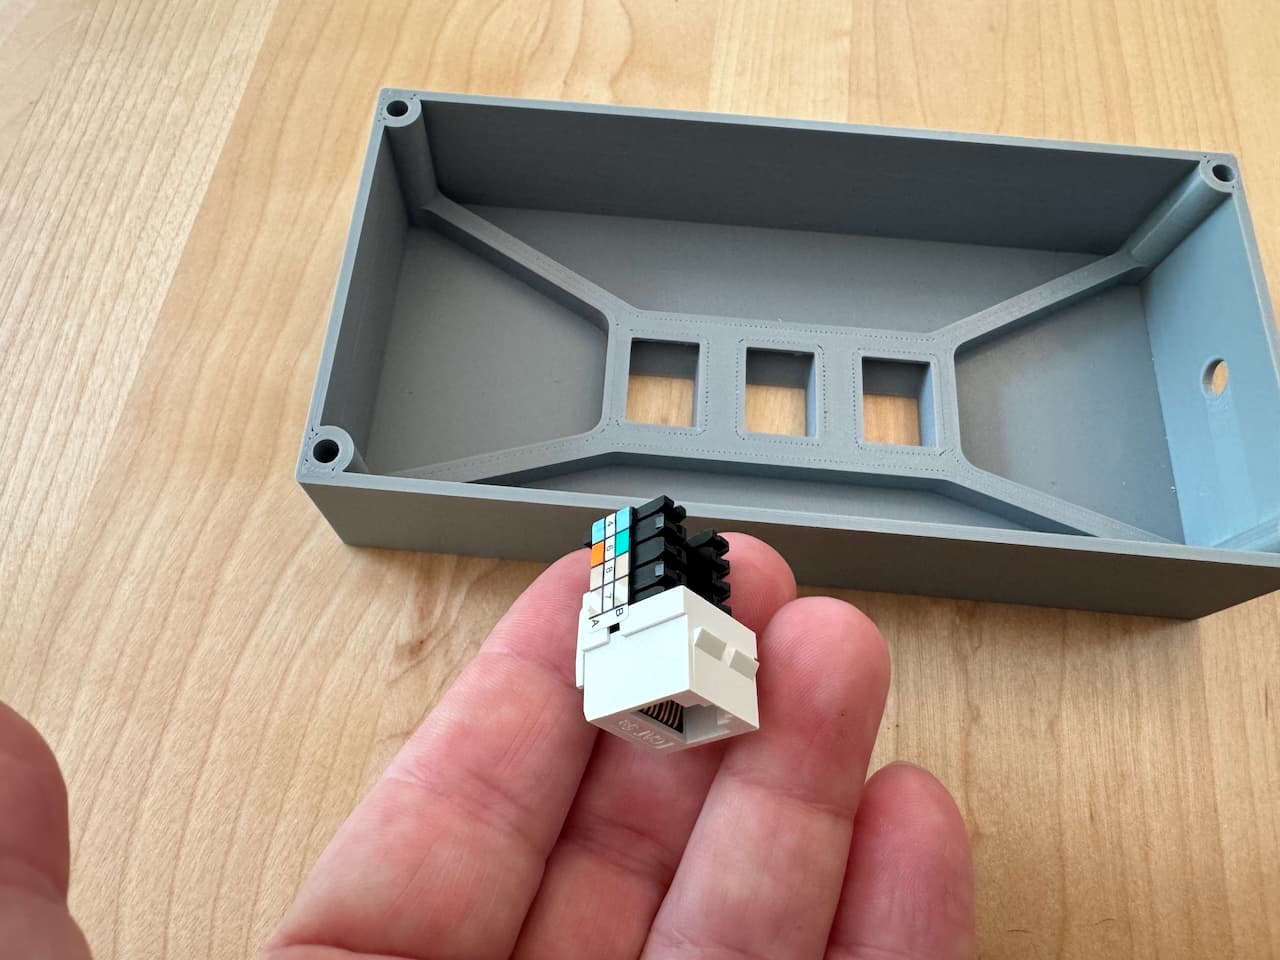
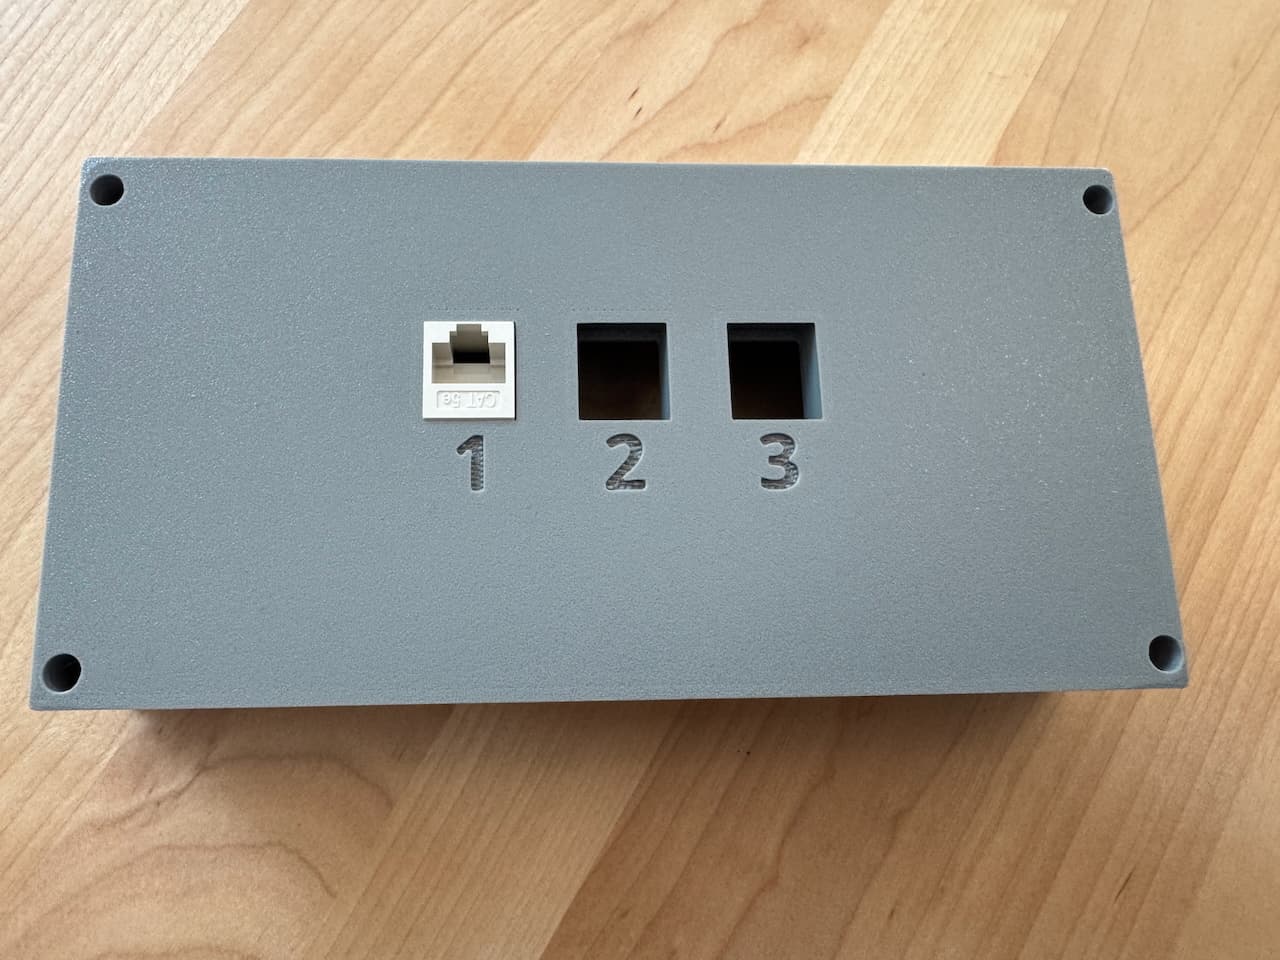
Another cool thing I learned was how to incorporate RJ45 keystone jacks into my models to make connections. I have to give credit to Karl at 737diysim with this idea overall, which is to use RJ45 keystone jacks not for ethernet, but just 8-pin connectors. Gosh it is handy to have connectors that don’t require fiddly pins (looking at you JST connectors) or soldering, but can use my type-66 punchdown and bam, 8 pins with twisted pair, reliable long premade cables (and not like the switches and LEDs have high data rates, I mean if you want to flip your landing lights switch at 10 billion changes a second, then sure, but I’m figuring 1 bit per 5-10 minutes per pair, even the cheapest ethernet cables will work just fine. Also since this is “high voltage” of 5-12V depending on the pin, I don’t have to worry about signal strength.
I’ll skip the banana on this since ethernet jacks are known sizes (well not on the GF, but that’ battle was lost long ago…)
I’ve got a weakness for DB-9 and DB-25 D-sub connectors myself (age showing!) but that is a sweet look. Not to mention that there is no screwdriver needed to connect or disconnect.
DB connectors are fine, and all but DB cables are a pain in the butt, I’ve never seen a DB-25 that is 100’ long for instance (but I could make a 1000’ RJ-45 cable right now (no idea if my drivers could power that much cable resistance wise, but 100’ is off the shelf. I will probably only use a 14’ ethernet cable since I A) have them on hand, let me keep the control box next to the PC running the simulator compared to my seating position.