Nice work! I prefer the 737 myself. I had not considered the advantages of using RJ45 jacks; I will definitely keep them in mind in future. Nice SIM cockpit build.
10 Likes
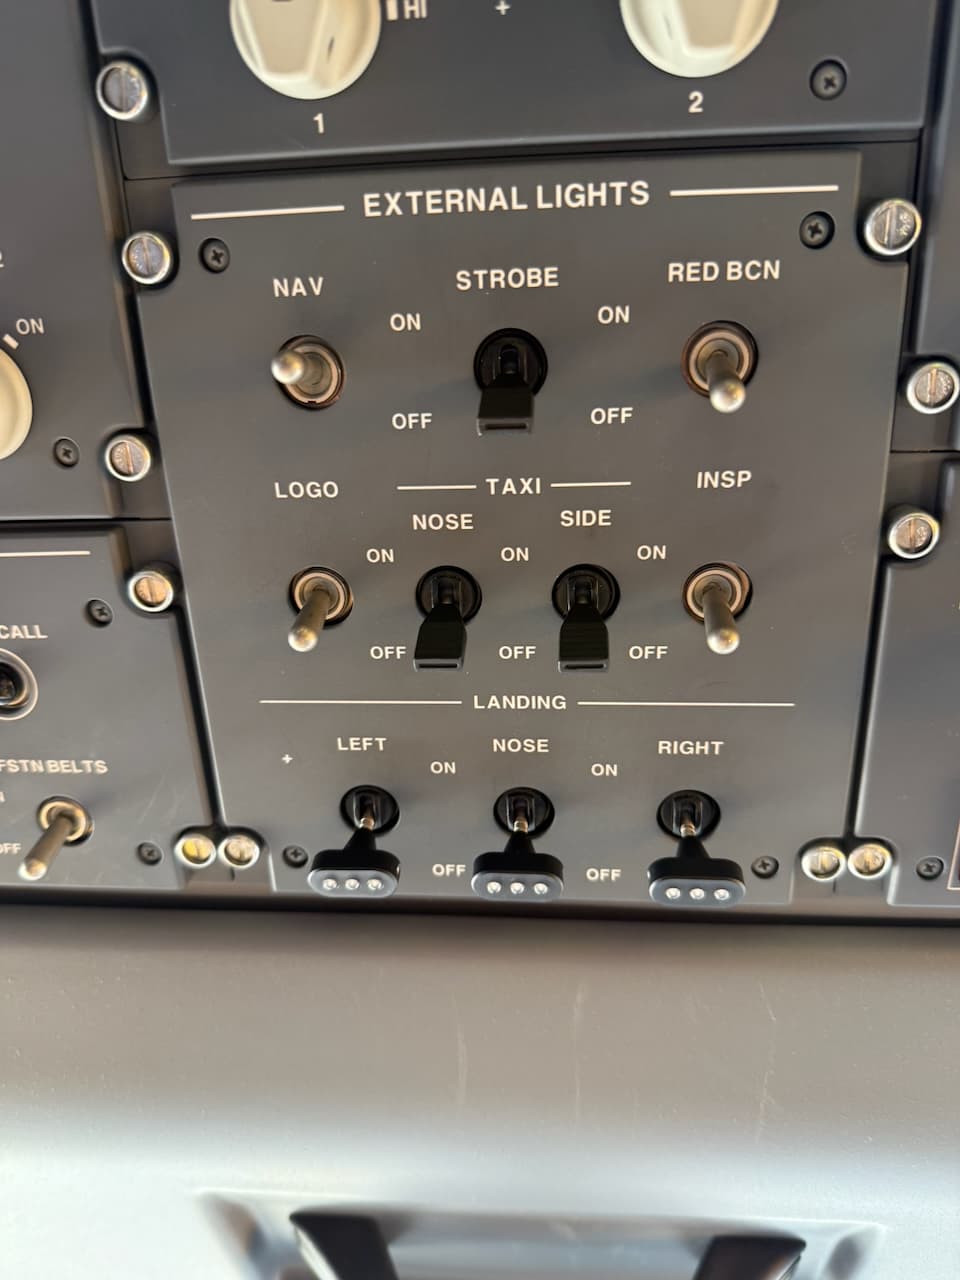
After making yet another failure (so much learning!) where I now have a really nice 2-layer panel which of course I discovered there was no way to tighten the nuts of the switches once I had welded the 2 together (which I did and painted to engrave the words). I wondered how the pros did it, and while most people don’t have easy access to airliner cockpits, since our youngest is operating today (as opposed to our oldest who is actually operating today) I asked him to take a closeup of his overhead lighting switch panel. This is the Embraer E-175, and those clever Brazillian engineers solved this in a way I never would have thought of, so if you zoom in close on the metal toggle switches you see they put a threaded insert through the panel, that’s insanely cool. I’m tightening a nut from the front and they just screw the whole switch in. I am assuming their threaded insert has a broached keyway inside and a little keyway pin to lock it (or some bar on the back that prevents the switch from turning). But that is so insanely cool…
Here is the failed panel: (note it can work if I don’t weld it until the switches are in place. but the Embraer solution is kinda tempting me…
Other problem:
Well have you ever looked at an eclipse without eye protection? Ever stuck your head in your GlowForge and stared into the running laser? Yeah, well those pale in comparison to my slightly overdone backlighting. Fairly sure it left a burned in shadow on the wall of my shop of my body when I turned it on. Then I put the engraved panel on top, and the letters are so blindingly bright that you can’t really look at them (and that is through 2 layers of 1/8” 50% white acrylic!) Gonna need a dimmer (the photos don’t do it justice but the entire room is lit bright orange):
note: the fire indicators have back boxes so don’t get lit by the backlight (their lights are in boxes driven by the sim)


14 Likes
Rivnuts?
8 Likes
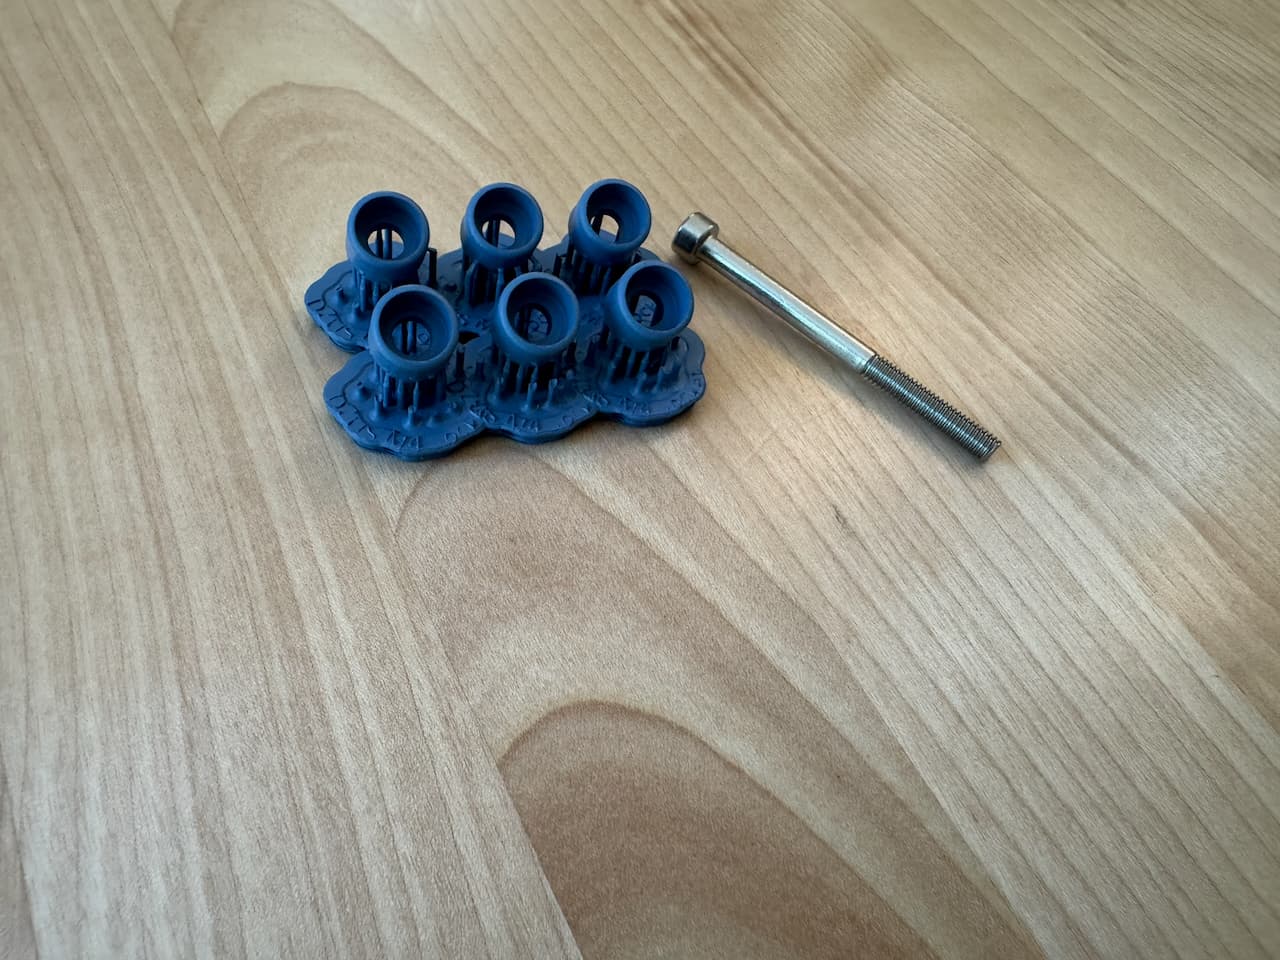
Simular but heat set into the 3d print.
8 Likes
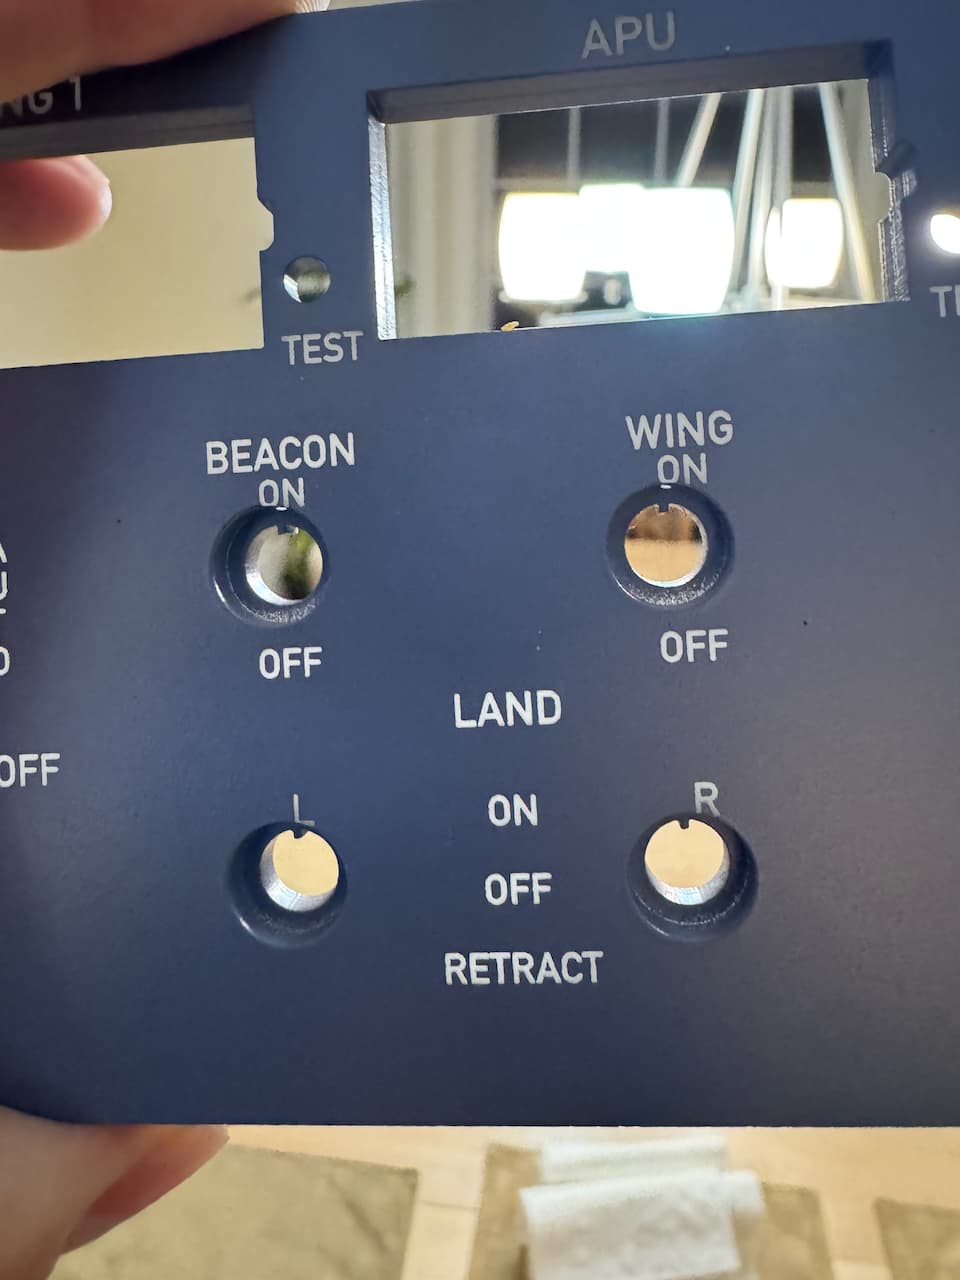
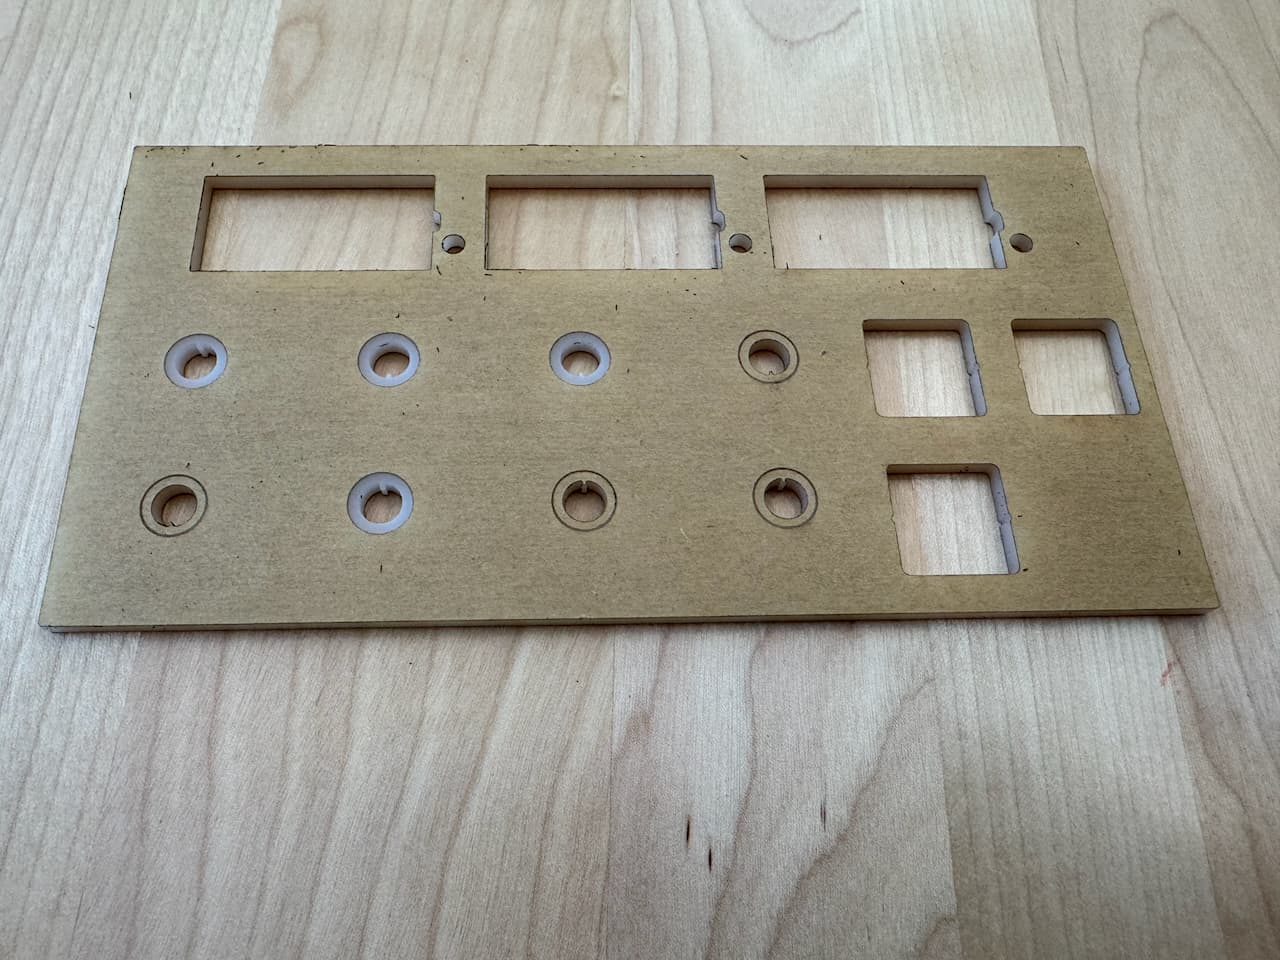
Yeah, except those panels are sheet metal (not sure if they are aluminum or steel). He said he’s seen maintenance open the panels before and there is a rail that hinges down to lock the buttons square. I have heat inserts on the project (for the case on the back) and 3D printed fake DZUS connectors for the screws in the corners (little 3D printed cups that make them look like real DZUS screws without spending $15/screw) While most DZUS screws are slot-headed, the good news when my son has sent me pictures of various panels from his jets, they must lose screws when they take it apart and replace and often the replacements are black-coated instead of zinc coated and might be phillips or hex, so my hex heads don’t look too weird.
8 Likes
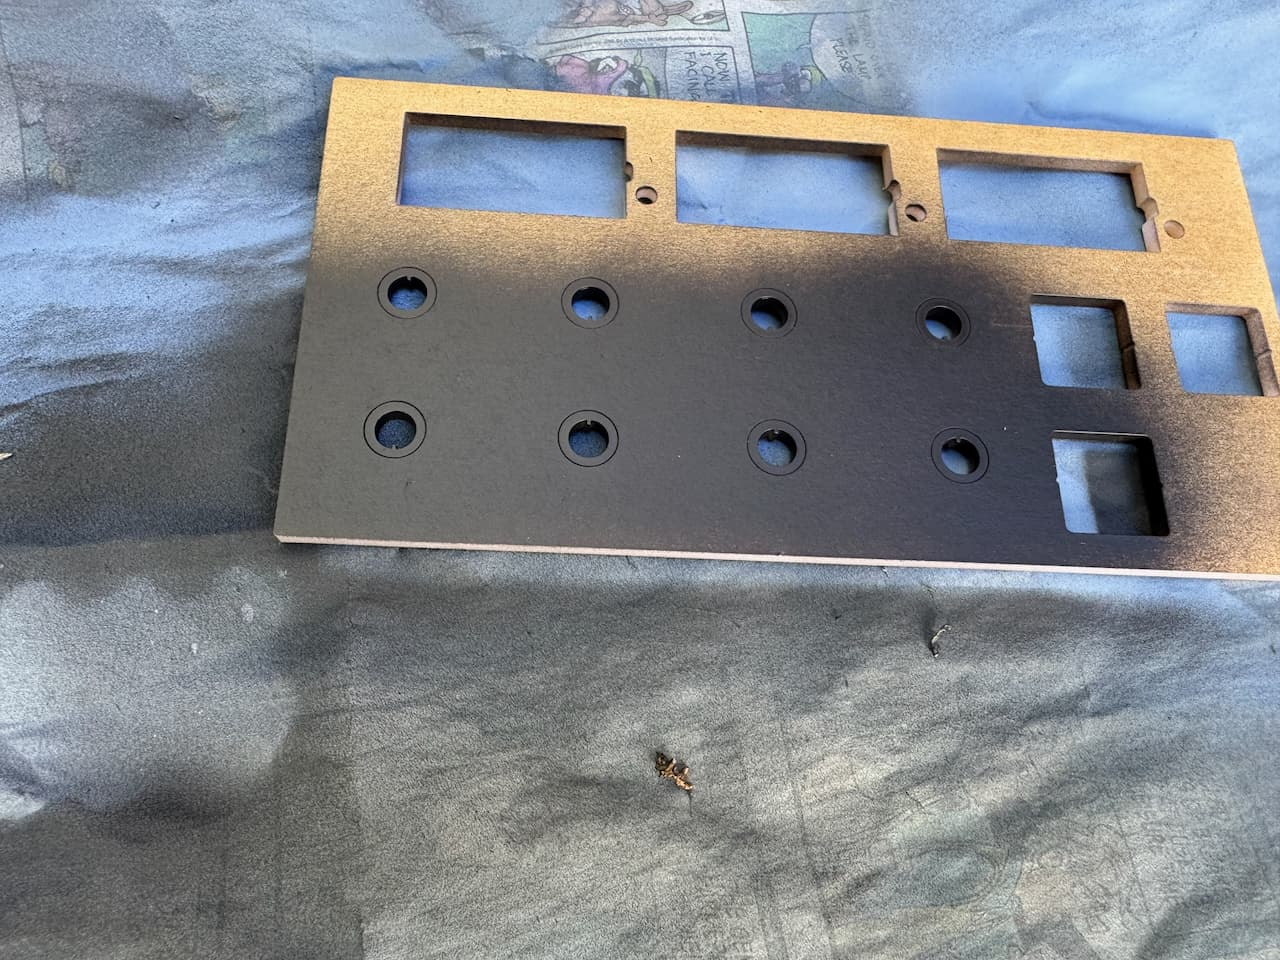
After assembling the double layers I realized I can’t tighten the nuts once assembled (no way to fit a wrench given the 0.5mm clearance) so then I was left with the problem of I can’t paint the second layer before welding it or it wouldn’t be translucent. I needed a mask, but had no way to do a simple mask that matched the holes on the top layer that wouldn’t be a whole project in itself. Until I realized if I just added a score outline around the holes I could just weed the ring of masking paper that just covers the area under the nut.

Here is the bottom panel layer straight out of the GF
partly weeded

Fully weeded
Primed with Mr Color 1500 black primer (did a few more coats)
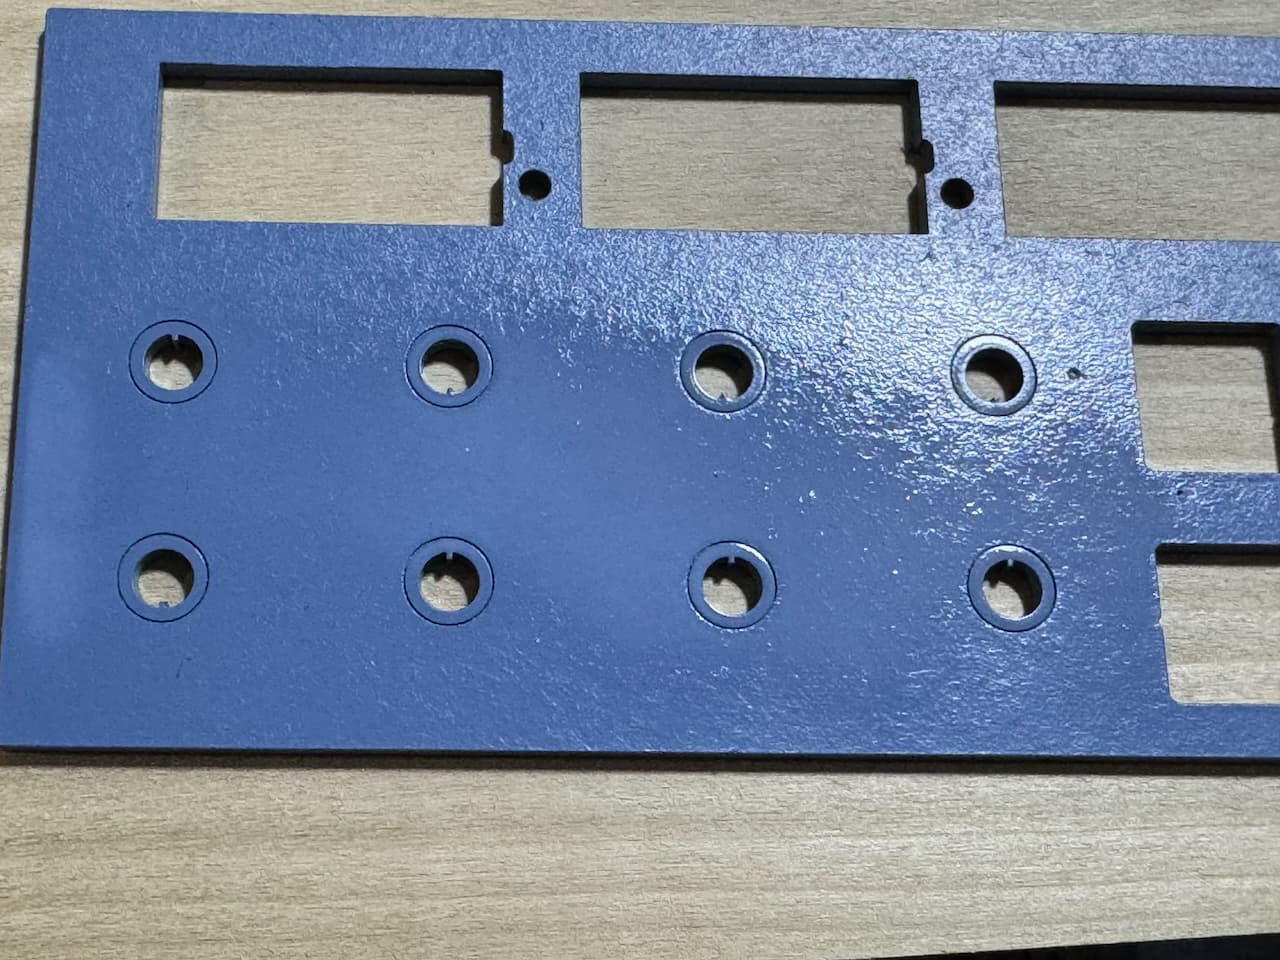
Top coat of Airbus RAL blue-gray

Removed top masking paper

Removed the backing as well and did a quick hold up to the light.
13 Likes
Yeah, poor reading compression on my part. Great solution though. The real thing works great but at that kind of money I can see no one using them in a for fun simulation.
8 Likes
Mark, you’re the kind of guy that might have done this. Have you put those inserts into acrylic? I’ve only put them into 3D printed parts, are the different ones? The 3D printer versions are typically longer than acrylic is thick (well the acrylic we all use, I realize you can get sheets inches thick - like if you are making the cool signs at each desk at JSC in Houston (I’ve been in that room and that is I think 1” acrylic that is machined and then edge-lit! I met the guy who made them when I was working on a project with NASA HSF and he says they weigh more than you can imagine but in that era the only choice was template milling so they had to be thick) which is also why the signs are such thick block letters to make milling easier and the letters are about 3-4” tall. I know these signs are gone now (but they were so cool) after the restoration they did for the apollo-11 anniversary (now they are just regular engraved 2-color acrylic)

10 Likes
Oh and cool trivia for space nerds, so the JSC control center is now perfectly restored to the way it was during Gemini/Mercury/Apollo and looks amazing (although, kinda sterile if you ask me as everything is in fact perfectly restored, they even put ashtrays out where people smoked on the apollo 11 landing). But anyway the cool part was IBM (where I was working at the time) got asked to recreate the 1960s era IBM terminal output that would have shown during apollo 11 (the guy who manned that console for trajectory is STILL at IBM, super nice guy!) anyway they apparently spent a hefty amount of time figuring out from old documents what the font generation was on that terminal, the refresh rate and how text was written to the screen and so perfectly recreated that exact terminal (you get a vertical refresh cycle despite it being an LCD, my boss was a SVP of engineering so I asked him to introduce me to those guys, talk about engineers living their dreams, rooms of white boards and 1960s era circuit diagrams, etc).
That guy, when we talked to him, after I asked if the IBM scene from Hidden Figures (great movie overall) was really like that, and he laughed, and noted that “No, IBM did not send out 2 dufuses to install a mainframe at NASA for the space program who didn’t know how to boot the machine, but that Katherine really was amazing in person, and the 3 of them from the movie were more willing to step out of their comfort zone and try the new technology as they were already kinda outcasts in that world so didn’t mind trying the new thing, and they had the math background to understand how that thing worked. He also described standing there in JSC in the white IBM jump suit as Armstrong switched to manual during the landing (due to the infamous 1202 error because the tracking radar was accidentally turned on), joking that brown would have been a better color for the jumpsuit that day, the margin was even tighter than the movies make it seem before he was out of fuel.
9 Likes
I have not, but I would if there were a use case I came across needing it.
This is where McMaster becomes a close friend. Not only do they come in different lengths, materials, and threads, but if heat-set isn’t going to work somewhere, there are press-in inserts. And all of these come with CAD drawings that you can insert directly into your plans for that cool thing.
Just type in “insert” in the search box within McMaster, then start parsing it down by style and such, as there are thousands.
I think I’d try a press-in, in acrylic, before trying heat-set.
9 Likes
I love mcmaster, their cad models of everything is just so amazing as a service. I will have to check out the pressfit ones, although I only have a heat set rig
10 Likes

Although the panel is ruined from the engrave being misaligned (?) the DZUS connectors looks real and snazzy (this is just a test fit for appearance’s sake as I haven’t welded the layers since the engrave is wrong…
10 Likes
Many of the press fit will simply press in with your thumb if the hole is properly sized and then expand slightly when the screw is inserted.
8 Likes
Got the panel’s wiring mostly done (need to do a 2 more of the MOSFET boards and then punchdown on the RJ45s. I made a miscalculation and realized I had more than 3x RJ45s’ worth of wires so realized I should have done 4, luckily this was parametric in my CAD design so that newer case is printing now. But here is the wiring progress:
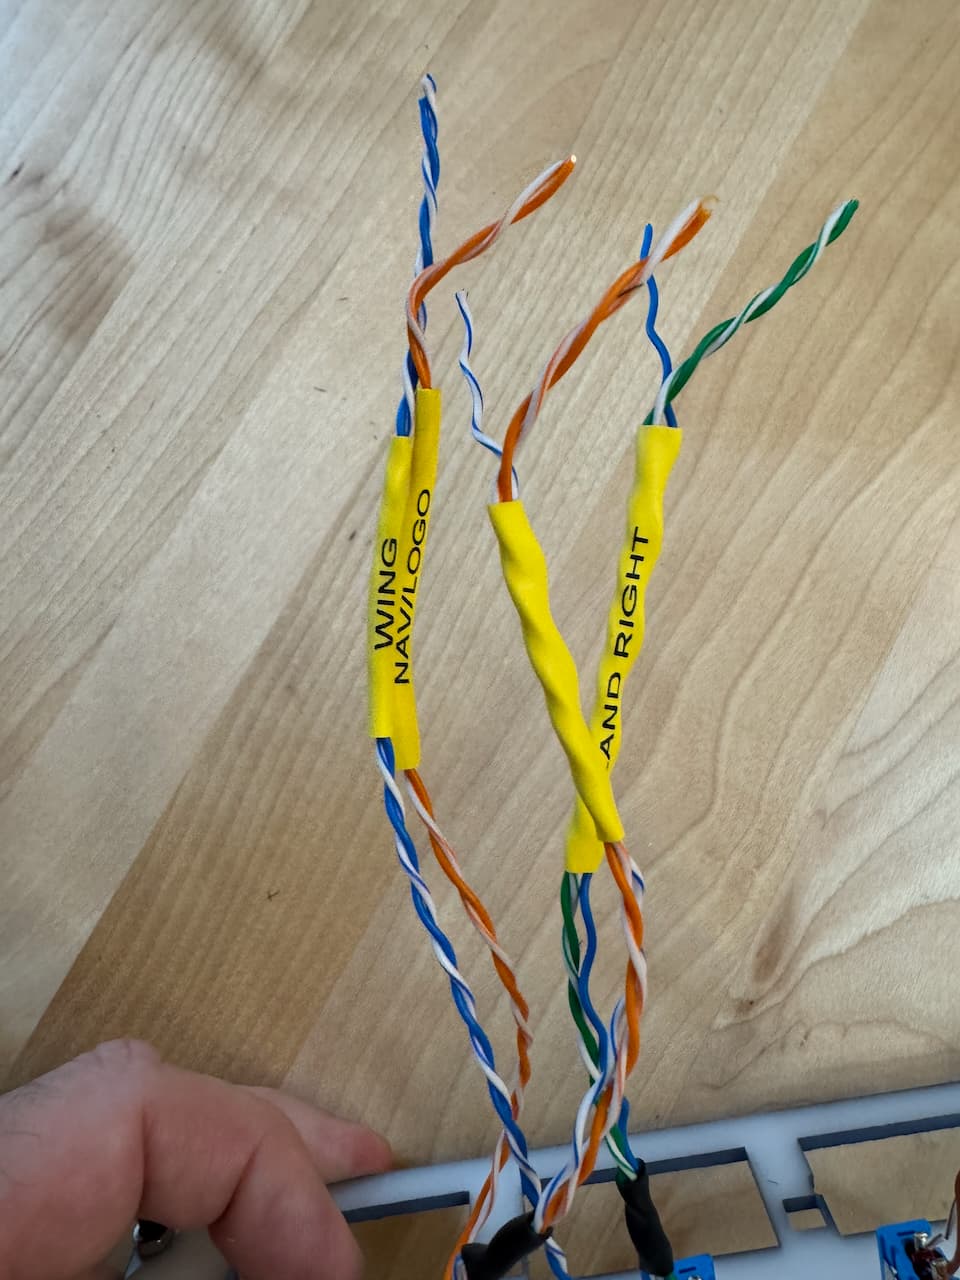
First splurge of the project was buying a labelwriter than can do shrinkwrap, because all of these look the same.

2 MOSFET boards to add to the fire indicators and as soon as the retaining clips for the test buttons come out of the FormCure the tactile switches will get mounted (that’s the 6 cables I forgot)
The only final mechanical step on this is to weld the 2 acrylic layers together once I am absolutely positively sure (I have so many scrapped ones). Those Kory switches use common anode wiring so only 4 wires (switch and 2 color LEDs). If you need one for a project, Karl is great, and they can be found here (these specifically are this one) which are amazingly cheap since “real” Kory switches cost like $100+. If you are in the UK Karl does allow visitors to the workshop (I believe he is in Sheffield) and of course at all the major flight sim expos.
12 Likes
About time. All serious projects require the purchase of one new tool. Otherwise they kick you out of the serious project maker’s guild because you’re just playing around ![]()
10 Likes
I have used this rule for years now, and at this point, I often already have all the tools needed.
9 Likes
Heresy! ![]()
10 Likes
That’s when they invent new tools. Eg. home lasers, and fractal vices (though that’s reinventing an old tool!)
9 Likes
![]()
![]() That is the way of the dark side!
That is the way of the dark side!
Or, evidence of not enough projects.
8 Likes
Or not ambitious enough projects. I think that is my case.
8 Likes