I’m fiddling with what’s optimal but I can show you what I do (fair warning, I’m one of those pesky Illustrator people who has never managed to master Inkscape.)
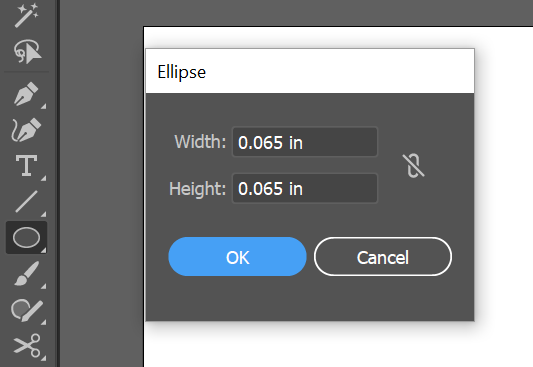
Step 1: Create a circle somewhere between .06 and .07 inches in diameter. (This really depends on your needle more than anything. Thinner needle, smaller hole is okay.)
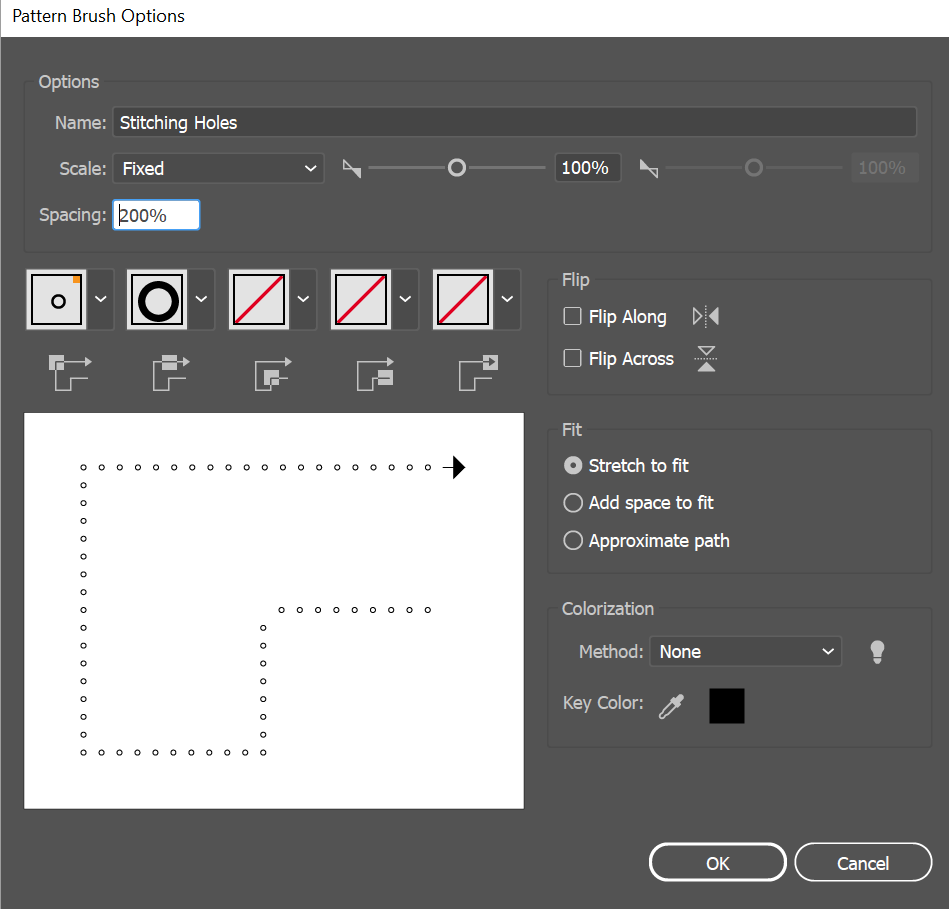
Step 2: Go to Brushes > New Brush > Pattern Brush and set your spacing to 200%
Step 3: I build most things that need stitching holes out of segments so I can grab a segment and move it a fixed distance before applying the brush. (Offset path is also a handy way of doing things for some shapes and the principle is the same.)
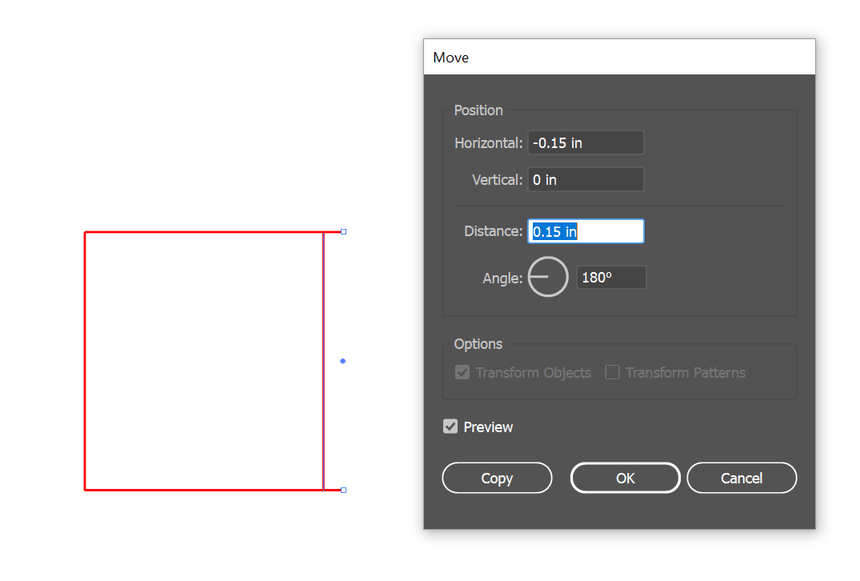
So, Object > Transform > Move, just use the copy button. I’ve found that between .1 and .2 inches from the material edge works for most of the things I’m doing. More load bearing / structural = further from the edge. Decorative stitching or things like bracelets can be closer to the edge.
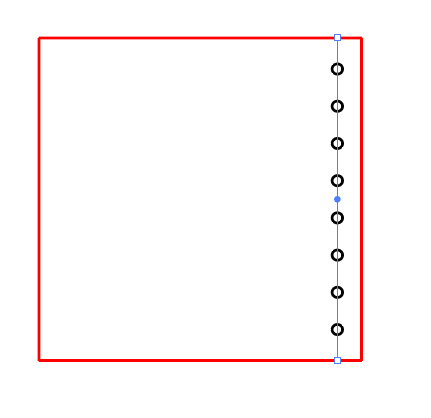
Step 4: Apply the brush to your new line.
Step 5 (Optional): Object > Path > Outline Stroke. Doing that will give you a group of individual circles that can be edited. Sometimes I need to delete a single hole at the top or bottom of a row to prevent collision / overlap with an intersecting row of stitches, sometimes the brush goes wonky around corners… it’s just handy sometimes.
I’m a long way from an expert with this stuff so don’t take any of the above as gospel or best practice… but so far, trial and error, it’s been working for me.
Also, by keeping the brush defined as black, when I build my cut lines in any other color (I could default to blue just as easily as I did to red but somehow red just makes sense for me), the stitching holes automatically load as the first step to print which is super handy.