Always test cut, always: Maybe my intuition will improve in future projects, but on this first one 90% of first cuts had something wrong: kerf, sizing, engraving depth, just to name a few. It's painful to watch a finished piece of wood go to waste.
Glowforge presets are your friend: I got carried away with custom settings in the beginning, but it quickly became clear that Thin and Medium Draftboard was all that was needed for 1/8" and 1/16" Baltic Birch cuts. Engraving is a different story - lots of room to control depth with custom settings there.
Working with vector graphics is essential: Insets, outsets, adding/removing anchors, simplify, merge, union, coloring your cut sequence and engraves were all editing skills I had to learn.
Don't be afraid to maximize board usage: Glowforge cuts are super thin and the burn from nearby cuts won't hurt (as long as you mask). Rotate (hold shift to get 45 degree increments) and cram the pieces in tight to make full use of the board. The software will change the lines to dotted when placement is out of bounds. Push the pieces right to the edge.
Use Refocus: The default focus appears to be from the center. When cutting into a board that's already been used use 'Refocus' over the target cut area to get a more accurate image so you can place cuts closer together. Before discovering focus, I made a number of cuts that overlapped a prior cut or were padded more than they needed to be.
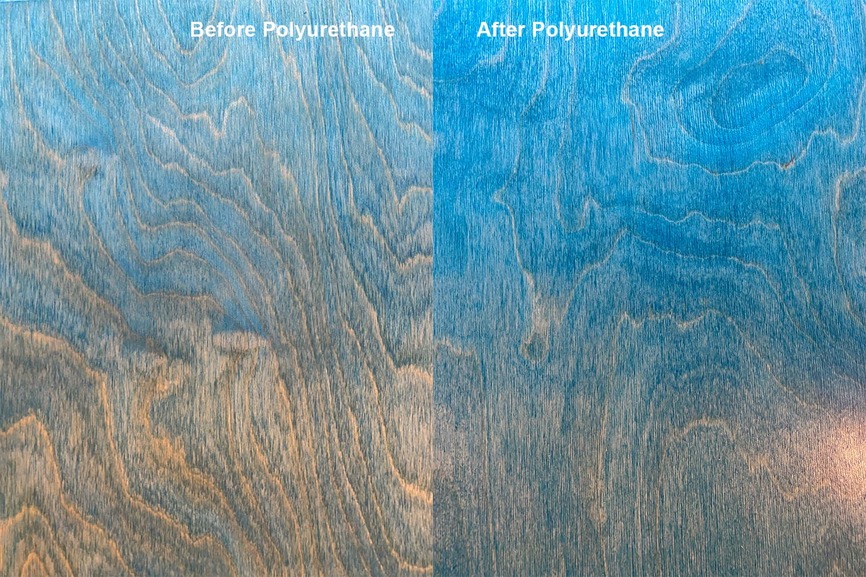
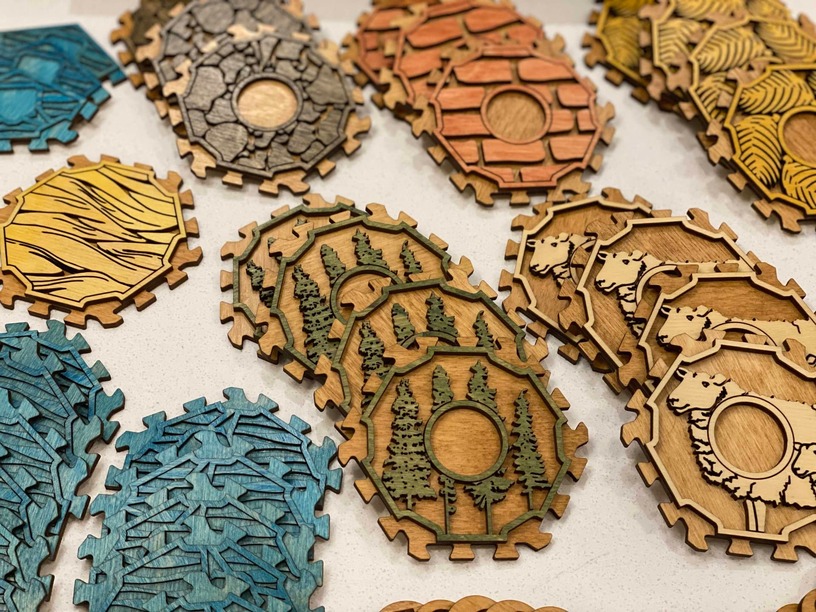
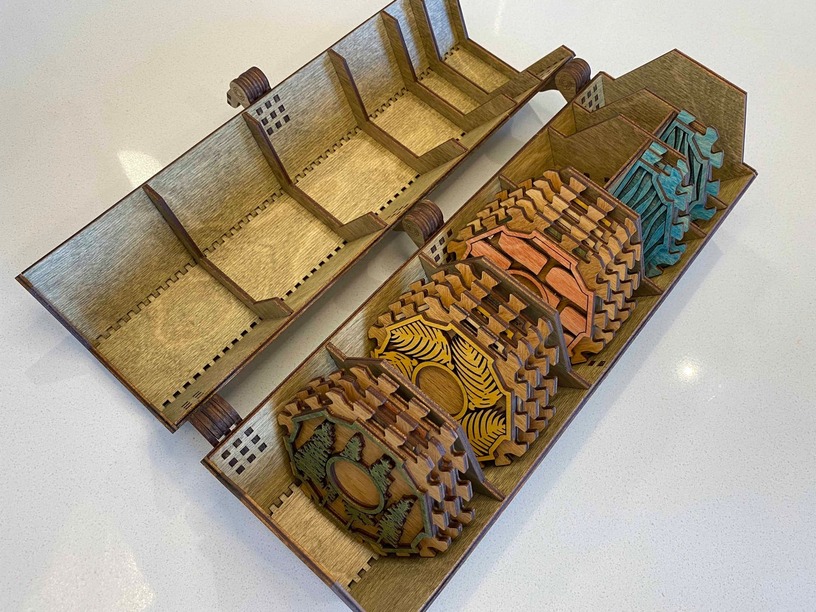
Let custom stains sit: The stains on this piece were hand mixed into Minwax Clear Tint Base. The color is much deeper if the stain isn't wiped off. Of course, it needs to be applied fairly evenly without pooling.
Masking doesn't stick to wood conditioner: I wasn't thinking and put wood opener on a board I didn't intend to stain. It repels masking tape. No amount of pressure was going to stop that tape from floating right off when the forge fan came on.
Don't skip steps: Don't skip the sanding or wood opener. Both steps make a huge difference in the appearance of the finished board.
Wood glue sticks so-so to polyurethane: Wood glue will stick two polyurethane pieces together, but you'll be able to fairly easily pull them apart. The pieces are likely to come apart over time without much agitation. Others have said 'don't try to do it' but for a good-looking end product it's a must in my mind to apply poly before cutting. My current approach is contact cement following the exact instructions for application (no skipping steps).
Hope this helps you on your forge journey. Next up, Seafarers expansion with custom acrylic pieces!
I appreciate your support should you choose to give it:
Etsy, Pinterest, Shopify
This design was modified from one originally created by 'katton' distributed under a Creative Commons Attribution 3.0 Unported Licence, which can be found here .