The Table Lamp - Final - Part 3

Greetings -

Thought I’d share my latest creation. A table shaped lamp for my entry way. I took measurements and decided to go as wide as I could on a sheet, and size the center circle so two could be cut out of a single 12x20. I did a cardboard mock up to keep it cheap. Test fit looks good.

I knew I wanted multiple layers, and thick enough to have an led strip inside, the Wiz 3.3’ to be specific. Couldn’t be a better fit on length.

On to cutting Draftboard for the ‘outer’ shell. Along with a ‘top’ and a bottom.

I had to cut enough sections to be thicker than the LED strip connector. Turns out the number is five sheets of draft board.

Then a nice top of Cherry, that I got on close out at Michaels. :wink:

Time to perform a light test. Perfect.

So at this point, the cost is starting to dawn on me as I contemplate how many layers of acrylic are going to be required in the ‘center stack’. Turns out, it’s a lot, of both. And I made the decision to just not care. I had plenty of materials on hand, so I’m just going to make my vision.

Given the cost, I decided it would be a much cooler ‘desk lamp’, if I turned it over, and flipped it. This took no small amount of mental energy to reposition my thinking around building it in a different orientation, and reversed, from the original concept. But, I was able to overcome and started cutting the inner circle layers

Having all the pieces cut, let’s start assembly. From the top up, as I want the screw heads on the face.

For the ‘top’ inner layer I bought a $5 Etsy svg I was able to stretch and make work for a nice white beachy like design. Yes, I had cut the bolt holes before I got the graphic, so I had to make do the best I could on the layout.

Table Lamps are like Ogres, they have lots of layers…

From the back piece, on top, going down to the face - Black, Medium Blue, Translucent Blue, Clear, Translucent Blue, Translucent Blue, Teal, White. On the medium Blue and Teal I also did an opposite in clear, so there wouldn’t be an air pocket. The middle ‘clear’ layer is lined up with the center of the LED’s and really helps spread light through the center of transparent blue layers.

One last thing to do before final assembly. Clean the Glowforge. This is following Adam’s philosophy.

15 min later. Just putting a draftboard back on it for now.

Washers and wing nuts, just snug.

Before the reveal, I’ll tell you the final cost below, but also realize, there is a lot of good materials left over that I’ll do several complementary pieces out of as well. Probably. :slight_smile: Ok, final reveal, without the lights on. Pretty nice.

It’s tough to get a good picture of the ocean part with the light on, but here goes…

There’s three layers of translucent blue with the clear in the center. Each layer reflects back and forth through all the pieces. It adds a ton of depth to the center section. And the reflections are also quite sharp, it’s mesmerizing…

Anyway, time to clean up the back and wiring. Just running off my portable battery pack from the ‘New lighting method for project’ post. :wink:

Normally I’d just tape this up, plug in the wall wart and call it good.

But I’ve already decided that cost is not a factor on this, so might as well finish the back with some cherry, velcro the controller and call it a wrap.

Seriously, this thing is sick…

Just stop reading here if you don’t want to know the terrible truth. The Cost… :slight_smile: Remember, it’s not just the lamp, but there are a ton of good left overs to make smaller, complimentary style & color, items.

And lots of Draftboard as well.

So here you go, and I think this is correct, not positive, but it’s - $221 in PG materials, $42 for the Wiz and maybe $4 in bolts. For a total of $267. Whoa… I would have never built it had I known I was spending that much. But that was the point, and I don’t regret it one bit. This thing is ridiculously cool.

HL

47 Likes

I agree! It is ridiculously cool! That was a heck of a lot of work you did…it looks fabulous!

I did a similar thing a few years back…but similar only in that I spent quite a tidy sum to make it out of layers of acrylic. It cost me about $80 just for the PG acrylic and that was before prices went up. Where yours stayed horizontal like an ocean…mine went upwards, but like yours mine also had an ocean theme;

17 Likes

Wow! Totally different from where I thought you were going with it. I would have used the cardboard as spacers and mirrored acrylic for that infinite look but if it was a shelf fairly high either lighting from below or from above onto a desk or something that alone would have been very cool, but then you went where I did not think of for a shelf and am wondering what one would do with that amazing result.

The idea would be mindblowing as a coffee table if bigger, but even then I would not want to put anything down on it. It is like made for a corner and demanding to be a centerpiece and I am wondering how you were dealing with that.

7 Likes

So neat. Thank you for the write up and pics.

10 Likes

Thanks for the detailed write up, the photos and the truth about material costs. Comparing the result to other things that can cost as much but produce no lasting physical item, I think you made a good decision.

7 Likes

Now that you have the proof of concept perhaps you can redesign for cost!

9 Likes

That’s super cool! What a great lamp. Thanks for sharing!

5 Likes

I love this! So cool!

6 Likes

I think you got something worth a lot more than the cost of the materials. And it’s one of a kind!

10 Likes

Very cool!

7 Likes

That is totally amazing! Fabulous job!

5 Likes

Love it! Thanks for sharing all the details of the design and build.

2 Likes

Thanks All, It was great fun, and now, Part 2 -

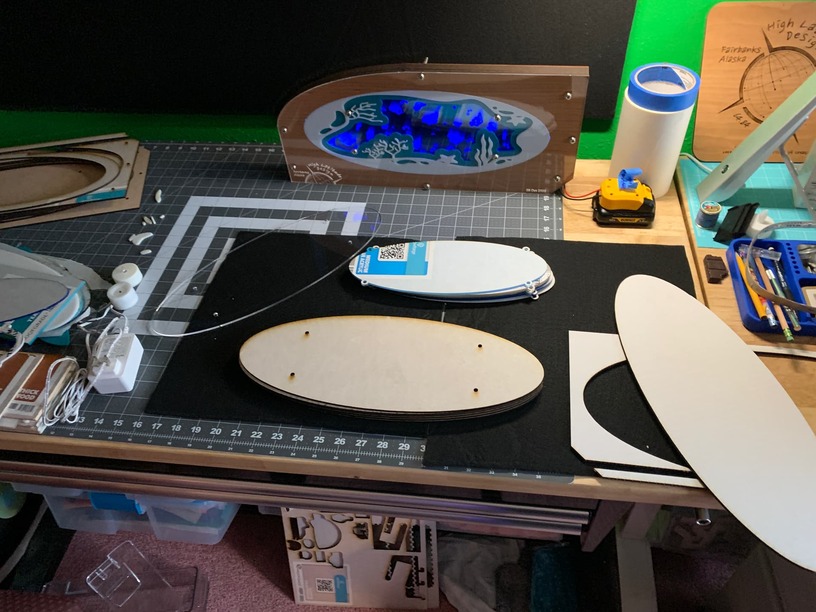
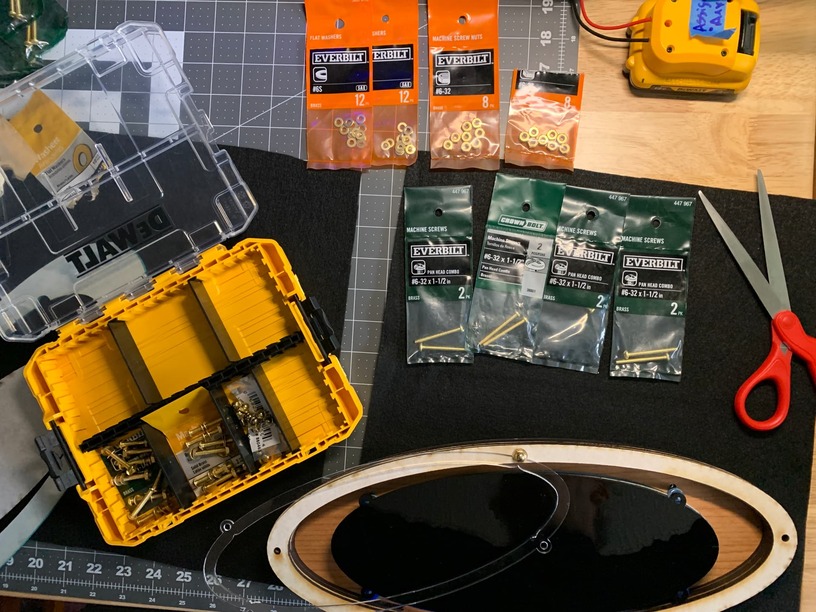
So I had all the excess materials, it seemed natural to build another. Now, I did add one sheet of thin Cherry Plywood, to do a new back, and another Wiz lamp controller. So that brings the total to about $315. But I’ll get two lamps out of it. And still bunch of extra materials. Here we go.

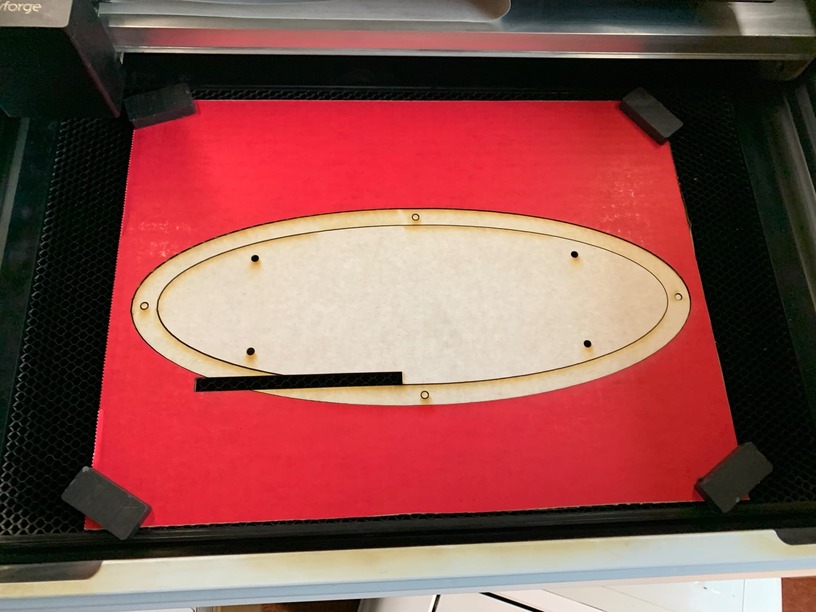
It’s going to be the size of the ‘inside’ circle cut from the Draftboard, It still has the four original holes in it, which we’ll use for the ‘inner’ ring of acrylic. And we’ll have to add four holes around the permitter as I’m going to make it the same exact way, to house a wiz strip, albeit a little shorter one. :slight_smile:

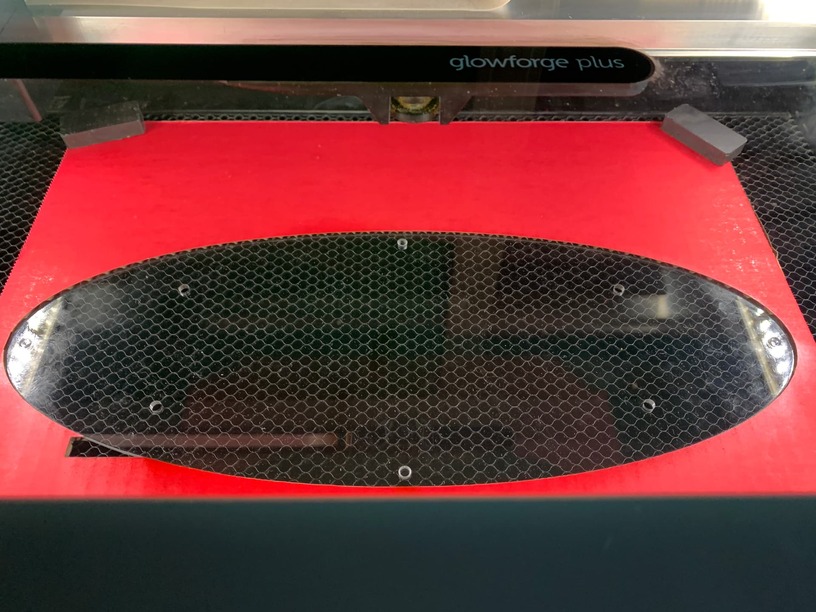
And I have a clear layer from the original lamp, and the new surface to add through bolt holes to. This is where the original file in layers, and a quick cardboard jig come in handy.

Got the white and teal top layers figured out. that’s the tough part for me.

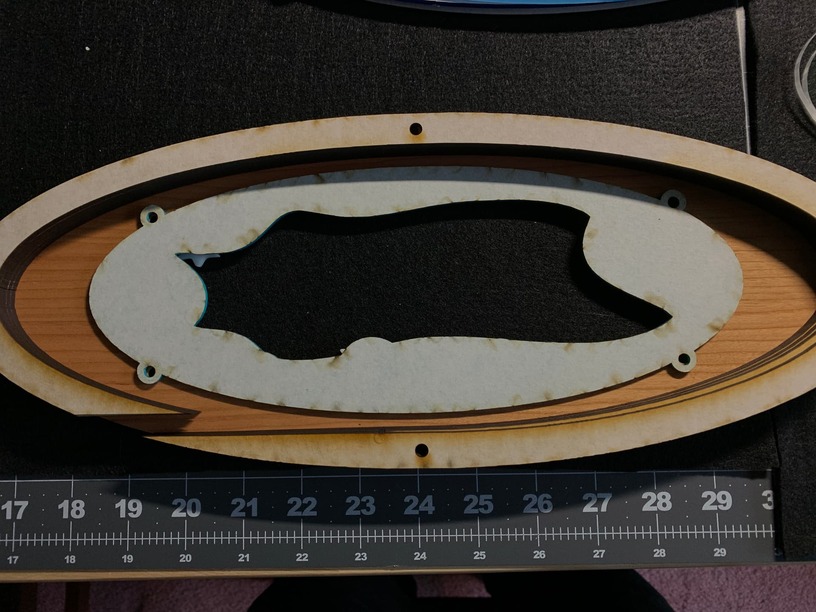
Cut, engrave fish, jelly fish and bubbles as before. And I splurged on some smaller brass bolts to look a little nicer.

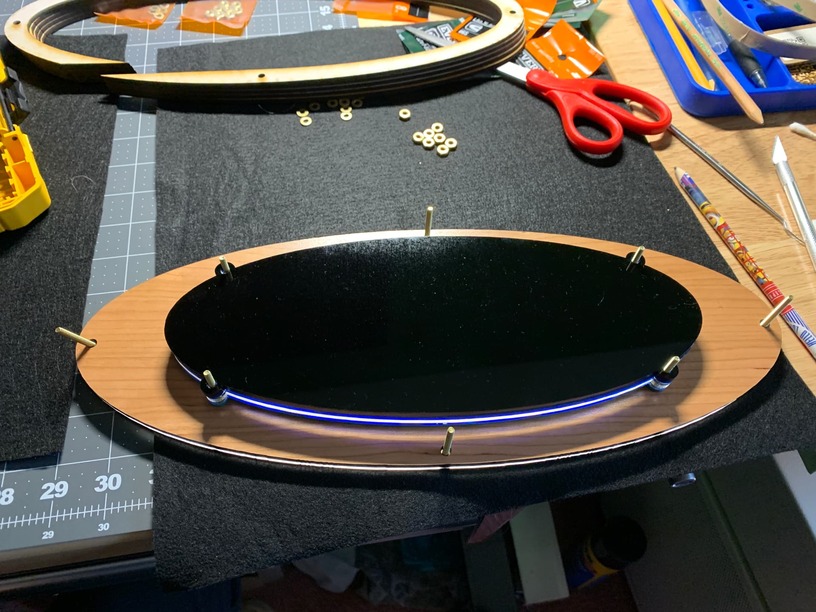
Stack’em up in final assembly with the nice bolts. Again, the face side is down.

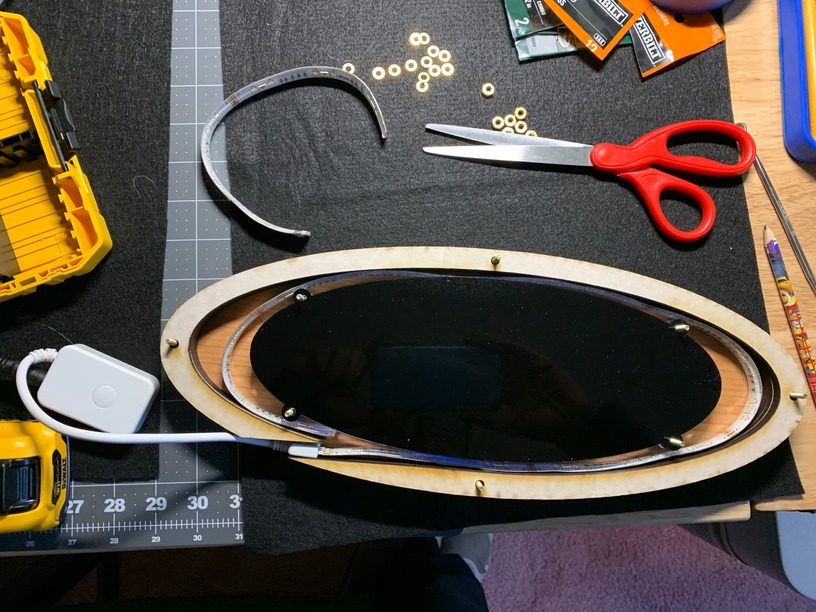
Test fit the outside frame and LED strip. The ‘cut here’ point worked out well to shorten it just right.

Sneak peek, to be sure the lights work and program the controller. Oh ya…

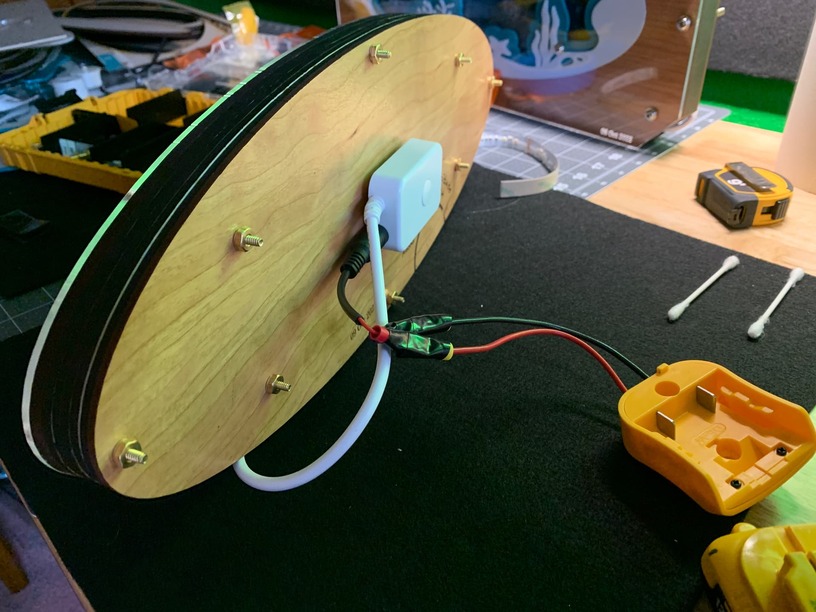
Button it up and velcro the controller on.

Side money shot. :slight_smile: Alignment of rear panel is off as it’s not tight yet, just loose fit to test.

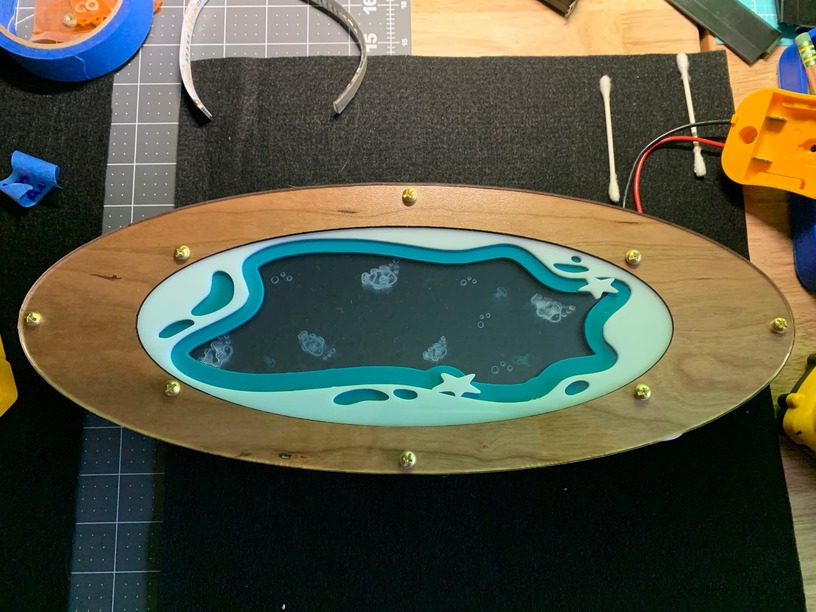
Here it is, Lights off -

And lights on -

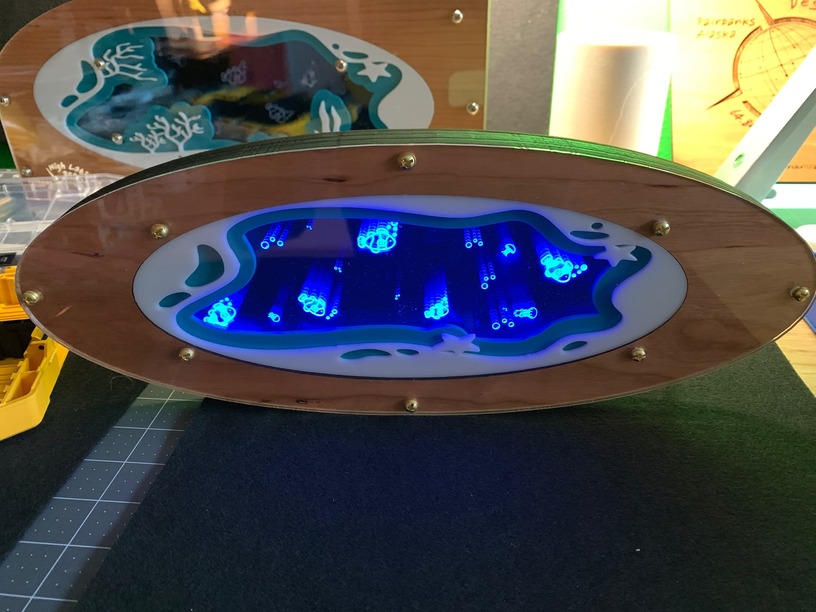
Oh man, this is just as cool, maybe even more so as it’s just an ellipse that is freestanding.
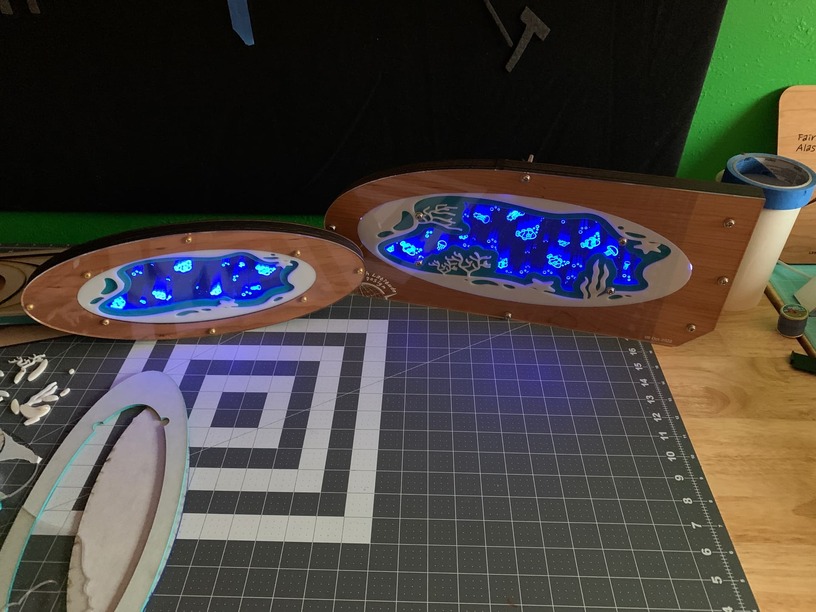
Both together -

And lit up…

Plus I still have a ton of materials left. Mabey a third, even smaller one? Doubtful, I may have reached my mental limit on this one. :wink:

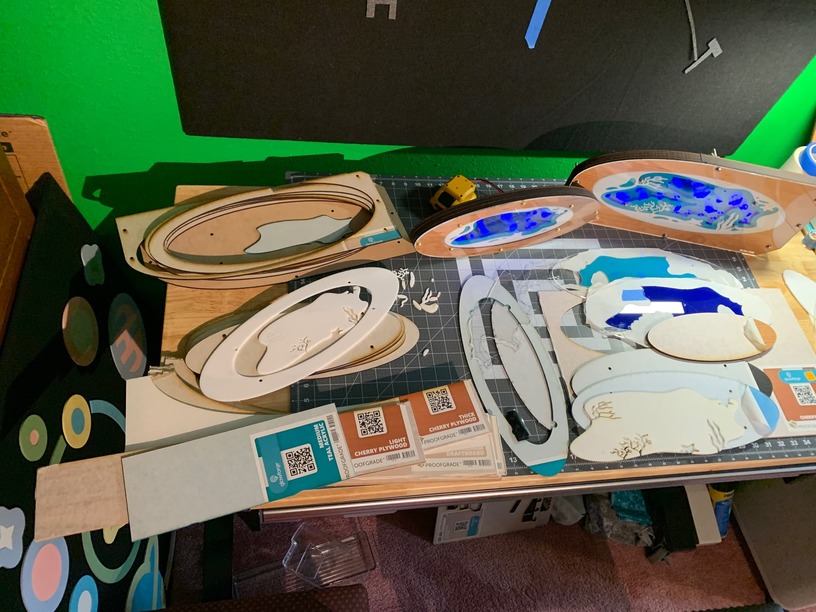
But I would defiantly make a non-lighted, smaller, decorative one with the scraps at some point in the future.

Thanks for checking it out.

HL

18 Likes

making the 2nd was a good call.

Greetings All -

Your upright design is totally cool!

You bet, and it kind of makes the case for using aftermarket acrylic in bigger sheets and cutting them down. If I were doing this for resale, I would definately go that route. :slight_smile:

Agreed, thanks, and no regrets here!

That’s one reason I wanted the clear sheet over the top of it, when it was going to be a shelf. That, and the white acrylic layer is just loose fit in there but sandwiched between everything so it doesn’t move around.

In conclusion, I can get one, smaller, lighted version out of the leftover materials - using a different light source. I’m surprisingly not burnt out on this design yet, and have a cool, cheap, USB powered light source on hand that I want to try. So I’m going to challenge myself to do one more version, for use as a nightstand nightlight. Wish me luck. :wink:

HL

2 Likes

Greetings All -
Just wanted to do a quick wrap up on this. I was able to make the third piece with the scraps and I like it the best, by far. It’s a terrific bedside table nightlight. I decided to go with the light strip from one of those cheap acrylic lightbox things. In bulk I pay like $4ea on Amazon.

Pop it open and there’s an awkward and unnecessarily large PC Board with the led’s mounted along with the remote sensor, a touch activated washer, and the battery leads. I’m going to power with the USB jack so the battery wires get cut off. I could have cut off the touch sensor wire as well but left it on as I was thinking I might be able to place it under one of the bolts that go through the project.

I put it on piece of roughly the same proportion ellipse just smaller and traced the outline of the space I would need ‘inside’ to house it and feed the cord out the bottom right side. Cause the others exit out the right as well.

Placed the ‘jig’ under the camera lens and created an outline to cut out.

Bam, works for me.

Turns out I needed way more ‘diffusion’ so the individual LED’s wouldn’t be seen. So the next two layers I used Clear Acrylic but left the masking on and modified the design to cover the LED’s.

Then two layers of translucent blue, engraving the fish on the top one. Then the Teal, white and a clear cover. I didn’t have enough room to give it a full frame of Cherry, so I just cut the edges for some nice effect and call it done.

You can see the light coming out of the ‘Top’ is transmitting the LED color through those first two layers of clear acrylic and really makes a terrific ambient night light. The surprising thing is, the remote sensor is behind all those layers of acrylic and still works fine, so I didn’t need to wire that touch sensor to one of the through bolts.

This was great fun and I would totally make the nightlight one again, and I’m sure I will to give out for xmas presents. I think the total cost for just the small one was $4 for the LED, a few bucks for the USB wall wart, and based on the size, needed one full 12x20 sheet of acrylic, in various colors obviously, but call it $20 in Acrylic, so still under $30. Not cheap, but it really is great little nightlight.

Thanks for checking it out,

HL

9 Likes

Excellent progression of a project.

3 Likes