The Table Lamp 2.0 - Update 2

Greetings -

Decided to take another run at a table lamp following my previous ‘learning experience’ - The Table Lamp :slight_smile: This time I’ll simplify the design and use a different (cheaper) LED strip. So here we go -

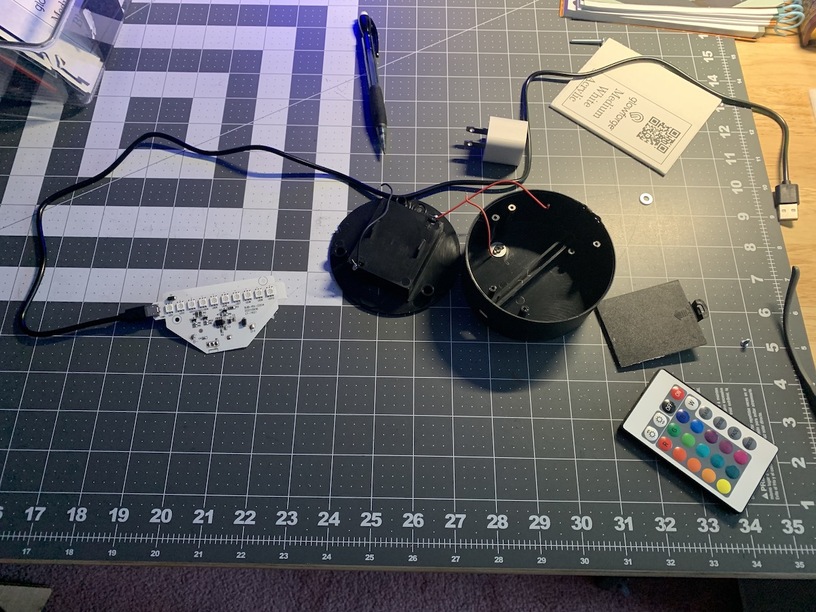
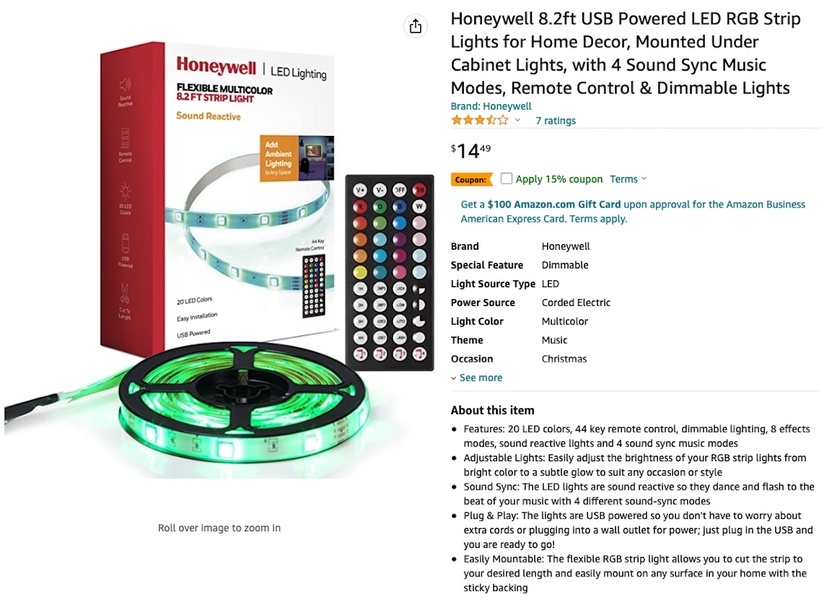
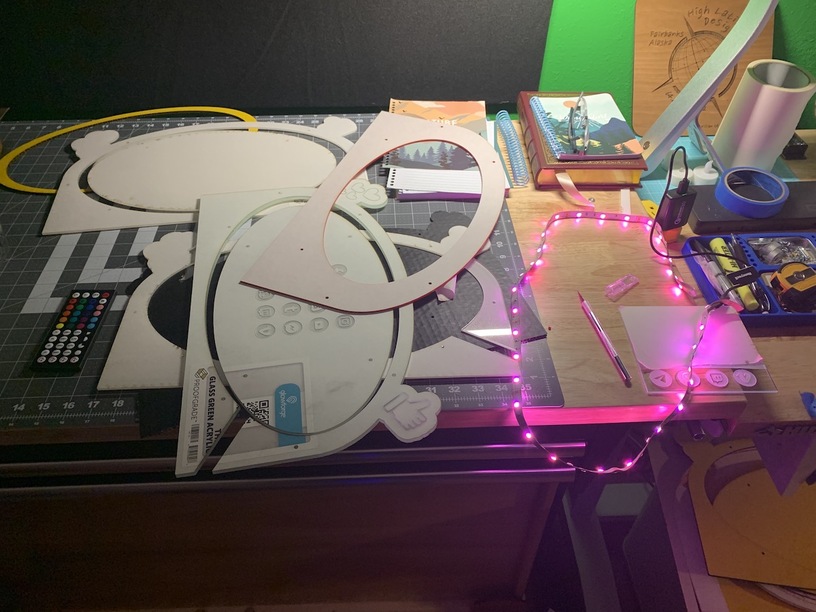
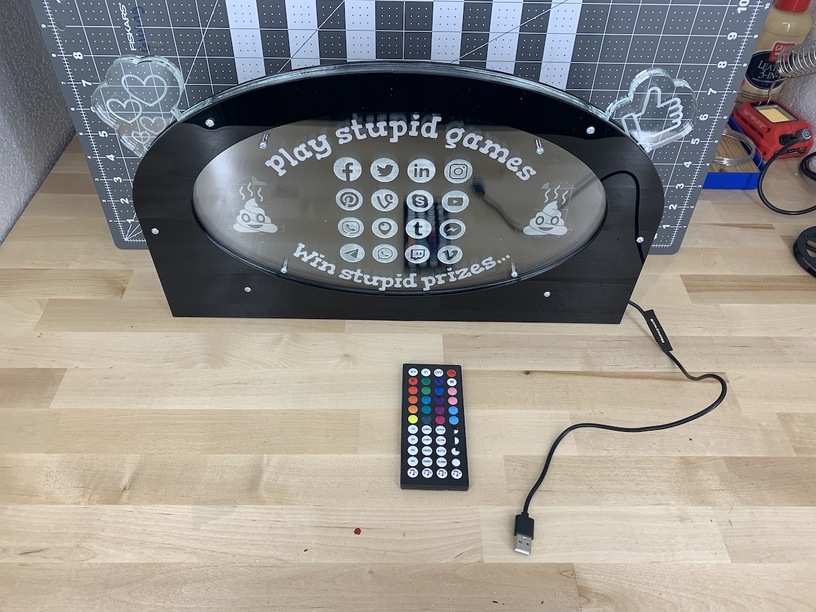
I picked up this Honeywell 8.2 foot USB light strip as it was only $15, the width of the strip is less than .5", and the remote receiver is tiny and attached to the cord which can be housed ‘inside’ the lamp. The length and cut points to shorten it worked out perfectly as well, as you’ll see.

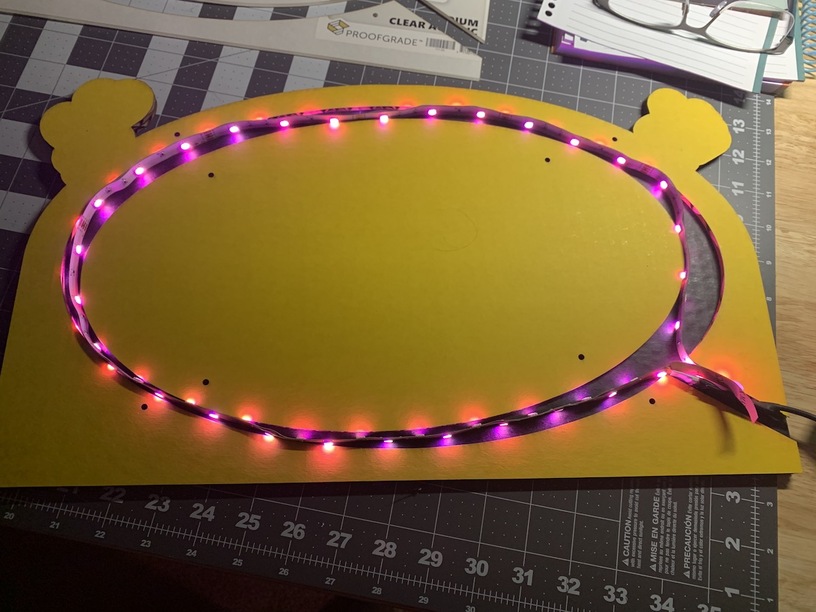
I won’t go into too much detail as this is the same style and construction technique as the last one, and I started with a cardboard sample to see how the LED strip would fit. I wanted it to shine in and out, so made a loop folded back on itself. The cut off mark happened to be in the perfect spot so I cut off about a foot to make it fit perfectly.

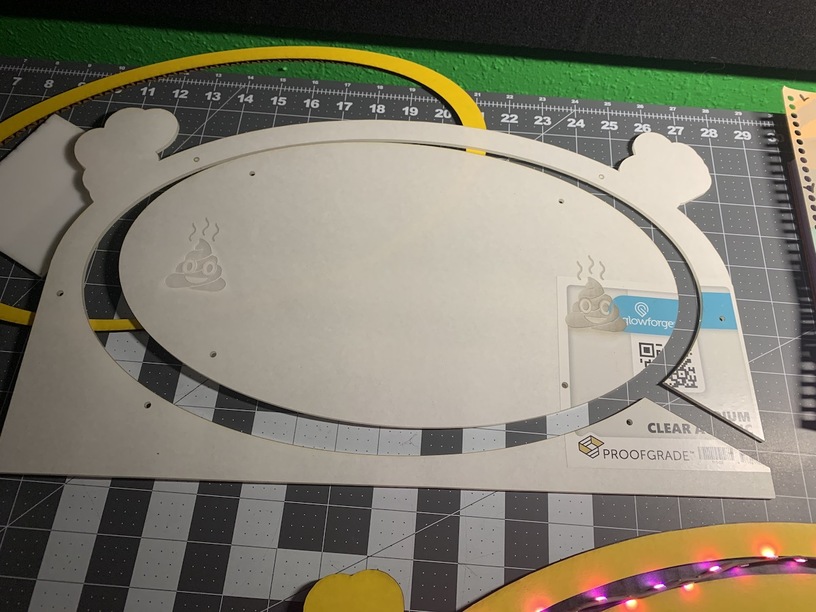
Made from numerous layers of one sheet each, I ended up using two medium black, three medium clear, one thick green glass, and one medium cherry. The cherry wasn’t necessary, I just wanted to add my logo to the back. If you don’t include the Cherry, total cost for the six layers, at current online sale price for PG, plus the LED strip totals $77.75

This is one of those projects where you have no idea what the final product is going to look like until you get all the pieces cut and assembled. So ya, burning $80 in materials with no idea how it’s going to look can be daunting. But I may have finally conquered my apprehension about this style of project, and have the confidence in my skill and vision to just go for it. :slight_smile:

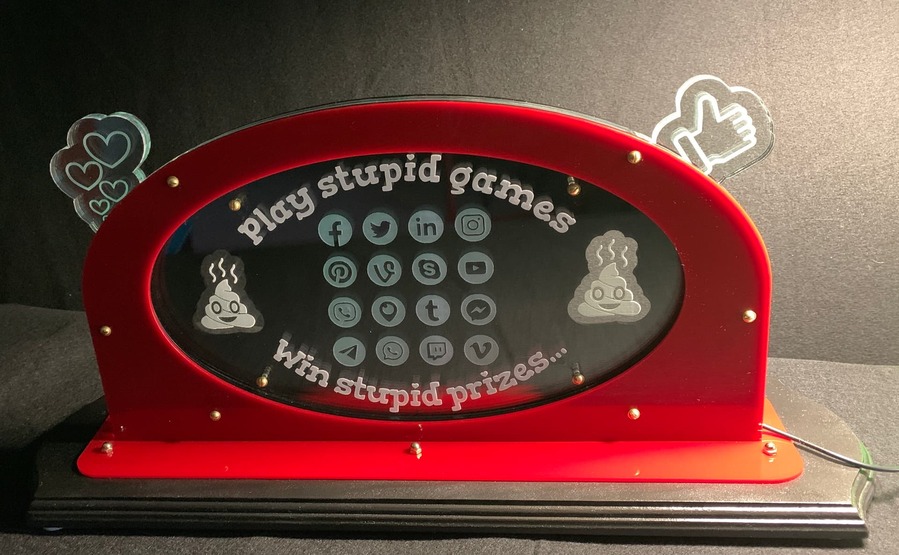
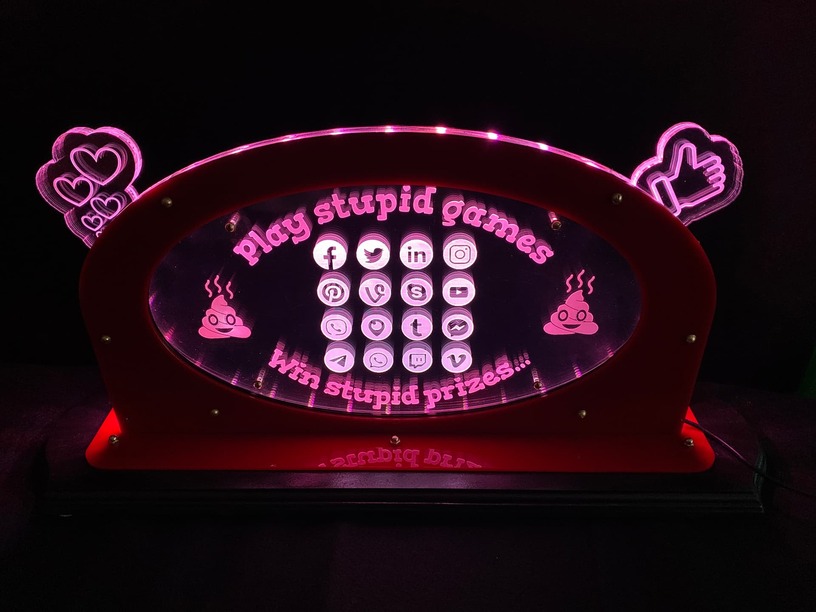
My vision for this piece was a sort of ‘Social Media Trophy’. Spoiler, I’m not a fan of it, in general, present company excepted. :wink: So let’s put it all together and see what we got.

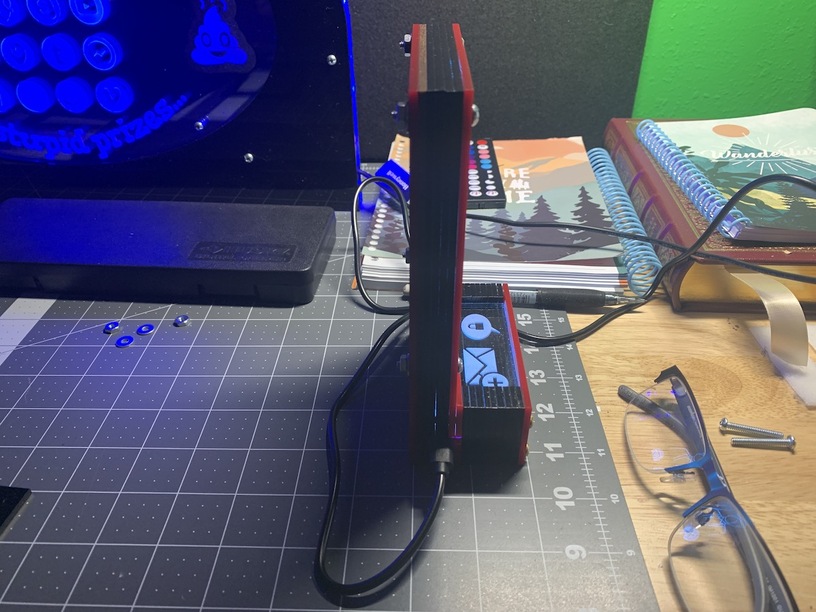
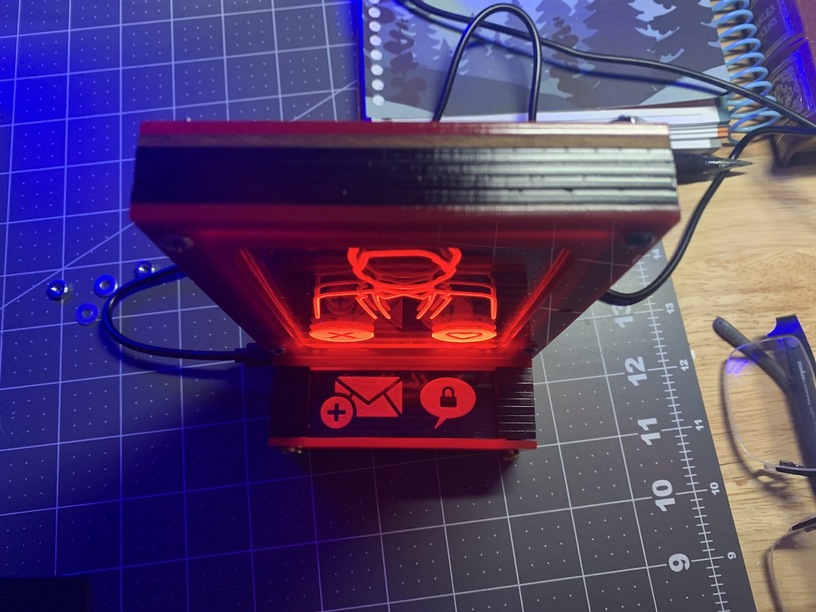
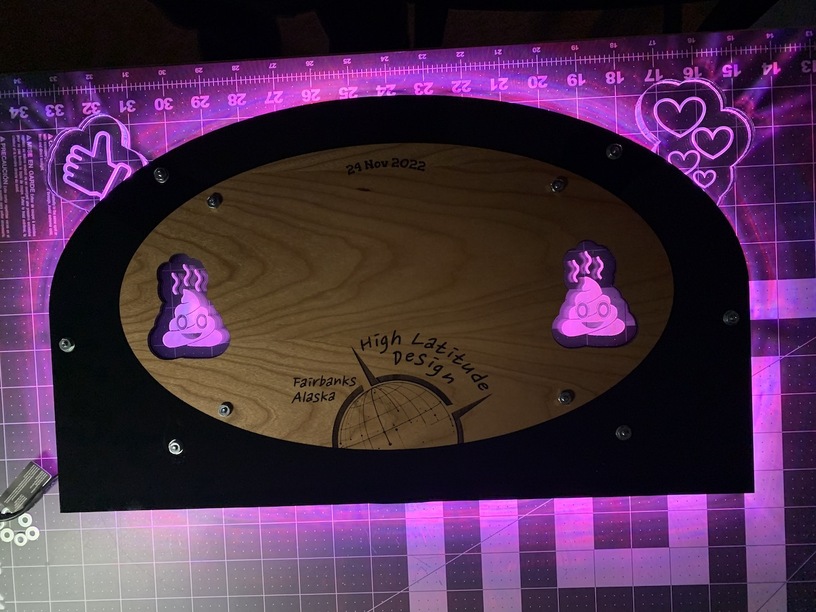
Here’s the finished back. I ran out of stainless acorn nuts so I’ll fix that after I get more. I wanted a ‘two sided’ lamp for this project, so I did cut outs for two of the images and extended the top thumb and hearts beyond the black face and back.

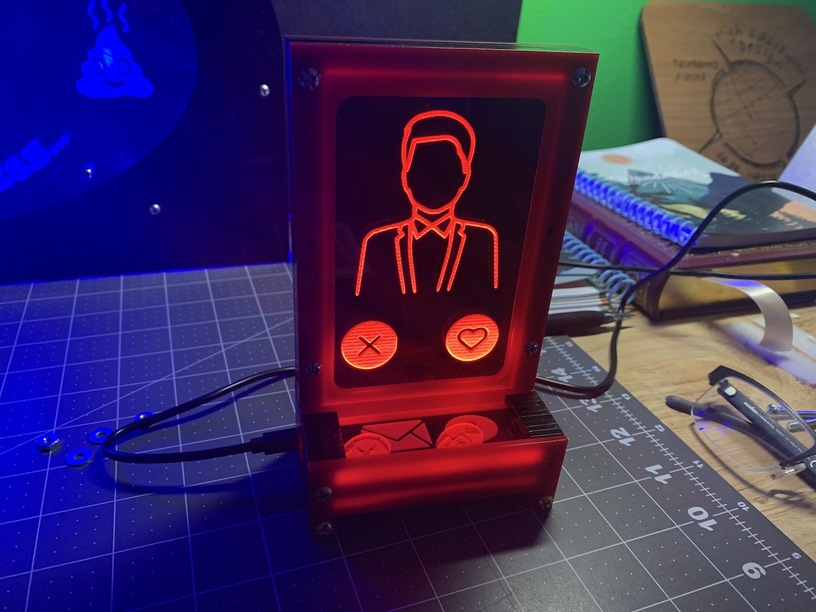
And now for the front, in different colors -

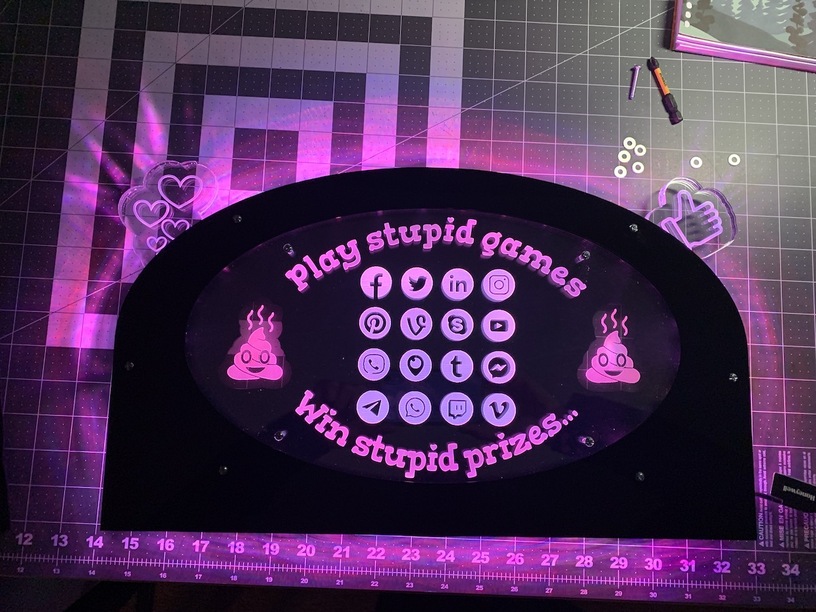
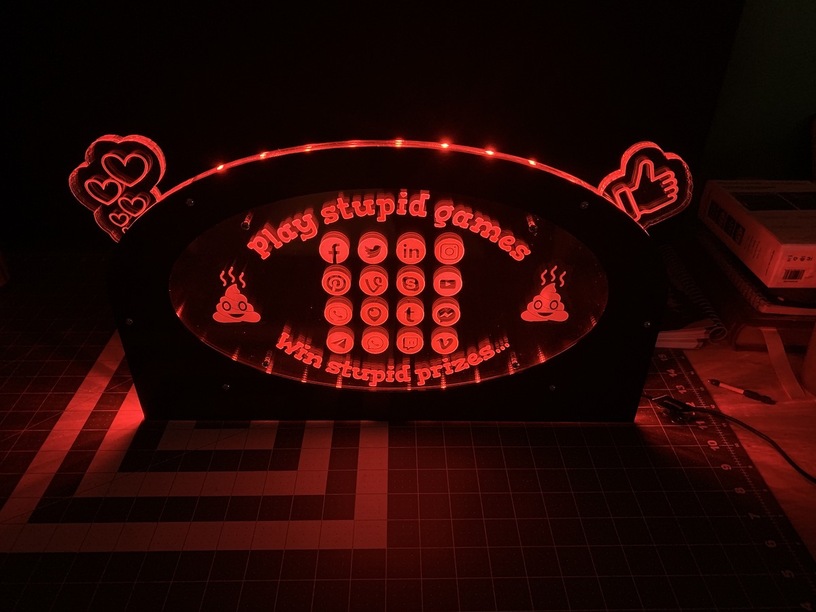
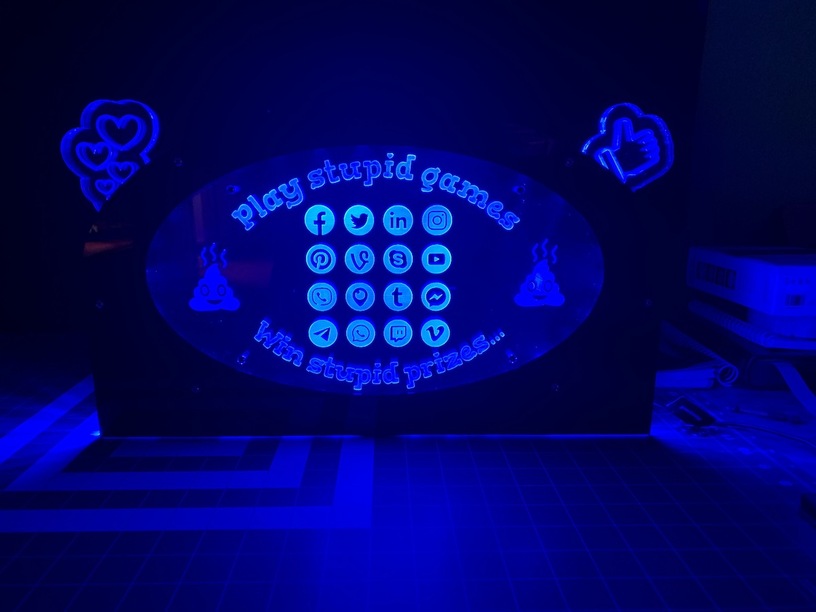
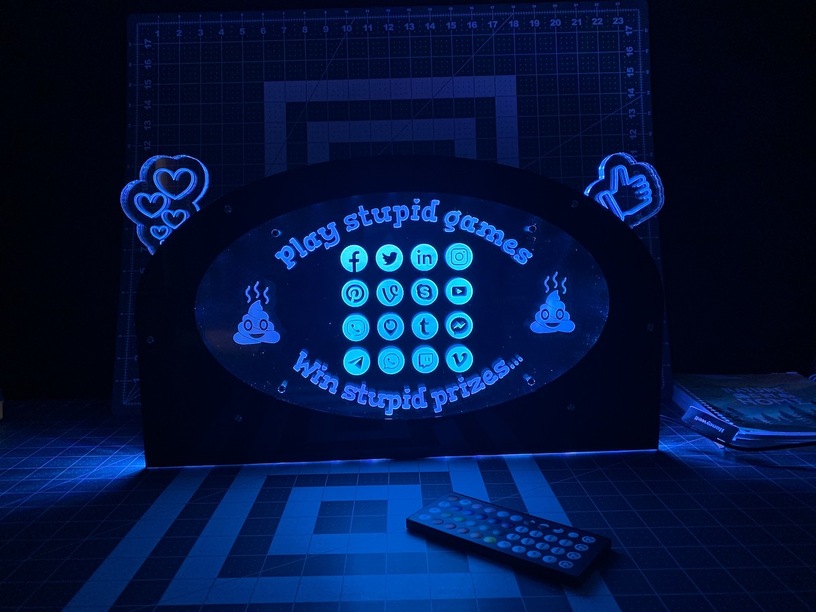
The little remote receiver works ‘through’ the layers of acrylic so you can still use it to turn on and off and change the colors. It’s tough to get a good picture and the multiple acrylic layers add that mirrored depth effect, which is totally cool. But hopefully this is enough to give you a good idea. This project completely meets my vision, and surpasses my expectation!

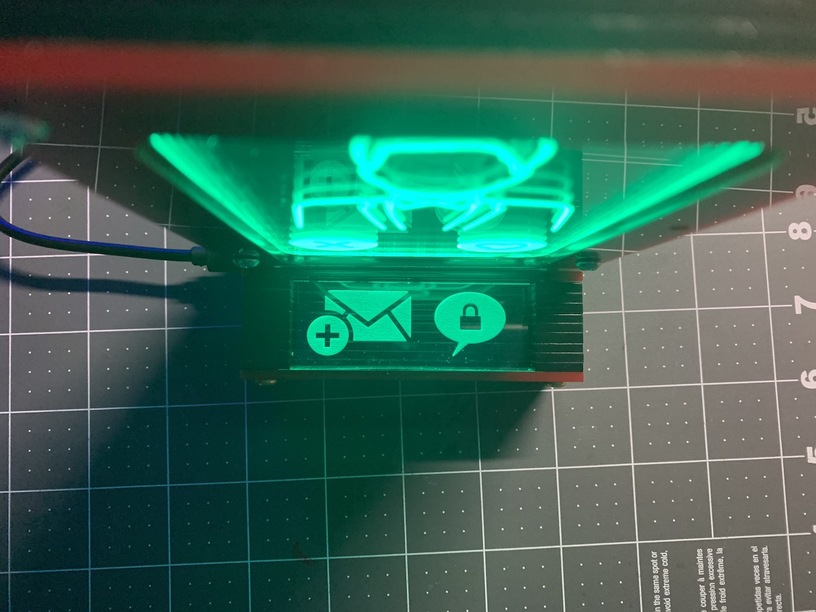
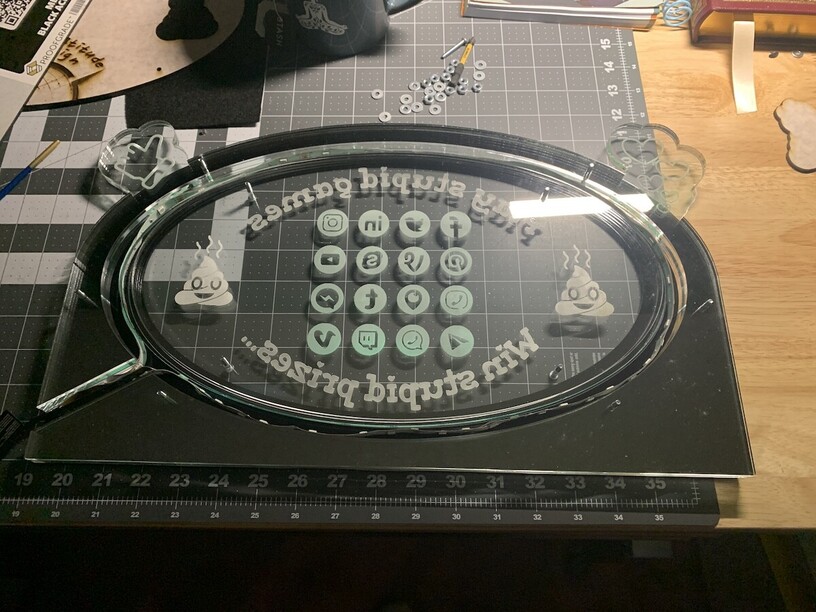
This last pic shows why I used thick green glass for the center section, the layer engraved with all the social media icons. The wording and poop are on separate layers, of clear, one behind and two in front of the green glass. This placed the green glass in the center of the LED strip, so it’s gets more light through it, making the logos a brighter and slightly different color.

Hope you enjoyed the write up,

HL

30 Likes

That’s some cool detail. I love your use of LED strips.

1 Like

Made me lol… I made a stand for my daughter’s match Glock 17 which she keeps on the bedside table loaded with JHPs and a spare magazine. It has a similar and popular (but not forum-friendly) phrase on it. They had an intruder a few weeks ago (she lives with her mom), she detained him until the police arrived. Perp had a history but committed a felony on my ex’s property and is now locked up.

Edit - her “stand” has a single LED powered by a LED night-light that I hacked. Just enough to see in the dark without lighting up the room.

2 Likes

Very nice!

2 Likes

This looks so cool!

2 Likes

This looks amazing and like you had fun creating! Thanks for the inspiration :slight_smile:

2 Likes

Thanks All - I decided to make a companion piece as well, since I had a bunch of oddball black pieces left over. I also wanted to test out a new light assembly method, and make a more ‘3d’ object with layers. So this is the ‘test’ piece.

It doesn’t have a purpose, it’s just a combination of things I wanted to try. But it gave me an inspiration for a cool project I’m going to work on next. Which I’ll do a full write up on.

Hint, I’m using the led board out of one of those acrylic light stands. Best $4 ever, even includes the micro USB cord. And yes, the design incorporates a way to keep the remote sensor, so it still works.
:slight_smile:

This was definitely the most complicated, by number of different pieces, that I’ve done so far. And using just the ‘Premium’ GF interface is a challenge, so I see Lightburn on my winter learning list. But this will get the job done while I teach my mind to visualize the pieces in 3d.

It’s kind of hard to get the flat part of the base to light as it’s 90 degrees to the LEDs inside, but I had a small fix, and think I have a better way to reflect the light ‘out’ on the next build.

I didn’t have #6 screws long enough to go through the base, which is about 2" but I’ll pick those up later for the final project - which is going to need even longer ones. :wink:

For the main ‘screen’ I’m using thick green glass and given the small size, and relative output of the LED board, it’s super bright. And I think on the next one I’ll edge the green glass in reflective tape, to boost it even more.

Another fun experiment and learning exercise. Thanks again for checking it out.

HL

4 Likes

Just wanted to update for adding a stand. I haven’t put much effort into ‘presentation’ of pieces, let alone taking decent photos of them. So I’m starting to incorporate a little more effort into those aspects as well. So, I made a stand.

It’s just a simple wood base I bought for $12 at Michaels. I was going to make something, but was lazy and wanted to wrap it up quickly to be done. That was wishful thinking of course, still took a while to get the method and spacing of the internal shims worked out. So ya, the base was it’s own project. :slight_smile:

I cut an oversized slot through the wood base, shimmed around with I think three layers of Draftboard and two cardboard. As I needed to go all the way around the base, It occurred to me quickly that it was a good idea to only build it 18" wide, since I needed space for both the internal ‘shims’ and the red ‘cover’ to hide the inside slot. That red base is like 19.4", or the widest I could do. Good thing to remember in the future.

It’s pretty snug, widthwise, but a tad extra long. Which makes it easier to get in and out, and still holds it in place super well. Thankfully, I made the slot for the cord to come out the side high enough ‘up’ that the cord clears the 1"+ thickness of the base. Got lucky on that one as well. :slight_smile:

And a parting shot in pink.

That project was great fun!

HL

2 Likes

JHP’s the only way to go.