Greetings -
Just wanted to try out a new technique and material, but not up for a full blown project. So I’ll make this one a short(ish) prototype. It’s basically a follow up to my ‘The Fire Project’ project but with a new 3d printed material and a new GF cut technique. So let’s get to it.
I have extra materials for another light box, so start with that, and one of the good LED strips. For reference, this is a 2x2 light box, so 160mm square.

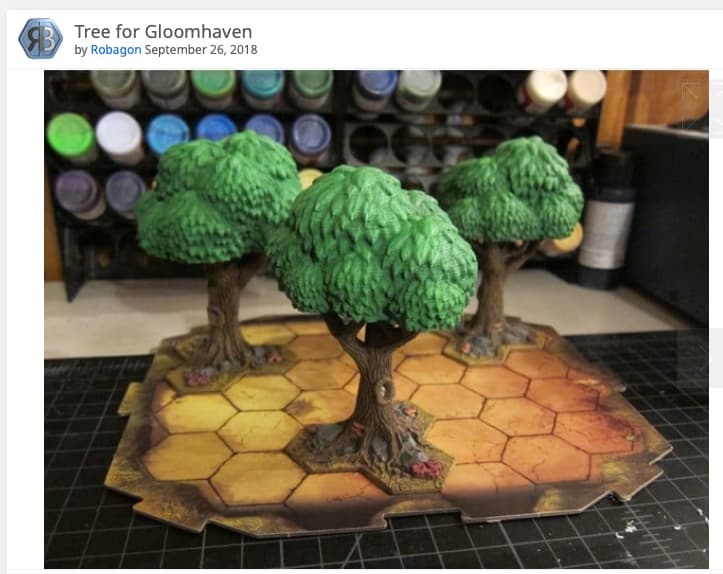
I wanted to theme it ‘Earth’, and a Tree will work for the technique I’m thinking of. I found a nice one on Thingiverse (to use for free with attribution) by Jon Robelia.
Printed a 3d sample to work with.

Bling

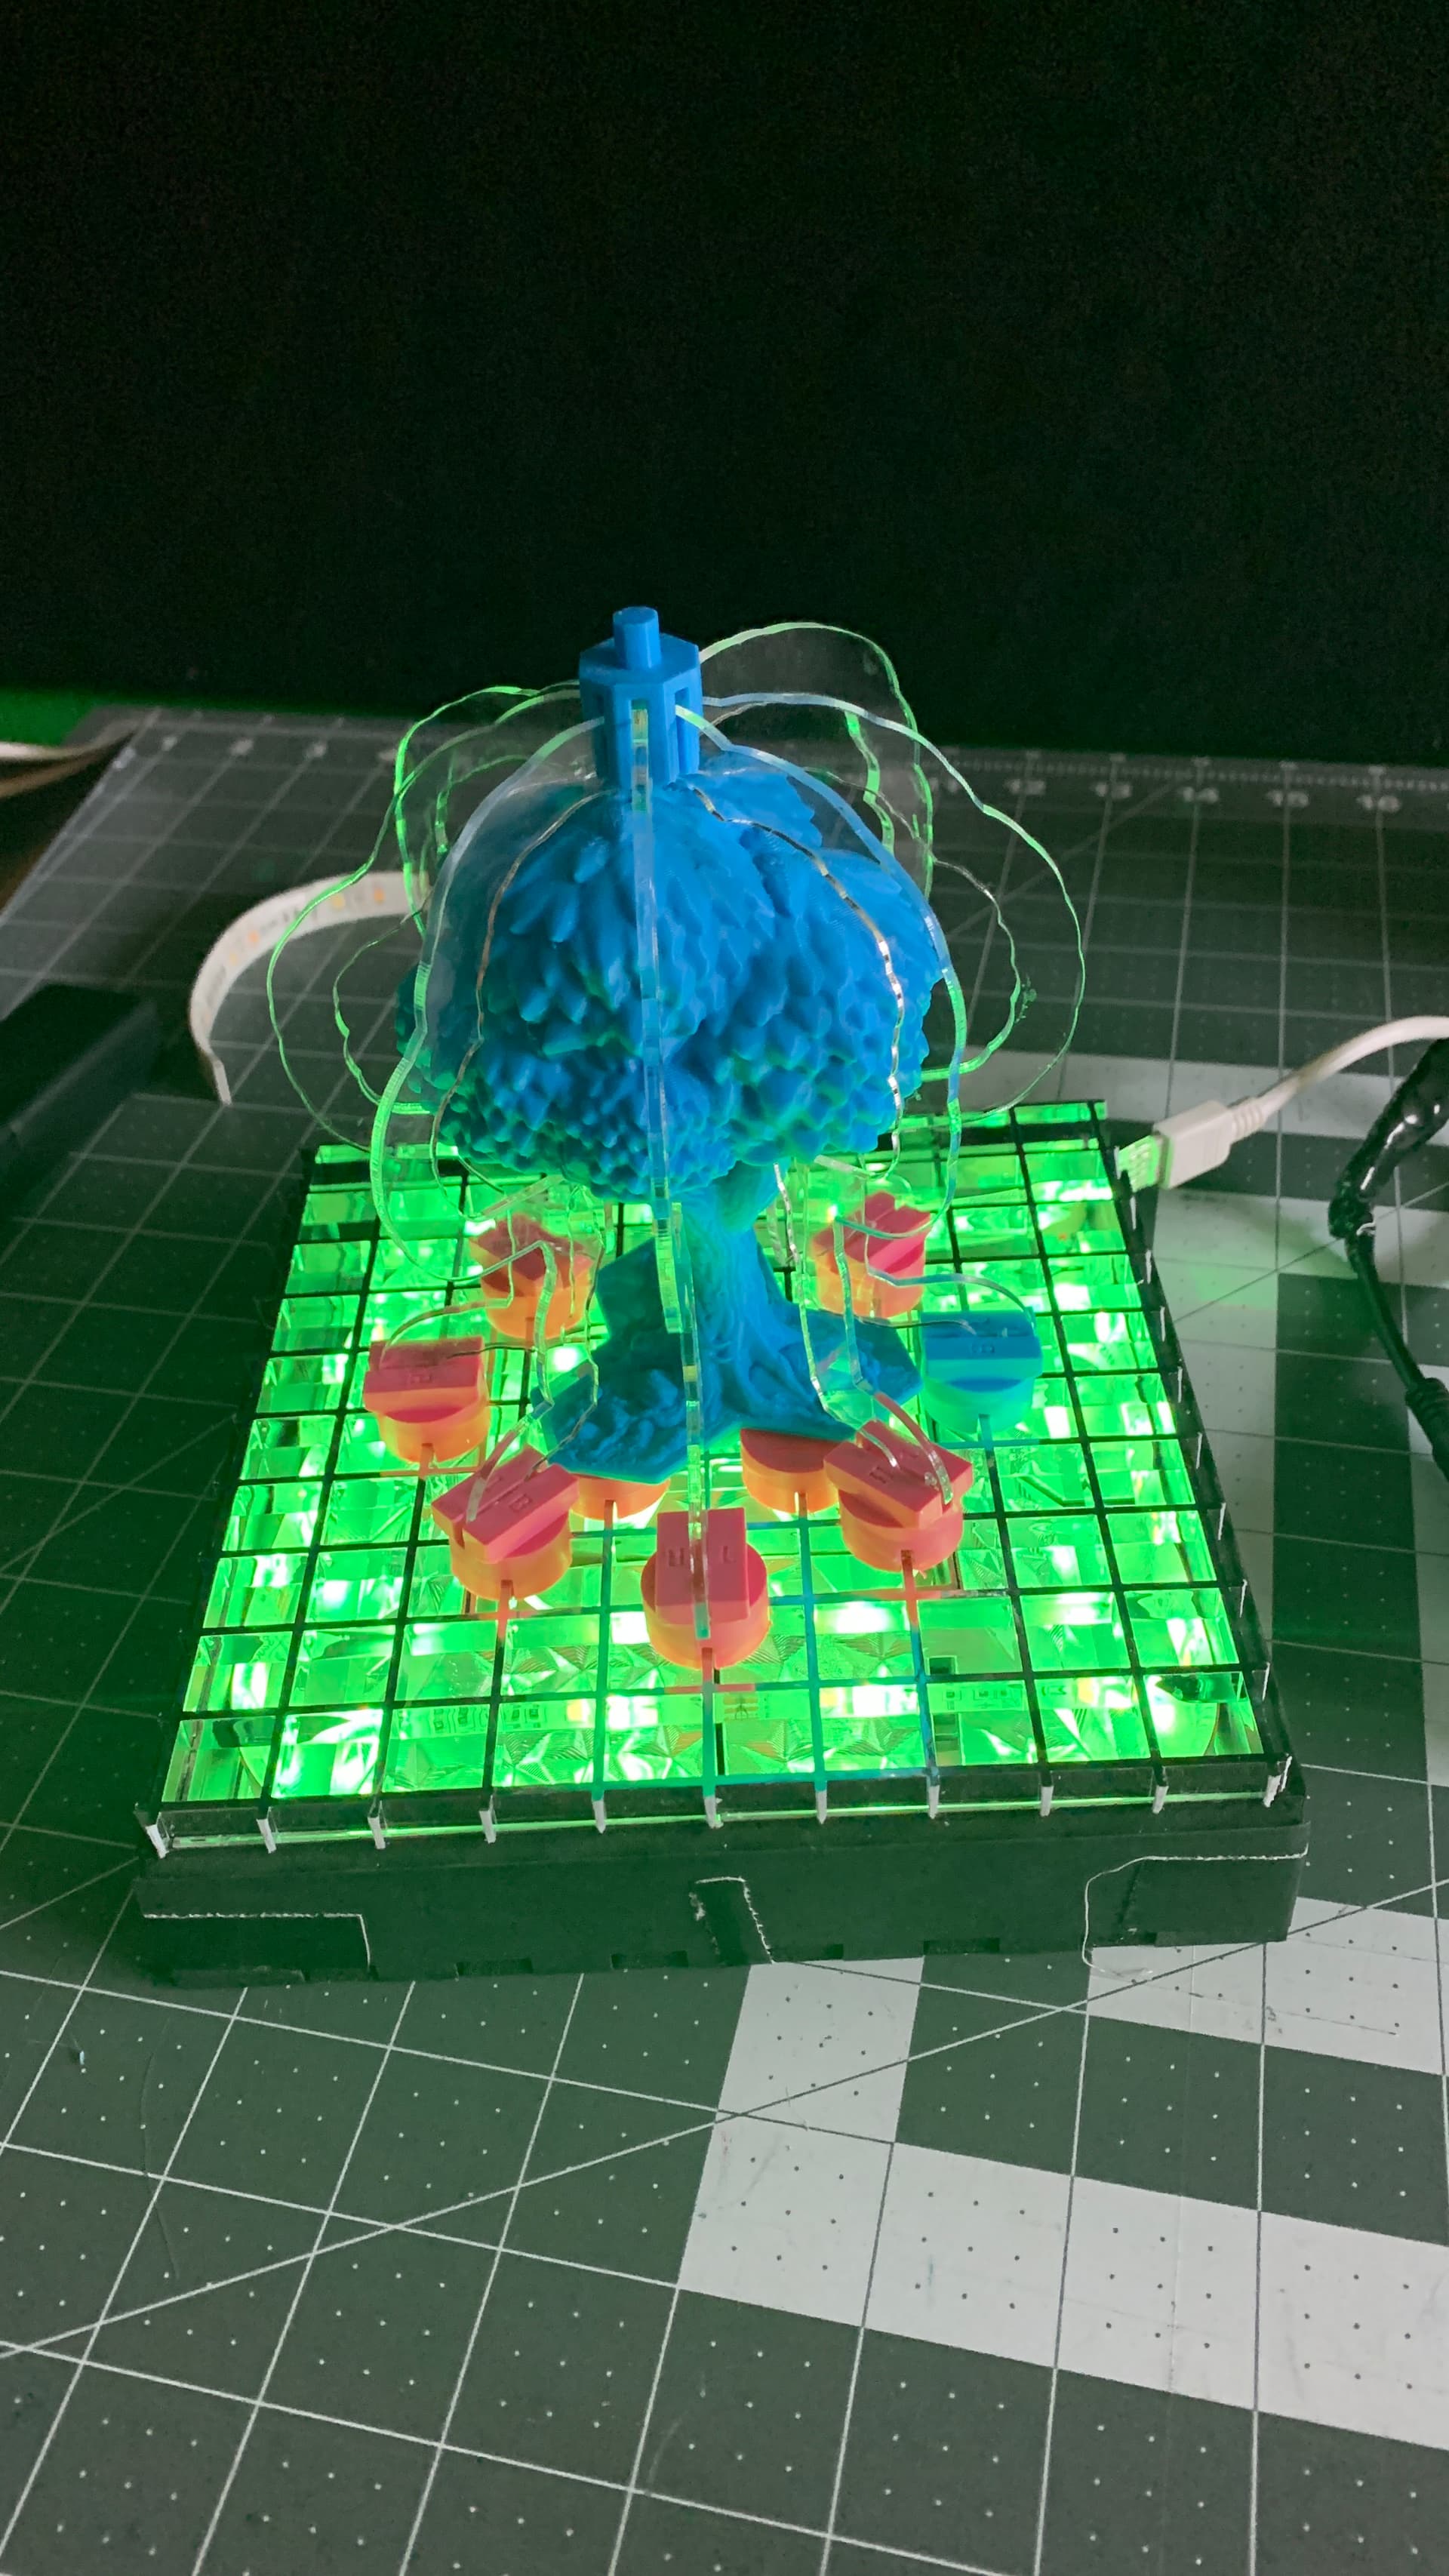
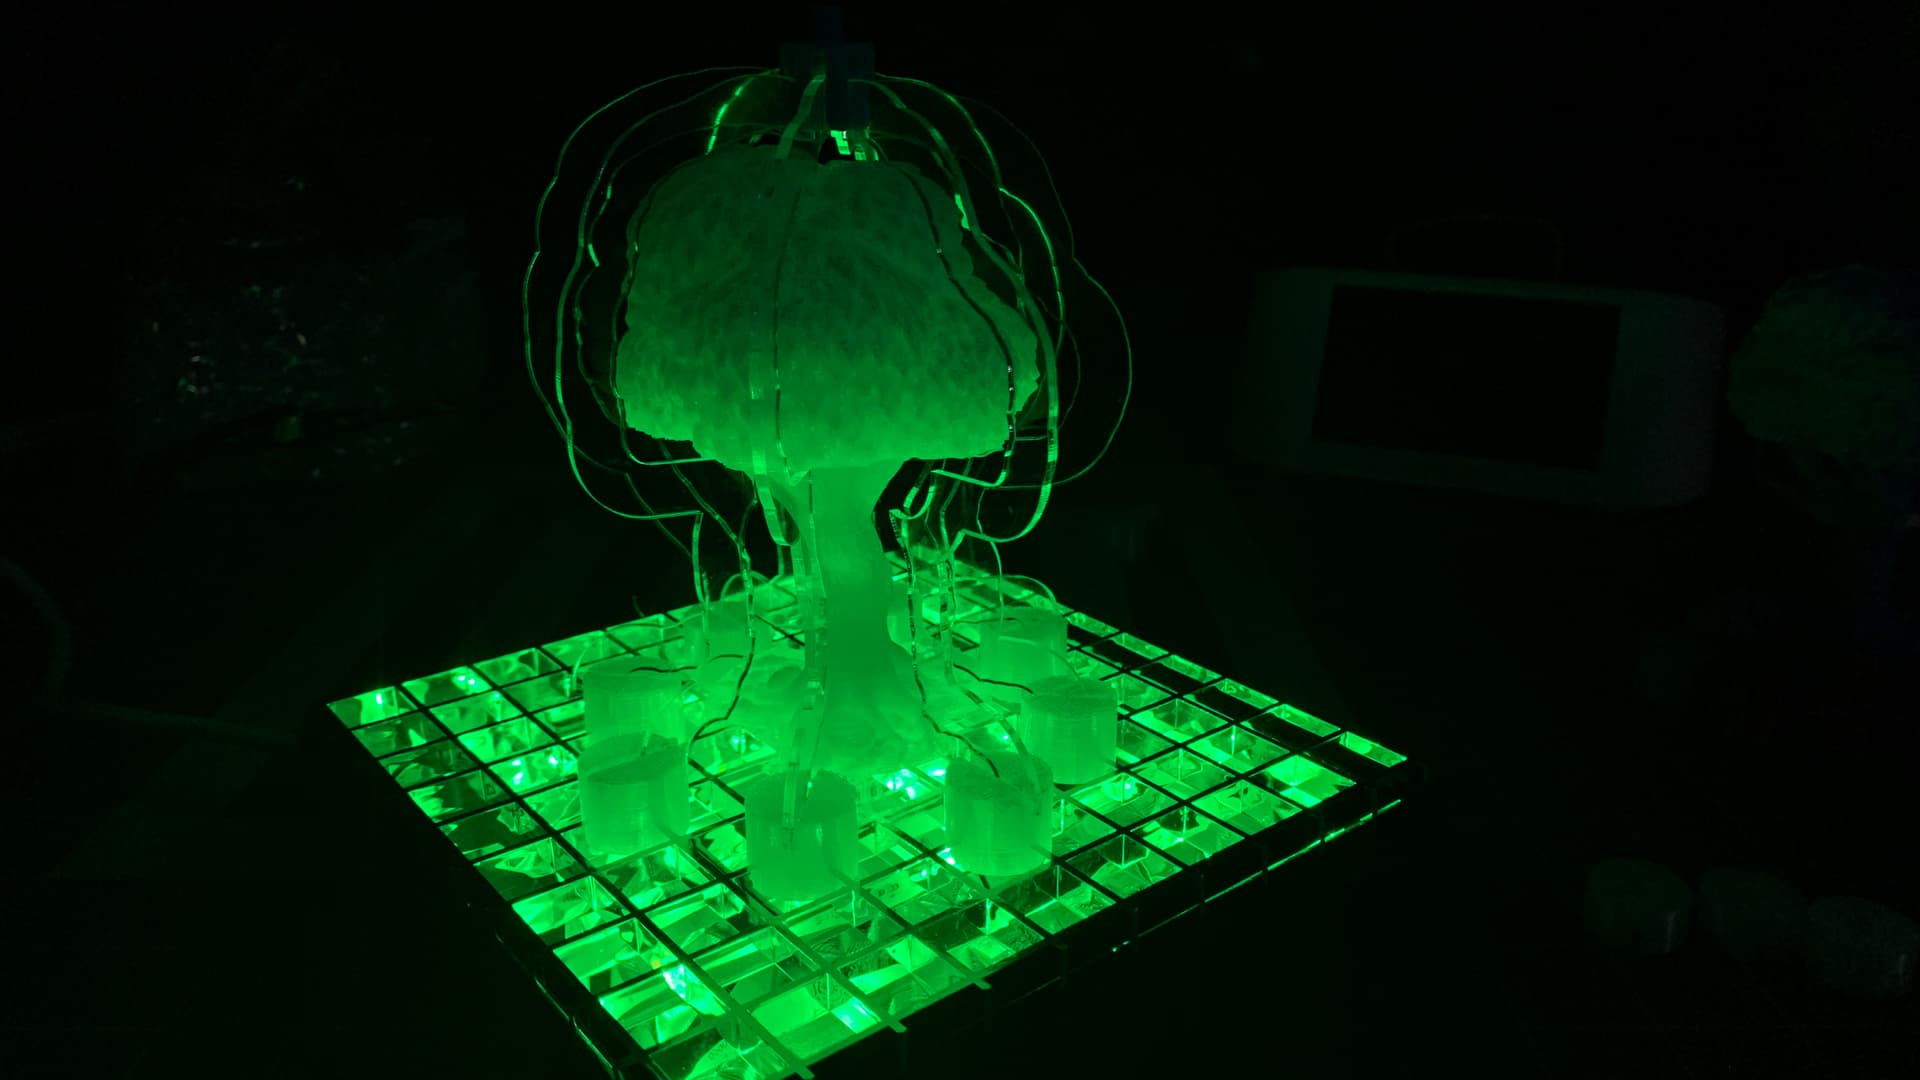
Now the fun part of the plan. I’m going to set it up on the grid like the fire project and light it from below. But I want a GF cut acrylic glowing shell, sort of, around it. Ok, it’s like 30% of a plan… ![]() Here’s my thought.
Here’s my thought.
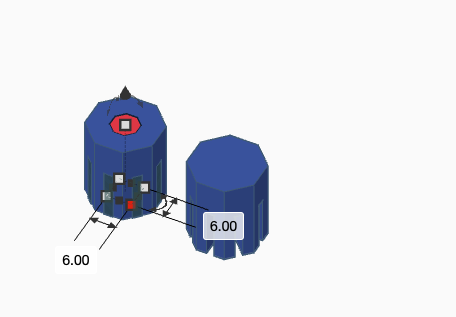
Take the tree and slice it into four quadrants, spaced at 45 degrees apart.

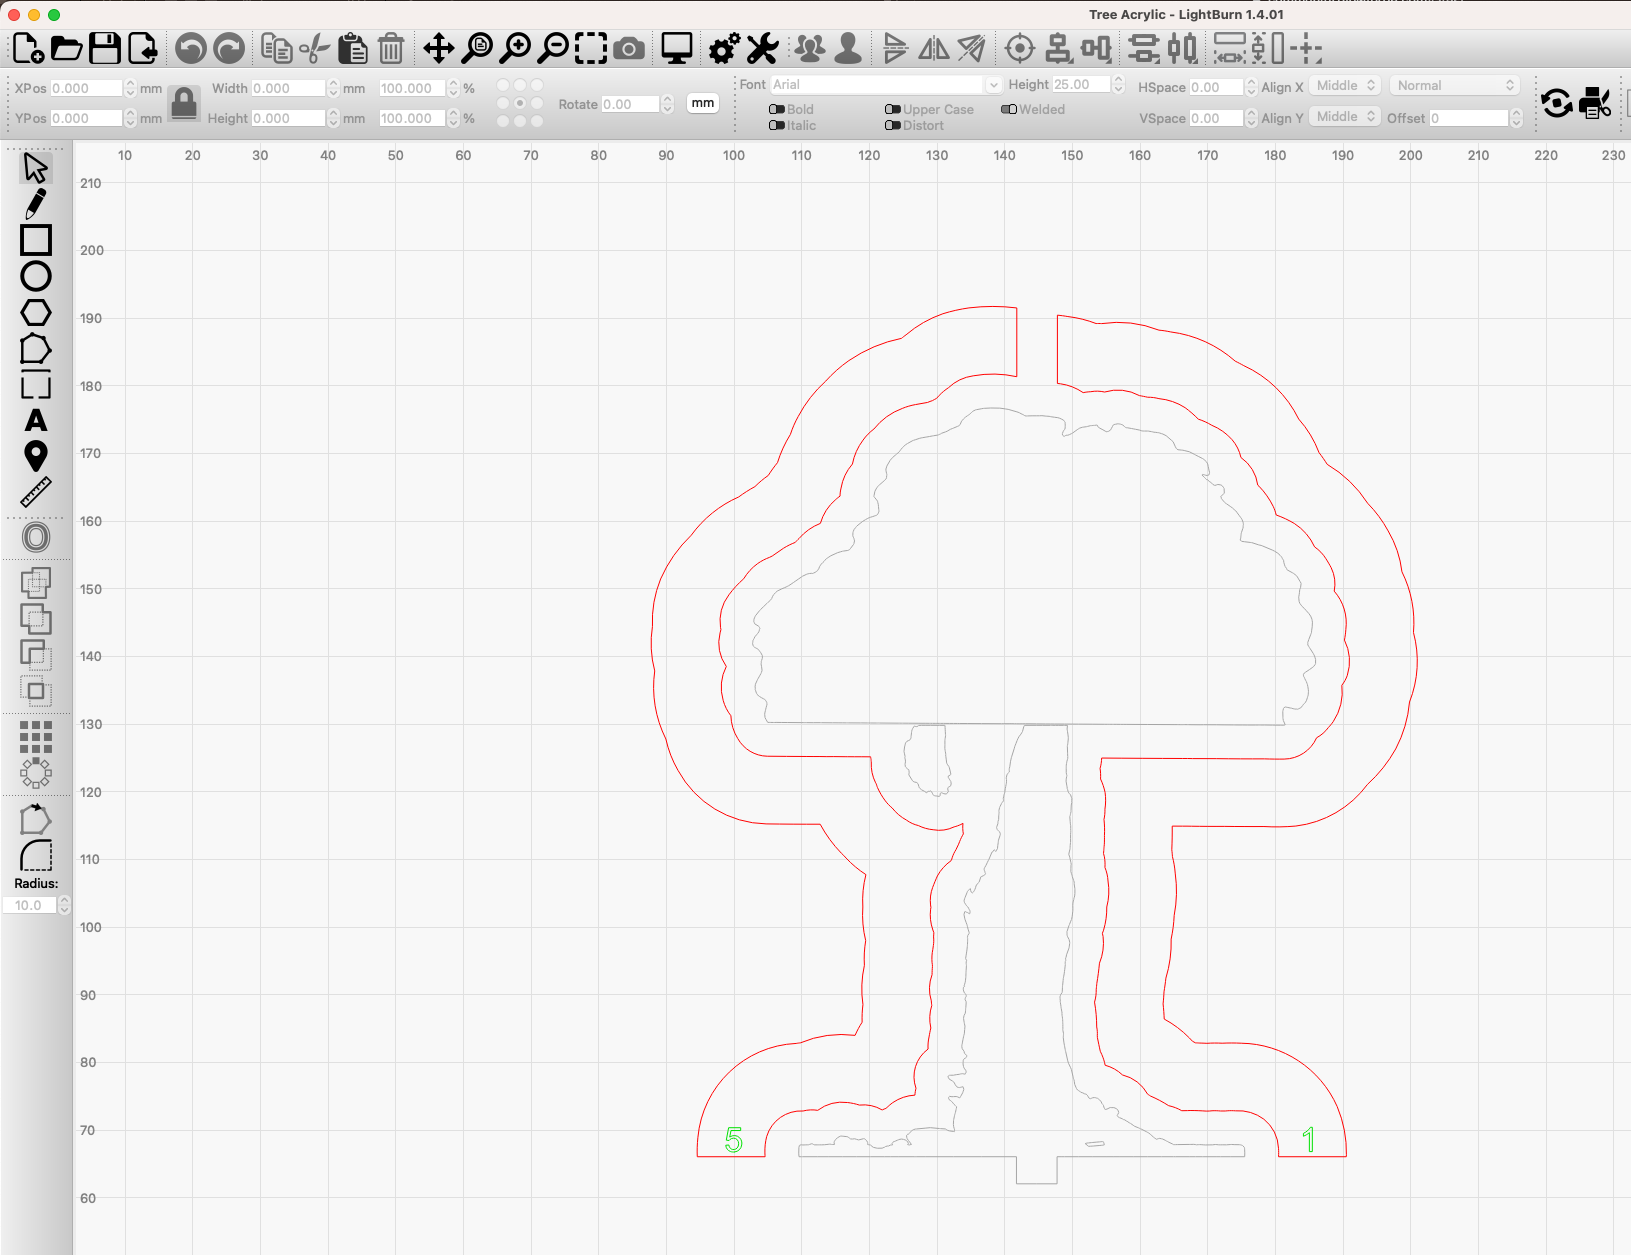
Lay that cut-away down, and export the outline as an SVG.
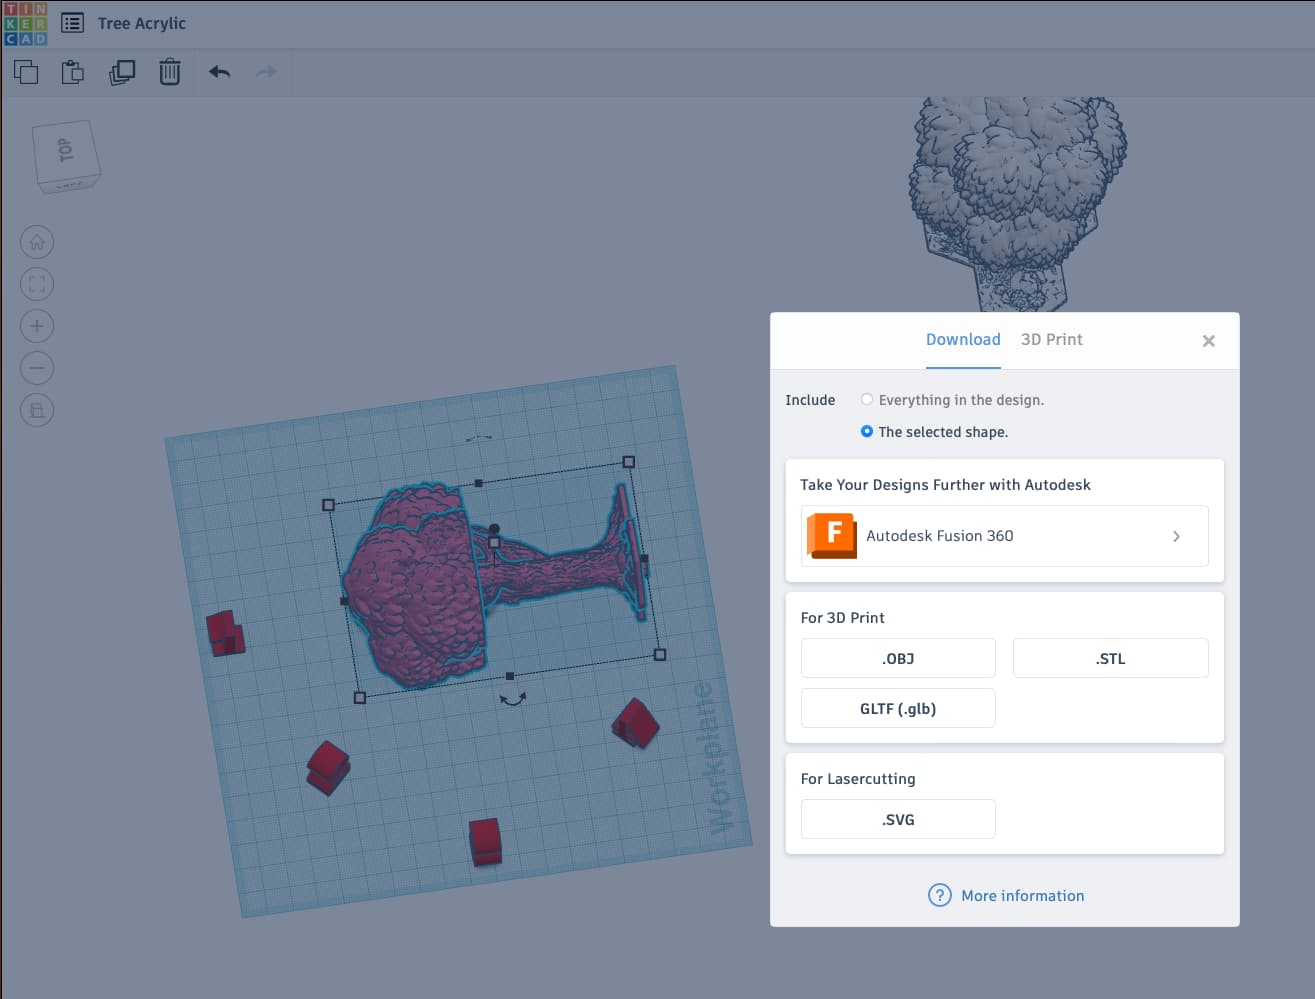
Then create offsets at 5mm and 15mm, with that 10mm gap being what I want to keep. I’m going to split each of the four in half, on the axis, so that’s going to make 8 separate pieces. Better number them.

You can see, I made the gap in the top pretty wide, 6mm, to be exact. As I want to put in a ‘cupola’ of sorts that tie them together. Also, as this is an experiment and given the scale, I’m using some 2mm cheap acrylic.

Put it all together and what have you got. I mean, it’s interesting anyway, but it gets a lot better. The shell pieces are out of sequence because when I split the tree, I wasn’t consistent on which half I layed down. That created a mirror image SVG on one or two of the sections. so I had to flip some of the pairs. But they all fit, after some head scratching. ![]()
So what about the new material? Oh ya, I’m going to 3d print with Translucent Polycarbonate. I didn’t dry it first, so it was a little more cloudy than it could have been. But still very translucent and sparkly -

So let’s print another tree and get this going.

This will work.
Get acrylic rocks and fine tune it. Call it good, as it’s just an experiment.
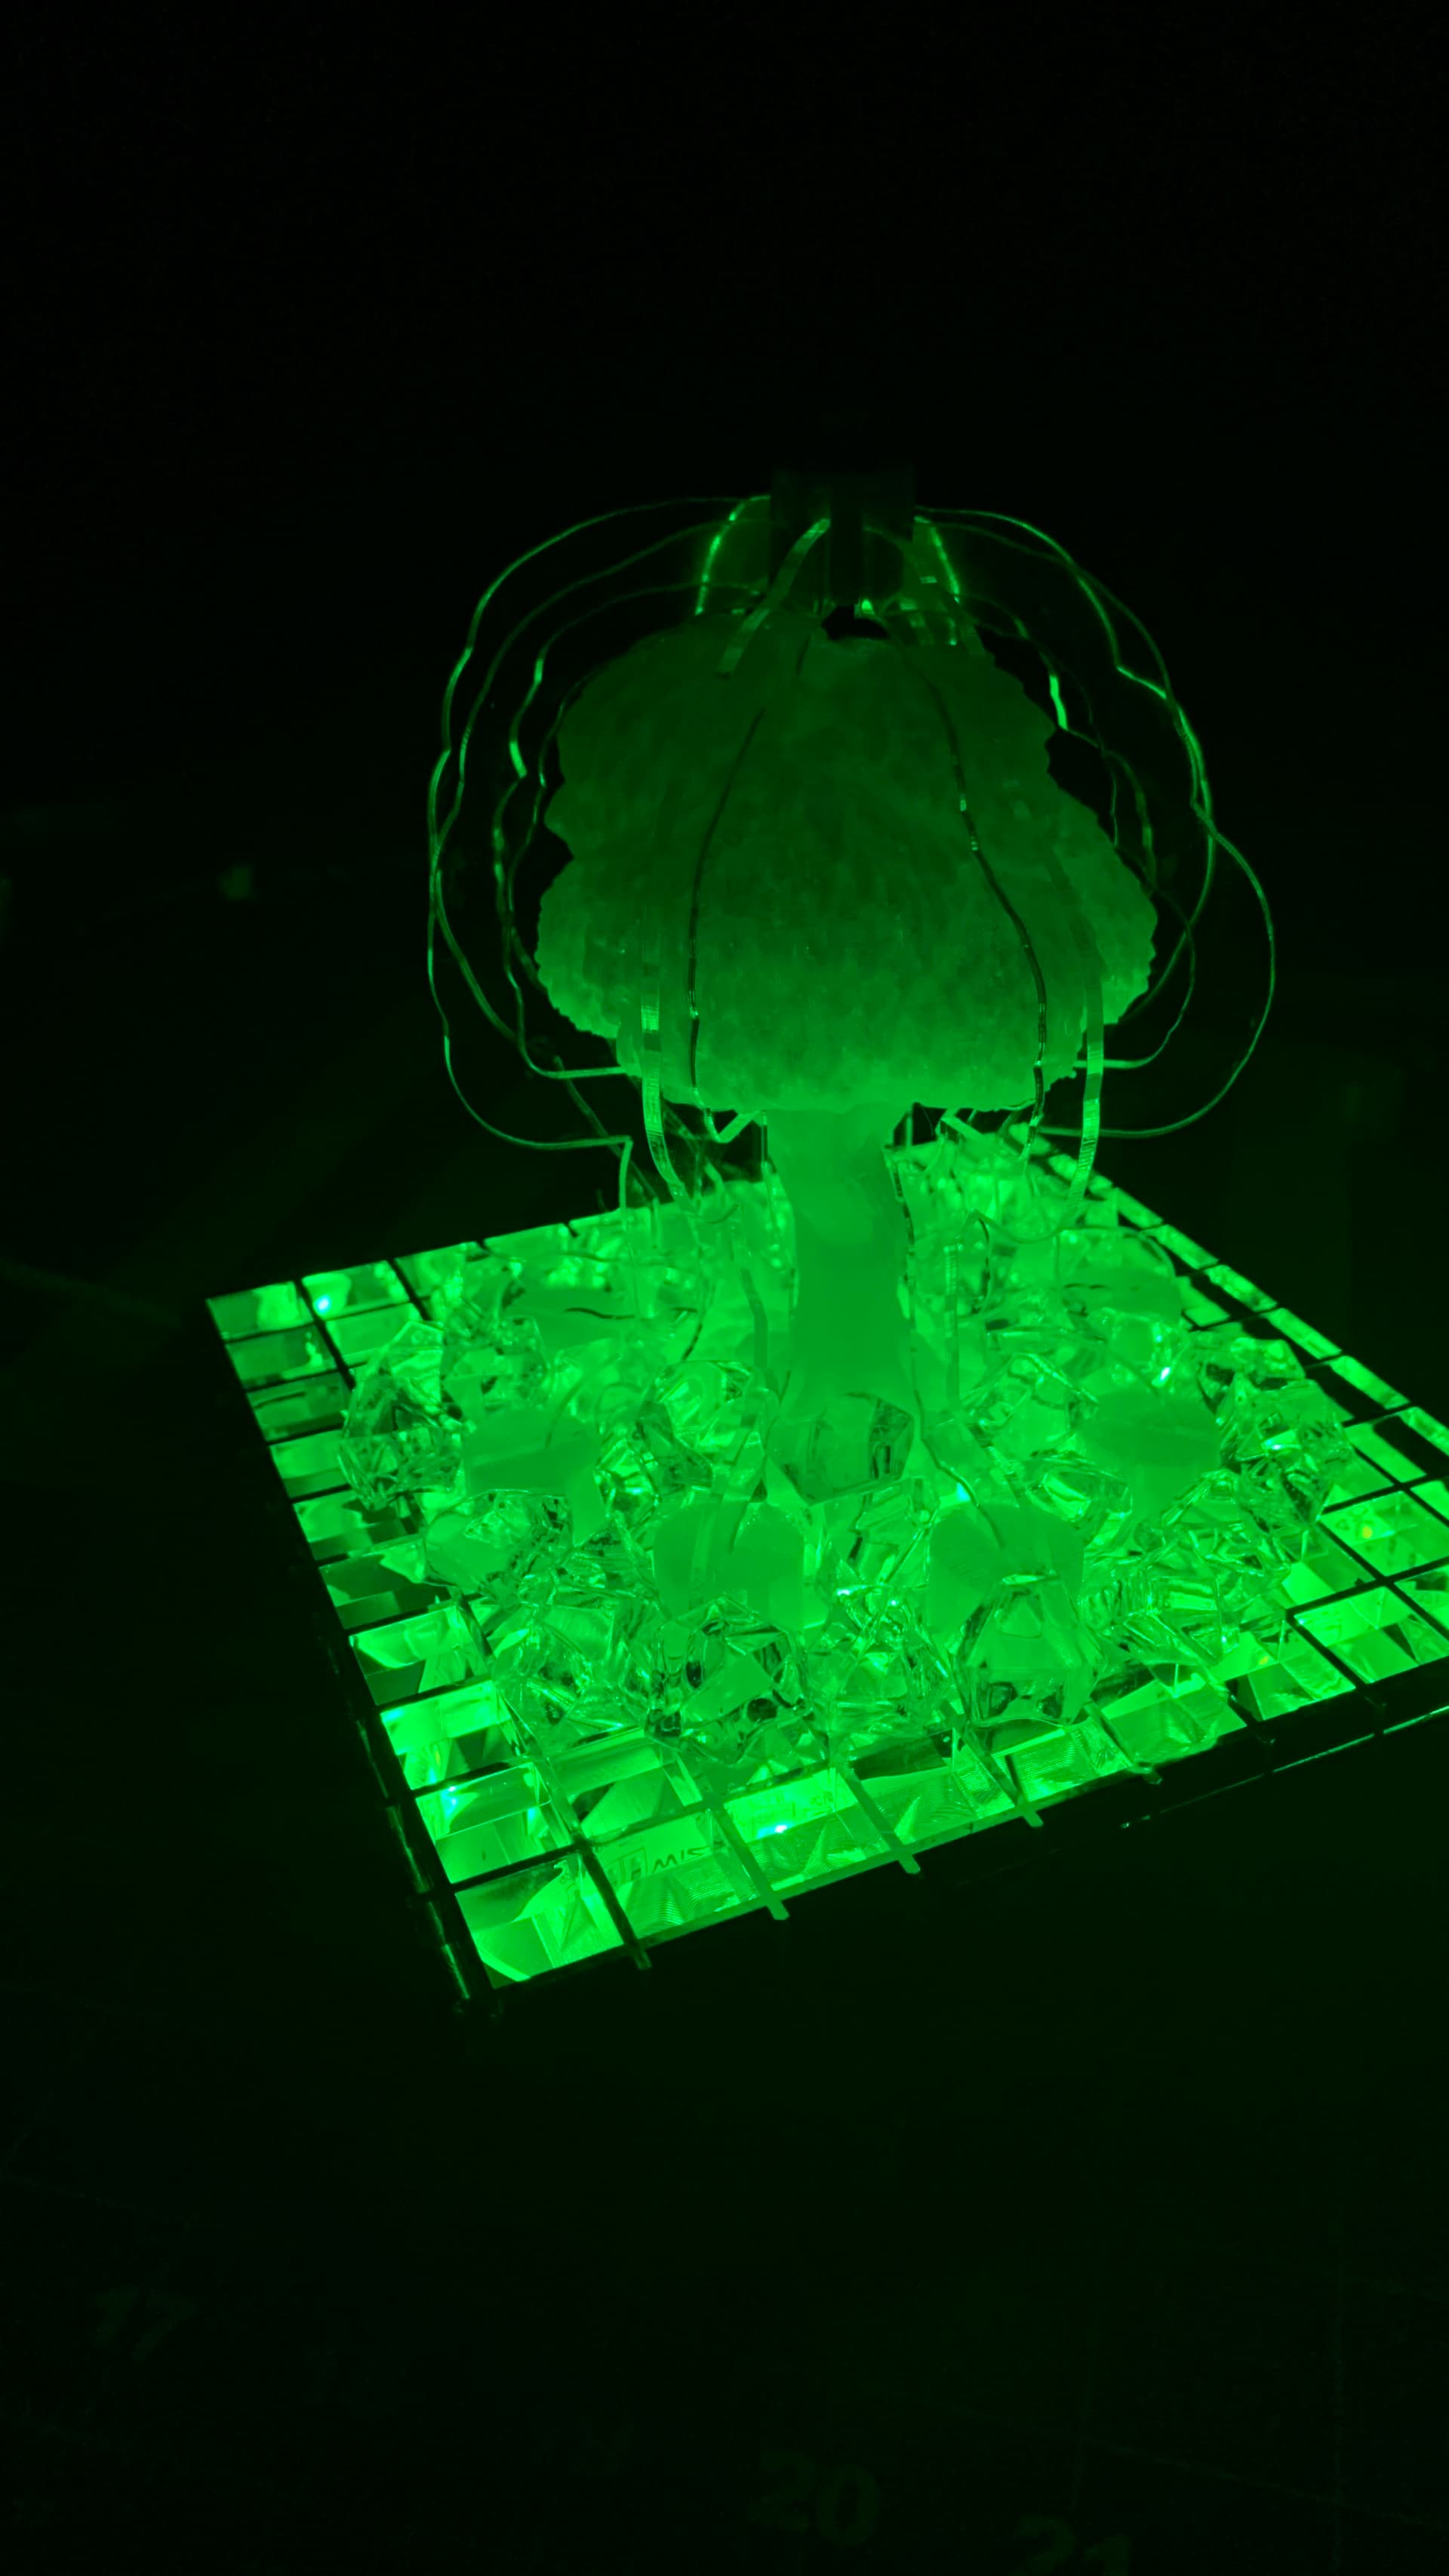
The 10mm acrylic shell is too ‘wide’ for the scale of the tree, but Overall I’m quite happy with it. Thanks for checking it out. I’ll post a few more technical details below it interested.
HL
Technical details -
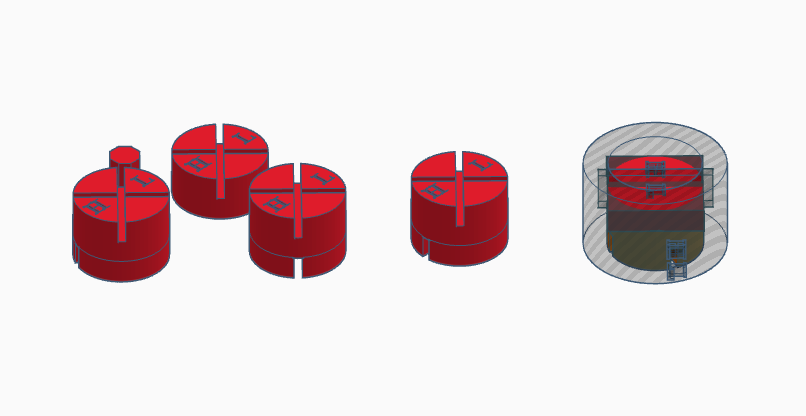
First off, the hardest part, slicing the tree. The trunk is not ‘in’line’ with the centerline of the canopy, not even close. So I decided to put in an eight sided ‘pin’ in the bottom which was centered on the canopy, in one orientation. It’s easy to see from the underside -

That way, the slices come to a point, more or less, in the visual center of the top of the canopy. If I had gone off the centerline of the base. Where all the shell acrylic tie together would have been offset (visually) on top, and look awkward.
I made the gap in the shell pieces 6mm as that was the distance, using 2mm thick pieces, that those slices could meet at the top and not hit each other.
I did crack one of the acrylic shell pieces putting it in place. But again, it’s just a mock-up. And since I numbered them, I could just print the one piece over. But this thing is so bright, and with all the cut acrylic rocks, you don’t even notice. But numbering each section with just a score was a good idea, and you’ll never see them.
And yes, at some point) I plan to make a larger version, and make 16 sections of acrylic shell at 22.5 degrees apart. Mabey not of this tree. But something slightly more symmetric might be fun. IDK. would also require different mounting disk, the ones I made fit on the ‘+’ of the grid.
Knowing that each section would be inline with either a track, or the center point of two 90 degree tracks, if that makes sense. If I cut it at 22.5 degrees, the foot of the shell piece would fall anywhere. Technically, it will fall in the center of a crosspoint, at a 2:1 ratio of over and down. But that would require a specific size to hit that point. And now my head hurts thinking about making a grid to scale in CAD, and scale it up accordingly. Ya, I don’t have that skill. But who knows, I might tackle it in the future.
And just a note on the filament. I had seen that PC can be difficult to work with. I was using a new box so could be reasonably certain it would be dry enough. Not going to lie, I had numerous balled up messes almost immediately. I bumped up the plate temp to 120c and switched to the engineering plate and it was sticking a lot better. And I managed to print the tree and all the mounting points. But after being open all day, and then sitting 12 hours overnight, I couldn’t get a print to stick anymore. I think it just needs to be dried before use again.
This size box and the amount of light needs a 50% larger Tree. Which I might do in the future. I’m not sold on the GF cut Acrylic shell as a technique. But I know the scale isn’t right on my sample, and it’s terribly non-symetric. So I’ll probably take an another run at it at some point in the future.
Thanks again,
HL