Greetings -
I’ve wanted to do an acrylic ‘Fire’ since getting my GF a year and a half ago. But I didn’t feel I had the concept to do it justice. But after the post by gensd on their 3D 4 “sided” Tree I feel compelled to go ahead and give it a shot. Then without further ado, let’s build this thing…
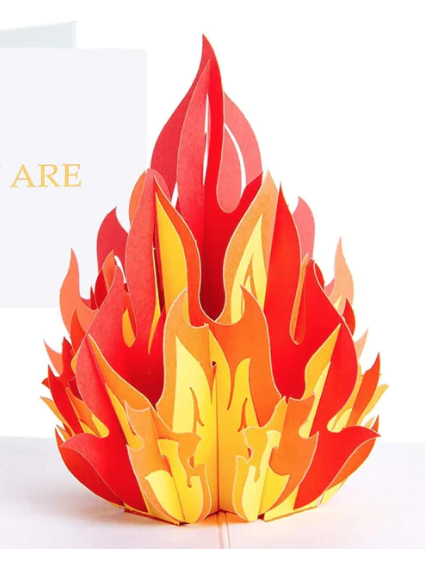
My Inspiration - Yes, one of the most awesome paper pop-ups ever -
And because the task isn’t daunting enough, I’m going to only work in metric on this project. It’s about time I do this. Anyhow, on to the first element - the base / and what size that should be. I want to keep it simple, so let’s go for square, foam-cor, and make it a maximum 10.5", sorry 270mm square. ![]() . Just some temp frames to work with.
. Just some temp frames to work with.
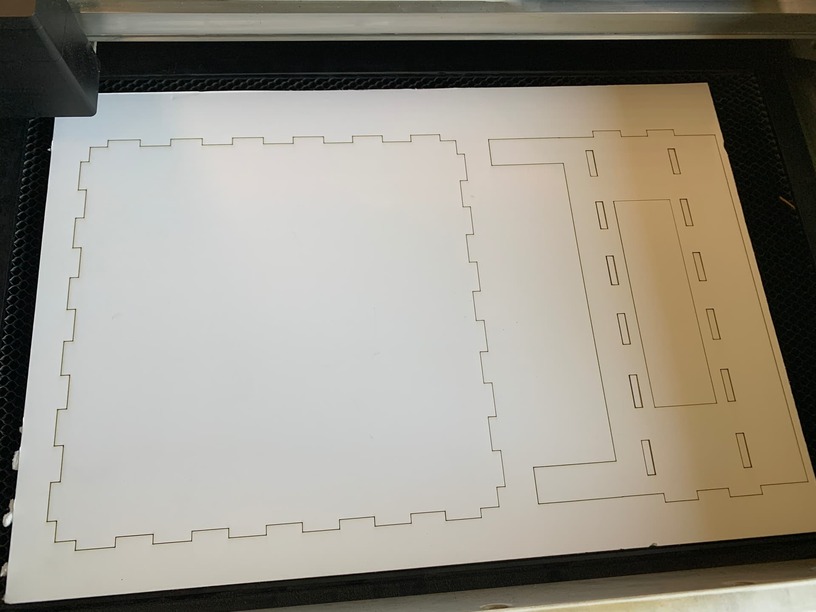
And since the foam-cor is 5mm thick, working in metric makes crafting nesting boxes too easy. The SVG started from Makercase and then edited in Lightburn to do a shelf kind of thing, for my first time. Whaddya know, it works. ![]()
Bling
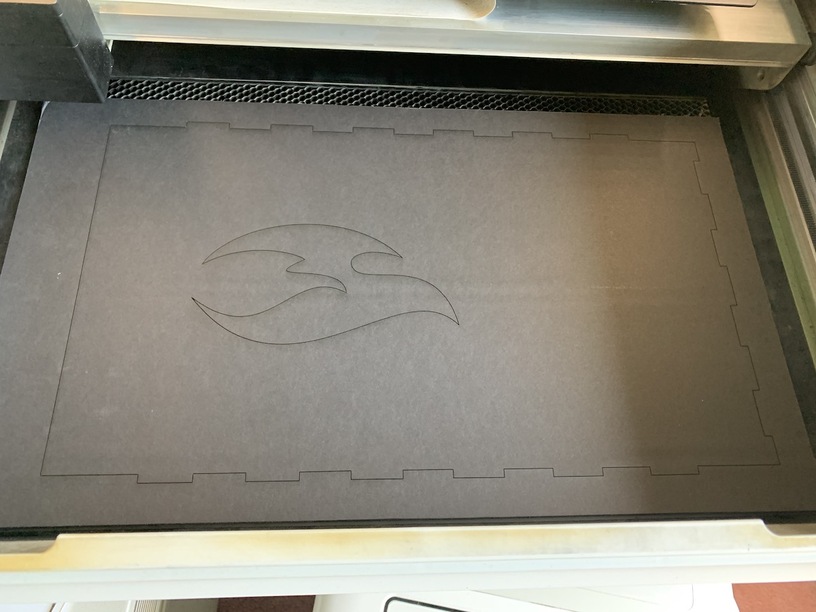
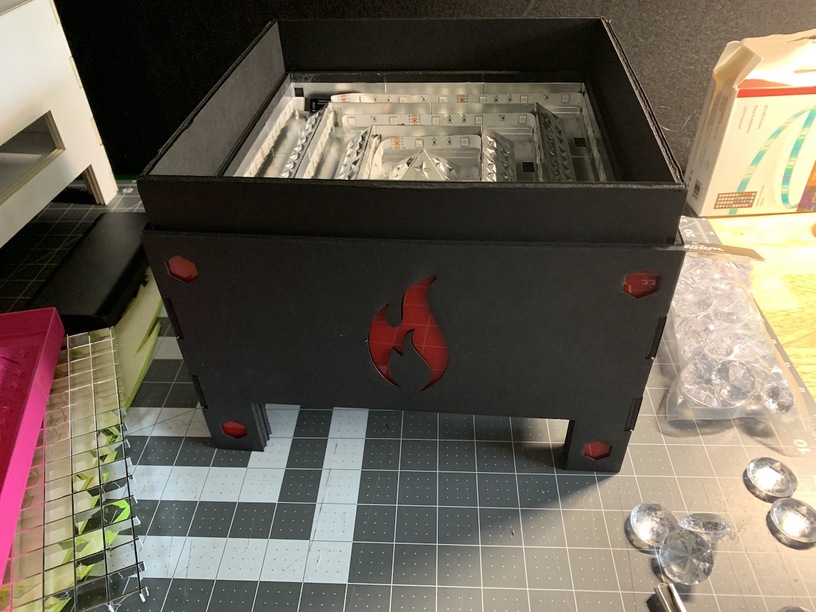
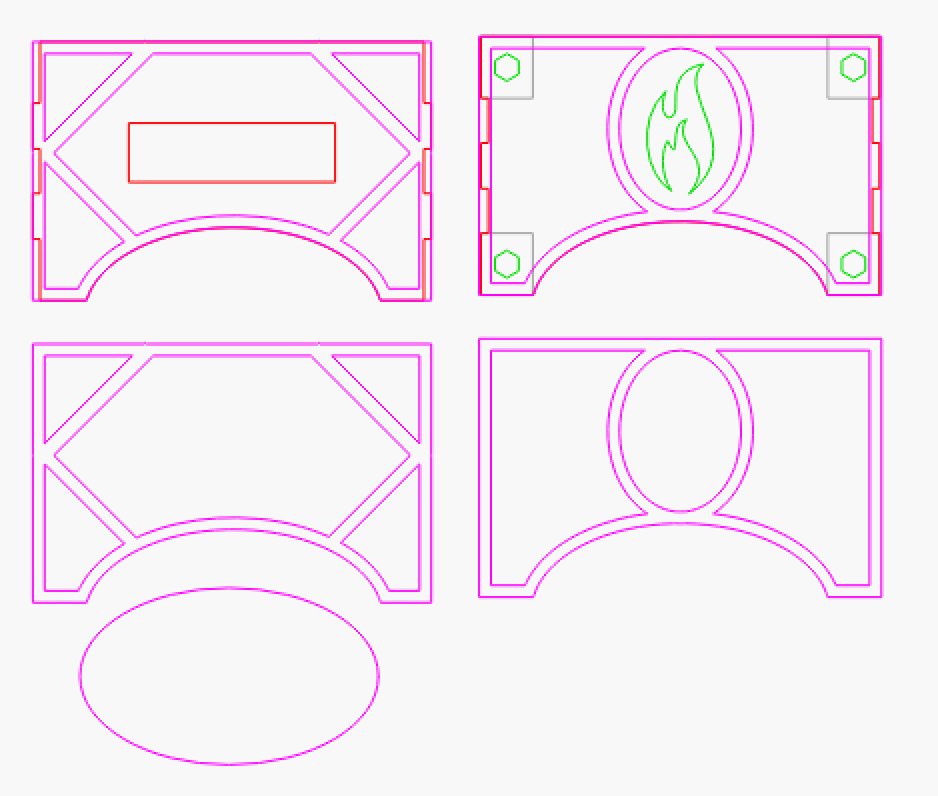
Flesh out some exterior box designs, make it look nice / interesting, and test that layer in black. I want to try some ‘inset’ acrylic in the foam-cor. So I’ll add a flame icon and some hex holes in the corners. No real plan yet, just learning as I go.
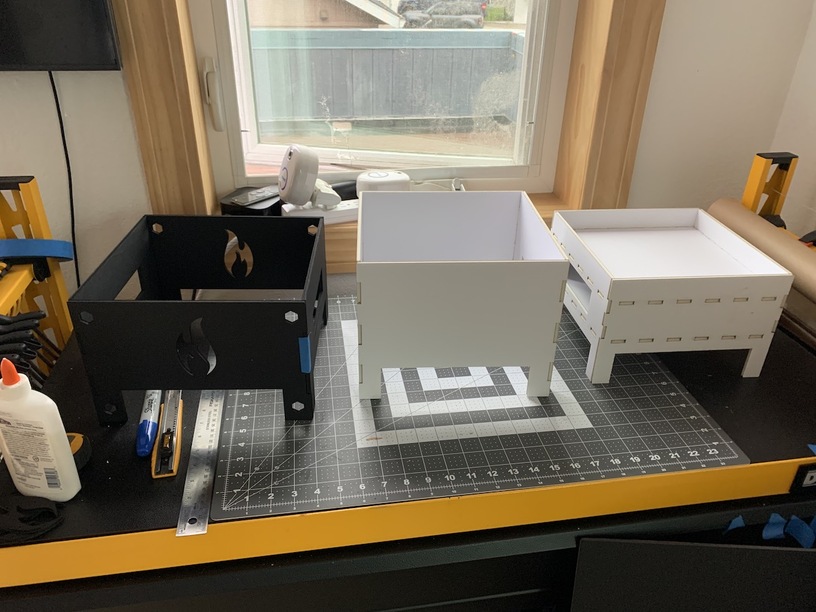
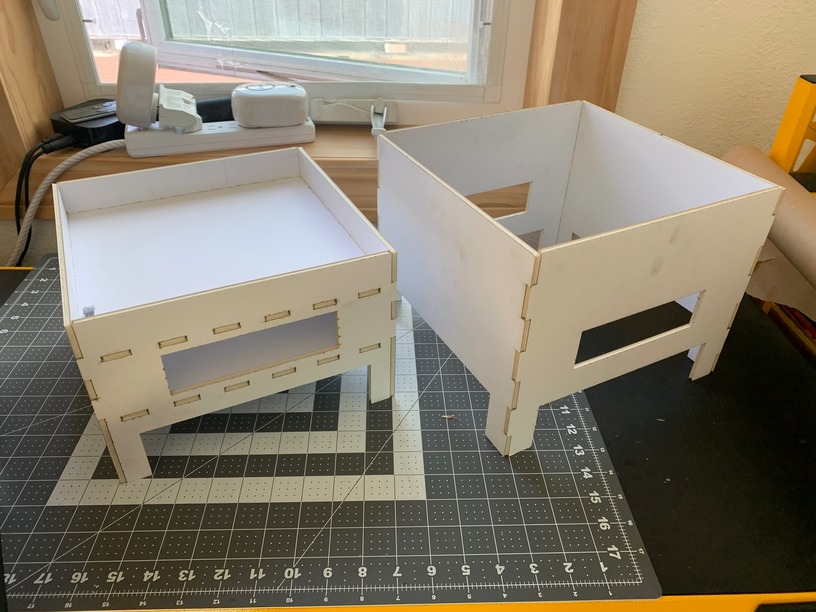
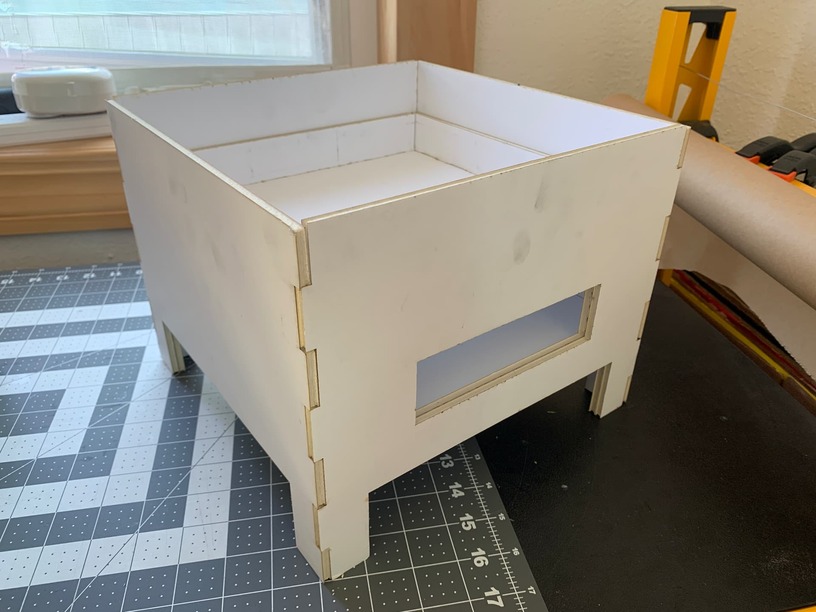
I would like a top on the box, and want it to slide down onto the base and stay in place, like a sleeve joint. I think 240(mm) is a good number to use for the inside of the ‘inside’ box, for the lighting that will go in it… And using 3 layers of 5mm foam board makes the outside of the ‘outside’ box 270mm. Which is about the limit for the GF to cut.

Go big or go home on the height too, right? This thing is going to be large…
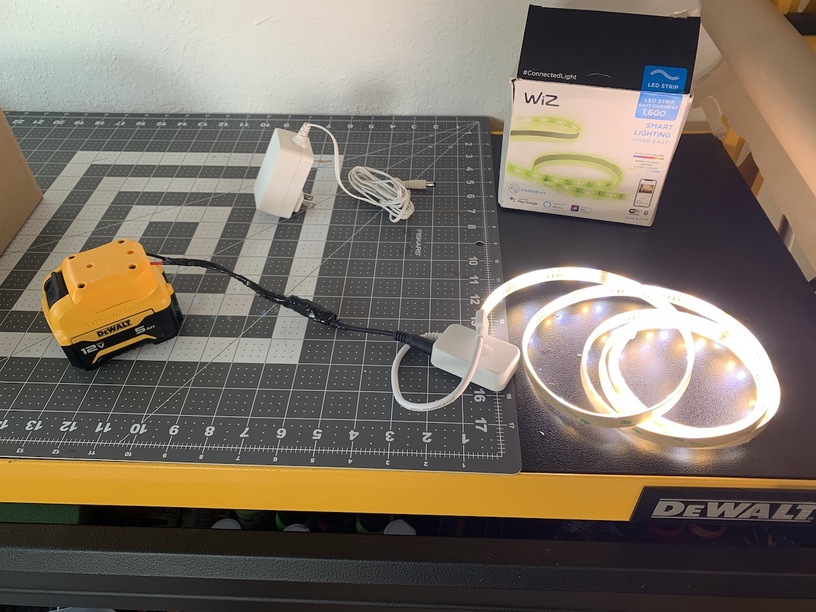
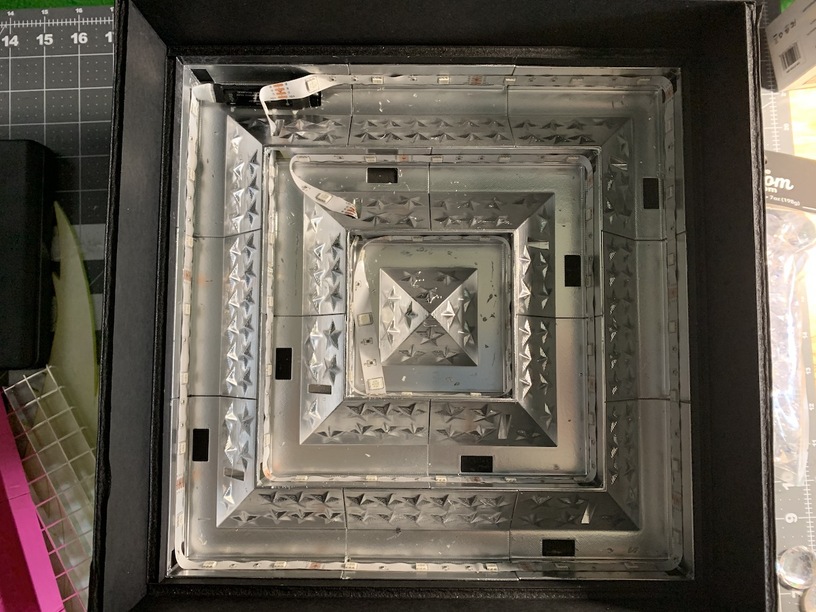
So on to lighting. I have 240mm square to work with. I want to try something interesting, and work on learning 3d modeling at the same time. My thought is to mount the strip flat, sideways, and have a reflective 45 degree surface bounce the light ‘up’. While also adding ‘facets’ on that surface to break up the light.
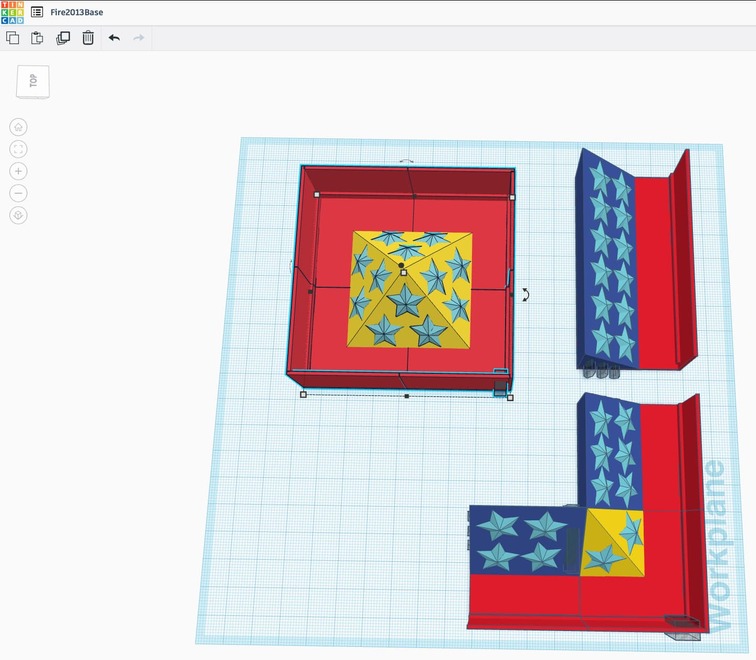
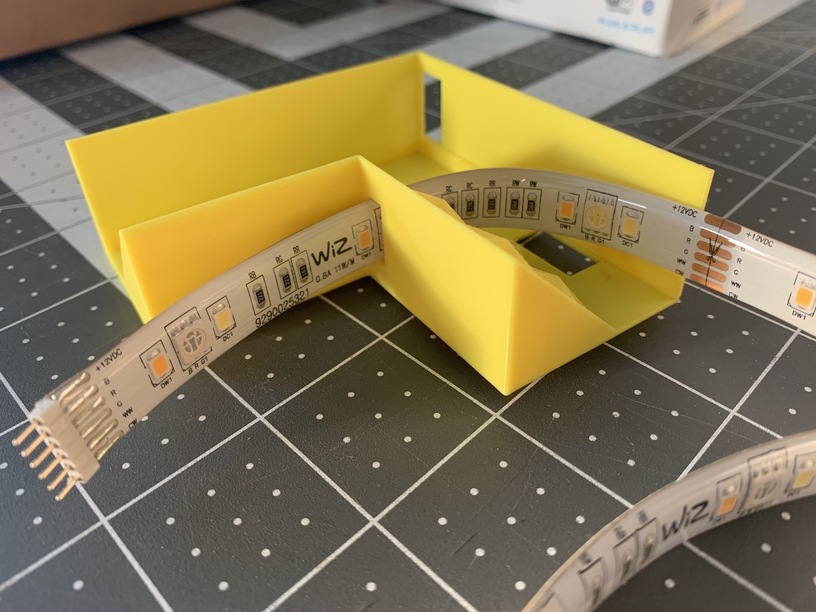
This seems like the most logical layout. Working on a 40mm square design, making the corner pieces 80mm square, with a 40x40 notch for the next corner, and an 80x80 center -
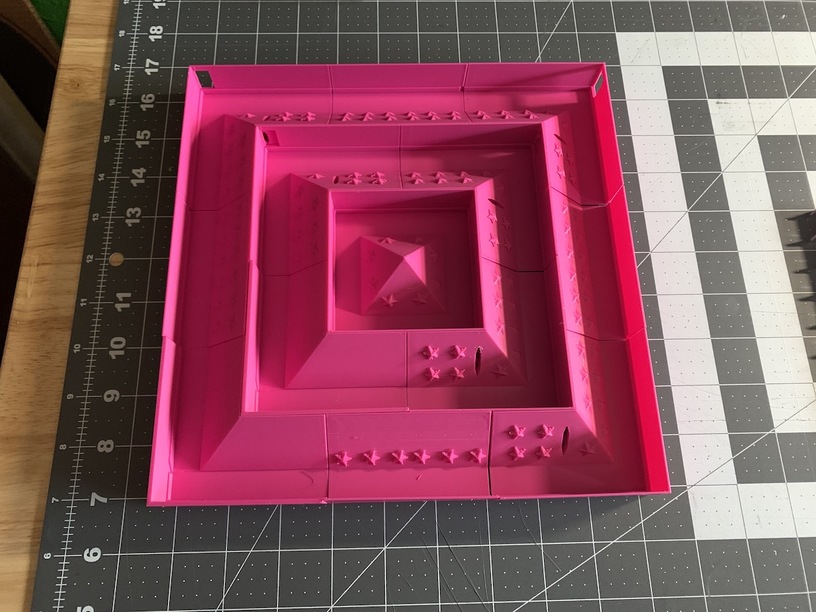
Built on 40/80mm grid, in pieces to make it easily expandable and here’s how the led strip wraps inside. Again, it’s just the prototype so I’m not too picky about how it looks at the moment.
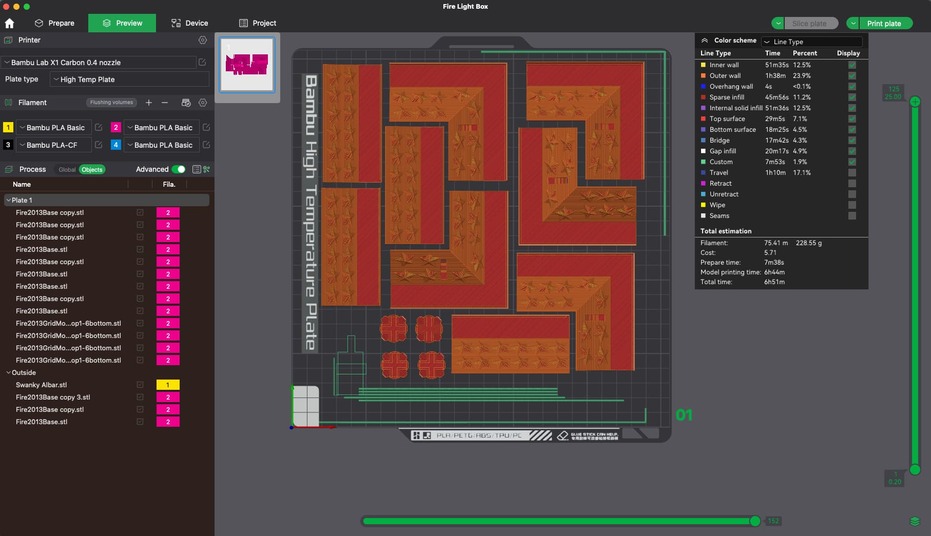
Cool, let’s go to final. How many of those pieces can I print at one time? A fair number turns out. Along with a few little mounting disks I created for the acrylic flames. Those will come into play in a minute…
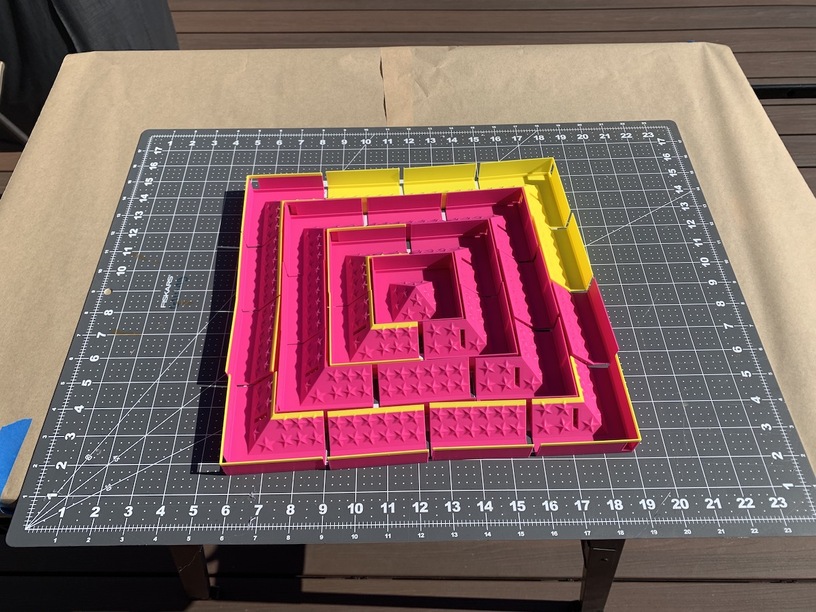
And yes, if the BambuLab printer runs out of a particular color in the middle of a print, you can put a different one in the queue and tell it to finish. Finally, ran out of magenta… It’s going to be painted anyway, so works for me.
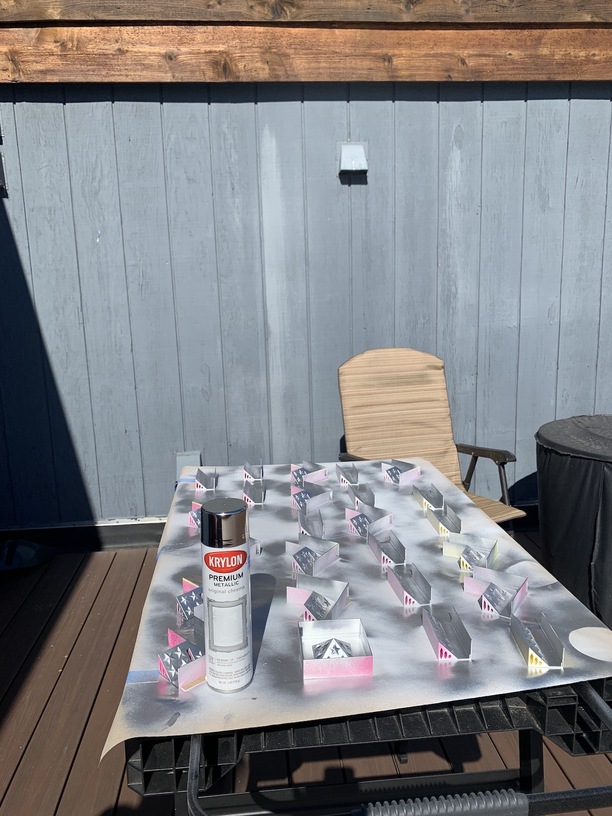
Then let’s get to it. I don’t think the primer is necessary. But I’d like to prevent the LED adhesive backing from pulling the paint off as best I can, and I have it, so I’m using it.
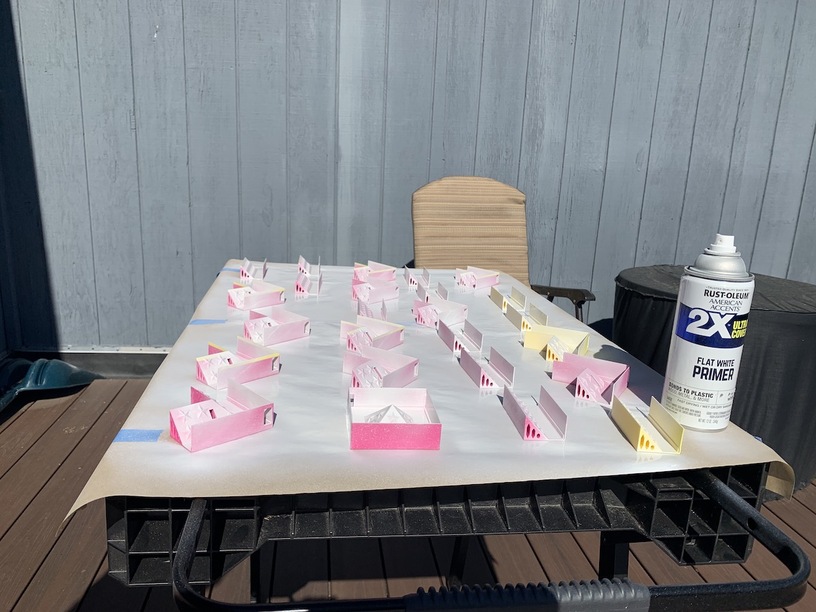
And because I want the most reflectance I can get, let’s make it all ‘shiny and chrome’. 10 points if you know the reference -
The prototype pieces had a hole for the led strip cord to exit the ‘side’. For this box design I want the cord to go through the bottom, into the pocket (handle) space in the lower box. So I made new corner pieces with the cord cutouts on the bottom as well. And what do we have -
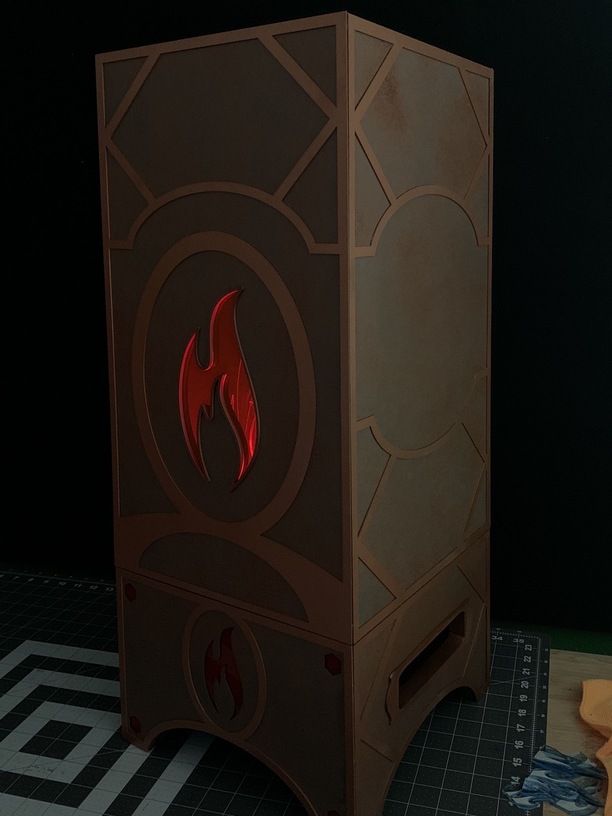
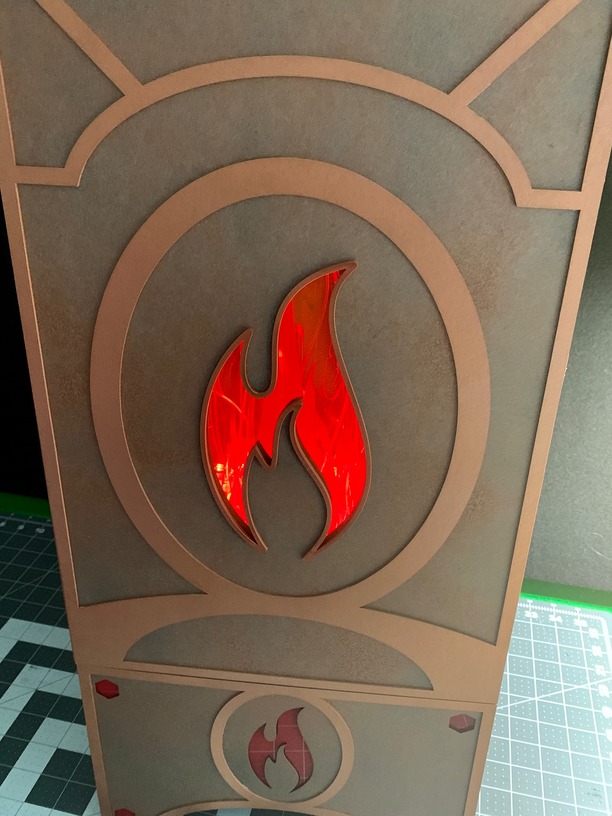
I’m definitely liking the black box design, and add some red acrylic to the cutouts in the lower box flame and hex holes. As the foam-cor is ‘cupped’ inside the laser cut edge, I scaled up the acrylic flame 1mm in width (2mm in height) and it basically snaps in from the back. Perfect.
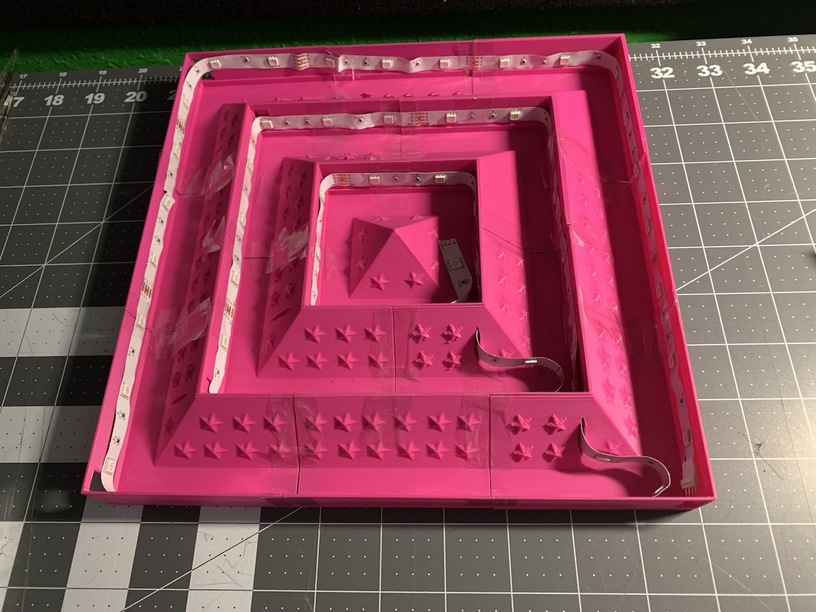
Now, back to the lighting. I need a surface above the LEDs for the acrylic flames to mount on. It should be reflective already if possible, and available. Right, plastic egg crate chrome grid from troffer ceiling lights. Super reflective and cuts to fits perfect on the top of the inside box on the prototype -
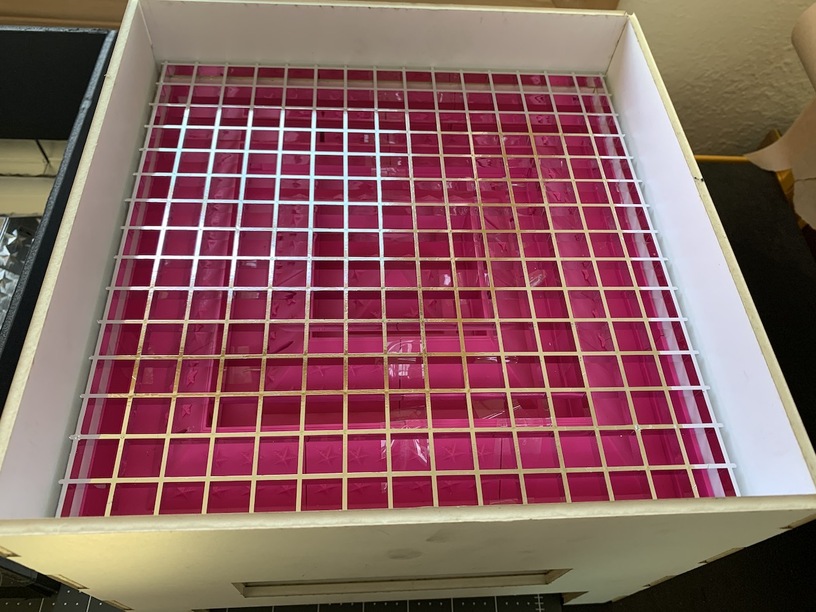
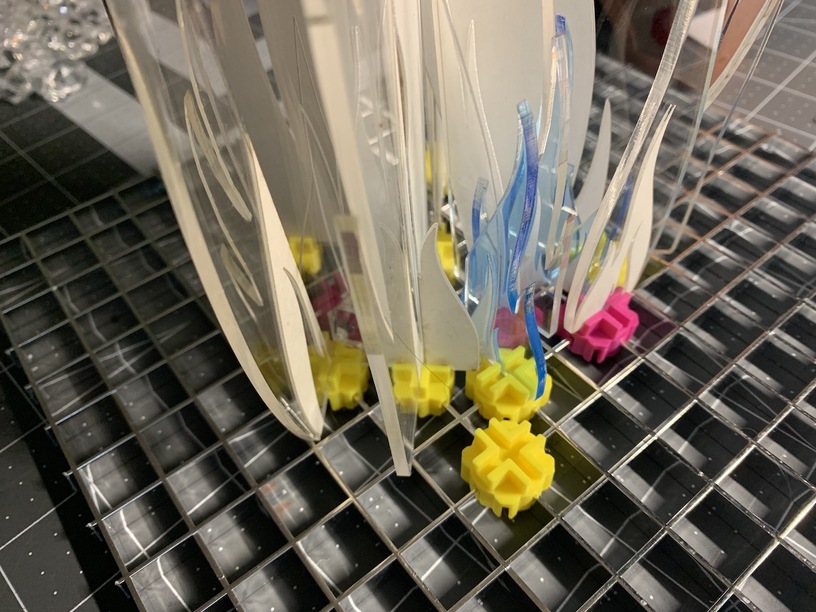
This will also provide the perfect mounting surface for the acrylic. How? That’s where the disks I made come into play. Testing how they mount to the grid -
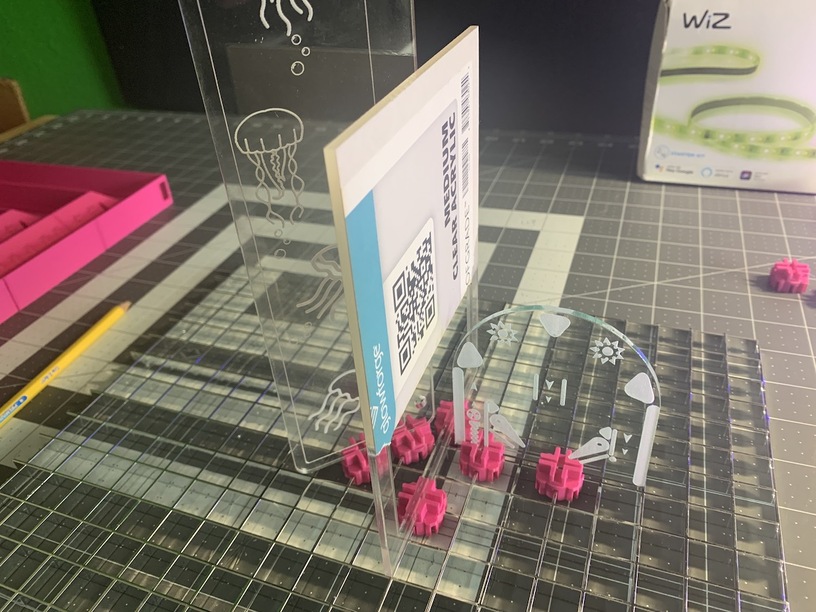
These can mount the flames either along the grid lines, or at a 45 degree as well. Put them together and what does that look like - oh ya, this is very bright and will totally work. I mean, it is almost 8 feet of led strip shining ‘up’ through about a 10 inch square. 240mmx240mm to be exact. ![]()
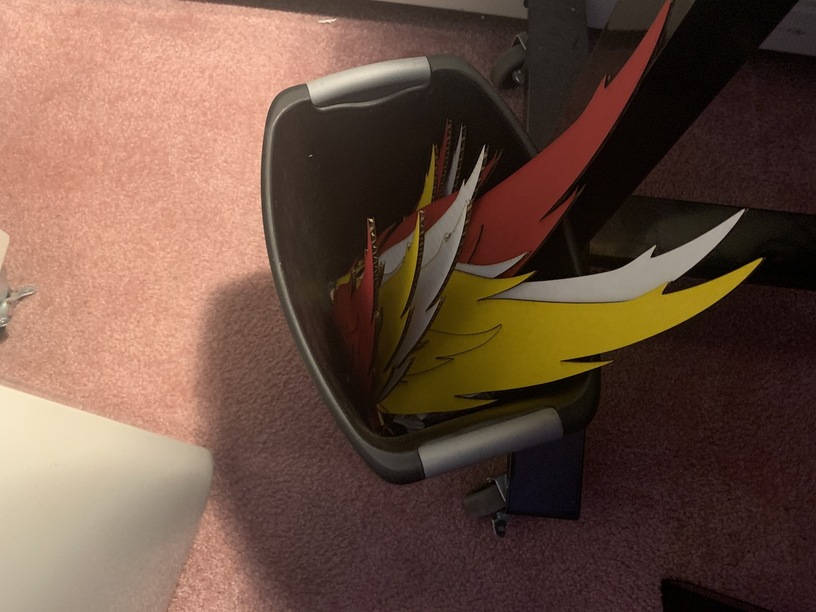
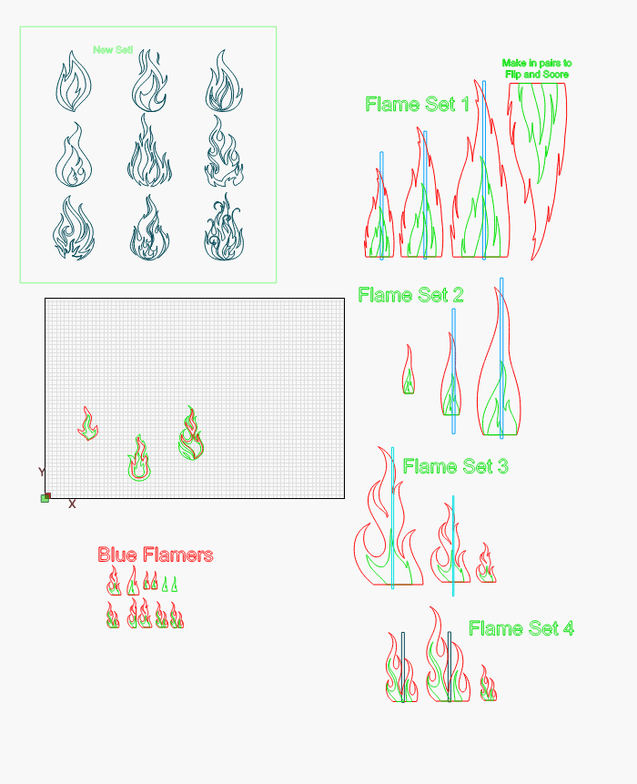
Onto the flames. Find some free Fire SVG’s, crop and scale one to work in the space I’ve got and use as a model as I go.
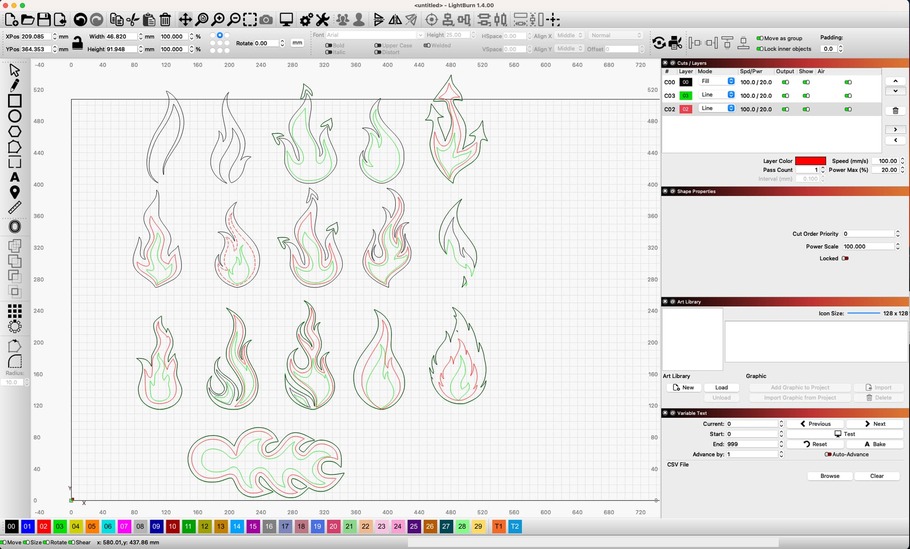
Variation is clearly a big part of how this is going to look the best. So let’s do 4 styles of flames, in three sizes each. And, each will be ‘split’ as well, to add at a 45 degree to the ‘flat’ piece, or a different flame even. If that makes any sense. Anyway, more variety equals more options, equals more better. So just go with it… Flame1 visual scale samples -
And some that didn’t make the cut.
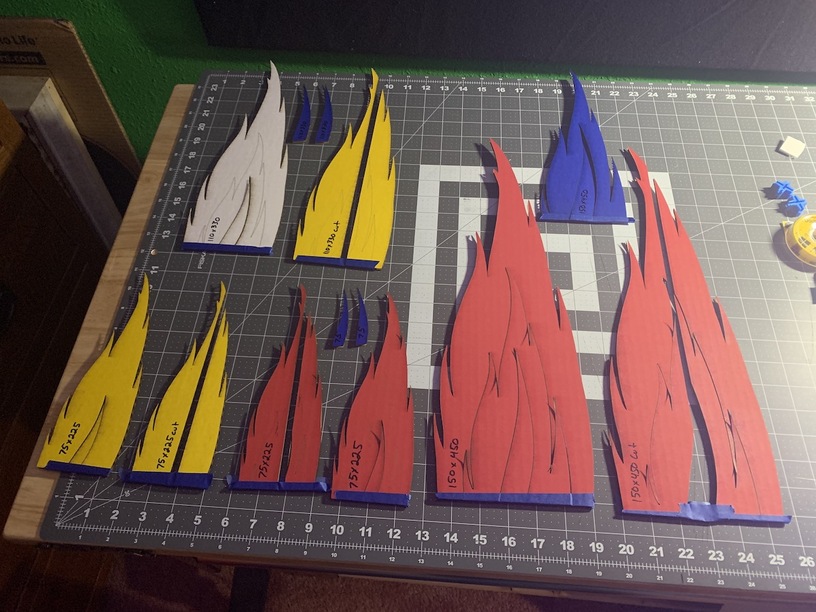
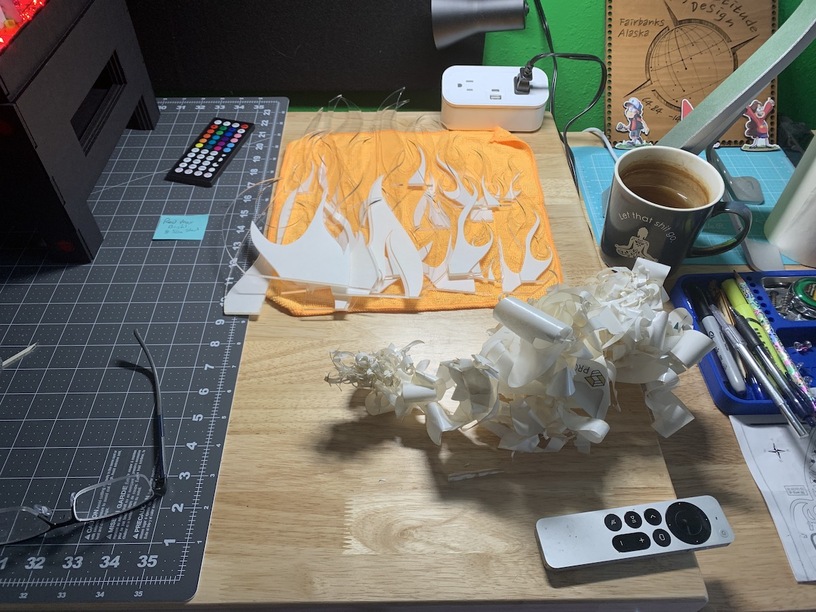
These others will work, and now, crank out the rest - [One eternity later]
The ‘blue flamers’ are small pieces added to the ‘base’ of another when nothing else will fit. Cut from Transparent Blue acrylic, they’ll add a great effect to the base of the fire. In addition, leaving the masking on the ‘inner’ flame of each bigger piece adds another dimension, or separate looking flame to the mix. So, two hours of cutting and mask needling later -
Ok, on to the test setup. I’m just lining up some of the Flame1 in a row to test how the mounting squares work. The final squares I’ll do in yellow, but this is very promising.
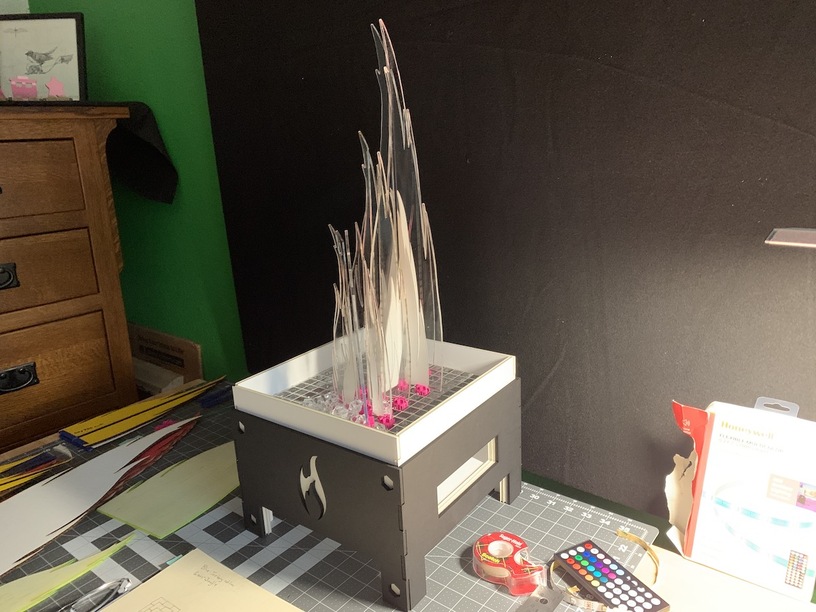
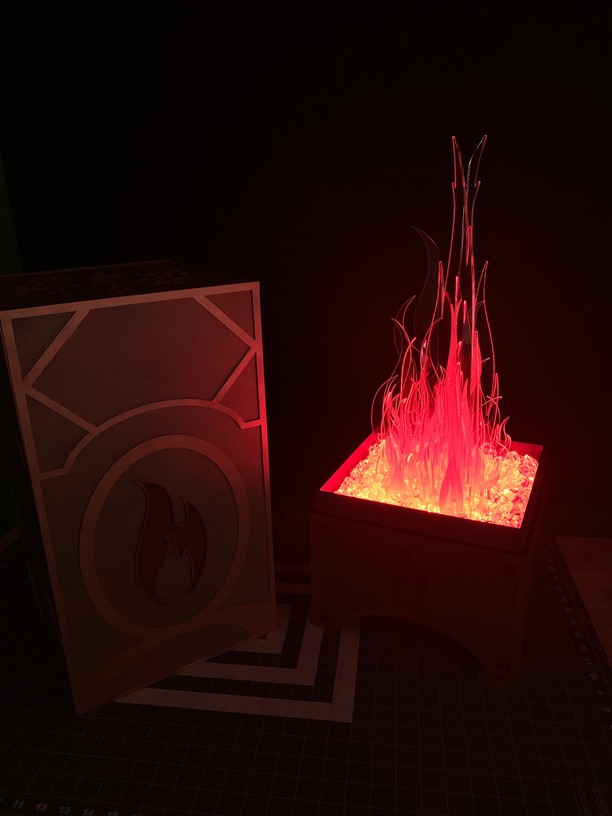
Let’s go to the all black base and add some acrylic ‘rocks’ to the grid. And while we’re at it, mix up a couple of the flames and turn the lights on, this is going to work…
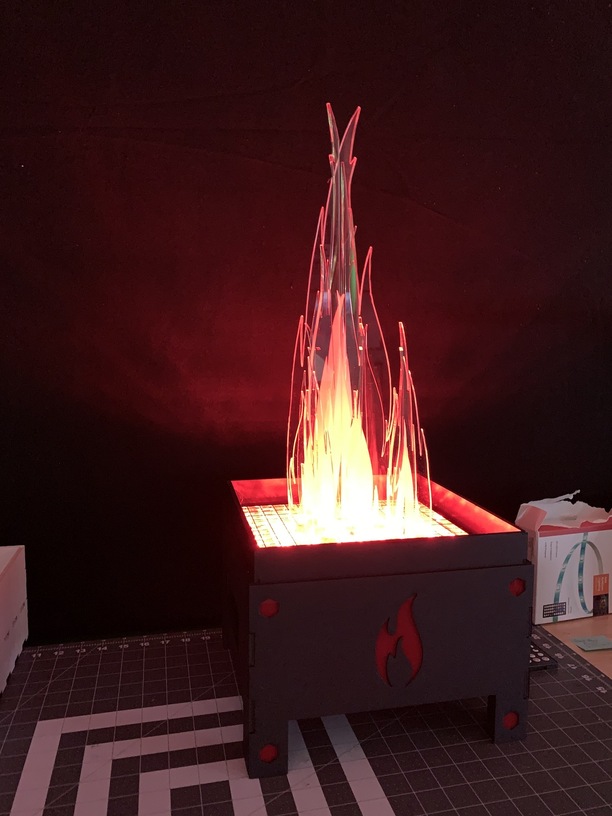
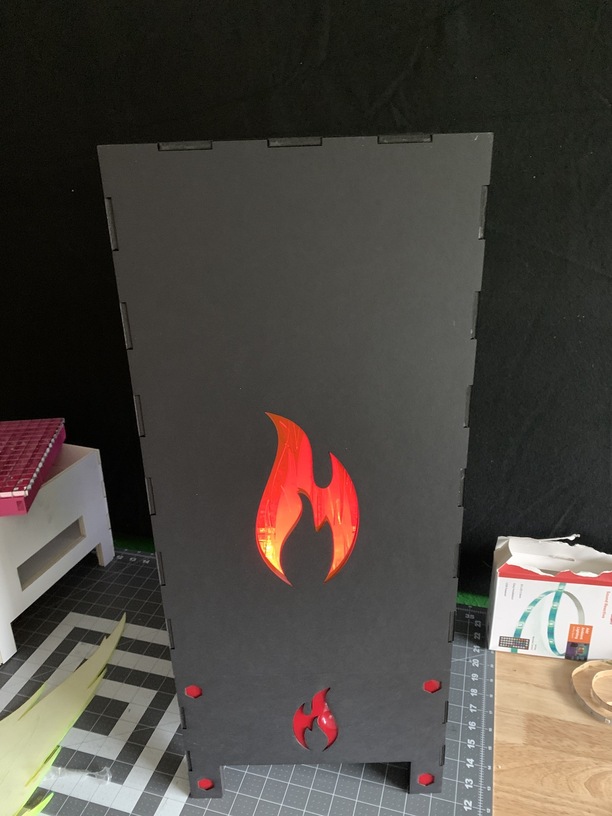
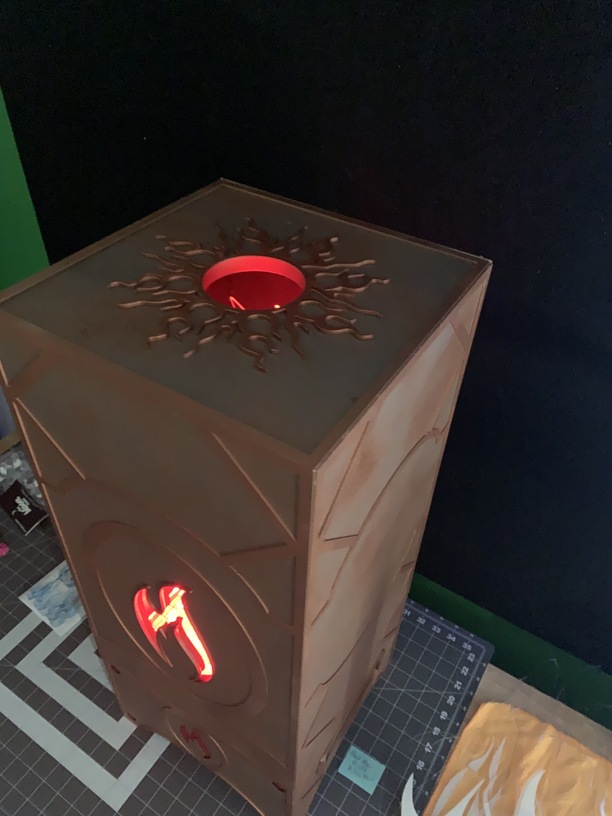
Now what about the top of the box? I want the whole flame to be enclosed, but, be able to get a peek at the fire inside. I did that flame cutout through the face, and going with Fluorescent Pink acrylic as the viewing window insert. Perfect -
Ready for some trim and paint I’d say. I want to use my tried and true favorite ‘matte hammered copper’ for most of it. And for the trim pieces I’m think of a more standard copper.

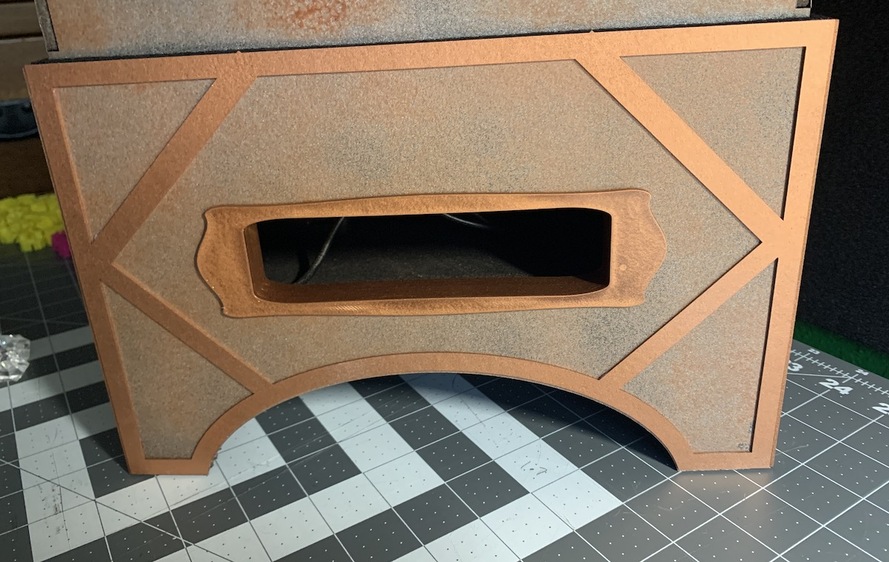
I’m in the ‘painting zone’ and not doing many pics. And by zone, I mean fumes… ![]() I don’t like the ‘square’ feet on the base design, and want to redo the outside of the lower box to add arches.
I don’t like the ‘square’ feet on the base design, and want to redo the outside of the lower box to add arches.
So I give you, ‘Botched Hibachi’ - bonus points if you know the reference - ![]()

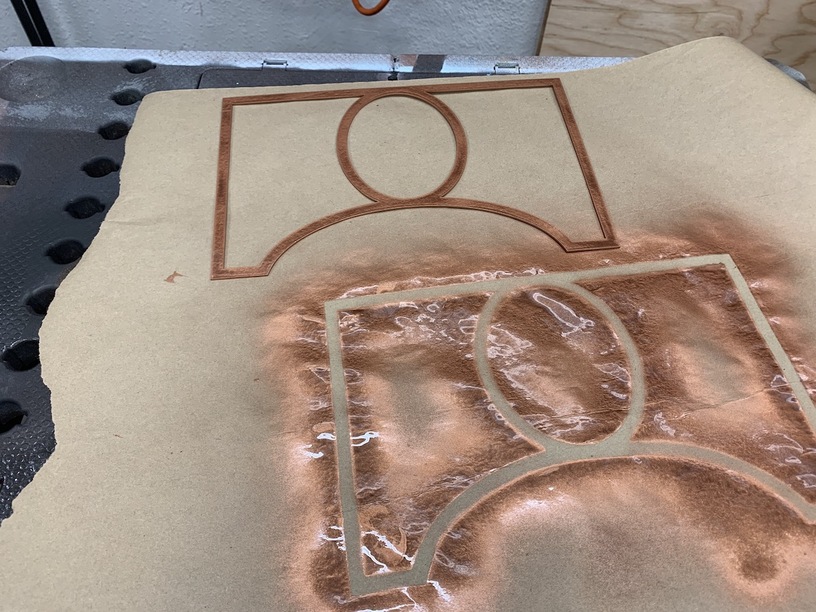
Now on to making the trim, which I’ve never done. Just draw it out in Lightburn by tracing the box sides, add width to the ‘fronts’ to cover the ‘side’ trim overlays. Lightburn is not intuitive at creating joined shapes. Something Adobe Ai, and probably any other graphic design program does easier. But I’m getting the hang of it.
I only have 1.25mm framing mat available. Kind of expensive, but a good friend says, You can always use what you got, if you got it. And it’s what I got…
Surprisingly, you can really coat it in spray paint and it’s not curling up or getting wonky from the wetness as it dries. Worth It.
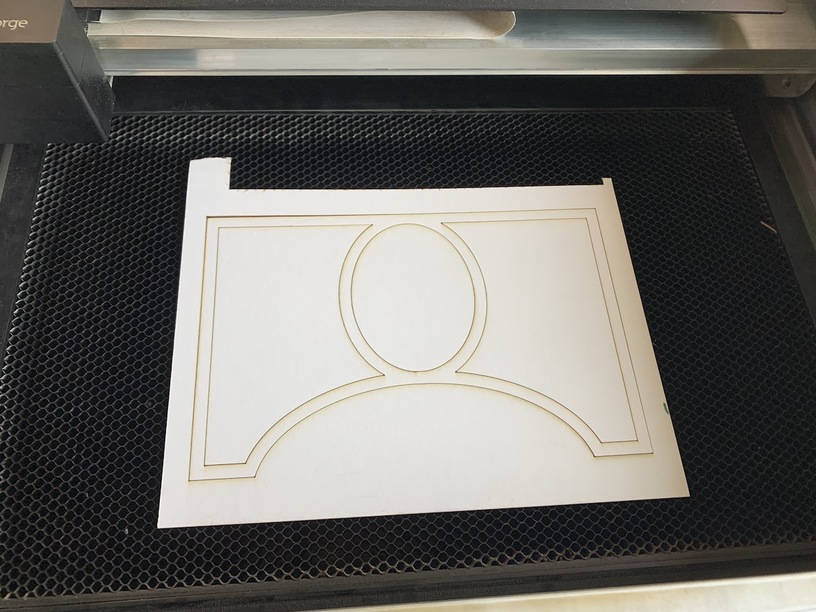
As an aside - I’m also organizing the construction files for easier reproduction later, including annotating the pieces / steps. Which is its own exercise, and I really haven’t done before. But LB does that pretty well. Here’s the Lightburn final build file of just the box and trim -
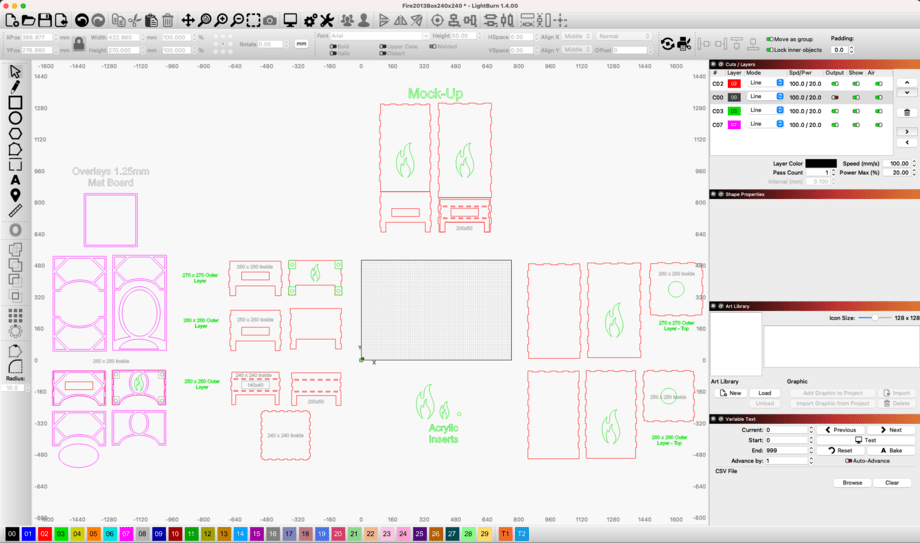
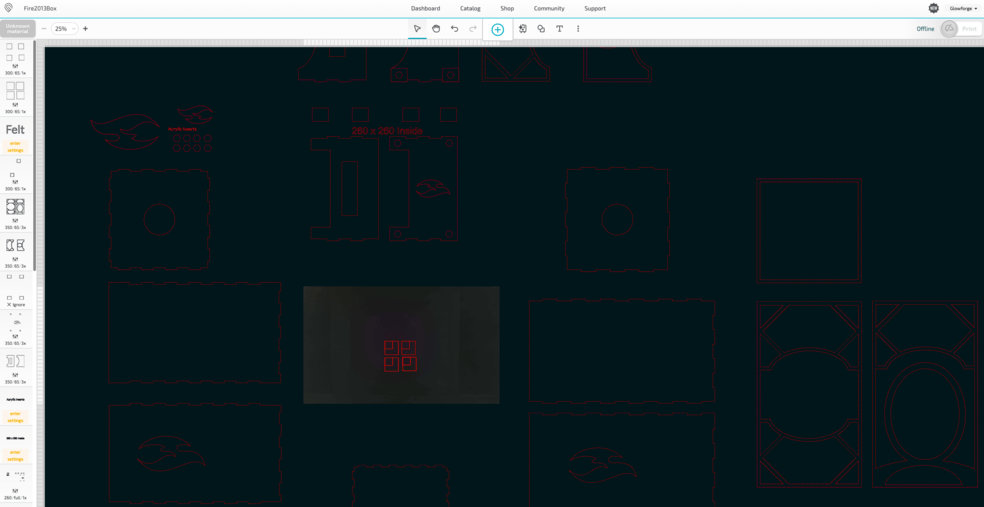
And the Glowforge file. Oh, that’s right, you can’t zoom out far enough to see all of this project at the same time. Double Sigh…
How about some box hardware you ask? Well it needs handles for the big cutouts on the lower box; I want to do a trim ring around the big sight glass on the upper box; And I included an 80mm hole in the top of the upper box for future something. I am just learning, but I can put together some basic 3d printed elements. These will work -
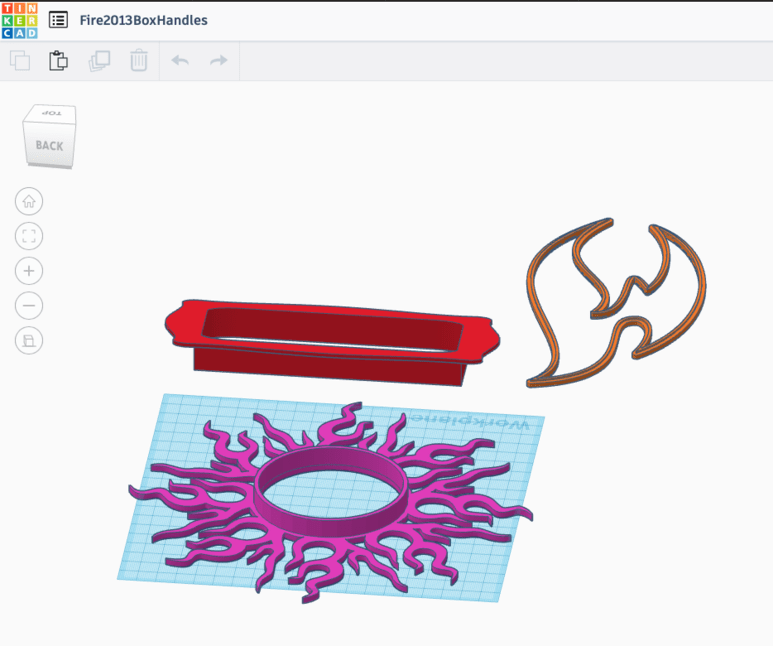
I printed them in PLA-CF which has a nice rough texture that spray paint sticks to pretty well, without sanding or even priming. I’m using the same bright copper paint as the box trim. Yum. ![]()

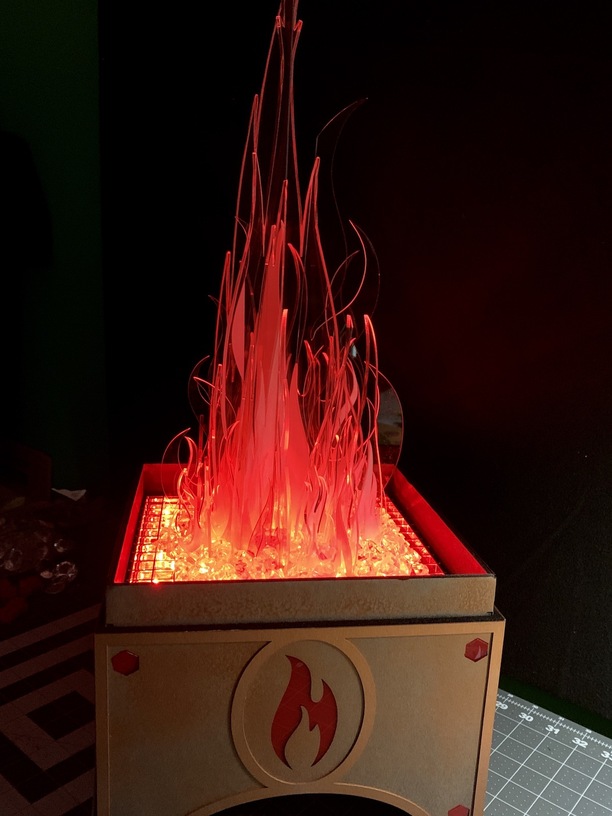
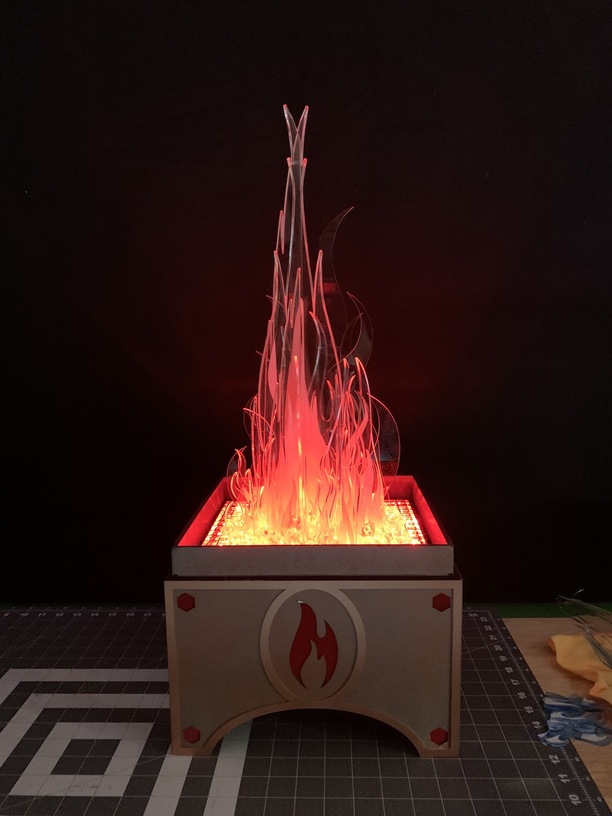
Man is this a long post, let’s get to the box already. Fair enough, put all the pieces together and what have you got - Boom -

Designwise it’s pretty simple. And the top of the box needs some kind of handles on each side to lift it off. I’m going to think on that for a while, but I’m quite happy with it -
The top hole I figured would be interesting at some point, but having the fire trim ring is pretty darn good. A fair amount of light comes out of there, so I’ve got lots of options for enhancing it in the future.
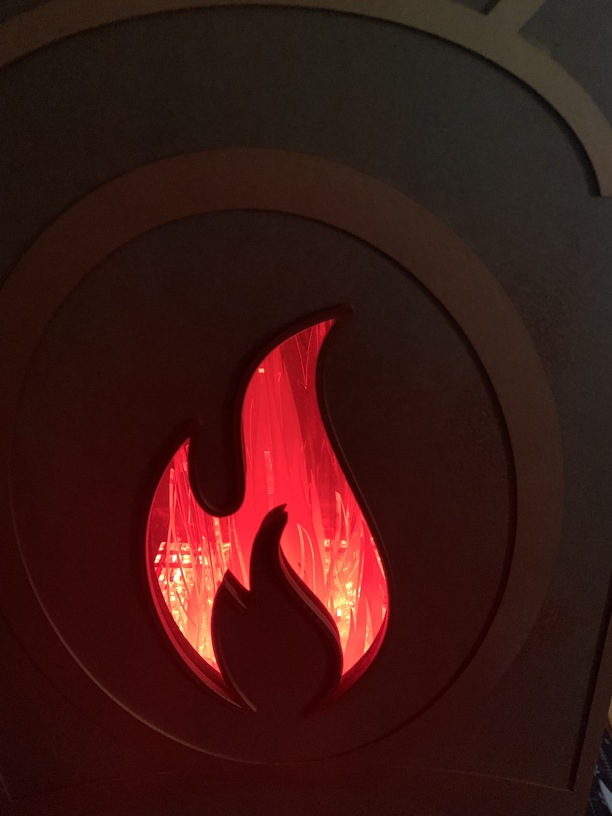
And peeking through the ‘fire glass’ is really great. This is with just the few random flames and a handful of acrylic rocks from the layout test.
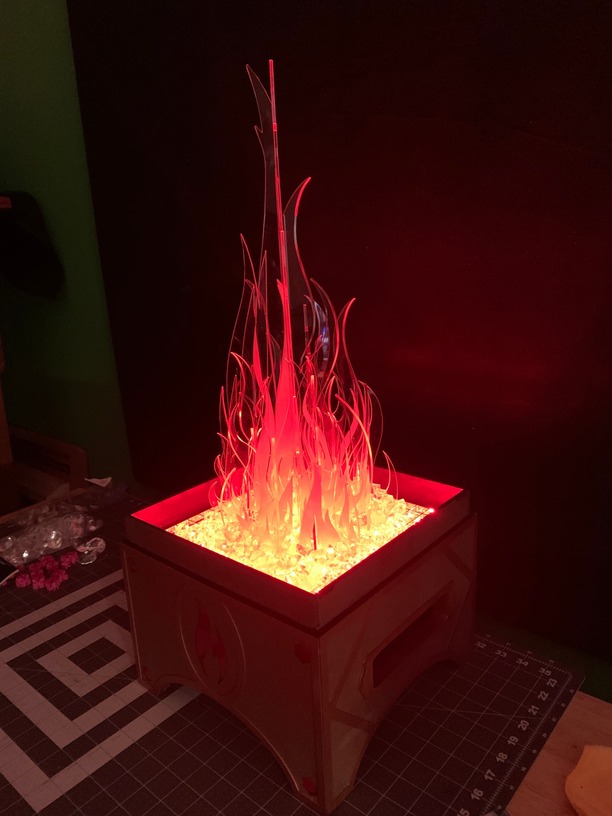
We’re not done yet though. Now on to the final fire layout. I tried to design the maximum width of each set of flames to a factor of either 20mm or 30mm, so that each could butt and pass on the grid to pack them more tightly. This worked well, and you can pack pretty tight, but still get enough space to put the rocks in to hide the grid, and also let the light through.
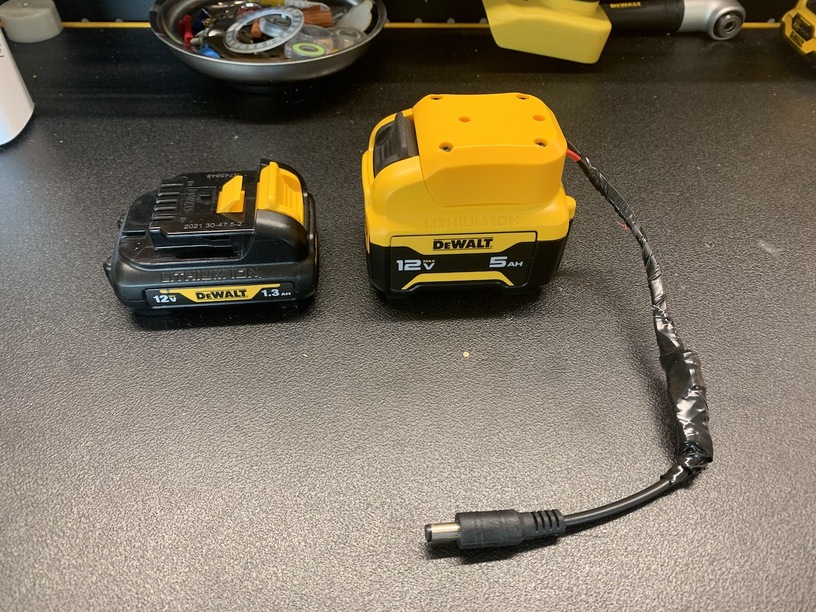
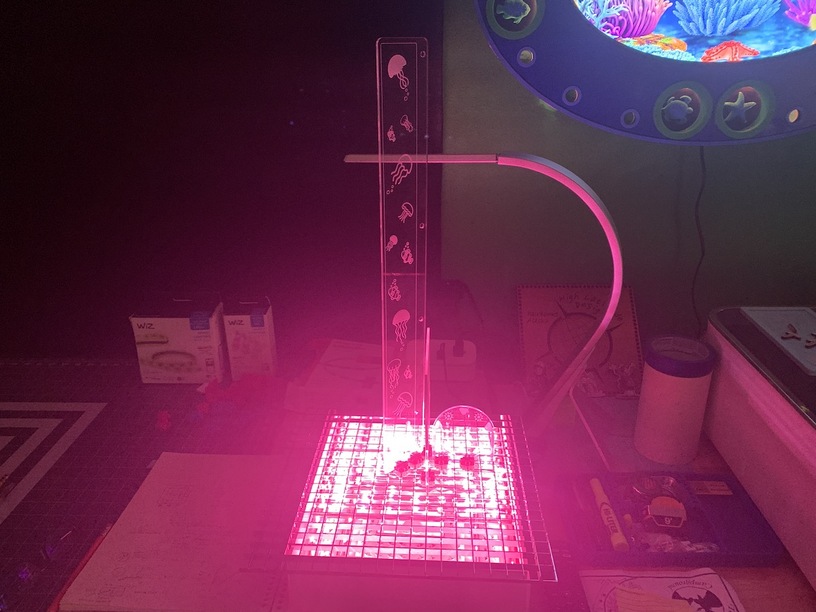
After spiky Tetris, let’s power it. I like to use this 20000 mah USB power brick as my ‘standard’, the goal being to power a thing for atleast 8 hours. My Ghost Table project uses two led strips and will make it about 10 hours on full bright blue. I just tested The Fire, and on full bright red it can easily go 15 hours. So no problem.
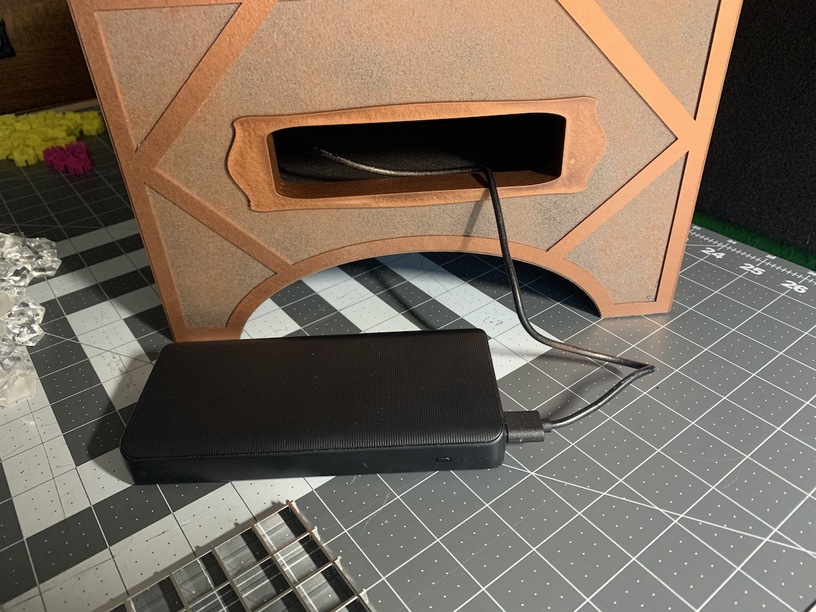
It just sits inside on the little shelf, so you don’t even see it.
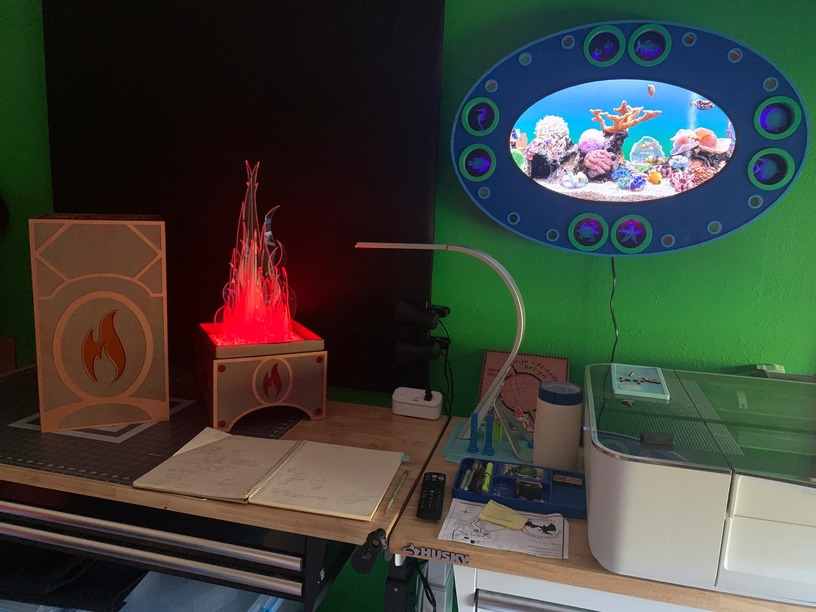
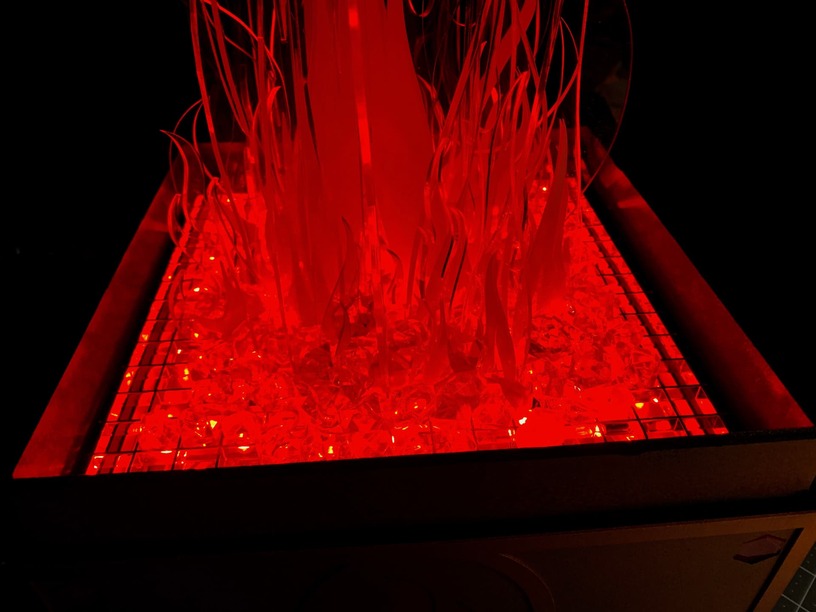
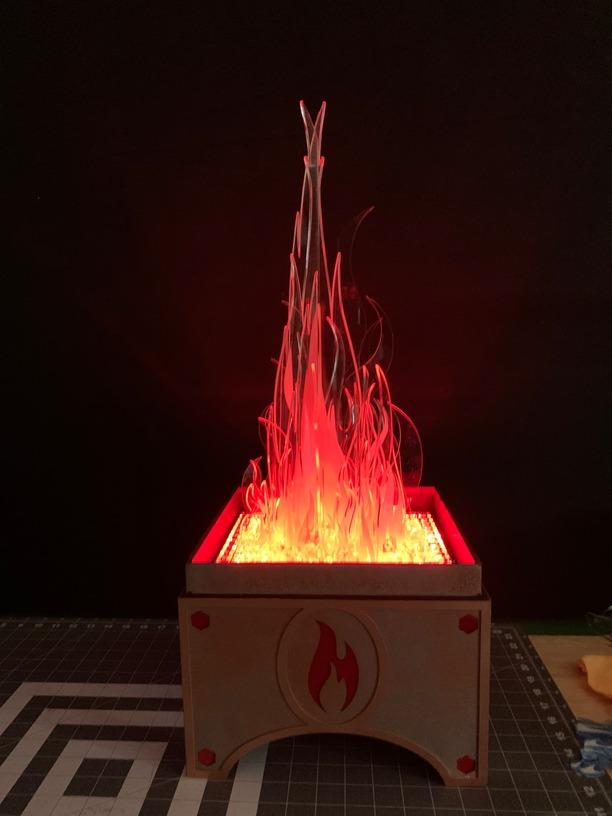
Time for viewing a more finished flame setup. This’ll do.
The acrylic rocks are perfect. Except, they were not available anywhere in my town. ya. I used the ones out of my fake fireplace and there isn’t nearly enough. But I’ll amazon them to fill the base.
With the top on, the view through the sight glass is awesome as well, even with a fair amount of ambient light.
I would scale down the center tallest spikes of flame. But, my original idea did have a really tall spike in the center. So I’m sticking with this.
It occurred to me that this is project something like the Fifth Element fire stone, in spirit. So mabey I’ll make an Earth, Water or Wind one at some point… Not Sure.
But I am sure that I crushed it on meeting my expectation for this one. ![]()
Thanks for following along.
HL