My younger daughter has a few sets of Sylvanian Family dolls that she loves, but they’re often sitting idle in a box buried in her closet. We first found a cute fairy dollhouse design on the web
which we played around with using corrugated cardboard. I had to break it down into 10 or so print files to get it all done, but it came out pretty decently.
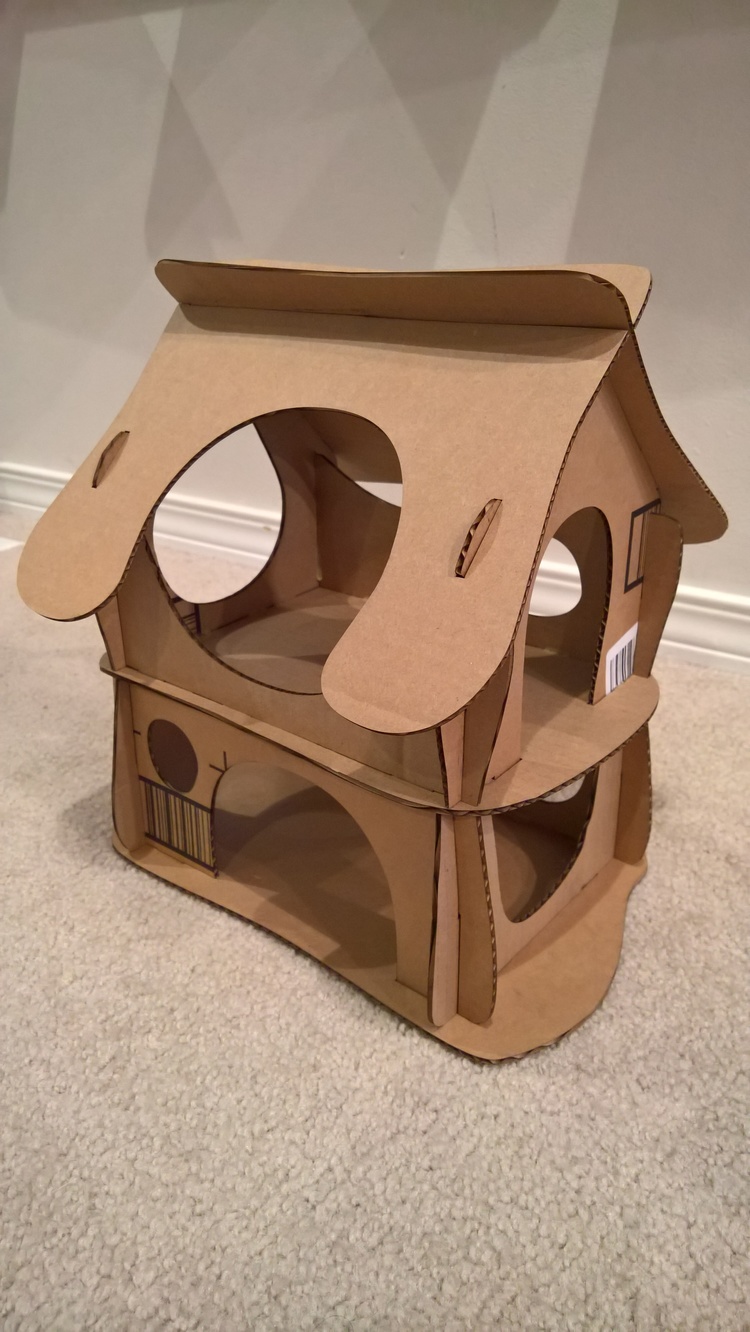
This still took some space though whether it was on the floor or her desk. It was a bit too tall for her shelves at around 12" in height.
The other week we were walking through Ikea and saw the Kasseby hinged shadow box.
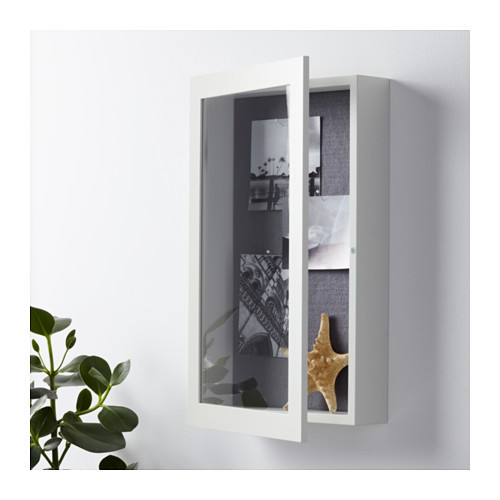
and it got me thinking. Why not use something like this to make a dollhouse she could hang on her wall? We talked about it for a bit and she liked the idea (as did her sister, so I had to buy two ![]() )
)
Once we got it home I took some basic measurements and roughed out a simple structure for the inside of the frame in Illustrator.
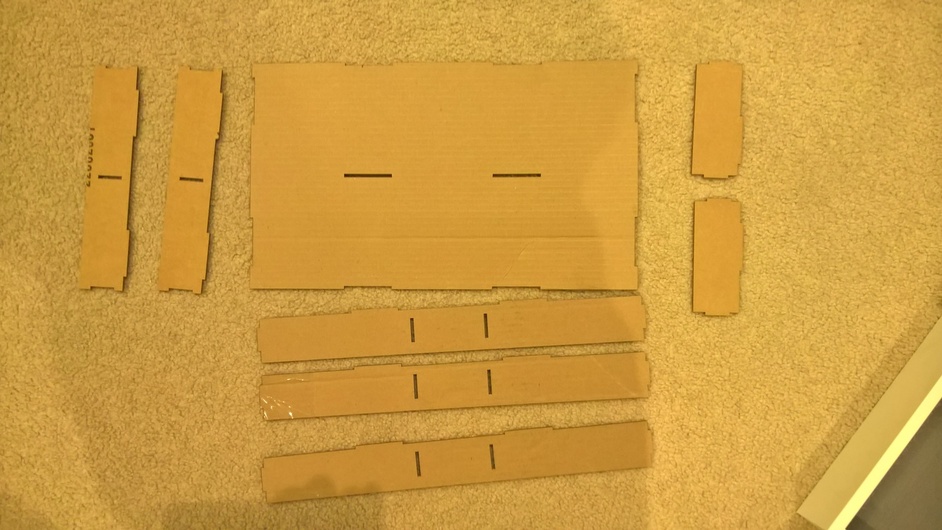
It looked about right after I’d cut the parts so I started putting it together inside the frame.
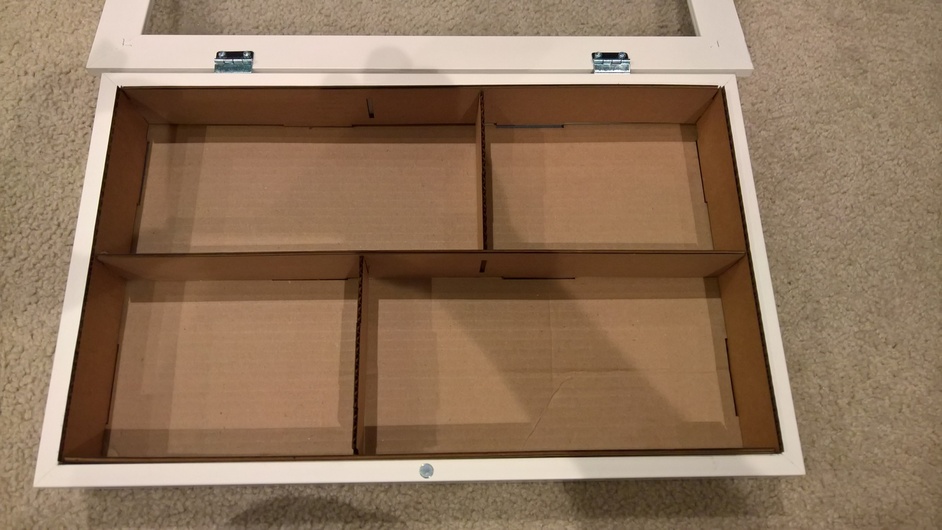
I’d gotten it almost right. I’d forgotten to put vertical slots in the back piece to allow for the tabs in the vertical wall pieces. So, I fixed that in the design and did a reprint of it (I didn’t trust my guestimates of placing them visually through the camera
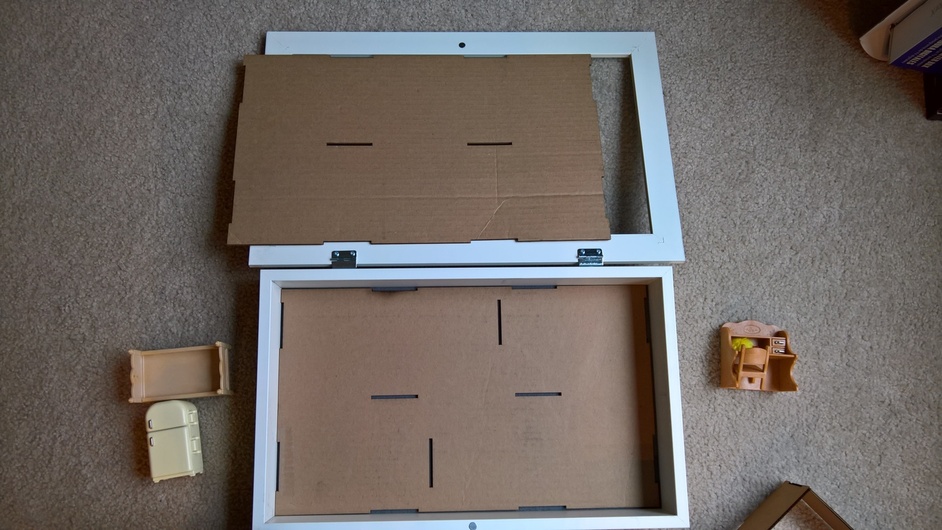
Next I did a quick sanity test to see how some of her furniture would fit for scale.
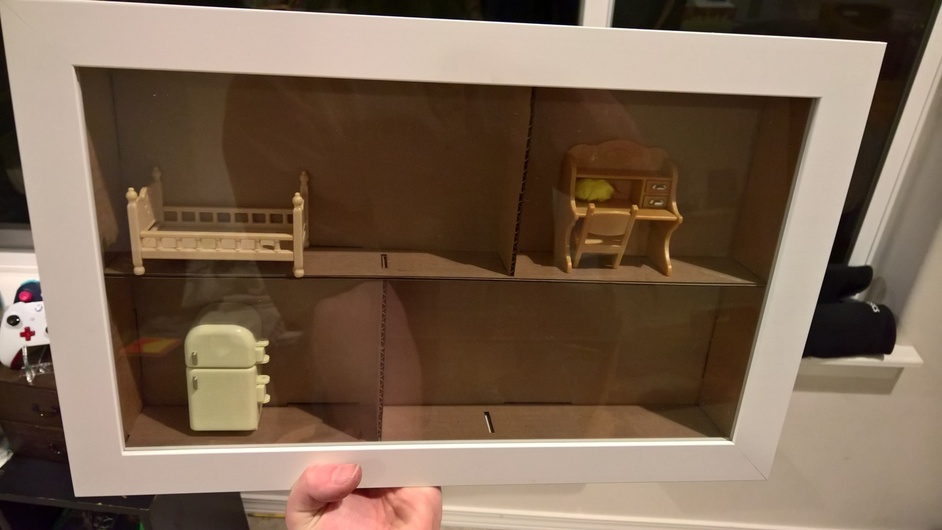
Not bad, the bed is a bit wide and prevents the door from closing properly so I may need to make a new one or find a way to countersink it into the wall behind it a bit. Good enough to keep moving forward though. Next stop, we need some additional embellishments to jazz it up a bit. A little time with Illustrator and we have some simple shapes that should do the trick.
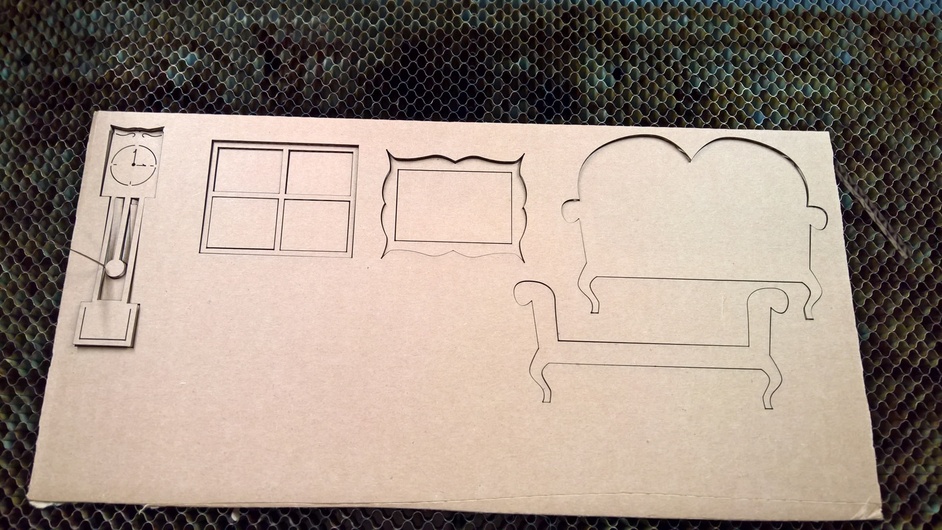
By now I’m getting tired of the plain brown cardboard though so I grab a rattle can and head outside to add some color to the new additions.

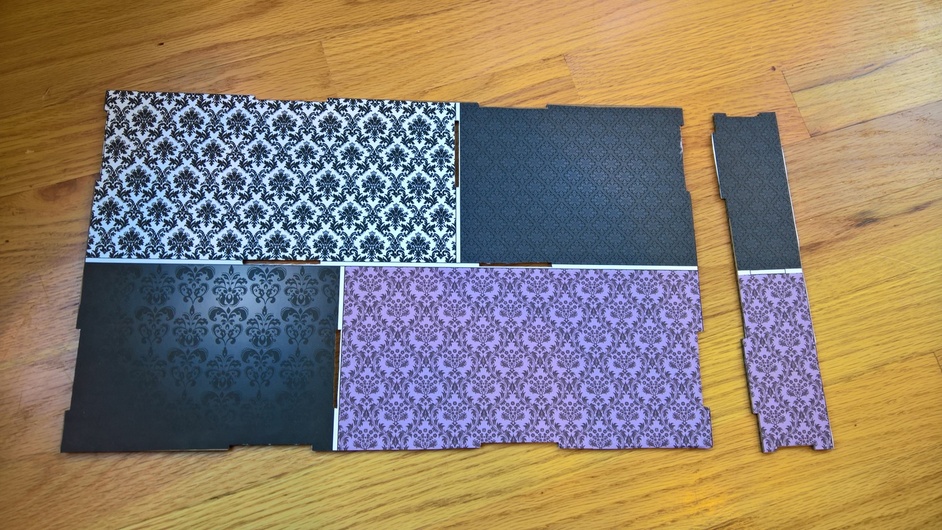
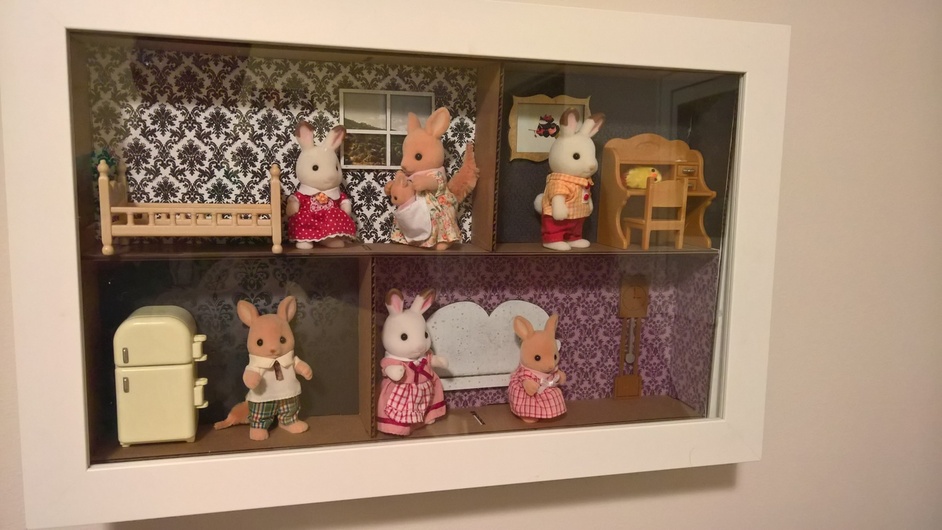
Since those looked better we started focusing on the bare walls we had. For this I took my illustrator file of the back of the box and we laid out some wallpapers that she chose from a web search. We took some that were a single file and placed them as well as some that we had to tile multiple times to get a design she liked. We only did the back wall and far right wall of the box to see how it would turn out. We printed it on a large format inkjet (though it would have been fine as multiple pages on a regular printer as well) and used spray adhesive to attach it to the pieces.
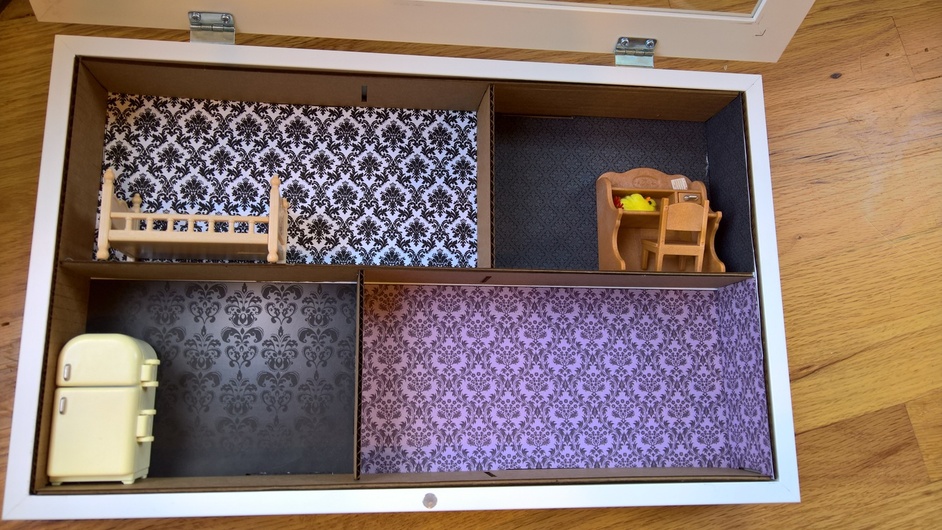
Since we’d already cut the cardboard I just trimmed the holes with an X-acto knife. Next time I’ll do the print and glue first, then cut them both at the same time with the laser. It looked pretty decent though.
Another quick test with some furniture for sanity check.
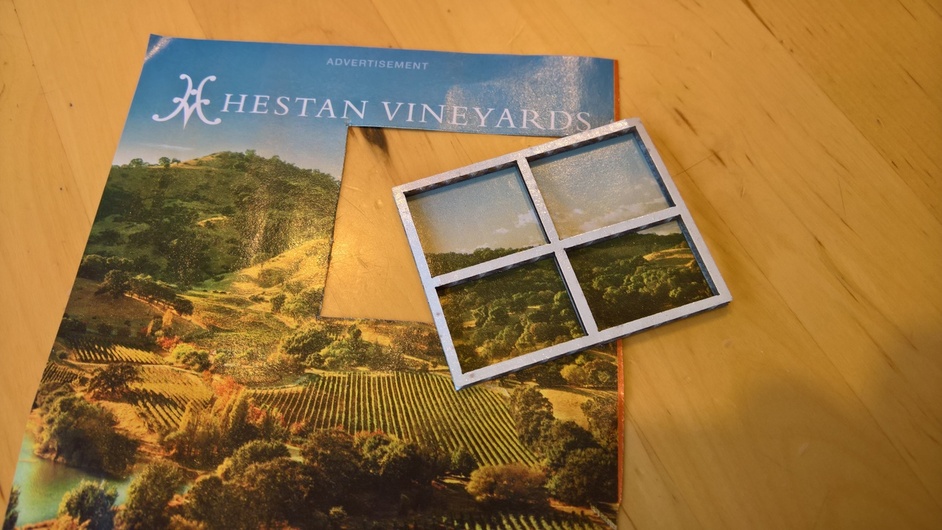
Yup, looking good so far. Next we look through some magazines and web image searches for our window and picture frame objects to fill them in followed by more spray glue and cutting.
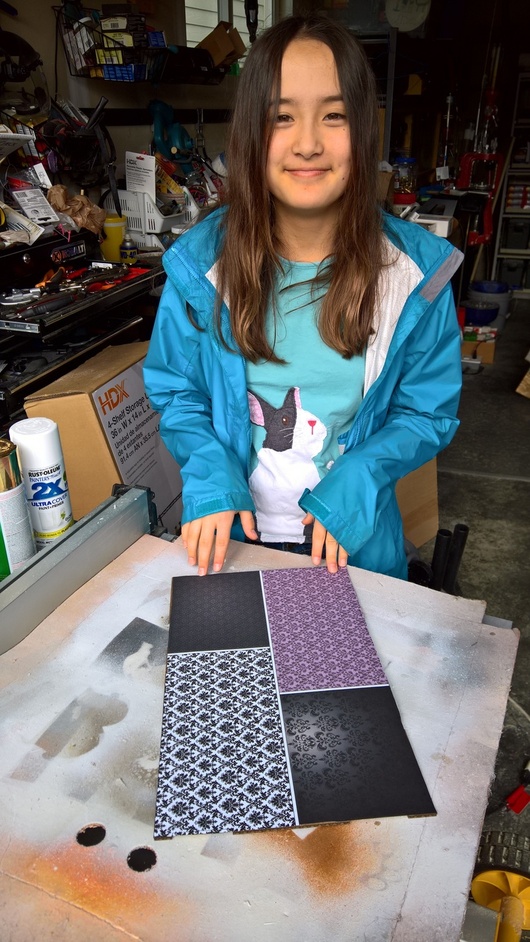
While still not totally complete for cleaning up walls and floors, we decided it was ready to mount on the wall for her.
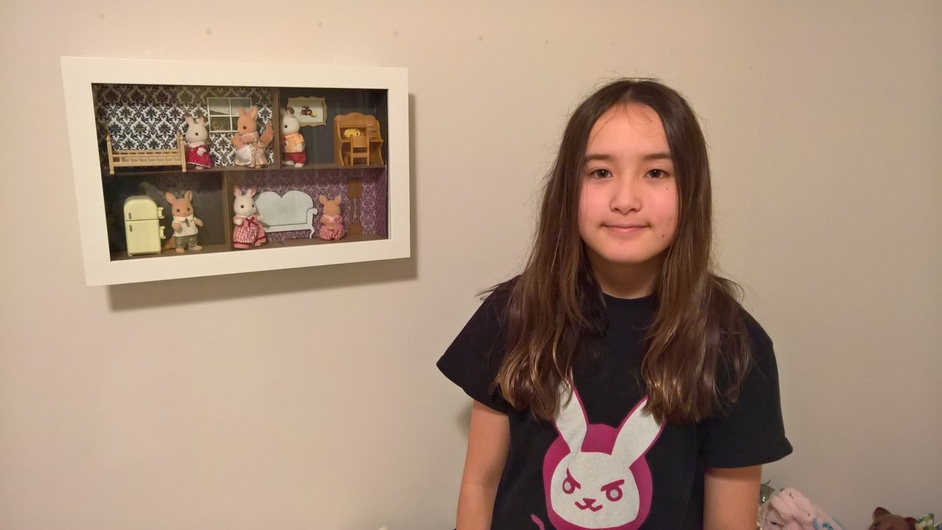
Looking forward to seeing what my older daughter comes up with for her design

