I’ve posted before about trying to flatten jeans enough to etch them. Well I’ve tried a few things, and thought I’d let people know what I’m doing that seems (finally) to work well.
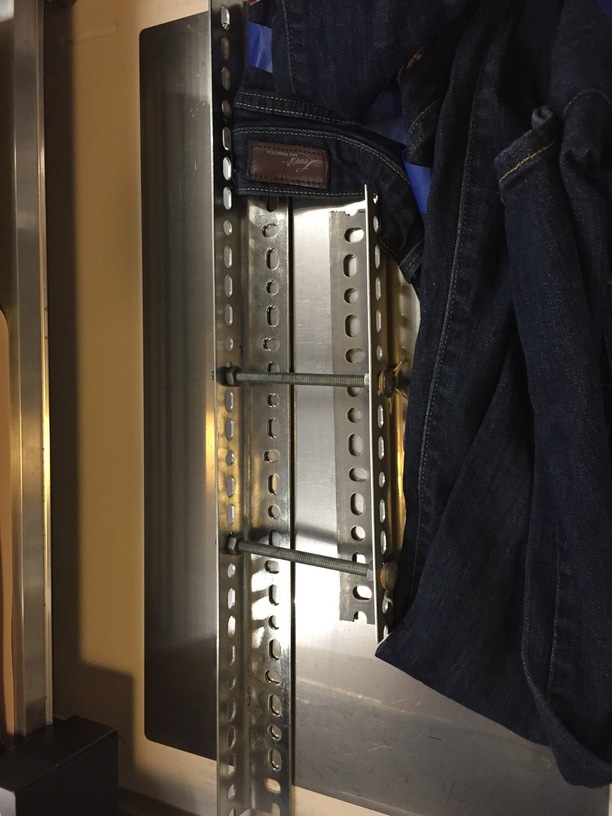
Replace the crumb tray: first off, you can’t use the crumb tray. There is no place to put the excess fabric, and the laser head will hit the excess fabric and push/pull things out of alignment. I now have a replacement made from angle iron, carriage bolts, and nuts, which I picked up from the local hardware store. Mine turned out to be 1.356" compared to my 1.357" crumb tray. Your mileage may vary.
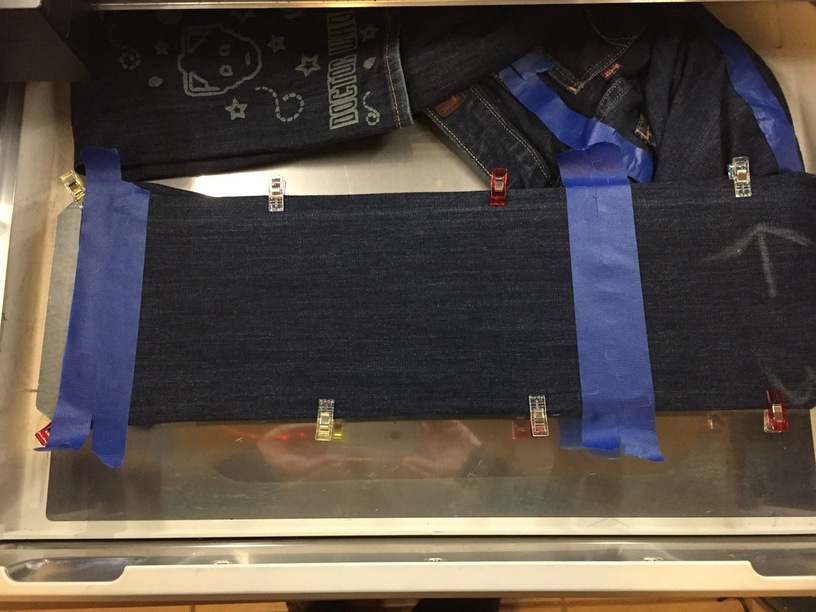
Something to flatten the fabric down to. I picked up a small piece of 26 gauge sheet metal, also from the local hardware store. I cut one section to 4"x20", and one section to 6"x20". Snipped the corners, and filed the remaining small corners smooth with a metal file.
Something to flatten the fabric with. I started with magnets, but you’ll notice my jig is metal too. So there were issues with the magnets sticking to the jig instead of the sheet metal. Since I also sew, I have a bunch of Wonder Clips. They are fantastic for this! They are tiny, so they don’t interfere with the laser head, but strong, so I can use just the teeth on the very edge of the metal sheet, and they’ll hold, without sticking to the jig. Search Amazon for Wonder Clips.
Since I had am etching both the front and back of each lower leg, I needed something to tell me which # design I was on, and which direction the design faced, and which side to pack the waist band. Again with the sewing aids! Tailor’s chalk, or some variation. I happen to have a fat chalk crayon specifically made for quilters, but any chalk should work. I number the sides, and put arrows pointing to which edge is going to have the widest etch.
Registration marks: Hallelujah I have seen the light on this subject! I put 2" of painter’s tape at the hem, and at where the other end of the design should fall. I make it wider than I need so that I can “cut” just the registration marks, and nudge the design as needed, before carefully and gently removing the tape, and do the actual etching.
I’m quite pleased with how the placement is coming out now! Hope this helps others.!

