To Tree or not to Tree

One last simple print to round out the week…this is that jewelry tree that I created last year, and I wanted to show you guys a couple of things with it…

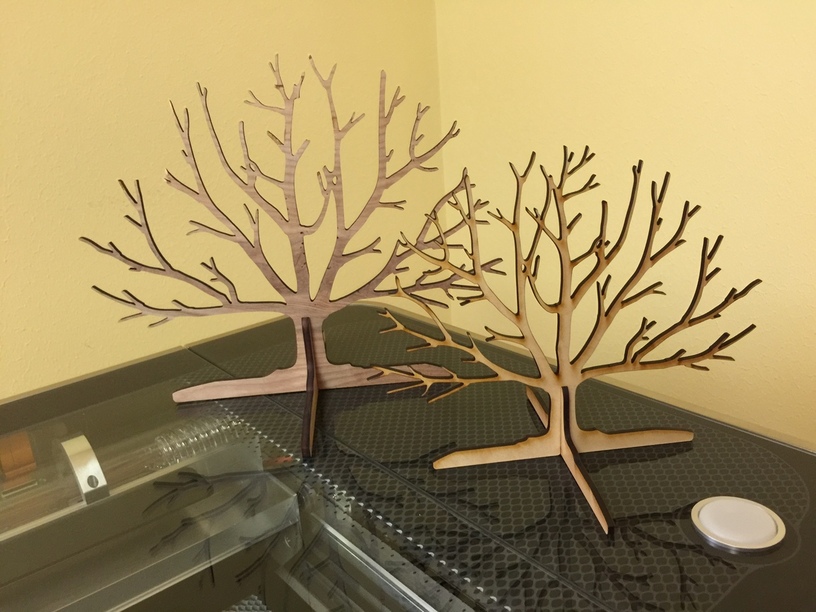
The smaller one in the front is cut from Maple Proofgrade ply, the larger one behind it was cut from Lowe’s 1/4 inch Birch ply. I removed the masking from the Proofgrade before cutting it, because I actually wanted that smoky residue…turned out pretty cool I think. (Definitely more interesting.)

But what I wanted to show you was the difference in how regular plywood cuts versus the proofgrade, and it’s pretty hefty.

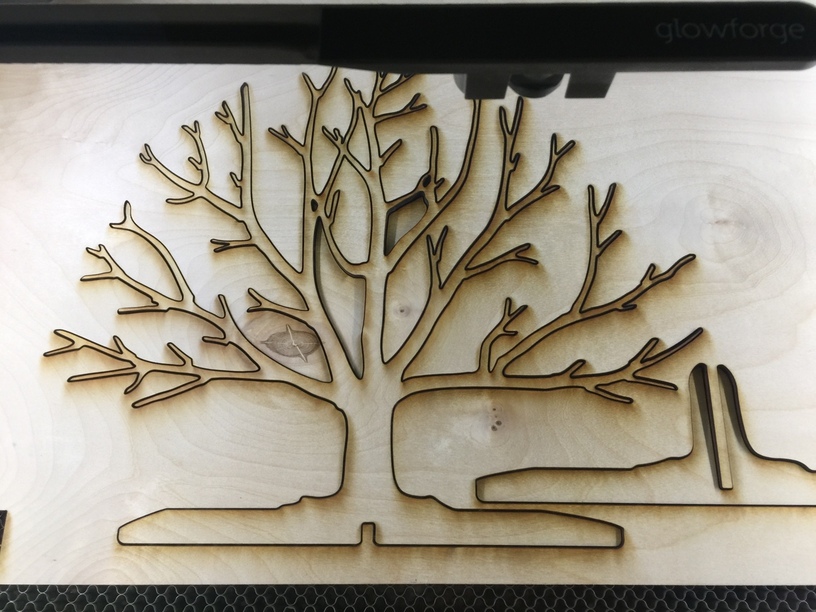
This was the first trial on the plain plywood cut - I had to arrange the cut around the knots in it, and tape the sheet down all around because of the significant warp in it. (You can actually see the warp where the cuts fell down into the freaking holes! Chuckle!)

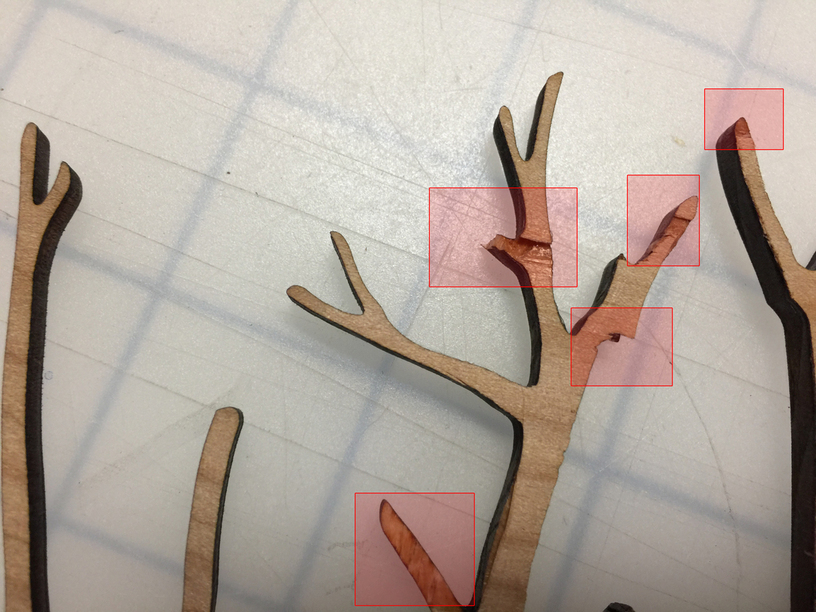
But that wasn’t the bad part…either because of the warp, or because the wood was unevenly dense - the cuts did not go all the way through on some of the little branches at the top of the tree. It was close enough to try to “liberate the tree” using a very thin knife. Meh…results were not great. It’s actually missing a couple of branches there in one spot. And it took a very long time to try to do it.

Okay, so I thought i might have the same problem with the Proofgrade.

I didn’t by the way - it cut through completely without any further preparation necessary on my part, but I didn’t know that at the time.

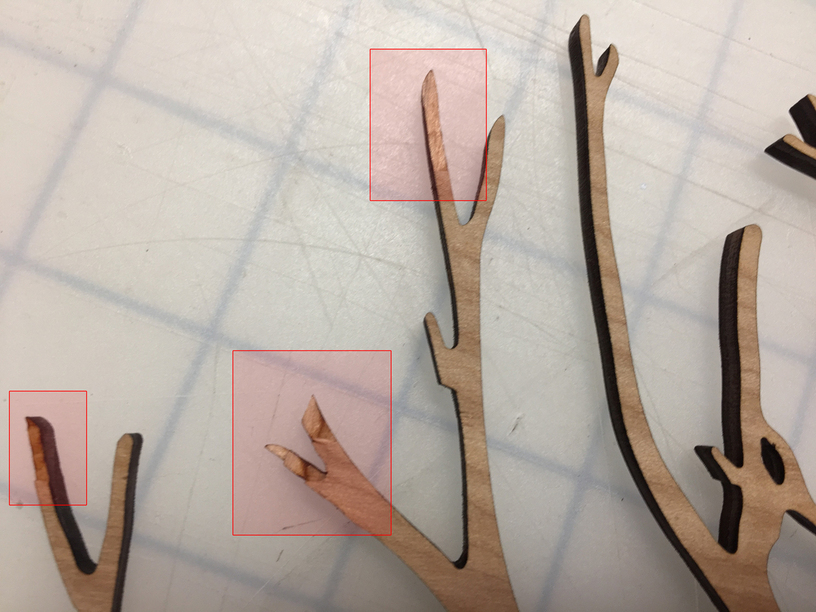
But I still want to show you a trick that you can use on files like this one, that have a lot of very thin branches that might be difficult to remove from the surrounding waste material without breaking something.

Give yourself a few weeding cuts:

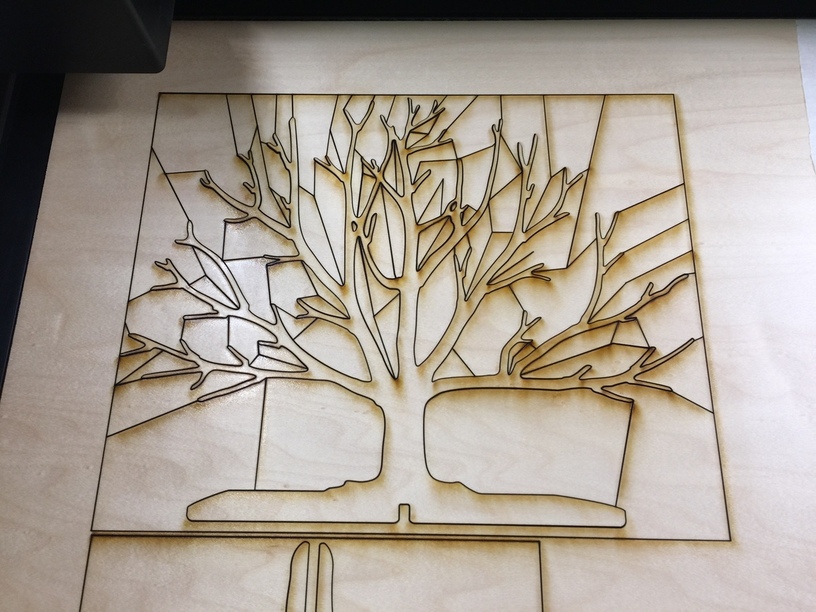
Drag the cuts down into the curves and connect them to a box around the delicate object to be removed, and you will eliminate any removal problems.

Besides, it makes for a very cool-looking puzzle effect, and I think I’m gonna have to experiment with a few of those down the road too… :smile:

76 Likes

Thanks @Jules, it’s interesting to see the difference in quality between your proofgrade and the box box store brands. Cool tip too.

7 Likes

That would be cool with some fairy lights like these, https://www.amazon.com/Batteries-Required-Included-Centerpiece-Decorations/dp/B01COK5IFA/ref=sr_1_3?ie=UTF8&qid=1489277678&sr=8-3&keywords=fairy+lights

I made a bunch of ornaments for Christmas gifts using those.

21 Likes

Very pretty! I’ve even got a stockpile of the lights here - just haven’t had time to learn to use them yet. ROFL!
:smile:

5 Likes

Great thinking on the weeding lines. I love this proofgrade stuff, I’ll be happy when they get some 1/4" certified. In the meantime, I found some 1/4, .200" actually at Home Depot that works pretty well. I’ll get the SKU next time I’m in there.

8 Likes

I’ll look next time I’m in there…we normally do at least a couple of hardware store runs every weekend. (Except this one - pouring out there.) :grin:

5 Likes

That’s great advice! The kind of thing you might figure out on your own, but only after a bunch of broken pieces. Thanks for posting it!

10 Likes

That is a great tip to put in some relief cuts to make weeding go easier around odd shapes.

8 Likes

Love the weeding lines tip… Are the full cuts or scores?

8 Likes

Full cuts.

5 Likes

When I was making vinyl graphics and wraps I used the weeding borders a lot to make the large jobs easier to handle. Hadn’t even thought of it helping with laser cutting!

Thanks for the reminder!

12 Likes

Thank you @Jules! Great demo, design, and pro tips!

4 Likes

Wow, awesome job on the trees! And your tip is outstanding, one I’ve not seen before, and really shows the value of your background in Silhouette cutting. (Hope I have the right machine there. You know what I mean). Please be sure to add it to the tip thread!

7 Likes

Those weeding cuts are a brilliant idea, thanks @Jules! I have that issue with some of the plywood I use for my lamps – because of rental costs for the laser I use, I primarily produce in Lowe’s birch ply ($25 per 4x8’) and now the Home Depot birch-faced underlayment ply ($12 per 4x8’). There are frequently issues with some warping and cut inconsistencies on certain parts, particularly my four seasons lamps, which have a lot of fine detail like your beautiful tree. I’ve found the Home Depot birch underlayment works better than the Lowe’s ply, due to the fact that it has three internal layers and two veneers instead of a single internal layer (so there’s less bowing – plus it’s half the price!) but you still end up with some issues regardless. One trick I use to minimize bowing is storing it flat precut at the store to my laser bed size, then put weights on the flat sheets on my living room floor the day before I cut. Even then though, you still get some bowing and inconsistency, so looking at this, it may just be worth it after all to go Proofgrade all the way.

8 Likes

Great idea!

A slightly lengthier explanation is one of the design tuts I was putting together this week - it just hasn’t made it into the matrix yet. :relaxed:

This is extremely valuable information …I’m definitely going to try the HD brand. (Second vote for the Home Depot brand…)

I’m really just using the 1/4 inch stuff for testing and files that have to have it to keep it stable…everything warps here. It’s pretty much 70%+ humidity year round. Grrrrrr.

5 Likes

That is some seriously soupy humidity you’re dealing with, whew :frowning:

Yeah, I’m not fond of Home Depot for most things (our local Beechwold Hardware’s my go-to tool-wise), but I ended up with some HD gift cards for Christmas a year ago and needed to restock my flat goods – I thought I’d get PureBond plywood from Columbia Forest Products, since Home Depot stocks them and they supposedly have a phenol-free soy-based glue…

…but man. That stuff is terrible. So expensive, so warpy, such inconsistent thickness, so many voids, sooooo much MDF in the center (WHY ARE THERE EVEN VOIDS IN AN MDF CORE?!? HOW?!? WHAT?!?)

So I had to figure out what to do with the cards, and lo and behold, the only other thing they had that looked like it might work was their $12 birch underlayment – very few voids, consistent thickness, tri-ply pine core, and it actually had some really pretty spalting bands on it. Outer veneers are a little bit thinner than the Lowe’s version, but still sandable. Even takes stains consistently, here’s a laser-cut table I did in the HD plywood with a wiping water-based walnut gel stain:

35 Likes

Beautiful! That stain is so even! (Totally unique design too!) :relaxed:

2 Likes

Thanks :slight_smile: 
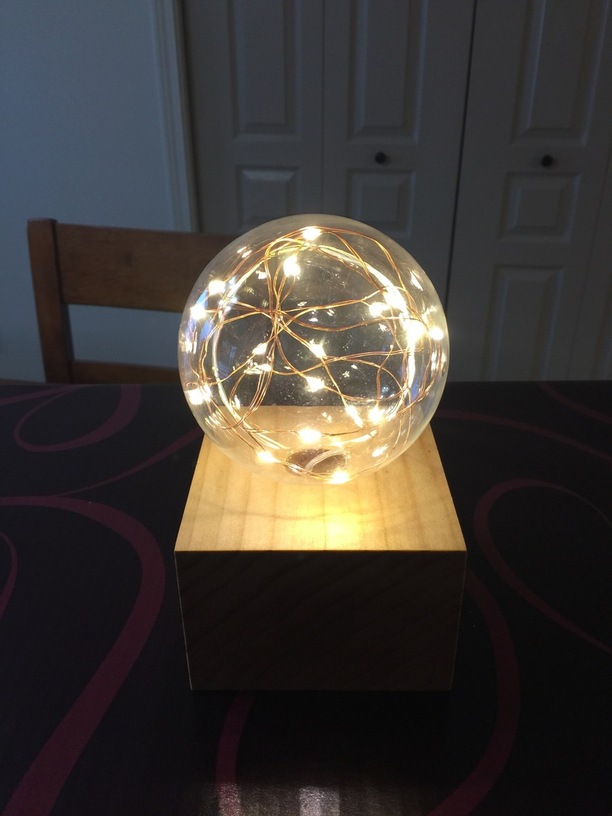
It took the stain super-evenly with no retouching. And I’ve done several other pieces now in other stains, even a lamp that was ebonized with black tea and iron acetate – nice, consistent staining on both sides every time. One side is totally clear, the other is slightly knotty, but the knots are small and tight, and there isn’t usually any attempt to messily putty them with patching plaster like on some of the other plywoods I’ve seen.

6 Likes

Ahh nice. I use that technique in cutting vinyl. Never thought to use it for the laser…although I elevate my stock so if it doesnt drop, I cut that part again…thankfully I can go back to the exact spot

14 Likes

You’ve inspired me, @Jules !

A new aspect to something I’m planning on doing. My 17-year old niece is an amazing artist. Wins awards and all sorts of things all the time so I’m not just biased when I say that. Anyway, I’d decided to take some of her “tree” artwork… She does this amazing black and white tree work across multiple canvases. It’s stunning. I can’t wait for her to create me one. Anyway, wanted to take her tree artwork and laserize it. At first I thought some cool relief work, different materials, mixed materials… I dunno. Planning on trying out many things. But I had not thought of making a 3D, stand-up object. And now I must do it. Thanks!

6 Likes