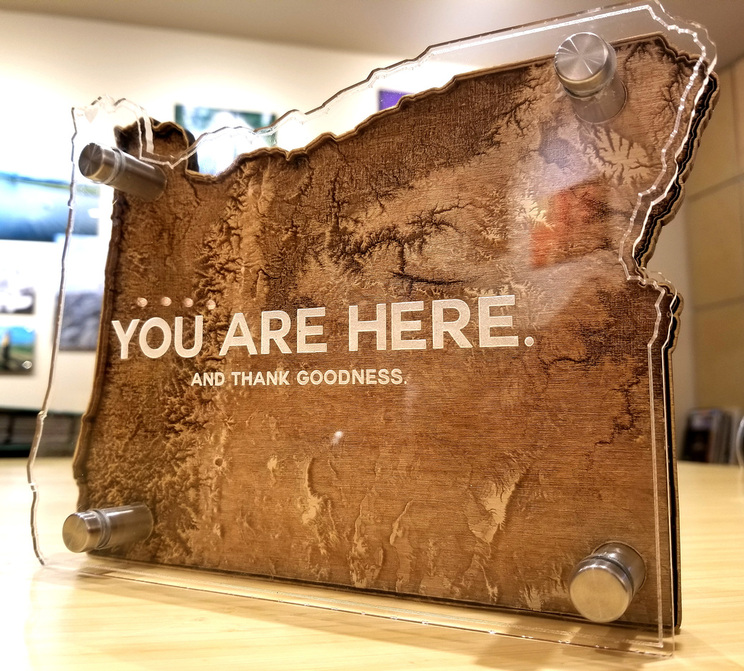
First project since sending back the Glowforge I never named. I’m not making that mistake again - this is the first print by GlowFindel!
…unless that name is taken…
So to test the new machine, I came back to this project, sought some advice from the community, and starting getting some great results. Thought I’d share them.
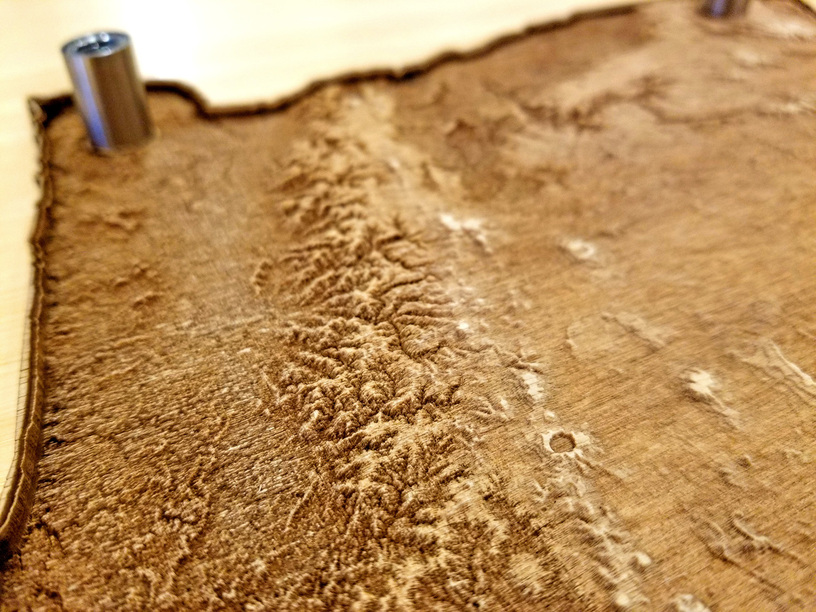
Not only did using thicker wood (1/4" BB plywood) prevent warping when washing, it also allowed me to do a higher-powered engrave and get some definition out of the topography. A close up (notice Crater Lake):
The engrave pictured took about 2 hours - I set it at 450 LPI, which I realized was unnecessarily high - I cut all the way back to 225 LPI while increasing the size of the map two fold, so it’s still at about 2 - 2 1/2 hours, I think.
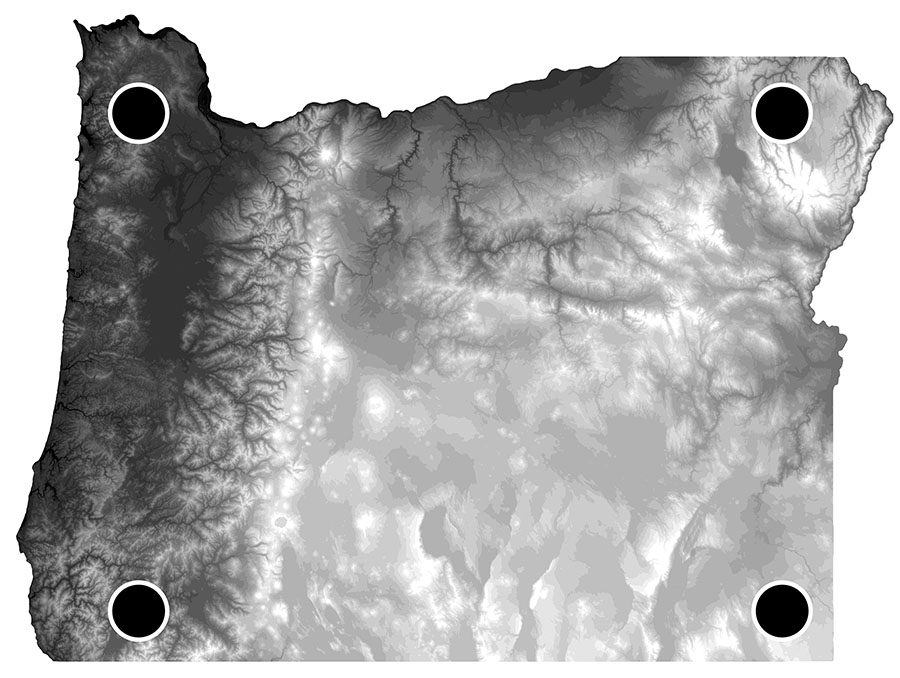
I knew I needed to make the map myself, because all the topo-maps you usually see have shaded hillsides to simluate depth, as if there is a light-source. That wouldn’t work properly for this this purpose, what we need for the topography to be accurate is a heightmap, where the lowest elevations are dark values and the higher elevations are light values.
I used Maperitive (free, open-source I think) to create the “Hypsometric Color Ramps” using just greyscale colors. I had never used Maperative before, and it was a pretty arduous forum-crawl to make it do the things I wanted. Everything about it was foreign language to me, so if I can do you, anyone can. This is what I came up with:
I knew I wanted the stand-offs to be embedded in the wood a bit, so that’s why you see those circles in the image.
Because of the elevations in Oregon, I think I set white to be about 1600’, because some of the state doesn’t have enough contrast at those high elevations, and I wanted some “stepping” effects to accentuate the changes. I also did a little bit of “posterizing” in photoshop for the same reason, though if I were doing a larger engrave (assuming the GF can handle it someday) I wouldn’t.
Finally, I’m too embarrassed to say how many times I’ve printed the image to try and get the values to translate nicely. I was determined to keep the heightmap “accurate”, but I did to a fair bit of value level adjustments between iterations.
I can’t necessarily recommend them, as they’re the only one’s I’ve tried, but they seem to work good for the job. You can find the ones I ordered here, but there’s lots of options.
I really love your work @ryanjpedersen!!! One of the major reasons I got a GF was to do 3D engraves, just waiting for the machine to arrive. Meanwhile, I have been processing every state, province, country and continent using appropriate DEM data for the scale.
Here is a dumbed down version of part of the U.S. Continental file without the vector overlay for cutting out the boundary and Idaho showing the boundary. I won’t do the final processing to stretch or compress the grayscale until I have some experience to know what is best when using the GF. Glad there are others like you doing similar work! Post photos as you do more states!!
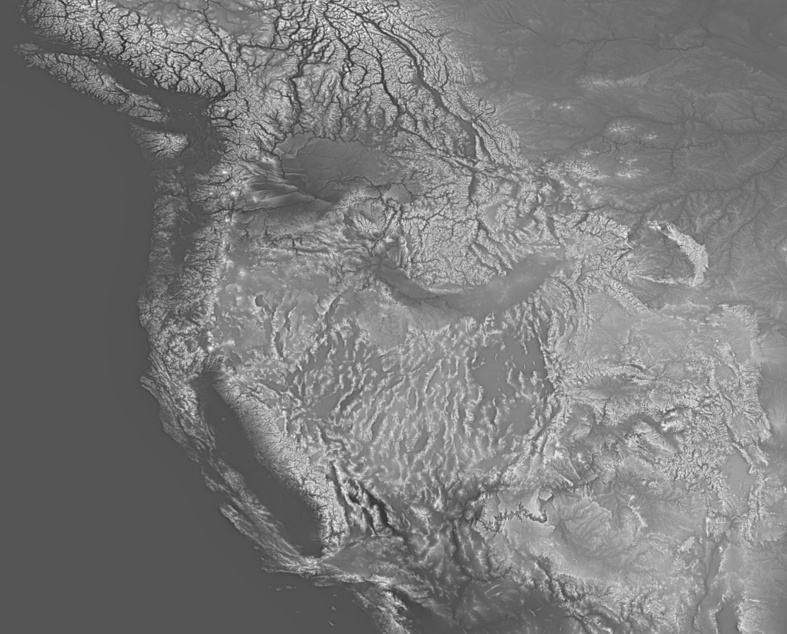
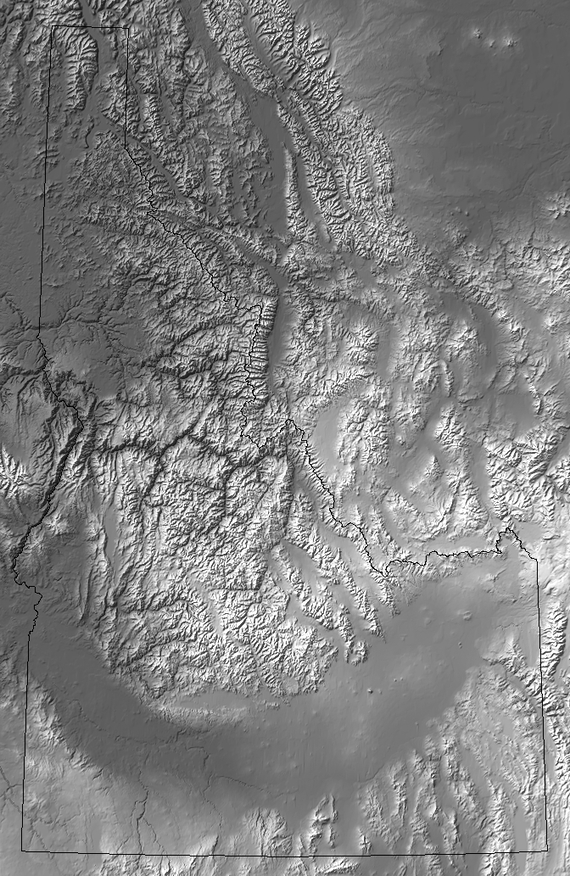
@timtsuga - maybe you know this already, but this is an example of what doesn’t work when engraving topography., the Idaho map, anyhow. It’s what I meant when I said:
topo-maps you usually see have shaded hillsides to simluate depth
See how the mountains have a light source? Like how the North-West side of everything is light, like it’s receiving light, while the other sides are dark, in shadow? The Glowforge will assume this means you want the SouthEast side of mountains to be lower in elevation than the Northwest sides.
It’s hard to tell, but the US map might be a proper heightmap.
What sun angle and elevation did you use when you processed your DEM @ryanjpedersen ?
Normally, shadows should fall toward the viewer to make hills stand up. When they fall away from you, hills look like valleys. I need my GF so I can experiment! It is easy for me to control the sun direction and elevation, just have to open the file and move the sun around!!! Got to love computers!!!
When GF fixes the registration problem, I hope to first carve the terrain on a CNC router then enhance it with the laser.