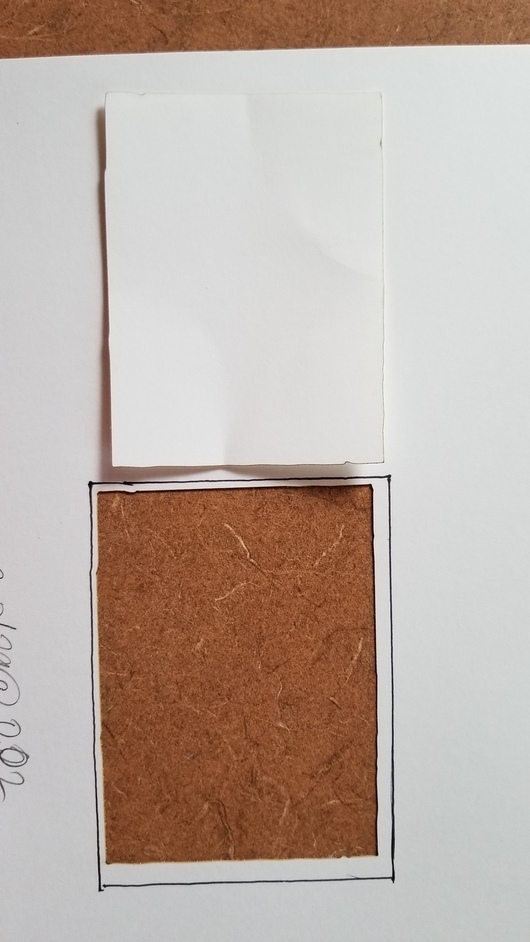
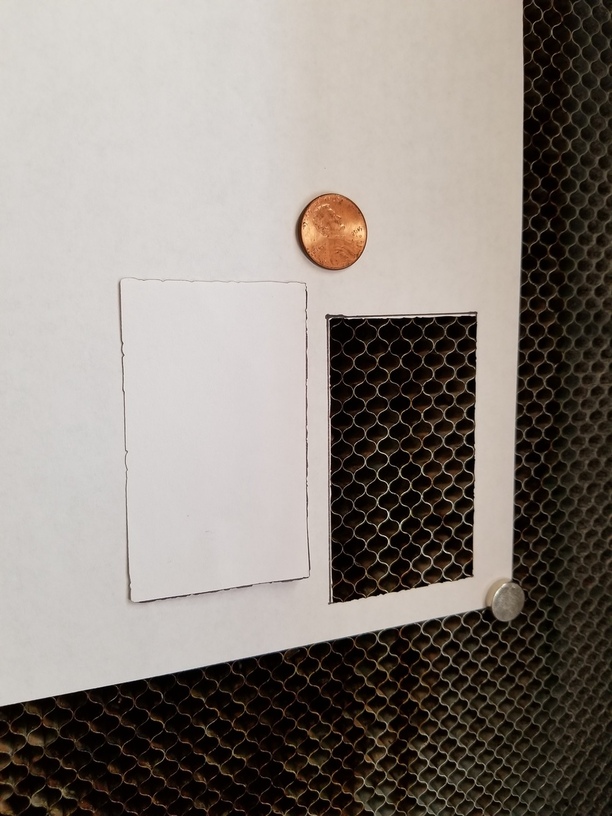
I did a test. I put in a piece of paper with a rectangle drawn on it. I had the GF scan it. I selected the part that I wanted cut out. The discrepancy between what was scanned vs what was printed is huge.
Drew a rectangle on the paper with a sharpie. I weighted the paper down with magnets.
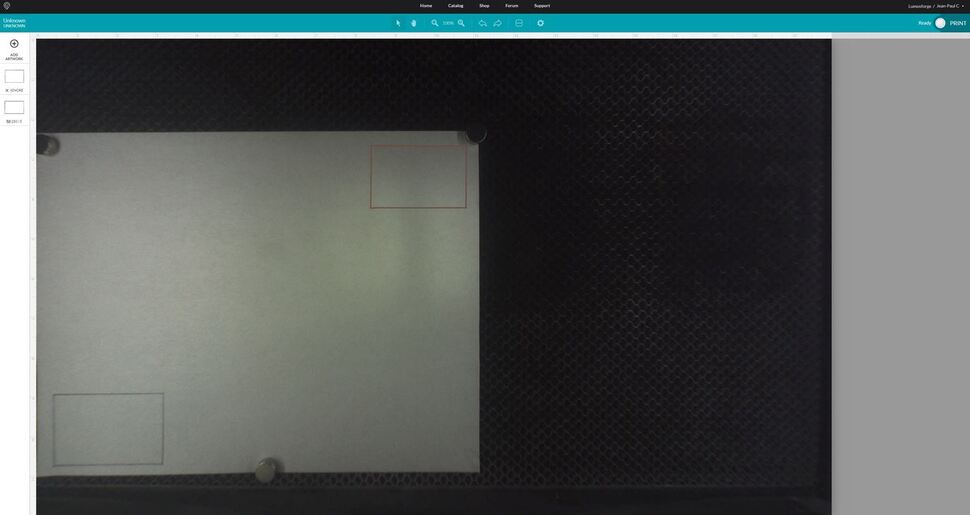
Did the scan.
Did the “cut this part out” in the software.
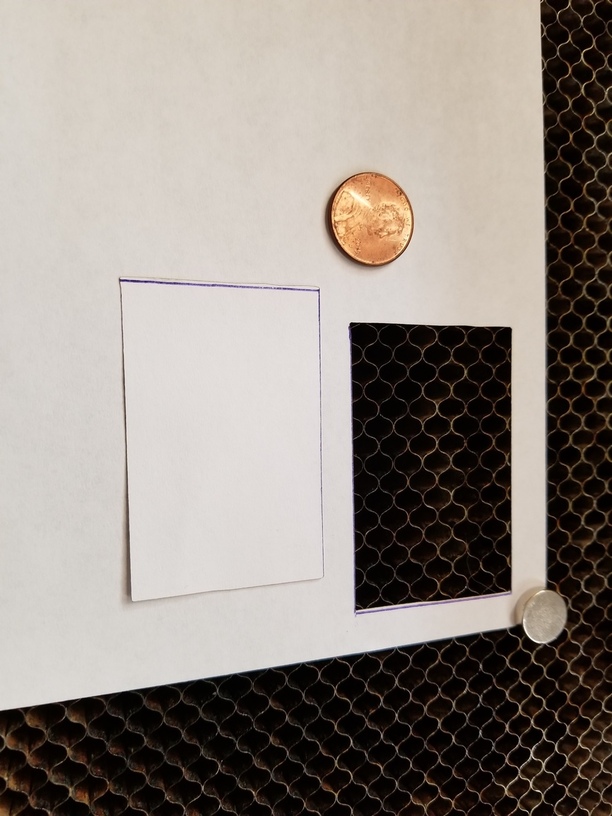
Sent to the printer.
This troubles me. I want to be able to put an object in, scan in the object and be confident it’s going to be accurate. Thoughts?
Thickness and camera alignment are a thing, which can lead to inaccurate alignment when placing items.
Not having played with scanning yet, I can’t say how that relates to the size. Hopefully someone smarter than me will chime in.
Yeah. I don’t think that’s happening. Not yet anyway.
Even after they get the individual bed warpage thing ironed out, you still have a material thickness and flatness problem that they might be able to scan for, but are not currently.
I should point out that a popular misconception is that the cut is not precise or accurate. Actually, for a machine in working order, the cut is both precise and accurate.
It’s the image on your screen of the material that is not accurate. The camera is using a fisheye lense and algorithmically dewarping to the picture you see.
Currently it can be off by 1/4" and still be within acceptable to Glowforge limits. They’re working on improving this however.
It’s that translation from the fisheye view to the screen view with rulers. For measurement of an object in an image it matters greatly how far the object is from the camera.
Try to measure the size of an object in a picture you take with your phone camera and you’ll see what I mean.
Huh. That seems odd to me. It’s a flat piece of paper, held down securely. Scanned by machine and then cut by machine. My expectation is an accurate cut. Creating designs through Illustrator are accurate. I am guessing it’s a camera/scanning issue. The scan should be 1:1 scanner capture to print. in this test, not only was the alignment off, but more alarmingly, the size was off.
Simple test: draw something. Do the scan. Print without moving the original scan.
It’s not a theory, you do need to enter the height of non-Proofgrade materials in the Use Unknown Material button (top left column) in order to focus the lid camera correctly. (Fisheye effect has to be compensated for.)
Proofgrade materials enter this number for you when the QR code is scanned. If it’s not entered one way or the other, your preview placement is going to be a lot farther off than it is if it’s entered.
Setting the material thickness accurately as others have mentioned is critical. Also, the closer to directly under the camera you can place the artwork to be scanned the better the results, both in position and resolution.
In this test I set the material thickness to 0.01, the lowest I can currently set it. Without making any adjustments, I was able to get 1/16" accuracy. My alignment has always been pretty good with this particular unit.
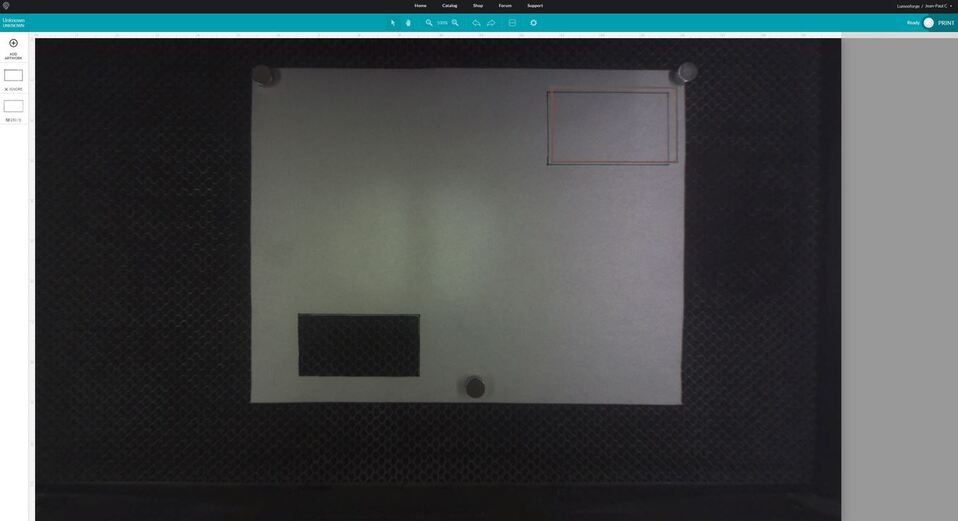
I was running a second test to demonstrate how much an effect the material thickness has on positioning, but the results did not come out as they have in the past. Could it be that they are using the laser focusing for the trace now?
Here is how the bed image looks with a material height of 0.20". As I expected, quite shifted.
But much to my surprise, it cut almost as accurately as the previous test. This one was even placed in the bed quite a bit off center to make the shift more obvious.
This is cool, jeanpaul. Could you let me know he exact setting you used? .01 focus, and what power/speed did you use? My question goes beyond my original problem. I am also trying to figure out what I need to set up for paper.
I can’t say my settings were very refined. I just used some settings I knew would cut first try. Speed was 250 and power was 5. If I were trying some high detail cuts on copy paper I think it could be further fine tuned with testing.
If you do some searching around the forum, you will find some amazing things others have done with etching paper.
Feel free to ask lots of questions here. There are plenty of people happy to help out.
Thanks for the great answer, @Jules, that’s correct. Thanks all for the help in this thread! @chroni, did the accuracy improve when you changed the material thickness?
It’s been a little while since I’ve seen any replies on this thread so I’m going to close it. If you still need help with this please either start a new thread or email support@glowforge.com.