There’s an old legend: an engineer wanted to teach his kids about programming, and designed a board game to do it. Then he took to crowdfunding to produce it, and, in coming up with premium versions for stretch goals, started investigating laser cutters. And then he found that the world was short on hobbyist-friendly laser cutters, and started a company to change that. Whatever happened to them? ![]()
That’s right, it’s Robot Turtles, @dan’s project that sorta inspired Glowforge!
I backed the Kickstarter version way back in 2013 as a gift to my older child, then a preschooler. He never got into it much (nor board games in general), but younger sister is big into board games of all kinds now, and Robot Turtles is her latest favorite.
After one too many times accidentally scattering cardboard tokens all over the table, and a recent cross-country rail trip full of evening games, I decided to try applying some ideas from the “travel” versions of commercial games.
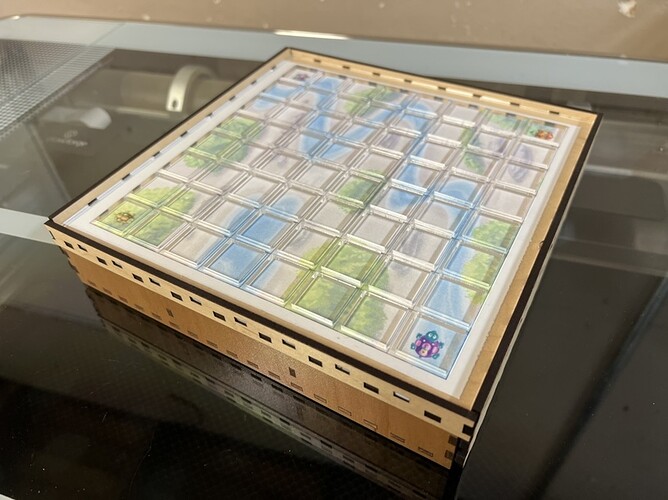
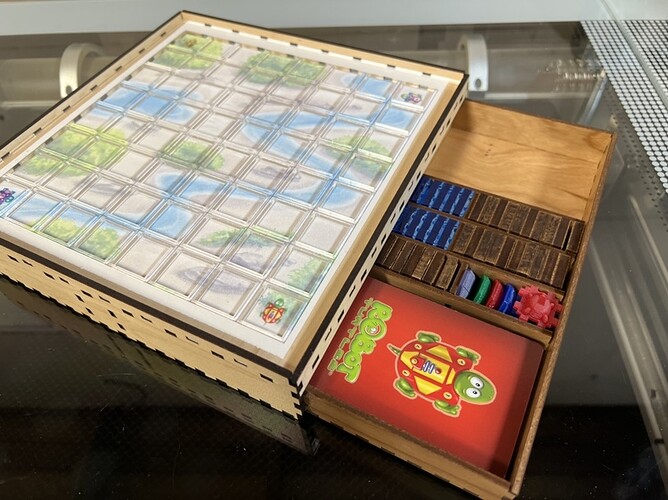
There’s a sturdy wood box, with drawers on both sides The drawers have little tabs on the back that fit just snugly enough into the internal walls of the box, so they stay shut, and high back walls, so they don’t accidentally get separated from the box. One drawer has room for three decks of cards; the other two decks and all the tokens. And there’s a clear acrylic grid on top, so the tokens stay in place during play. (The color board design is printed on sticker paper, stuck to the plywood top of the box underneath the acrylic.)
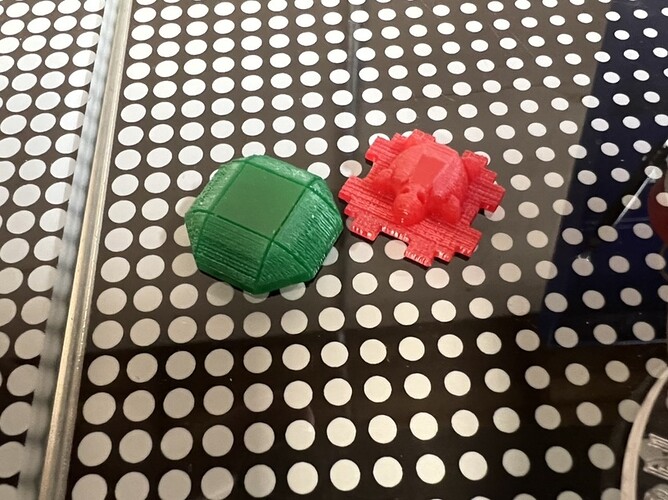
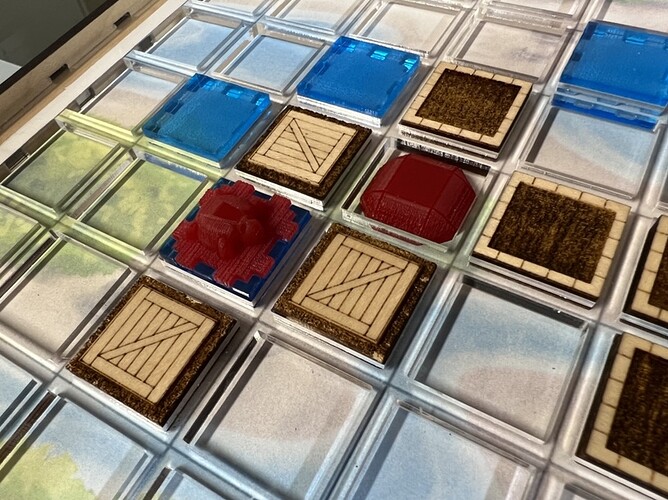
Here’s a closer look at some tokens: the gem and turtle are my first attempts at designing something for 3D Engrave on ![]() thick acrylic.
thick acrylic.
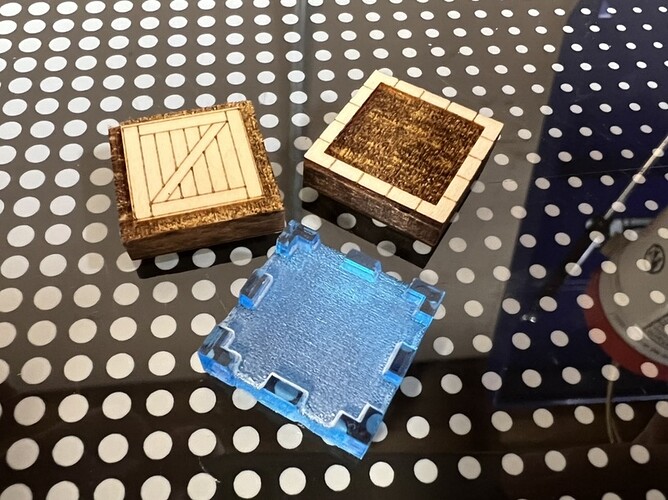
The solid wall and sokoban crate tokens are ![]() thick plywood, and the ice wall is from TAP Plastics because
thick plywood, and the ice wall is from TAP Plastics because ![]() clear blue acrylic doesn’t come in thick.
clear blue acrylic doesn’t come in thick.
Why the funny shape on the turtle token? Well, in the original game you can flip an ice wall token to leave a puddle after a turtle melts it with their laser. In this version, you can start with the ice walls engraved side down, and flip them when melted… and then the turtle piece fits into the castle-wall pattern on top.
So, why is this just a prototype? For one thing, a design with such relevant history in this community ought to be shared, and selling it would be dubious, so I’ll be posting it in Free Laser Designs once I’ve refined it a bit. For another… there’s definitely some refinement needed.
A quick journal of lessons learned and planned improvements:
- Didn’t have a great plan for aligning the sticker paper. It came out okay, but could probably be easier with some combination of guide lines on the plywood and laser cutting the paper before or after sticking.
- Joinery tolerances too tight all around, needed so much clamping that the box is a bit warped.
- Left some joints I meant to get rid of on the sides next to the drawers. Next version will have the drawer fronts extending in front of the box side walls.
- There’s nothing to grab on the drawer to get it open, unless you have strong fingernails. Need some finger holes or handles.
- Drawer is a tiny bit short — the gem and turtle pieces don’t quite fit their cubby right.
- It’s kinda hard to pull out the tokens and card decks. Need lower internal walls or more extra space in the drawers, or finger holes, or something.
- 3D engraved tokens are necessarily convex, so they’re a little hard to pick up, especially when slotted into the grid. Maybe they need a less ambitious design? Maybe the turtle token can be flatter and given a handle on top?
