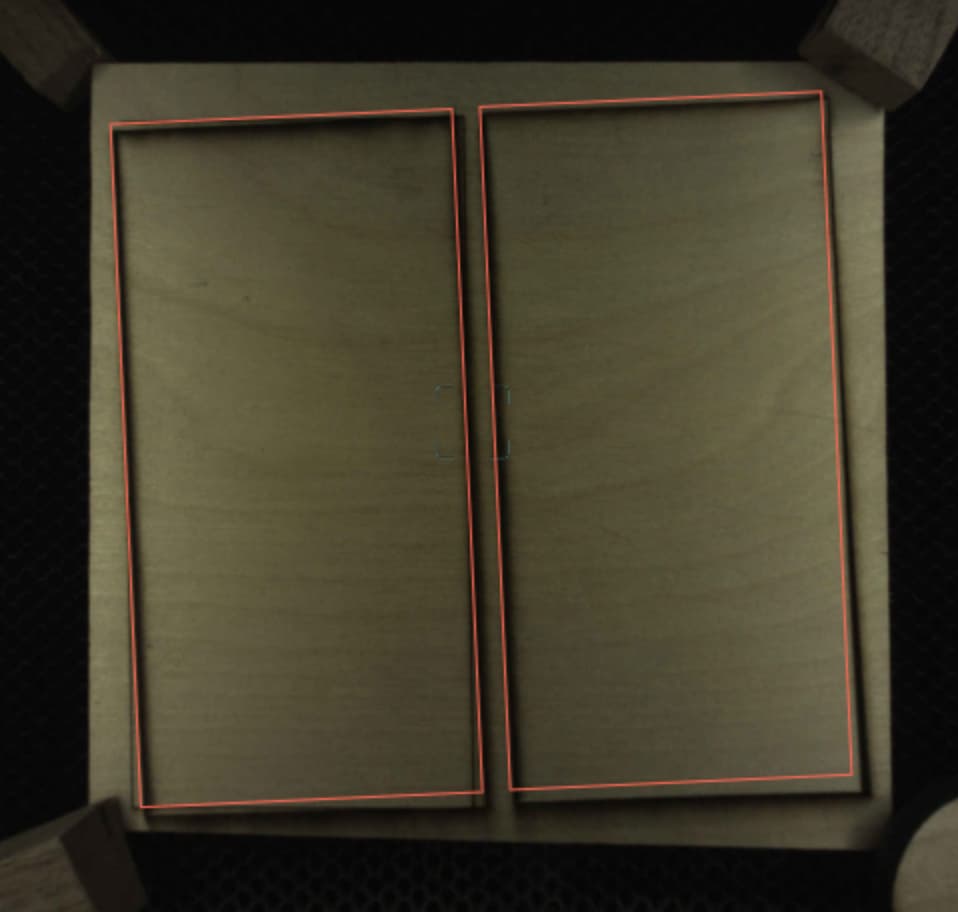
Hello, community. First post for me. I’m not sure what I’m doing wrong. I’ve measured my wood piece and typed in my material thickness in the “use uncertified material” section. However, it doesn’t seem like my laser-cut line isn’t set right. Any tips would be appreciated. Thank you.
It looks like the camera in the lid somehow got rotated?
1 Like
If that were the case, the design outline would not be tilted in the screenshot of the UI.
The design was intentionally rotated slightly, best I can guess is they are complaining about the cut not matching up perfectly with the design. For that, run the calibration, although it looks well within the stated specification of 1/4".
3 Likes
With the improvements made in the lid camera/set focus software, you do not need to type in any material thickness in the material screen. Simply ignore that prompt and use the set focus tool at important points where you will place your design. You can run the lid camera calibration, but I don’t think you will see much improvement. Your cut seems to be within the 1.4" tolerance of the Glowforge specs.
2 Likes
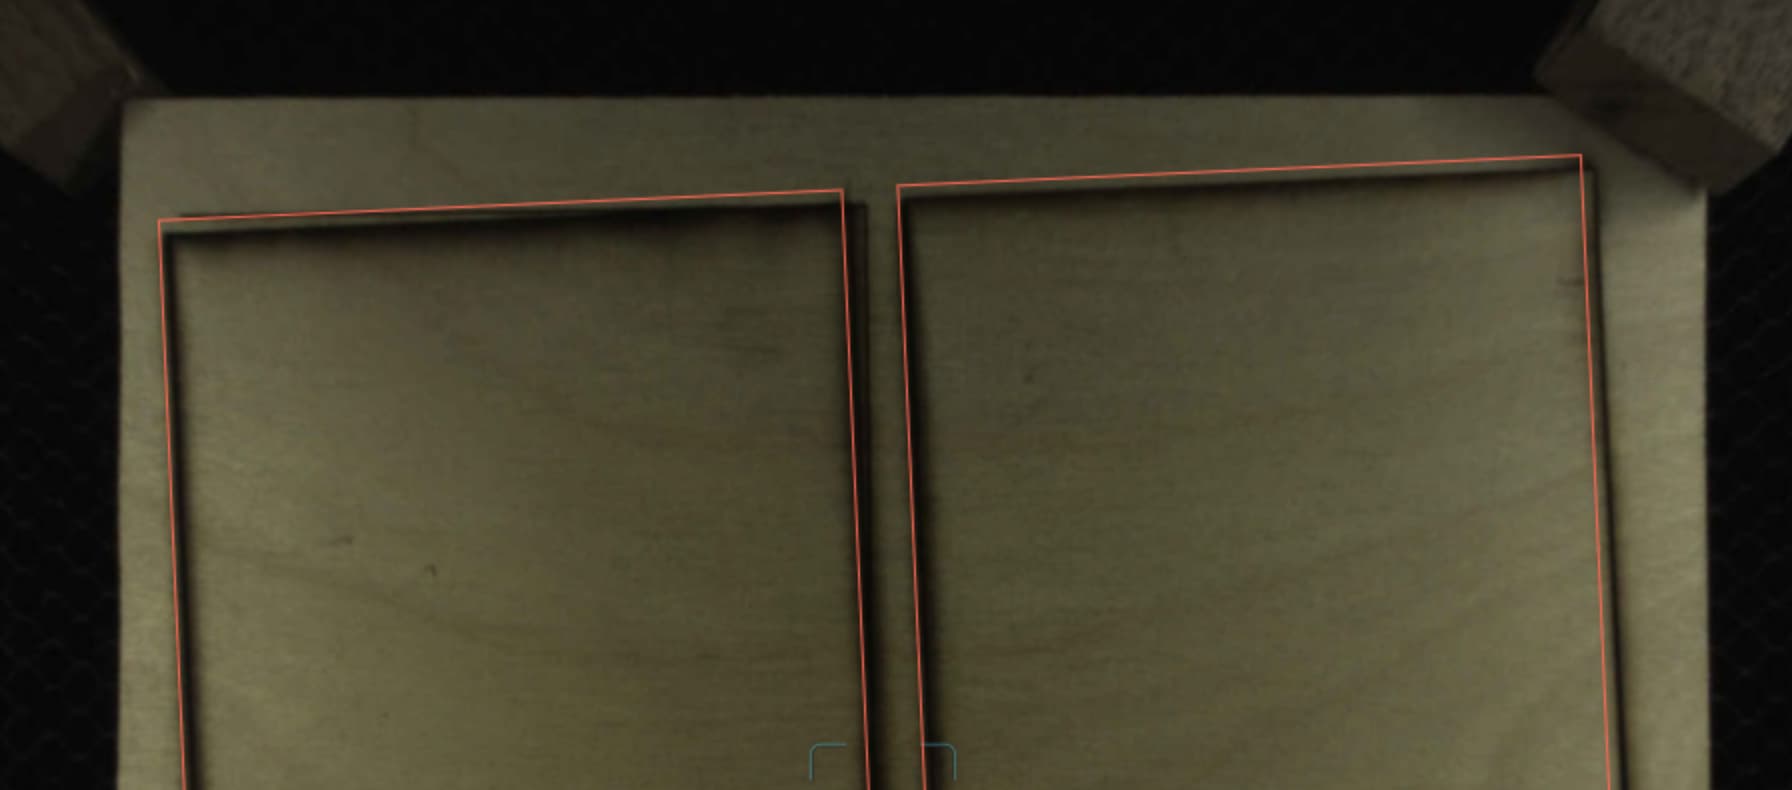
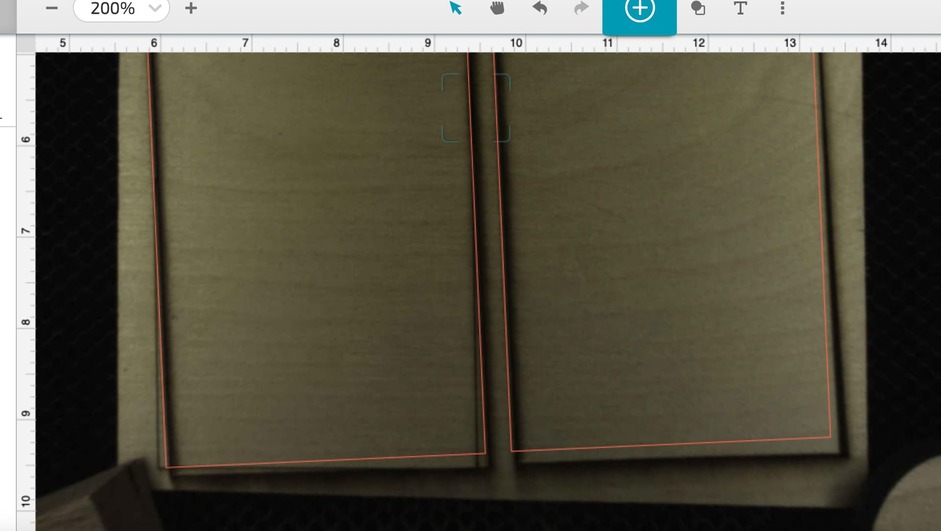
That looks like the refreshed bed image after the operation. That subsequent image is always slightly displaced, at least on my machine. Even though the file image is displaced if you ran the file again without moving the material, it would cut in exactly the same place even though it shows the design has moved.
5 Likes
oh! So using your strategy, if the passes that I used don’t cut through the wood and if I don’t move the piece/open the lid, then I can rerun my job again?
5 Likes
So with “tolerance” as a factor, are you saying that I should always use material that has more margin on all border sides to compensate for tolerance? Basically, should I expect more wasted material if I’m precutting wood pieces?
1 Like
Yes! Even if you open the lid, as long as the material hasn’t moved, but use set focus again.
3 Likes
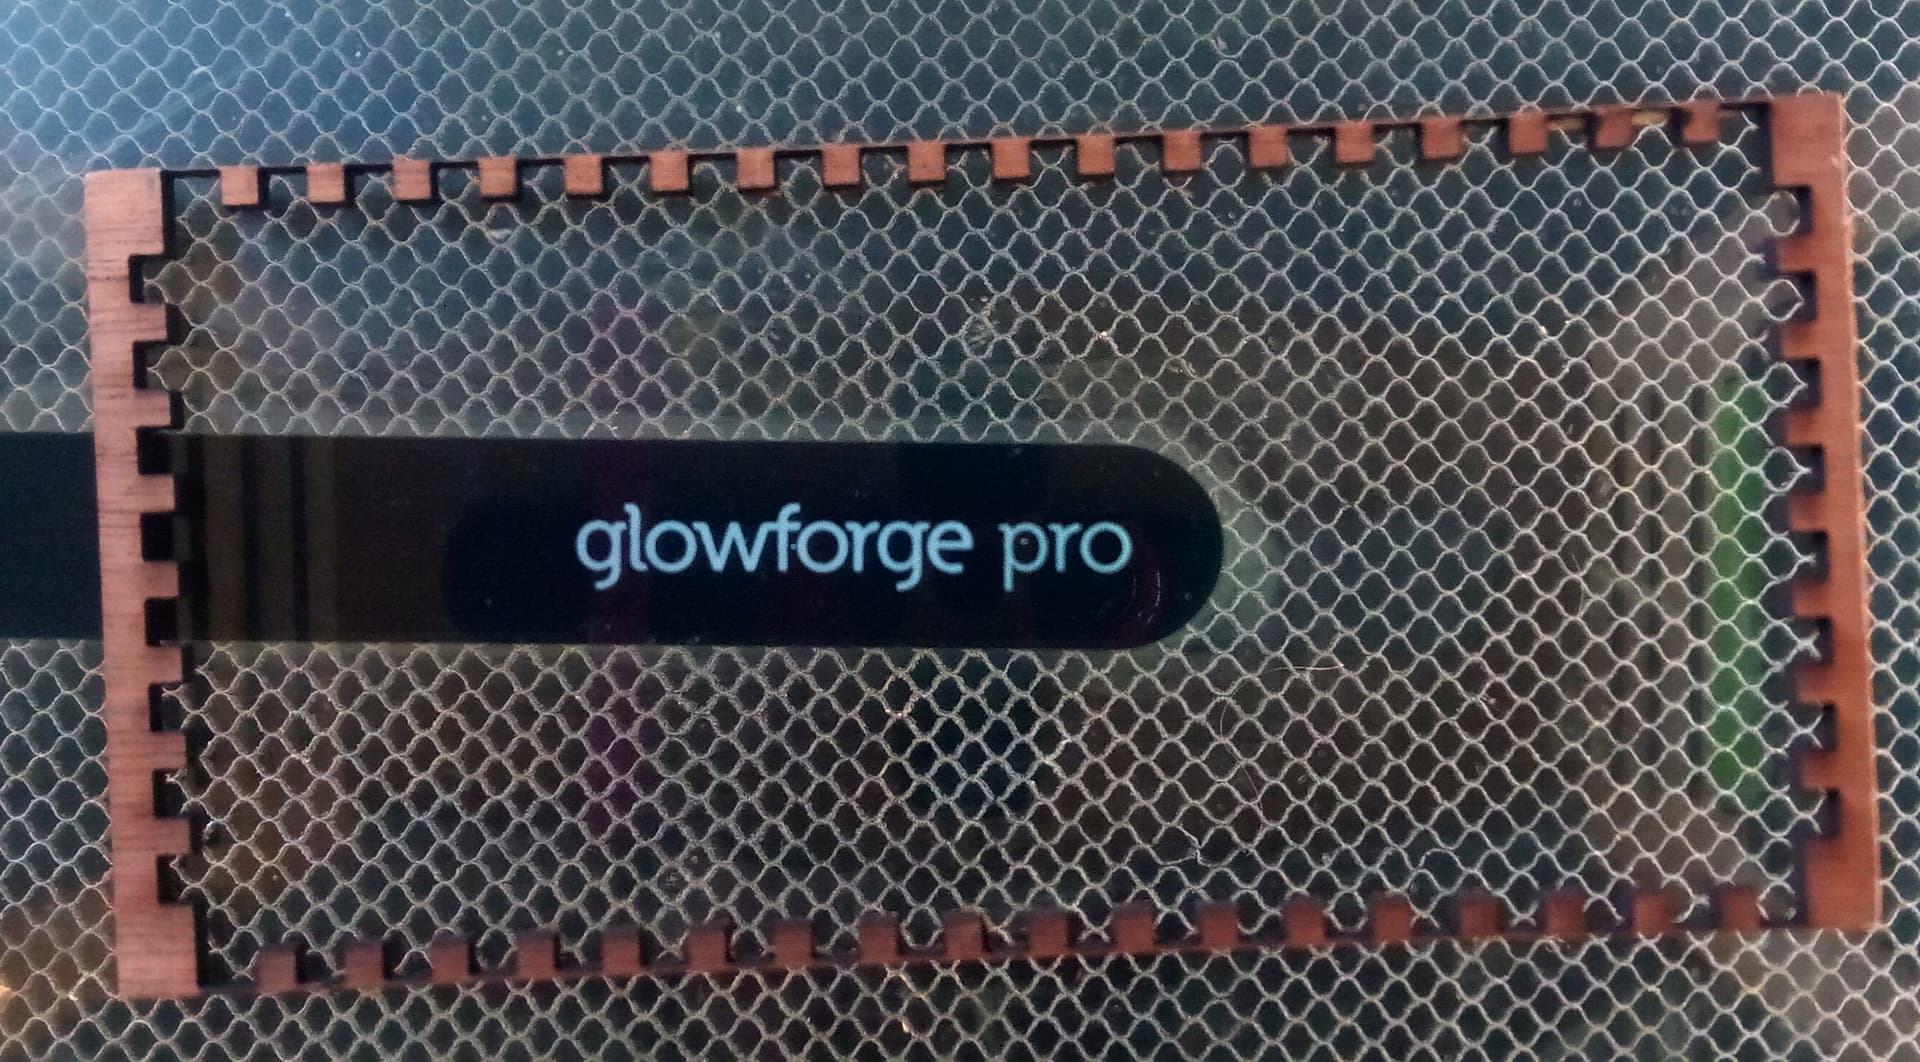
The machine uses the numbers that you can get with the widget that shows up on the lower right when you select what you want to measure. By not moving either the design or the material those numbers will stay exactly the same no matter what your screen shows. 1/4 inch is the promised minimum, but in actual practice if I am very careful I can get it under a millimeter and when engraving two sides by locking down the outer scrap and flipping the symmetrical cut. it can be more precise than my eye can see.
Being very careful entails having a good calibration, and using set focus several times zoomed in very close, and sometimes needing to rotate the material a fraction of a degree several times to get the rotation correct. but it can be done.
This photo illustrates how close I had to come to cut the piece that was very near the size of the material. It took a couple of hours of care but was worth it.
4 Likes
This topic was automatically closed 30 days after the last reply. New replies are no longer allowed.