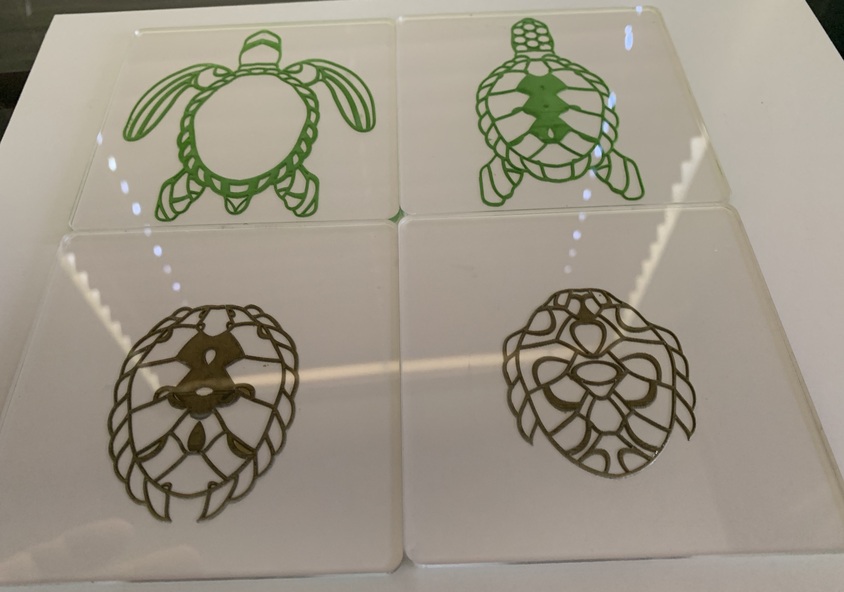
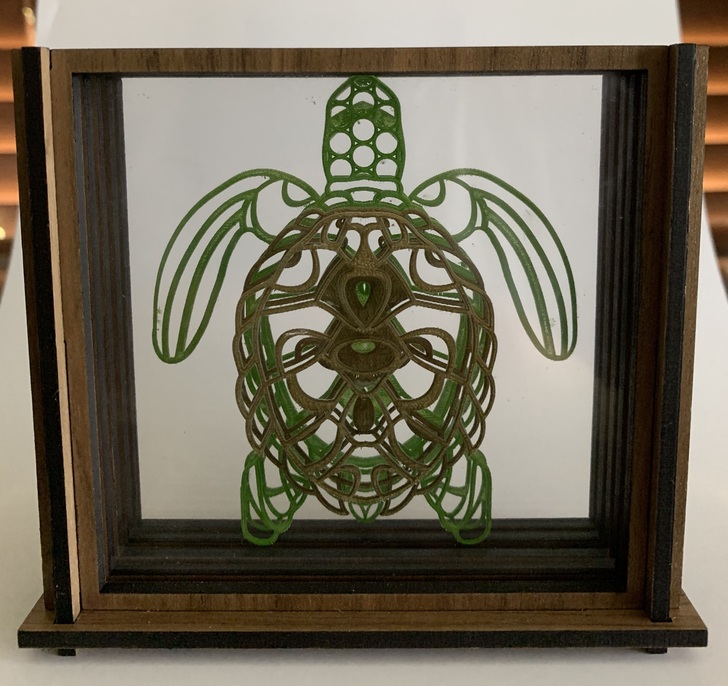
I’ve been working on some creative projects utilizing a beautiful turtle design from an Etsy seller. I’ve manipulated their work in many different ways, and this was one of my favorites.
Done in medium PG acrylic, then color filled with sharpie oil-based markers. The holder is medium PG walnut plywood. The pictures don’t really show the depth effect or colors, it’s very cool to see it in 3D.
I would really love to find an ideal way to fill acrylic:
If I color fill then peel, a lot of the tiny masked sections seem to get “glued” to the sides with paint and I have to scrub enough to scuff the acrylic. The sticky tape trick doesn’t do it.
If I weed first then fill, I still have to scrub the extra paint off the acrylic and that causes scuffing.
It’s possible I’m expecting too much perfection from acrylic, it just seems to be a little too delicate. Wondering if anyone has any other tricks. Perhaps spray paint since it would most likely be a thinner coat?
That is amazing! Love it! I am so happy to see some creative ways to use the design!
I spent yesterday creating a new holder that I will post soon - once I perfect it. Hint…It doubles as a candle holder.
Awesome, can’t wait to see the other variations of these coasters. If you’re sealing your paint after filling the acrylic, I’ve heard warm soapy water works really well to get the masking off. Just let them soak for a little while and the adhesive should loosen up enough that you don’t have to scrub it off.
If you use this method, try filling your engraves with paint and then use a piece of scrap acrylic with a straight edge to squeegee off any extra. This should minimize any gluing. Also, if possible (depends on many factors) remove the masking when the paint is mostly dry, but not completely set.
I was under the impression you were leaving a paper masking on the acrylic, engraving, filling with paint, drying and then peeling off the paper masking. In this scenario only the masking would be scratched, and with a flat edge, not really. You’re removing wet paint, not scraping off dry paint.
Are you’re not saying use the flat edge to remove the masking, you’re saying use the flat edge to scrape off the excess paint so the masking doesn’t adhere with such a thick layer.
What I’m using are sharpies, it’s not exactly a flood fill, but it could be worth a try. I’m all about refining processes so I’d like to find one reliable way of doing it and then just do that from now on.
When you have a bit of scratching I have used 2000 grit sand paper that almost polishes in itself and healing car polish should do the rest but try the ideas on scrap first
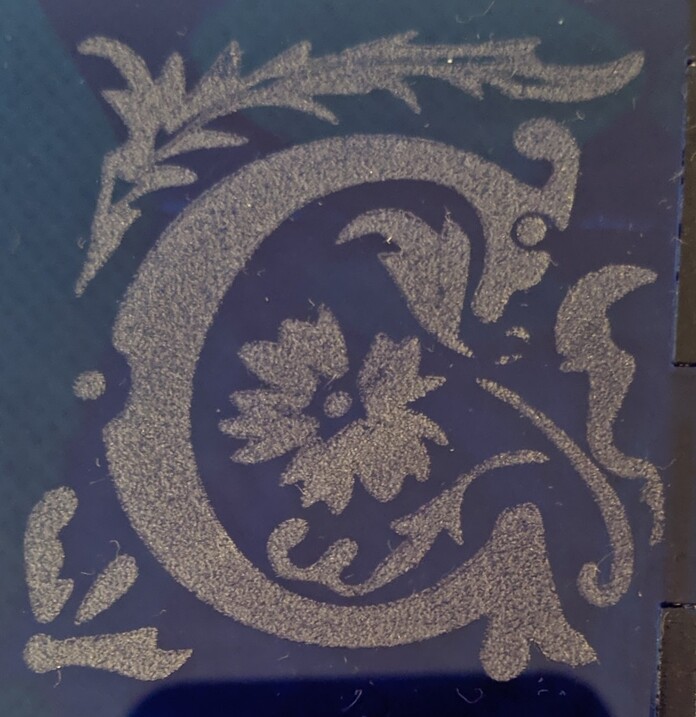
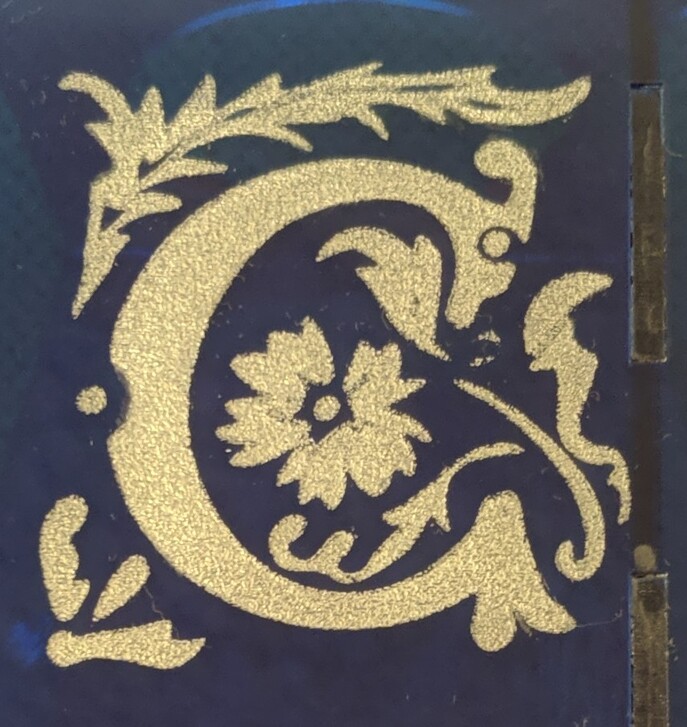
You may want to try a paint and wipe method. I used a silver enamel paint pen on an etched monogram to help it pop. I wiped the paint off the smooth surface while wet using cotton circles for makeup removal. A little rubbing alcohol on a pad helped me get the stubborn bits off. Any scratching came from handling the material during assembly or setting it on a surface. I have also used metallic sharpies with the same method.
I’ve been using mica power pigments and then brushing over with acrylic resin and then peeling the protective layer off and haven’t had any issues with it sticking.