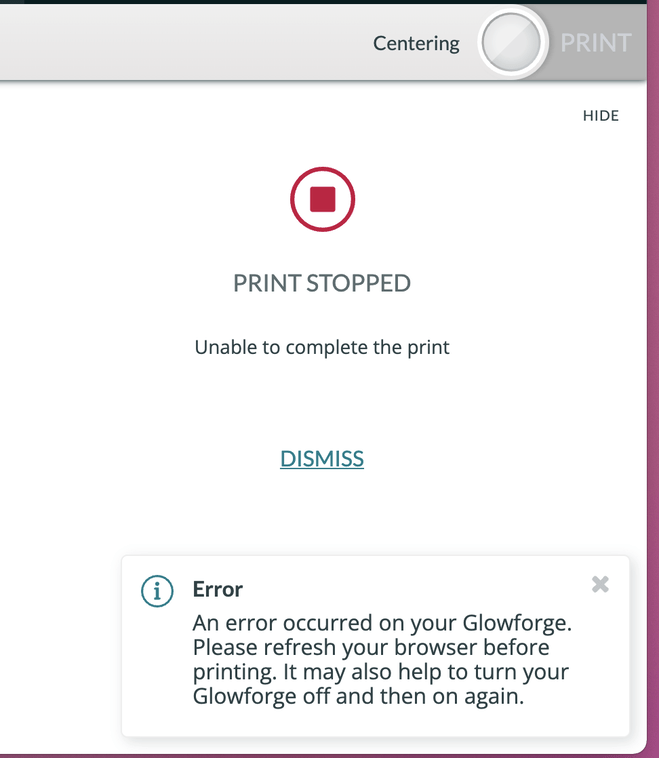
When I click the “Print” button to send it to the Glowforge, it starts sending the file to print and the printer head moves to focus. Then it sits there for a few seconds and eventually, the printer button turns amber and I get an “Unable to complete the print” error.
The printer head never leaves the area it was trying to focus on.
I’ve turned the printer on/off multiple times.
Video of what’s happening in the Glowforge app: Video file
I’ve cleaned all the various cameras/lenses and reconnected the ribbon cable to the printer head a few times as well.
Oh no, I’m sorry to hear about the trouble with your Glowforge @Shpigford.
Can you confirm for me the trouble is occurring on “Lester”?
If so, I extracted the logs from your Glowforge to investigate, and it looks like the orange button is appearing because your Glowforge is having trouble communicating with the printer head. There are two key connections I’d like you to check for me.
Could you please do the following?
Turn off your Glowforge.
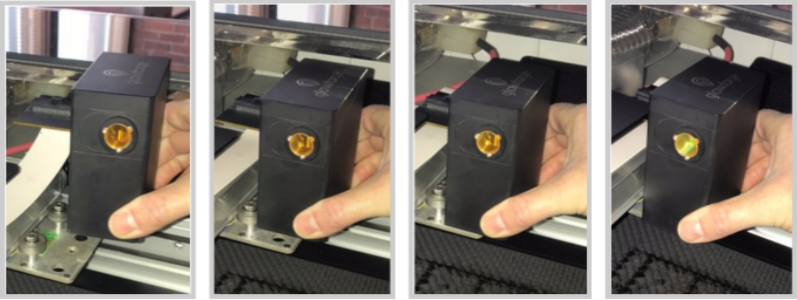
Holding only the finished black surfaces, grasp the printer head as shown. Pull gently up and back to disengage the magnets and remove the head.
There is a small tab in the center of the wire ribbon. Push down fully on the tab to release it, and gently pull the wire ribbon plug from the printer head.
Pick up the printer head and wire ribbon. Make sure the tab on the wire ribbon is facing up. Slide the ribbon back into the head until it clicks.
As shown, lower the printer head over the metal plate so that it rests next to the two round posts. Then push it gently away from you – you’ll feel a “click” as magnets pull the printer head until it sits snugly atop the metal plate.
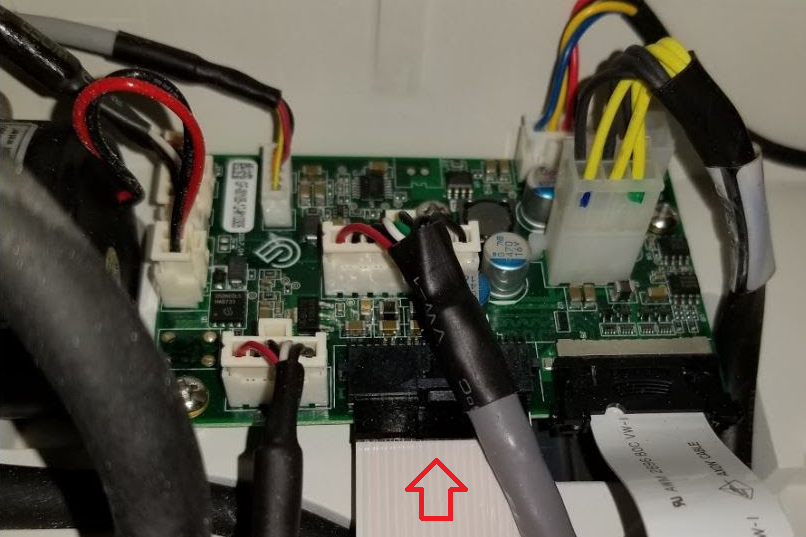
Take a photo of the circuit board. If the cable I’ve indicated above with the red arrow appears to be loose, please reconnect it and try printing again. This cable should ‘click’ back into place.
I cleaned those parts with electronic degreaser (they were absolutely caked) and for whatever reason, that seems to have done the trick. Working fine now.