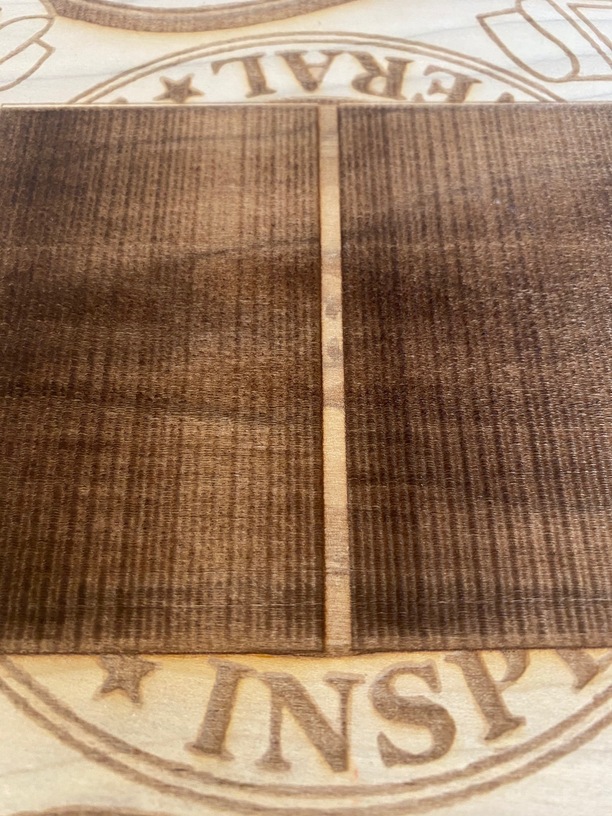
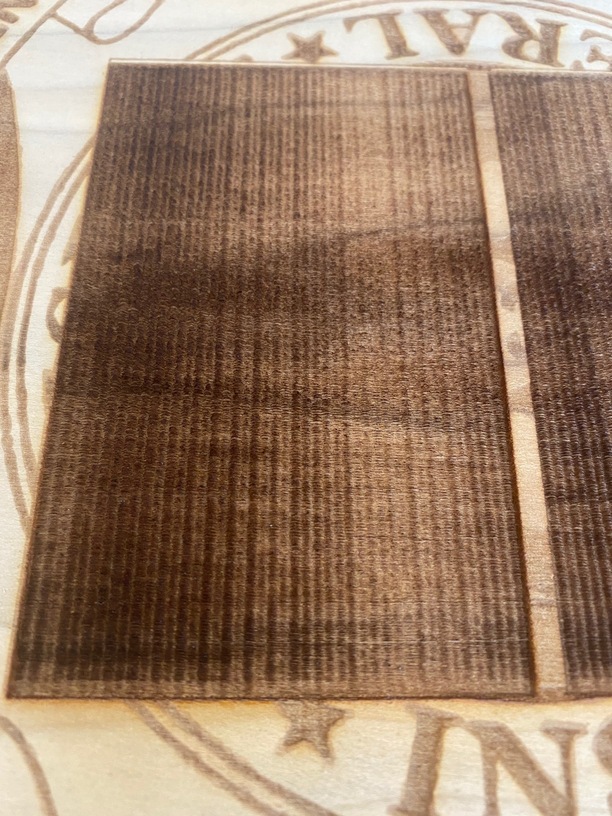
Anyone have thoughts or suggestions on the perpendicular lines I’m getting on these wood engravings? The vector fills are clean and the same settings have been used successfully for the file in the past, so it makes me think its a mechanical issue. There are no problems with accuracy or fine detail, just the lines perpendicular to the motion of the laser that are consistent across the entire ‘y’ axis.
Debris or slippage on the belt or rail? I’ve cleaned several times, but maybe missed something?
What kind of material is that? (I just noticed you don’t see it on the shallow engraves which appear to be on veneer, but you do see it on the deeper engraves…meaning you might have gotten down into the fill.)
It might be a function of the material…maybe glue lines in the inside fill material?
Good eye. It doesn’t always manifest on light cuts. The material is solid poplar, which generally engraves consistently as material is removed. I have seen the same perpendicular line effect on oak, pine, and walnut.
Can you fit the piece into the machine if you rotate it and try a solid deep engrave running with the grain to see what it does?
(We see that effect on acrylic sometimes, but it’s the first time I’ve seen it on wood. You might also try reducing the LPI. In some softer woods it might be concentrating the carving effect. (Try 195 or so.)
Everytime (except once) this has happen to me it was dirty rails. Test an engrave with the wood rotated 90 degrees. If they reappear, but oriented in the same direction as before, they could be feed roller compression from the mill.
Thanks for letting us know about this, and for sharing those photos. So we can better understand how this issue affects your engraves in relation to the direction of the laser path on the material, I’d like to have you try the test @ovm.steve mentioned. If you’re able, please rotate the wood 90 degrees in the bed, try a test engrave with the same settings as before, and let us know how it turns out.
Thanks for the comments. I did a rotate test, and the lines are still perpendicular to the motion of the laser. I think that rules out any compression, feed roller or planer tool marking as the issue.
I have been thoroughly cleaning the rail and saw some improvement. However, I’m not sure how to clean any further and still get some lines. There is no visible residue, and the surface is smooth to the touch. I may have a problem with the rollers that interface with the rail.
When you remove the carriage be sure and get the back rail on the gantry. It gets overlooked and the crude hides really well there. Remove the tray and lay a flat mirror ( a piece of mirrored acrylic works great for this) on the bottom of the machine. It will help tremendously in seeing what is going on as you remove, clean and reinstall the carriage and belt.
It’s been a little while since I’ve seen any replies on this thread so I’m going to close it. If you still need help with this please either start a new thread or email support@glowforge.com.