For inkscape, if you want to have the stroke preserved, then your best bet is to convert the stroke to paths (creates a path on outside and inside of stroke as currently exists). Then fill the new shape, and set the new stroke to hairline (0.001mm).
This will let you retain the original “stroke” as a fill pattern, and lets you do intersection and other commands with the visual overlay, instead of the path overlay.
Thanks. I hadn’t thought to make the path a hairline in this. I have been converting to a path but then in the process of breaking apart and deleting the inner path so I have a solid fill, that leaves letters with the counter space not punched out correctly when I do the difference. I played with the steps a bit more, worked with the counter spaces individually for the letters and came up with a way to get the punch for the engraving of the background around the letter, leaving the full size of the letter in silhouette. I’m almost theree but the counter spaces in the a, o, g, and e are not correct. I need to keep trying. It’s easy enough to export a PNG of the punch out and import it, but for the process sake, it would be nice to have it all as an SVG.
By the way, this post helped me get to posting an svg and have it visible. I never could understand why they weren’t showing up. Turns out they were, just at 6x4 pixels!
Duplicate the layer the text is on, activate the lower layer and while holding down the “Alt” key (on a Mac) click on the thumbnail for that layer in the Layers pallet. This makes a selection of what’s in the layer. Then under the “Select” menu, choose “Feather” and set a feather radius for the selection. Then you can use the paintbrush, pencil or airbrush tool to paint inside the feathered selection. This is one thing I wish GIMP would mimmic from Photoshop and just make an “Outer Glow” layer style.
just so im on the same page here, are you doing this in Illustrator?
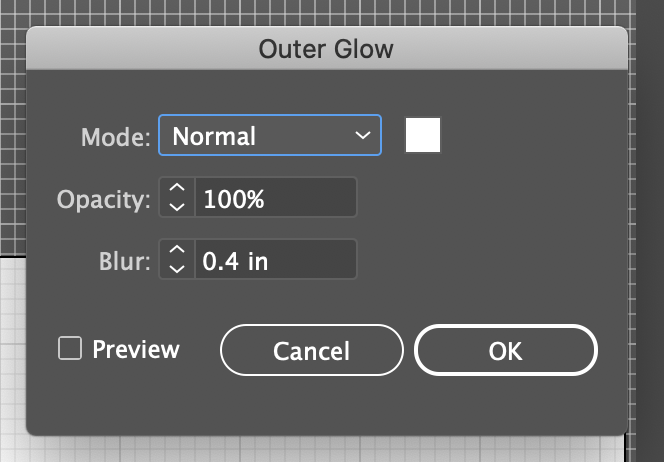
I’m on the new CC version, and IN illustrator I go to Effect, then under ILLUSTRATOR EFFECTS (not Photoshop Effects) , I go to Stylize, then Outer Glow…
thats where I’m HOPING to find the box like you have above, with that Quality area with the adjustable contour.
What I get however, is the small box with only a couple options! Very frustrating. Did Adobe just ditch the options for outer glow?
Thanks!
I believe if you check the Preview box it will display on the original, and then you can make adjustments to it as desired. (But I do not have a newer version of AI, so just try it and see.)