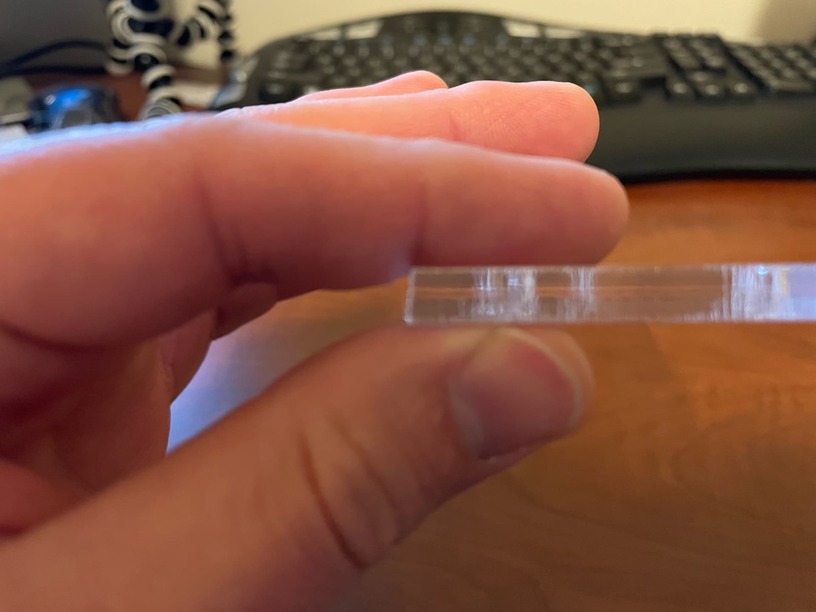
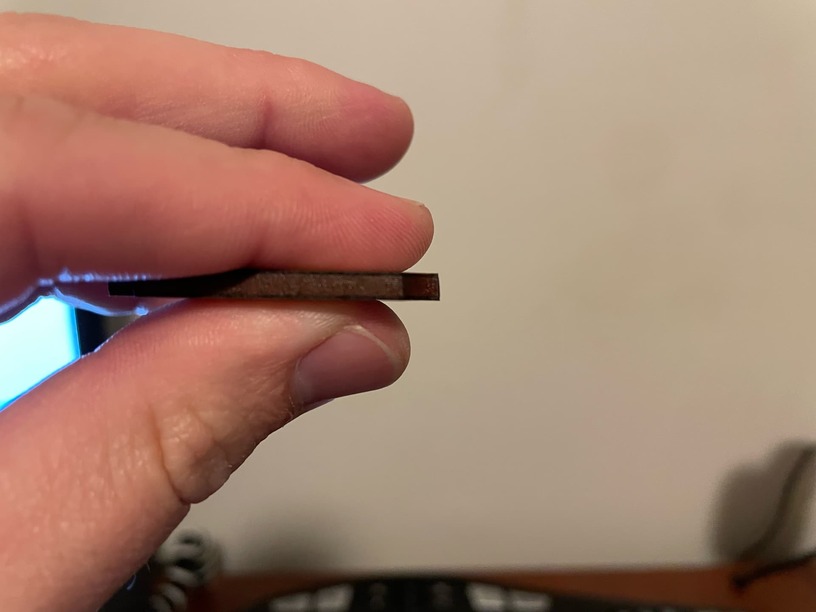
I’ve begun to notice that my cuts are not plumb in the Z axis. For example, when I examine the piece after cutting through its cross-section, it’s polygonal rather than rectangular. Refer to the photos.
Although I’ve had my Glowforge for some time, I use it sporadically. Because of limited use, I’m not sure if this is typically something that happens over extended periods of use, it came like that and I didn’t initially notice it, or it’s the material. I do notice that some of the proofgrade material is slightly bowed after removing from the packaging once delivered (usually wood material), but as shown in the photos, this happens to the thick acrylic as well. It’s more pronounced becasue of the greater thickness (Z dimension). I also did a calibration based on the method I found in the forum (I don’t know why I did it - probably wasn’t necessary) and am wondering if that could have had some minor effect on things.
It’s primative for what this machine can really do, but I want to start making simple routing templates for my woodworking. I’m not sure if this taper in the z axis will translate into my routing projects or not.
Any advise as to how to correct this would be very much appreciated!!
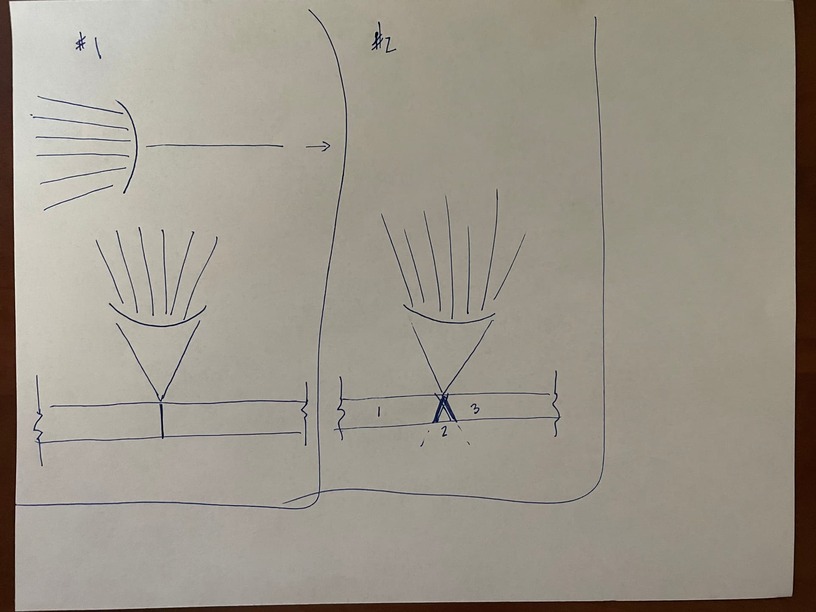
To take that further then, wouldn’t the “tapering” effect be symetrical around the entire perimeter of the object that is cut? There are pieces where the “waist” effect is exagerated more on one side than the other side (refer to previoualy attached photos). Also, if a beam is focused by the lense, once it leaves the lense, wouldn’t it remain focused until it lost all energy at some distance “x” from the lense? (sketch #1) Lastly, if the “waist” is focused at the point of the surface of the material (by the software and formulas built into the system), on the material cut, it would have one taper, and on the material left behind, it would have the opposite taper? (sketch #2) Depending on where the focal point is calibrated to (i.e. the top surface of the material, bottom surface, or middle depth of the material), the accuracy of the laser and the thickness of the material, theoretically you could end up with three pieces of material after the cut (the desired piece, a waste piece, and the oringal stock left over).
Maybe there is more to it, but I don’t fully accept “just the way it is” as an answer.
Nope, because the machine is not built to that level of precision - although it’s hit-or-miss whether yours is a good or bad example.
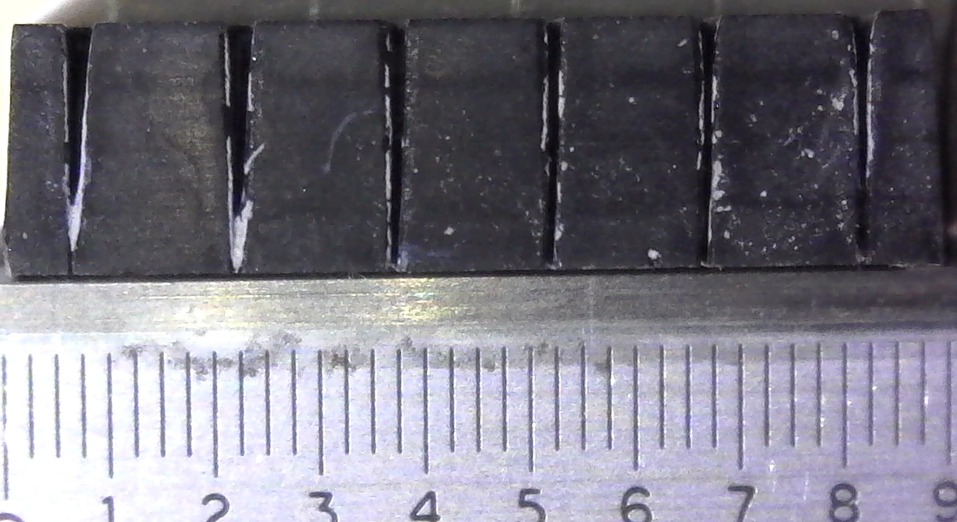
This has come up in the past. I ran a test piece based on one members’ quite poor results. Mine is canted in the Y-axis, although I forget which way. I think the front of the carriage plate hangs a little lower than the rear.
This was my test, it’s not immediately obvious because the material is not square with the image. Each cut used different focus settings but without finding the original post I can’t say what I used.