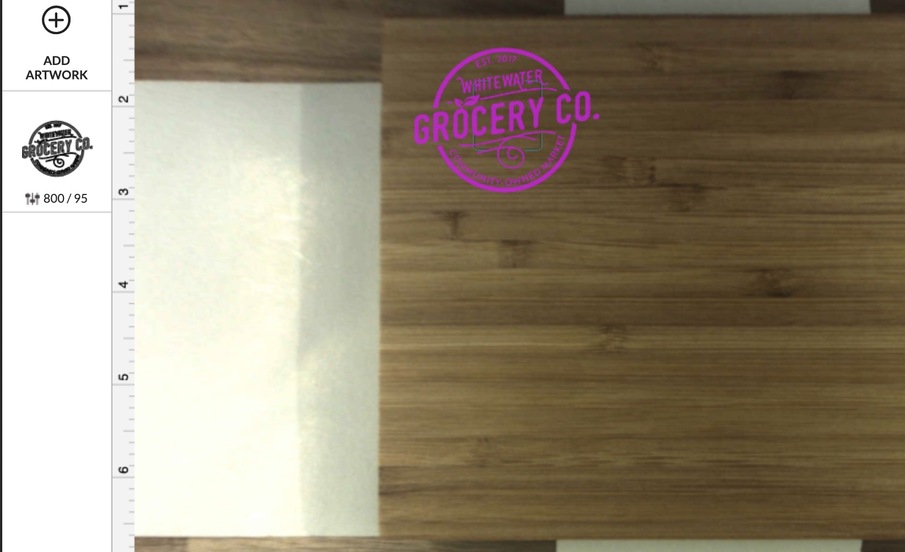
Is this after using Set Focus? The option is under the gear tool in the top menu. It’s not just misaligned, it’s not the same size, which tells me your focus isn’t set correctly.
Sadly this is after a calibration, manually setting the height, and selecting set focus before the print
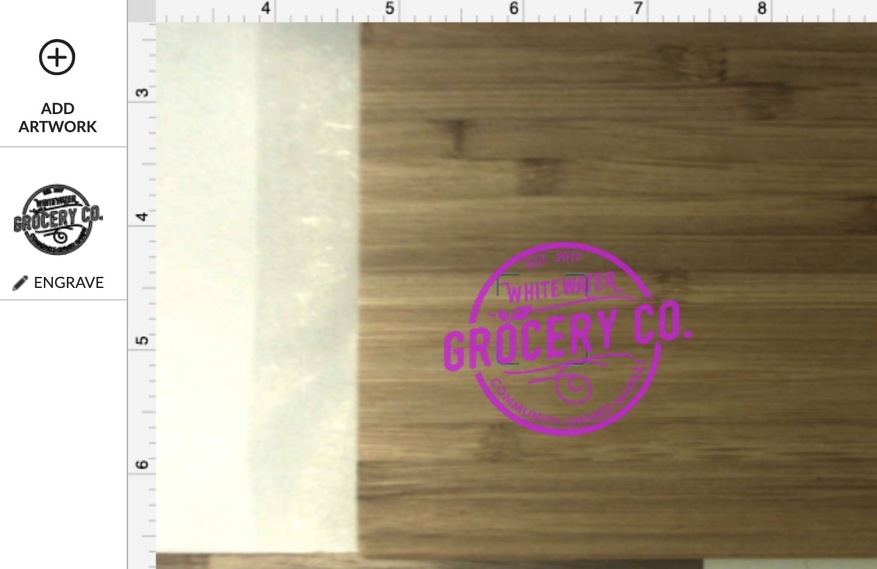
Right. What about if you set focus after the print again, as per @rbtdanforth’s suggestion?
I’m not sure if it’ll solve it, but I’m curious.
Did you take the screen shot before or after opening the lid? Opening would undo the set focus.
1 Like
No need to set material height and then set focus. Just put material in, hit set focus on the area you want to engrave or cut, and run the job. If you open the lid, the “set focus” measurement will be gone. Just compare it immediately after the print.
Thank you, yes, tried either/or and both in desperation. And didn’t go anywhere near the machine, just watched the computer screen to see what it did.
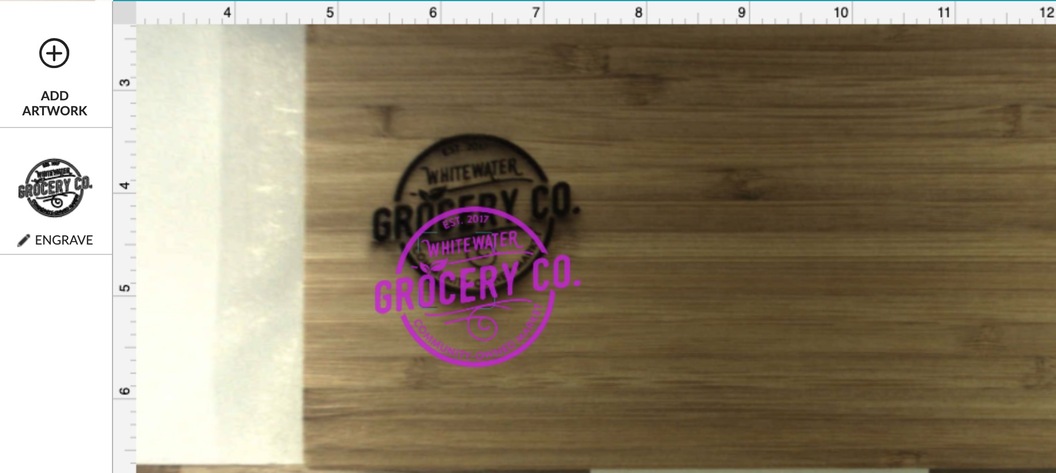
This is at the very edge of the GF limits.
If you were to run the calibration process with a piece of material that sits at that height, no doubt these prints would look almost perfect in the UI, but anything on more usual material (1/8-1/4") would be shifted by about that much.
If you’re propping up your material that much (I assume that’s what you mean by “base at .65”) then I suggest you drop that down so that your material sits a lot closer to the original bed height. I’d bet $0.05 that solves the alignment problem.
1 Like
I just can’t anymore. This is absolutely ridiculous. I had this propped a hair’s width from exactly what medium PG materials would be. I just can’t afford to keep wasting materials! I’ve done this with setting focus, I’ve done this with entering the measurements, and I’ve done this with just running it as a similar PG material. I get some variation of this all the time. In the meantime, PG materials do seem to be pretty much right accurate. What am I overlooking?!
I mean at first glance, I’d say no you didn’t?
Did you use autofocus? It would take the guesswork out of it.
That’s what is a bit confounding.
Two ways to go:
-
Not set focus: place your design, hit print. The system will then scan the material and if there is any height discrepancy between the material height pre-populated for Proofgrade and the actual material surface, the bed image will change between the time of pushing print and hitting the go button on the machine.
-
Using set focus, which scans the material and updates the bed image as soon as you hit set focus and it processes
Functionally, they are exactly the same processes - it’s just a matter of when the scanning is taking place.
As I said above, I’ve set the focus. That didn’t work. I measured with my calipers. I measured with my “no math” tool, with a special mark I made on it exactly where PG materials came to. So yeah, auto focus was no different than anything else tonight.
It seems your only option is a jig if you think you have tried everything - I assume you have done the lid calibration and this is the only project you are having trouble with. Don’t keep wasting material. Again, is the tray in or out? If the tray is out, what height riser are you using? What is the thickness of the board? Is your material up against the front of the honeycomb?
One of the techniques I use when I have expensive materials is to do a trial run on the material, but with a sheet of paper or card stock taped over the target. This won’t affect the focus. Adjust the power to just score the paper or card and then you will get an accurate position. You can change the sacrificial layer as many times as you need to get it perfect, then when you are ready, just adjust the power and run it again. You don’t even have to pull off the last sacrificial layer, just burn right through it and adjust the power a little.
If this doesn’t work for you, there may be a mechanical issues throwing your positioning off.
1 Like
Any project that’s not PG is giving me problems. If it’s something thin on the crumb tray, or something I’ve got sitting on risers to get it to the appropriate height. This particular one was tray out. Total height to the printing surface was 1.45"
Yes, I should do that, but I get lulled in to a false sense of security when I do something on PG first, and I move ahead with great care and confidence. Until this happens. It just shouldn’t be that far off. I’ve gotta be missing something.
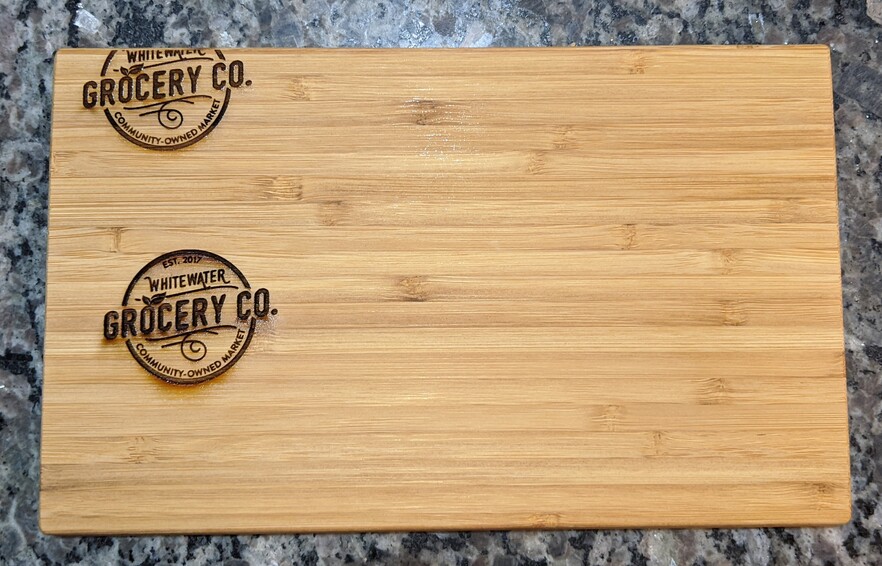
Do you have any white masking that you can apply to the top of the cutting board? The only thing I can think of is that the auto-height reading might be having trouble because of the grain pattern.
(I don’t think it’s likely, but can’t think of anything else that might be causing that much variance between the proofgrade results and the cutting board.)
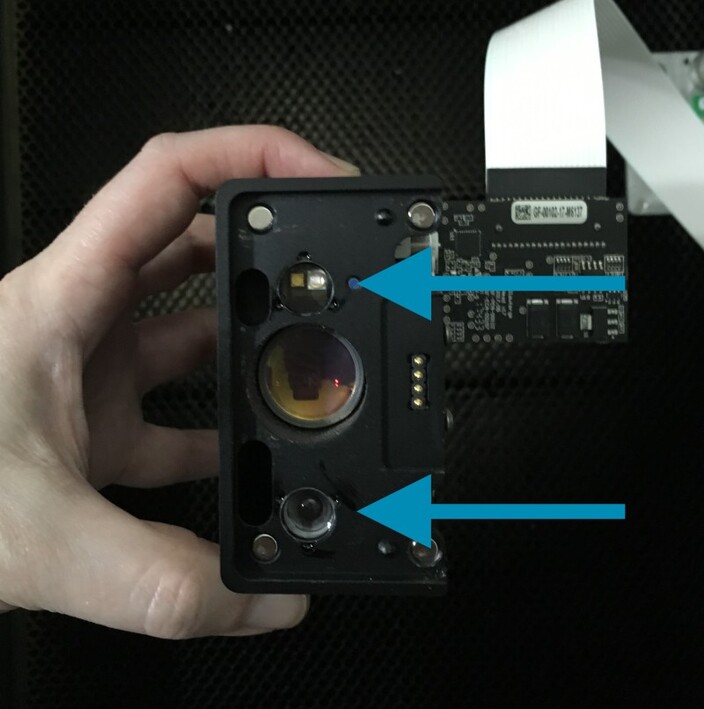
Hold on…can you take a picture of the two small side windows on the bottom of your printer head? … give me a second to find a picture…
I’ve got something going for another 30 min… But yeah, this wasn’t masked tonight
Okay…when that gets done…these are the ones I’m thinking might need cleaning…they light the way for the laser focusing beam. Look for any scratches or dust buildup.
I did clean them five days ago and barely did anything since then, but I can try again, and mask my board, then do a light score and see if I get anywhere.
It’s worth a shot. That might not be it, but you might get lucky.