I posted about a Voronoi pencil holder I created, and thought it would be nice to explain a little bit about how I did it.
How to make a Voronoi pencil holder in Inkscape
Create the box
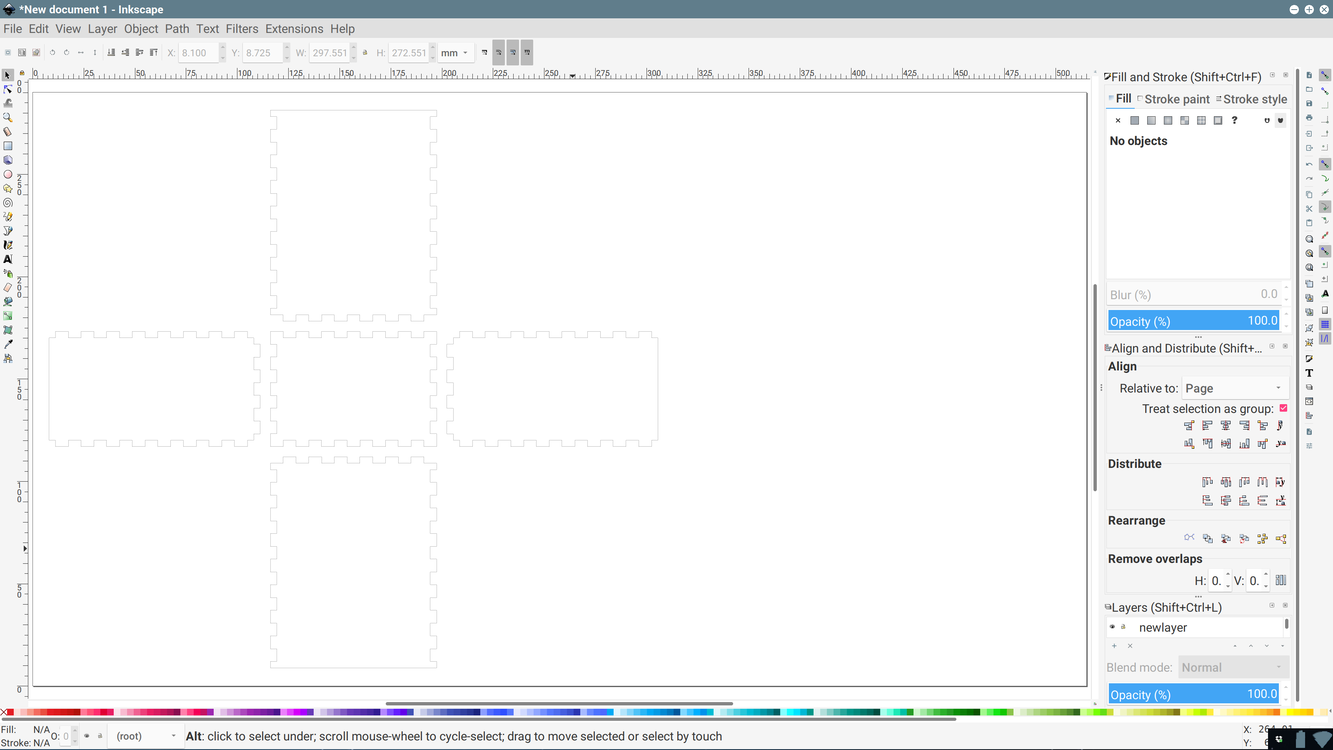
First, using the Tabbed Box Maker extension, create the outline of the box you want to cut:

The important things to note here:
- Box dimensions are internal — this helps with setting a good border around the outside of the eventual design
- Box type is “one side open (LxW)”, as we want to be able to put things into it

Clean up the box design
Now we have a box, the next thing to do is clean up what the extension generated. Slightly annoyingly, it creates each edge as a single path, rather than each face. This can lead to the Glowforge doing odd things, like cutting different edges of the face at different times.

In order to fix this, we need to select the four paths that make up each face, and hit Ctrl-K to combine them into a single path (or use Path > Combine from the menus… but I love my keyboard shortcuts).
Unfortunately this still doesn’t give us a closed shape, so use the Node Editor tool (F2) and select the overlapping nodes in the corners using a rubber-band selection (click and drag from an empty area near the corner to draw a selection rectangle around the two nodes).
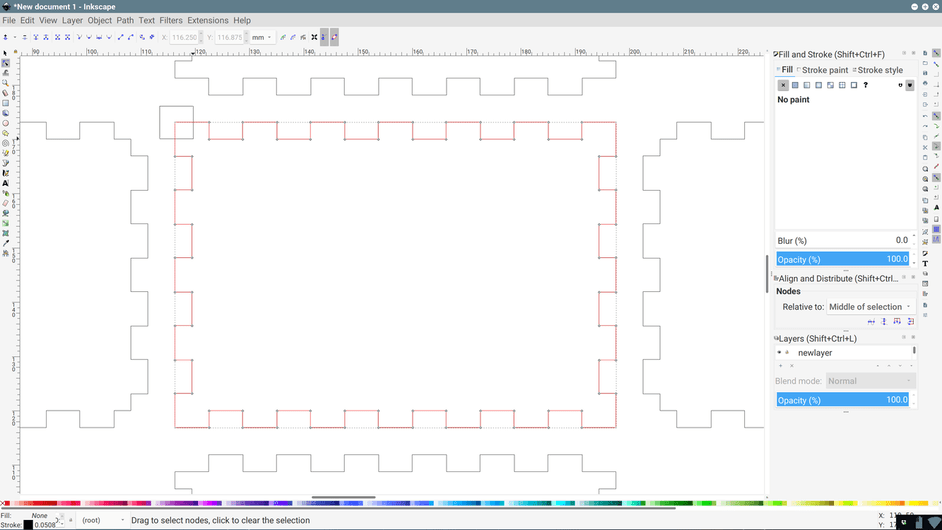
After releasing the mouse, the status bar at the bottom should say “2 of x nodes selected”. No more, no less. Then press Shift-J or click the “Join selected nodes” button in the toolbar (third from left, with two nodes combining into one). Repeat for each corner, and then repeat the whole “combine and join corners” pattern for each face.
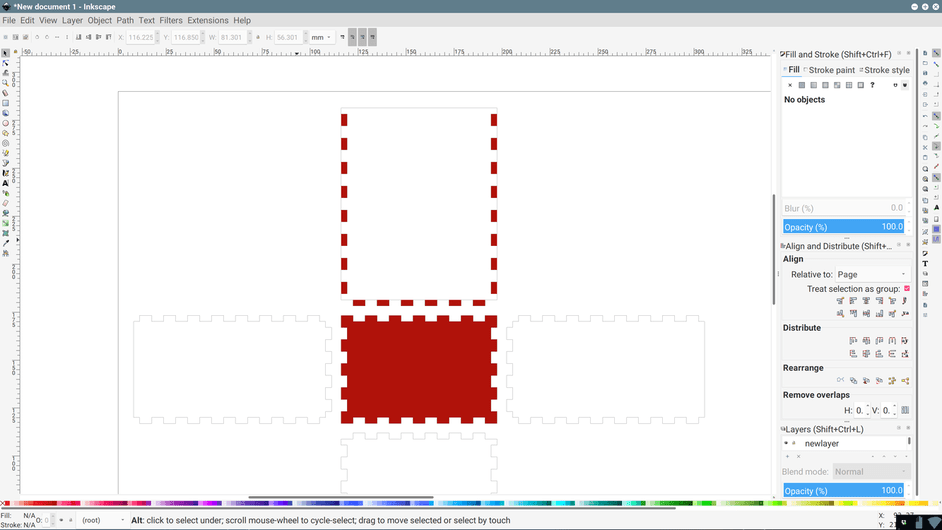
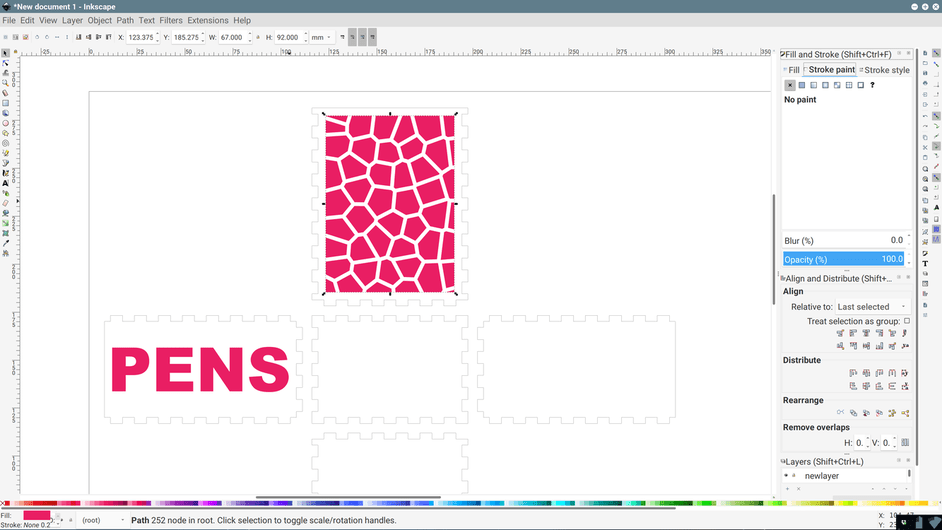
Just to illustrate why this is important, I’ve combined and joined one face, and combined but not joined another, then given both a red fill:
Create a mask for the design
You won’t want your Voronoi design to reach the edges of each face, as the box won’t hold together, so you’ll want to create an area that the design is restricted to. This doesn’t have to be a rectangle; you can be as creative as you like! Make sure that if you use text, you convert it to a path once you’re happy (Ctrl-Shift-C).
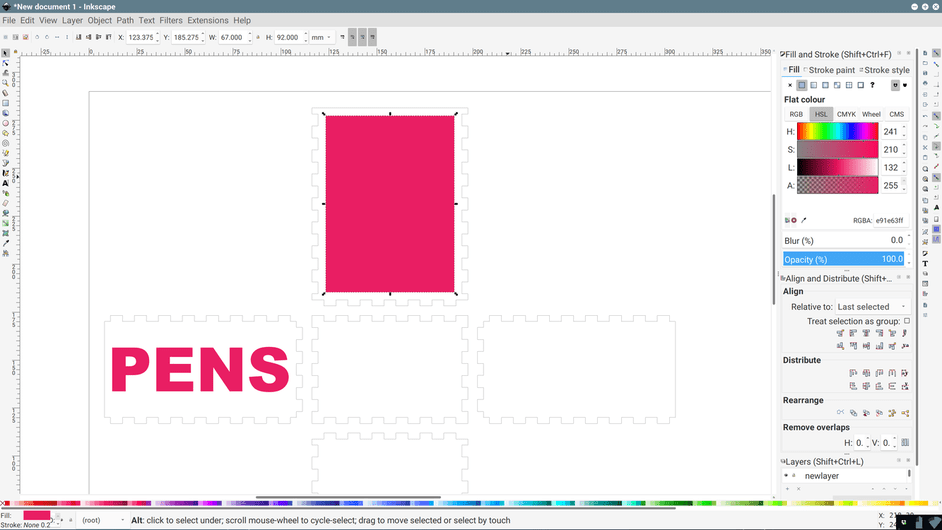
Tip: centering won’t quite do what you want with the faces that have a non-finger edge. Instead, you’ll want to set a fill and remove the stroke on the face, align the mask design to the non-finger edge, and then add whatever distance in order to center it manually.
For example, the rectangle is 4mm smaller than the internal dimensions of the face. Centering it horizontally worked fine, but I had to align it to the top of the face and shift it down by 4mm in order to position it properly.
Prepare the Voronoi diagram’s centers
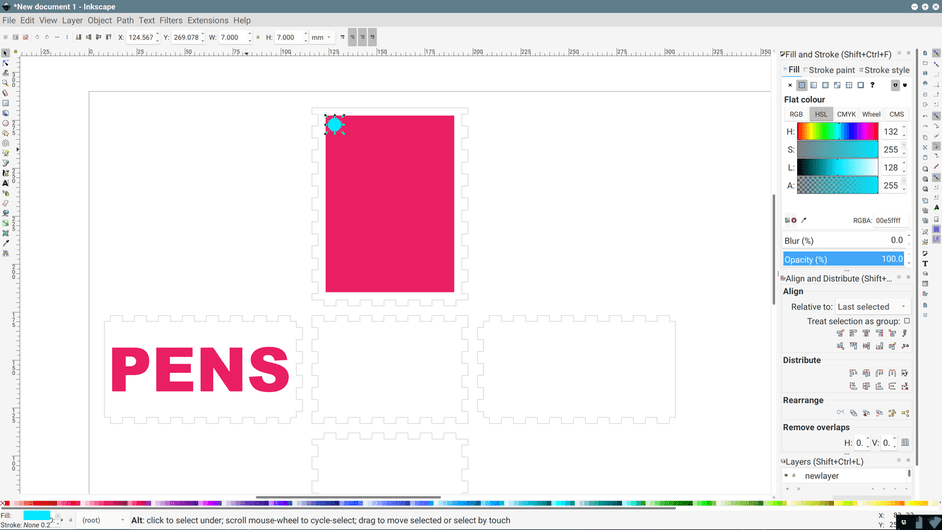
Now that you have your mask, the next stage is where we can be even more creative! First, draw a circle of reasonable size. The smaller the circle, the more cells you’ll get in your Voronoi diagram. Place this somewhere on the top left corner of your mask.
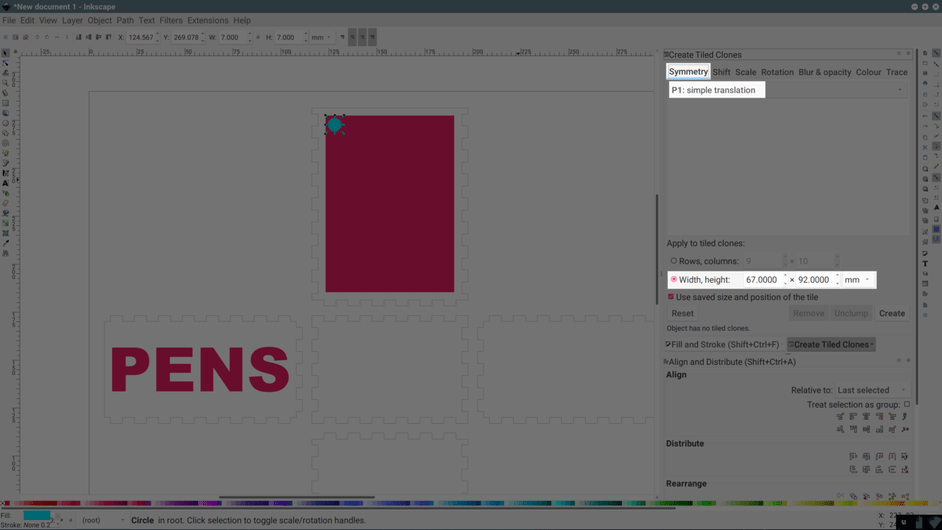
Now we’ll create some tiled clones of this, in order to cover the mask. Go to Edit > Clone > Create Tiled Clones, set the symmetry to P1: simple translation, and enter the width and height of your mask in the appropriate section.
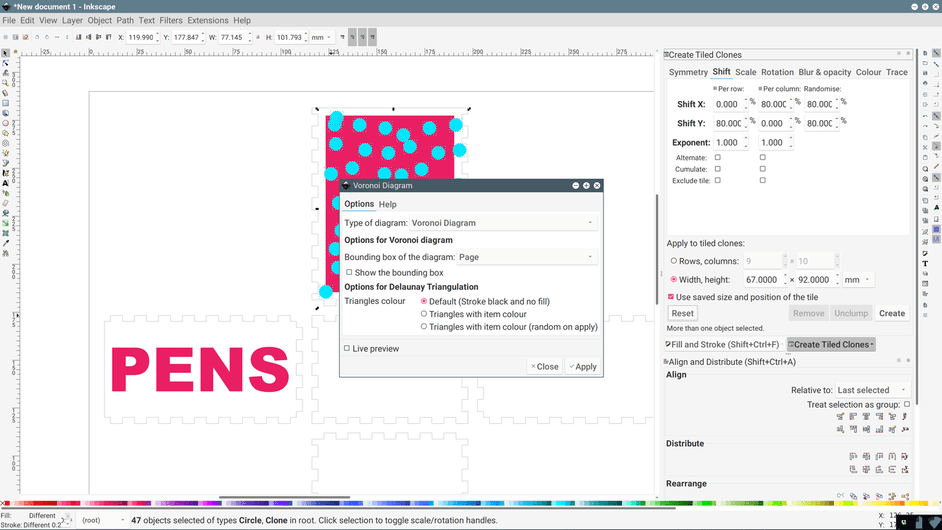
And then configure the shift like this:

Make sure that the other options are set to defaults (no scale, no rotation, etc) and then click Create. If you’re not happy with the arrangement, just undo and hit Create again. It may also be helpful to Unclump the circles, as you don’t want too much overlap.
Tip: If you want smaller cells, you can also reduce the shift percentages. For the text faces in this design, I used 40% shift and 80% randomness. Play around until you get something you’re happy with.

Next, you want to select all of these circles. While you could do it by hand, there’s a quicker way! Simply Edit > Select Same > Fill Color and you’re done.
Generate the Voronoi diagram
Now for the most important section: generating the Voronoi diagram itself.
With the circles selected, go to Extensions > Generate from Path > Voronoi Diagram… and use the defaults:
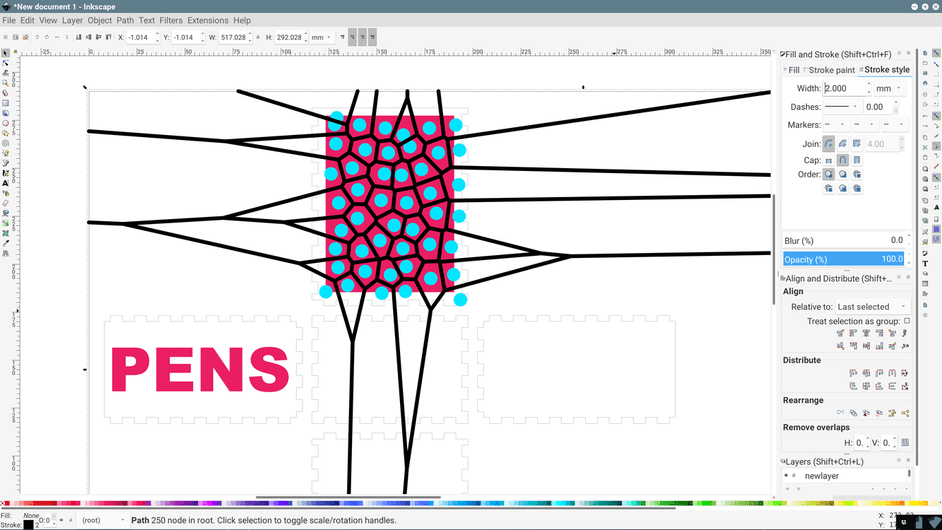
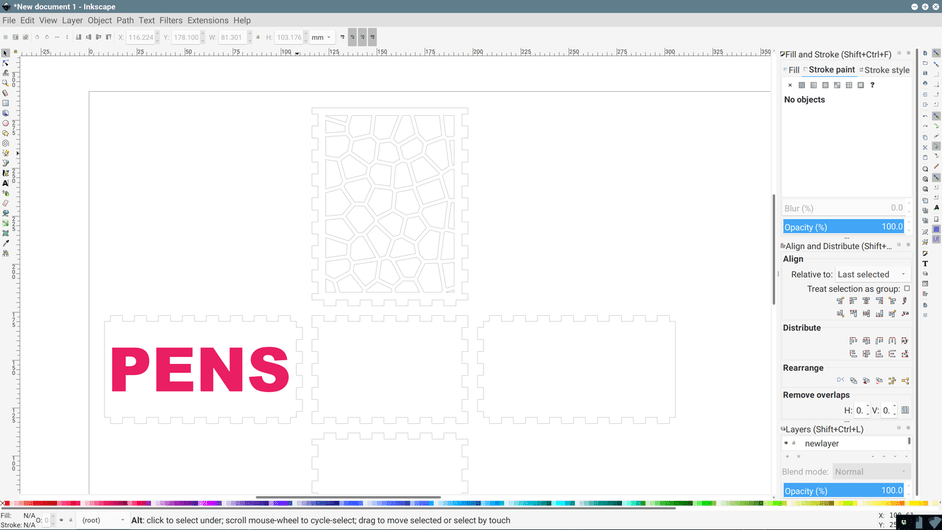
Select the newly-generated diagram, ungroup it (Ctrl-U), and combine into a single path (Ctrl-K). Set the stroke width to something reasonably thick, like 2mm:
Then convert the stroke to a path (Ctrl-Alt-C, or Path > Stroke to Path) and we’re nearly done. You can delete the circles at this point.
Apply the design to the face
Select the Voronoi path and the mask, then subtract (Ctrl-minus, or Path > Difference).
And finally, select the mask and the face, and subtract again.
And there you have it! One face to be cut. Now rinse, lather, and repeat ![]()
[Thanks for moving the post, @cynd11!]

 I may get around to writing some other tutorials and things in the future, especially as I start writing extensions and other tools to help.