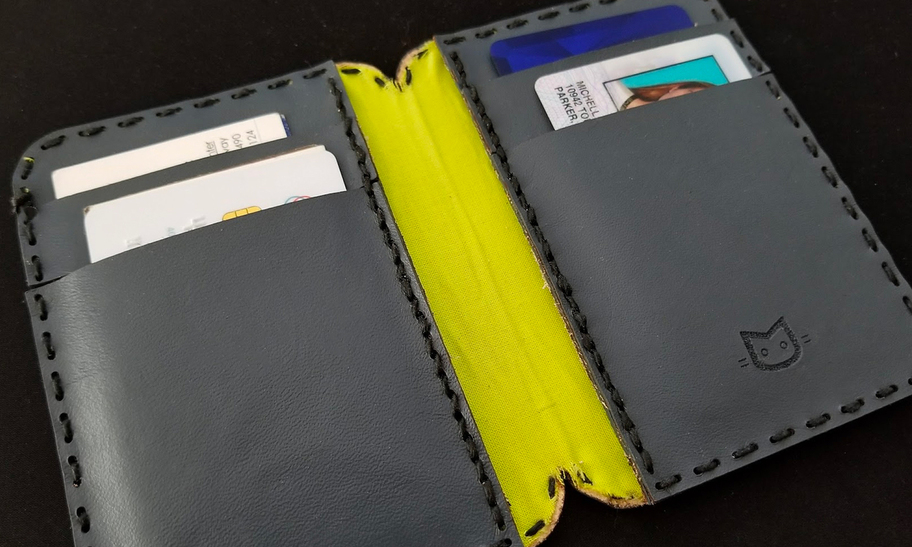
My second glowforge project. I’m not very happy with it because of four things:
I should have dyed a thin piece of leather instead of using fabric for the pop of color (it gets frayed and has a different texture.
I need to learn how to burnish edges to finish them, I think it would look a lot nicer.
Using sewing machine with a walking foot and leather needle to sew the wallet together instead of hand sewing would have produced a more consistent finish.
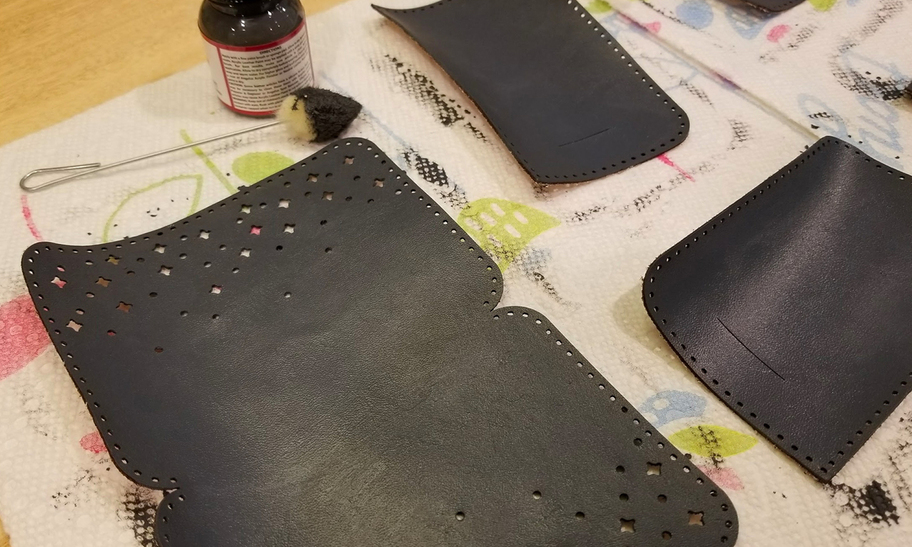
I had leather dye and leather acrylic paint, I used the leather acrylic paint which worked super well for the color I wanted but also doesn’t look like leather anymore. When using the paint you should condition the leather first instead of after and I forgot that part so it will probably crack after some use.
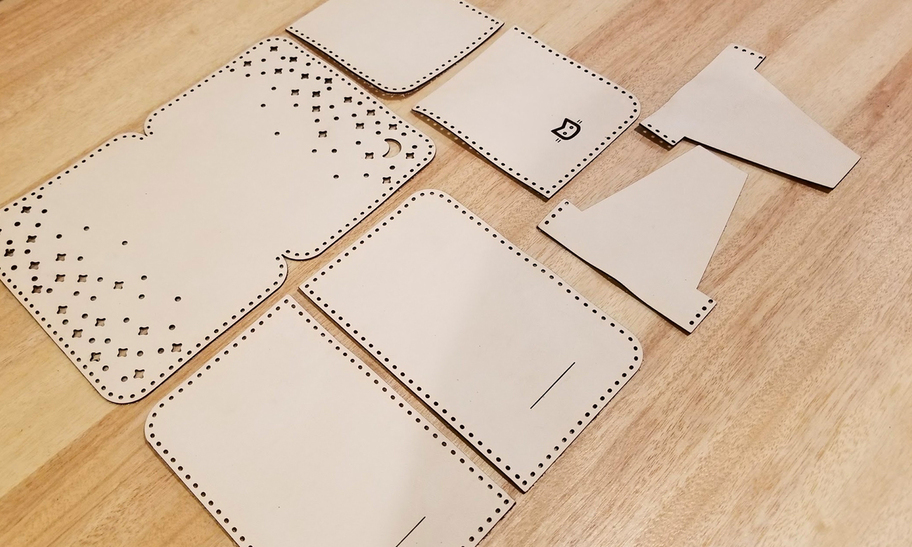
step one:
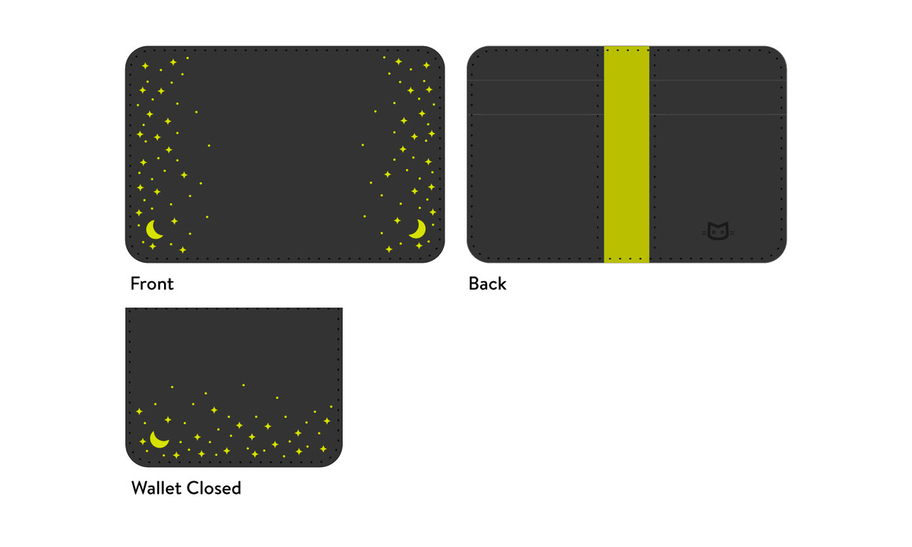
Created pattern in illustrator, also colored it and put the pattern together to plan exactly what I wanted it to look like before cutting any of my materials, so I could make sure I ordered everything I needed. Also spent awhile aligning all the sewing holes before printing.
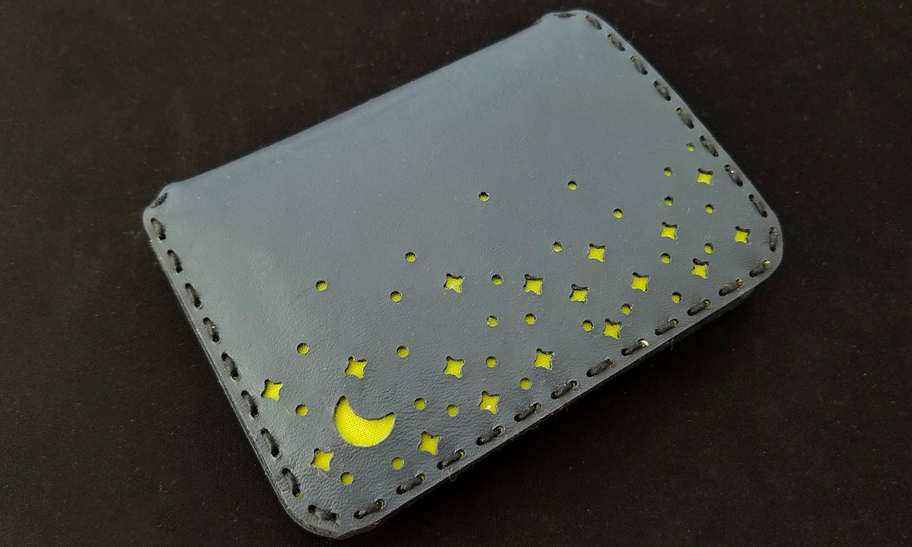
I wanted to sell these but I don’t think anyone would buy it at this quality, Will take awhile for me to practice to be able to make these faster and better. I plan to remake this soon to try and improve on an original design!
Still pleased that I was able to make this in about 2 hours and $20 of materials!
Really nicely done. I like the color contrast. For the stitching, try using a saddle stitch and make the holes a little closer together. I am not a leather expert, but I think that might help.
I love the list of lessons learned.
The contrast is really eye-catching.
Did you design the structure yourself or buy the pattern? I would buy that pattern.
I made one attempt at a wallet before the current settings came out, and my results were not fantastic.
I haven’t tried again - and am delighted to see yours.
Perhaps I shall go back to the wallet idea… I have a kid requesting.
this is great, but it’s even better considering it’s an early project (@dan might say you have a gift for leather ).
personally i wouldn’t know how to go about using a machine on leather, really. if it were me, i might consider doing smaller, more frequent holes, and a saddle stitch, as @bruceaulrich suggested.
Very nice first effort and if you do want to sell them you have the right idea. You have to iterate until you can say “yeah, I’d buy that” in the meantime gifts and nicer and nicer ones for yourself.
And, even if you don’t do more frequent holes, using the saddle stitch should give you more of a thread look, since you won’t be skipping every other hole (over and under). With the saddle stitch, both needles go through every hole.
As others have suggested, saddle stitch is great for projects like this. Though I would not make the holes any closer; if you punch the holes too close together, you can actually weaken the leather.
Last but not least, you can dye your leather first and then paint over it. This will avoid any holidays in the paint, and it will allow you to do a lighter coat (or less coats) of paint, allowing your leather texture to come through nicely.
Hope it helps, and please share your future iterations
This is Great! Yeh, ok the inside material difference is an issue and the burnish would help but honestly, your stitching is really neat and the colour on the back side (via moon and stars) looks ace! Great job. Leatherwork is not easy and for a first try this is awesome.
I can see and understand why you feel that way. But from my POV, it’s nothing short of incredible. Your design was inspiring and your execution was fantastic. Don’t sell yourself short! So… what… 1 or 2 more tries and it’ll meet your level of excellence? I’d say that’s pretty darn good!
Nice work and thanks for sharing. The other thing I learned with my first project the other day was conditioning first before dye is the leather will absorb the dye more evenly. I found the lasering really did dry out the leather too.
THIS IS AWESOME!!! I keep thinking I’ll make a small wallet, but I’ve been a chicken and made up all kinds of excuses. I love what you did with the cut-out shapes. You’ve got me far more interested and excited at trying now. Way to go!
That’s the exact instructable I found and used to stitch my son’s “Gryffindor” Name tag. I can definitely say after the 2 hours I spent hand stitching that thing while sitting on the couch I’m definitely getting a “stitching pony.” Thought about trying to make one with my Glowforge, but I think I’ve kind of decided I’d just buy one so I can get to the real leather work sooner (one more project that I fear I can’t do right and I then when I keep putting it off would probably keep me from other sweet leather work I want to try).
Look for 1-1.5 oz pigskin suede. It’s s specifically meant for linings and often comes in fun colors.
Leather needle yes. Walking foot is expensive and not entirely necessary. A Teflon foot or roller foot would also work for these thinner leathers. If you machine sew, skip having GF make the holes. Tack your pieces together with a water based leather contact cement or double sided tape, use bonded nylon thread (which also comes in fun colors), use a longer stitch than you would for fabric and go slow, especially around those curves. For mass production a sewing gauge attachment helps a ton (to keep you at a consistent distance from edge)
Have fun! I making leather wallets, they’re so satisfying
 ).
).

