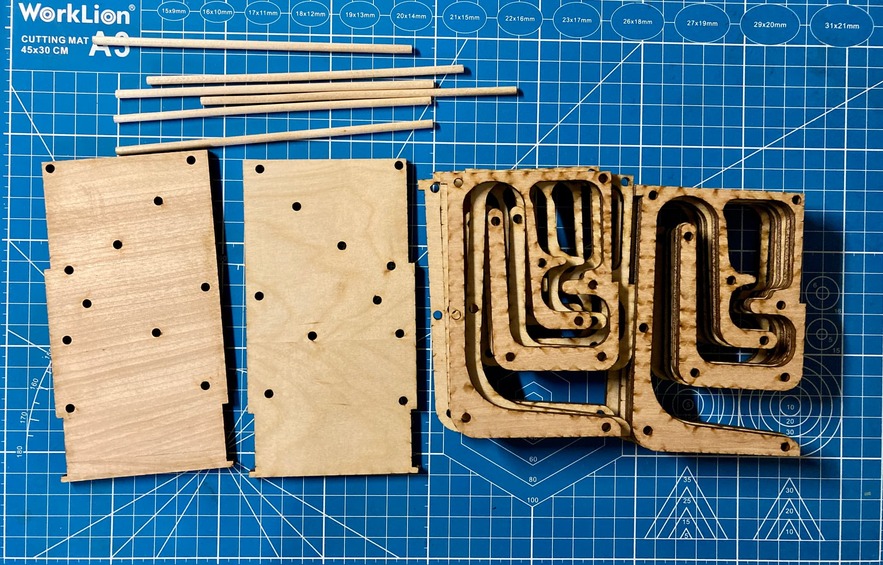
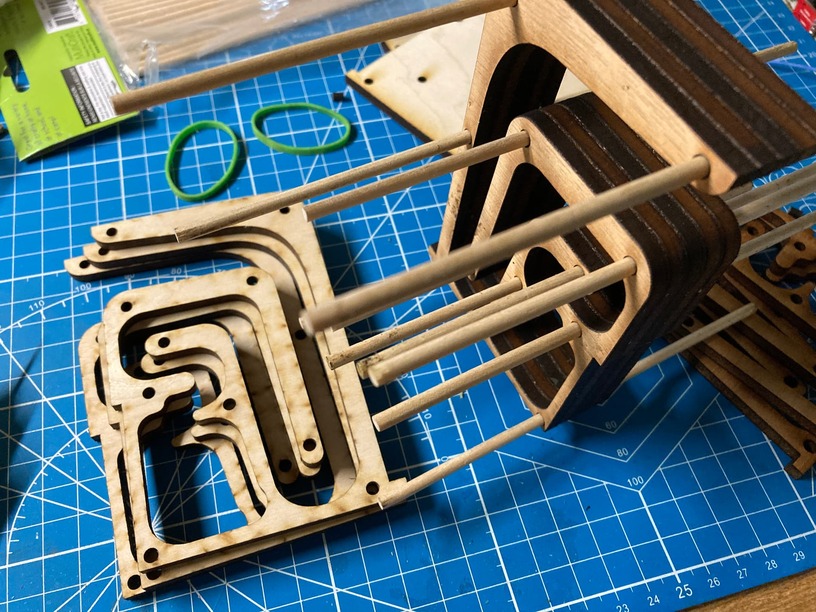
Finally got around to glueing this thing together. These layered projects sure use up a lot of material.
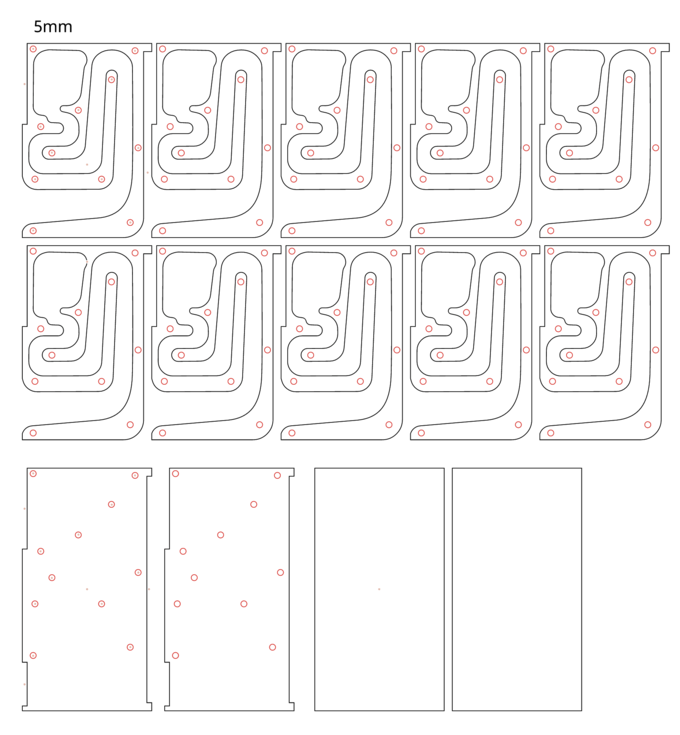
This was something I created using the Cuttle web based drawing program. I mentioned it two weeks ago. ( BoxySVG )
I really like using cuttle to organize my designs.
Columbia Purebond Plywood
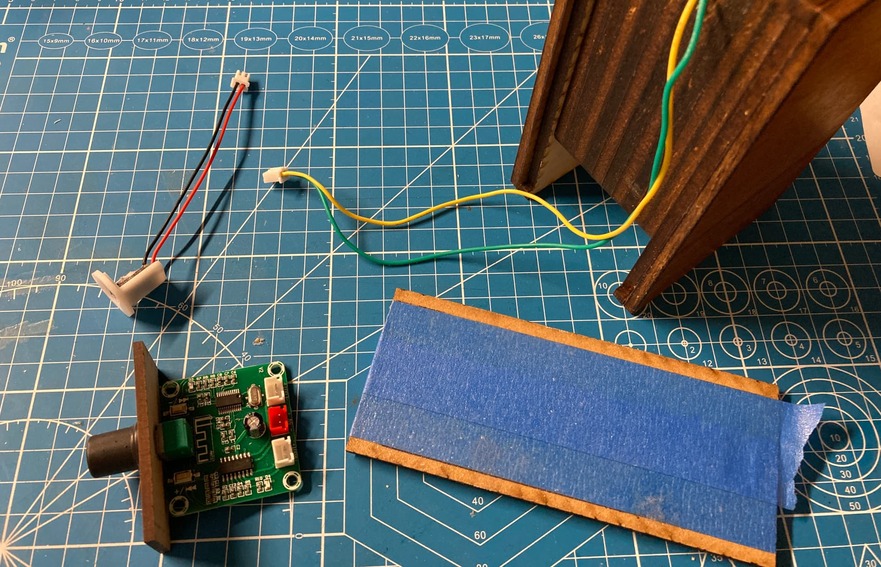
I had bought a few different Bluetooth speaker boards and had an extra speaker. I designed it around the board. It has stereo output, but I only used one speaker. I added a usb board plug for power with a 3D printed mount.
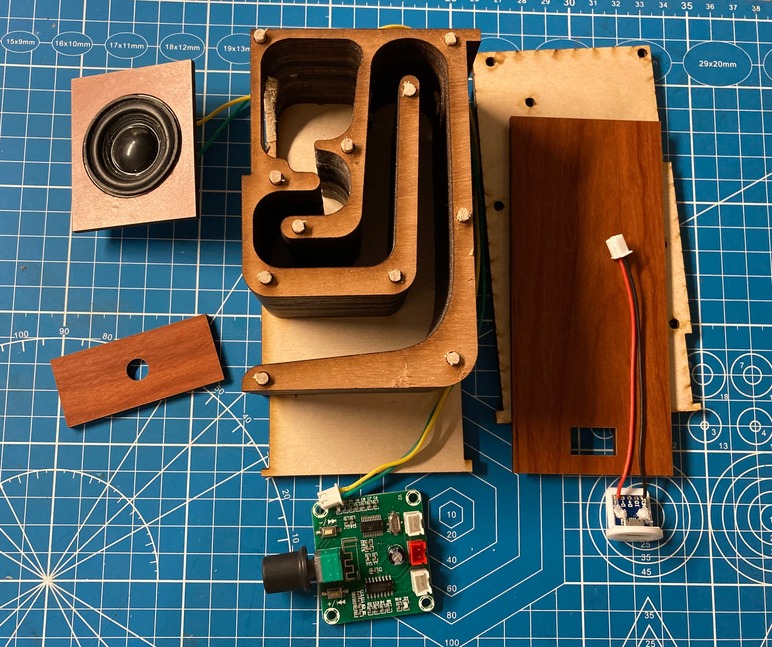
I wanted to be able to take the back off so I am trying out this idea, I masked the back with painters tape and added a few coats of spray adhesive. Pulled the tape off and it stuck to the back, we will see if it holds.
The faces are 3mm JPP duro wood, only finished on one side.
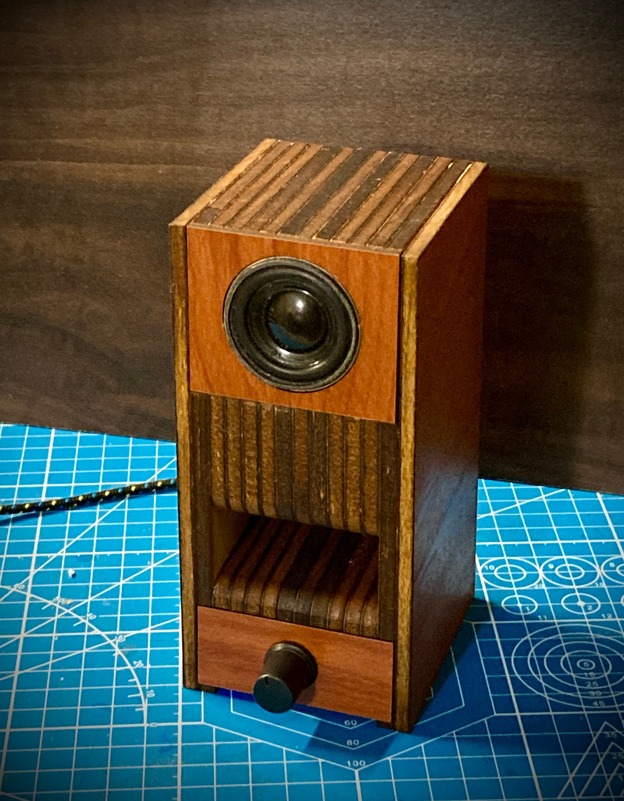
I am no audiophile but I can tell you the speaker is plenty loud. I can’t say that the quality is any better, with the shape or not. But it’s a cute little thing, If I ever get the urge to do it again, I would use threaded rods and acrylic to see the wave tunnel shape.