Just to give a little background for today. I am working on a private order for my uncle.
I am engraving on wood with no masking tape.
I just cleaned all the cameras/lenses less than 1 hour (of printing time) ago.
This is what it looked liked before
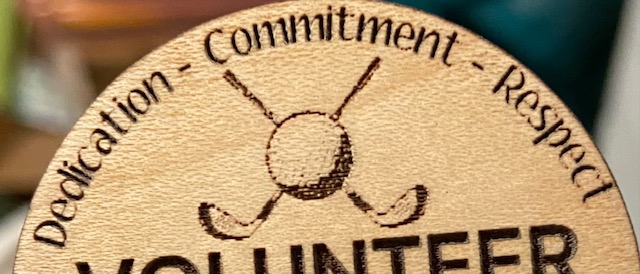
All of a sudden, it is printing words as if they were bolded, but its not printing them very well. As you can see on the photo, when sanding off the burn marks on the wood, the words do not appear legible. I have included a photo of what it was printing before perfectly fine, then what it changed to. The machine was not turned off between these prints. I am engraving on the same wood. Just finished one cut and started a new one and that’s when it changed. I understand that it is a very slight difference, but when I am doing small words like this, I feel it is very noticeable!
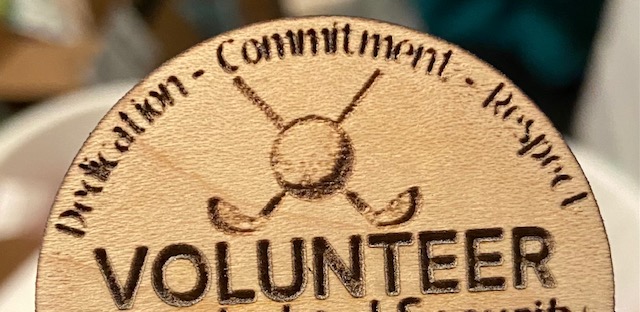
What is going on with my machine and what can I do to fix this?
Just to give everyone an update. I turned my machine off for about 5 mins, turned it back on, and now it is engraving perfectly fine.
Has anyone else had this problem?
Not I, but I use either alcohol or household ammonia to wipe the smoke stain off as opposed to sanding. Also, the charred surface of the engrave is rather fragile. I generally avoid scrubbing it because it removes some of the dark charred surface.
this very much looks like the laser was out of focus on the one that you didn’t like.
Hello @smaartistrycreations,
Thank you for reaching out to us. I’m sorry to hear your print results didn’t turn out as expected.
Just looking at your photos, it does look as though there might have been a focusing issue on that particular print. Looking at the logs from your unit, I see that you printed a lot of pieces with this design, so without knowing the exact time of the print, I’m not able to review the logs for this failed print.
I did notice, there was one print from yesterday with a failed autofocus event because the red dot, used to detect the height of the material, missed the material all together. This can happen if you try to print too close to an edge or a void space in the material. Its possible that could be from the print in question, but I can’t fully confirm without knowing the time it was run.
Since the rest of your prints have turned out as expected, its likely this was a one off event. Should it happen again, please let us know the date and time of the print and we’ll be able to pull those specific log for review.
Please let me know if you have any questions.
Very helpful reply Morgan. For lurking newbies… is there a way to not print when a focus error like this occurs? Is this a setting?
@MorganW Would I be able to see something on my end when it fails a focus like that. I don’t remember seeing anything, but I wasn’t looking for anything either.
@smaartistrycreations and @CustomByKeith, great questions! There is unfortunately no error that is shown when the red dot misses the material, because the printer head is producing the red dot as expected. It has no way of differentiating what kind of material it landed on.
The best course of action is to use the Set Focus feature when you are printing on material that is not flat, has a lot of voids in it, or is not-Proofgrade. That will allow you to dictate where the red dot lands on the material and concentrates its focus.
Just be sure that when you’re using Set Focus you place the focus area on the material, so that it’s not near an edge. Then go over to your Glowforge and watch to make sure the red dot hits the material.
I hope this helps. Please let us know if you have any other questions.
It’s been a little while since I’ve seen any replies on this thread so I’m going to close it. If you still need help with this please either start a new thread or email support@glowforge.com.