A few years ago I made some stands for my comics at conventions with a poorly-maintained, hand-me-down bandsaw and they served me well enough, but time for an upgrade.
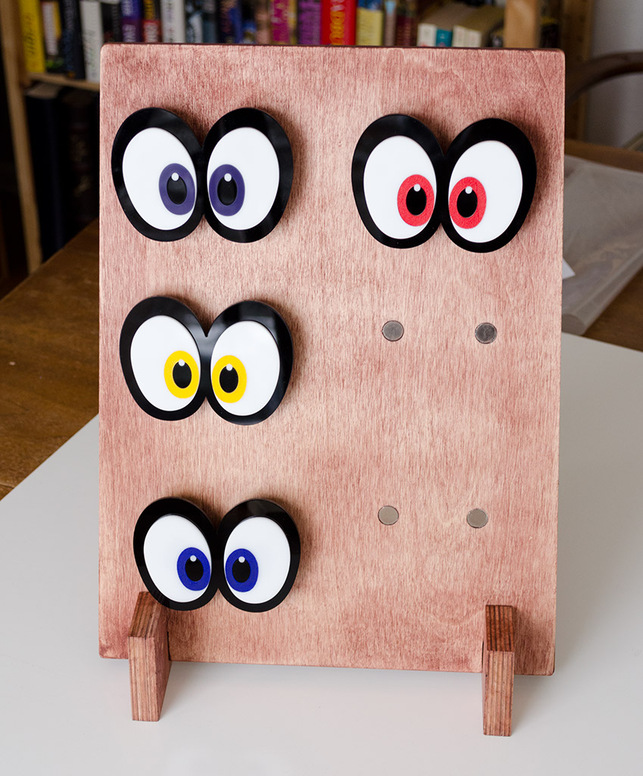
I also made some cute Mario Odyssey themed hat pins, so I needed a display for those as well!
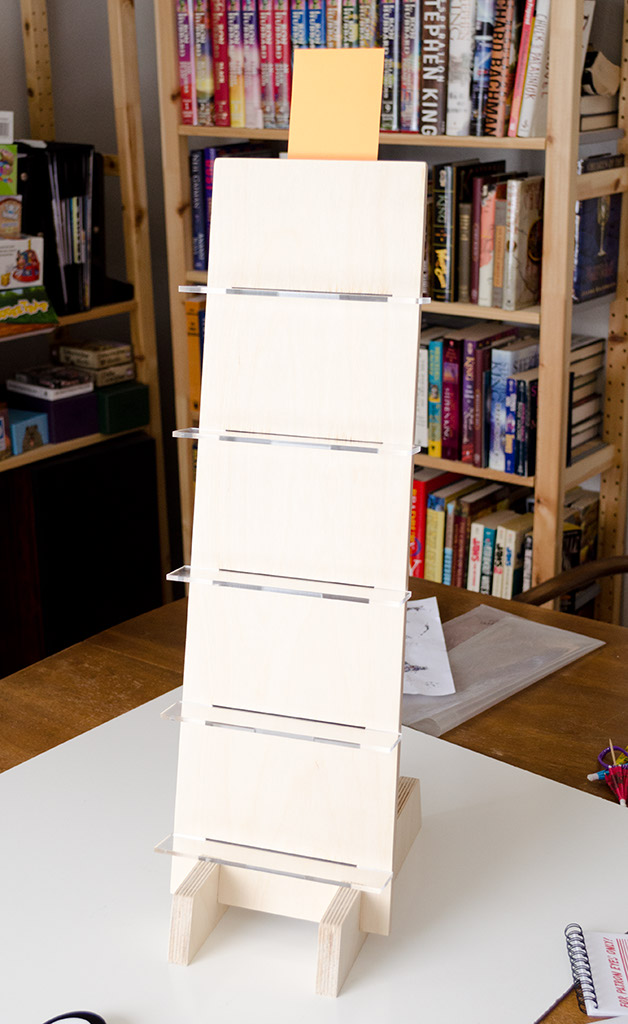
It needed to be tall and sturdy, so it’s made from the so-called birch ply from Michael’s: 1/4 and 1/8 ply glued together for the upright parts, and 3 layers of 1/4 ply for each of the legs.
They both made use of the Pro model’s pass-through slot. Once again, thank you for that sweet tutorial on using the pass-through!
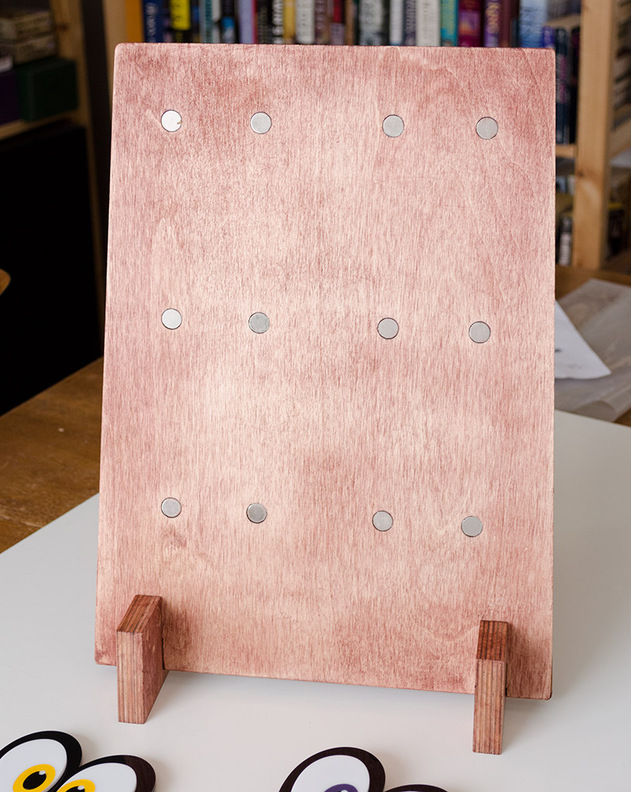
The eye stand has holes cut into the 1/8 layer where magnets were glued in(the backs of the eyes have large safety pins) so this stand is very much One Use Only, but it looks and feels great. This one is stained, but the comic stand has a nice contrast with just natural wood.
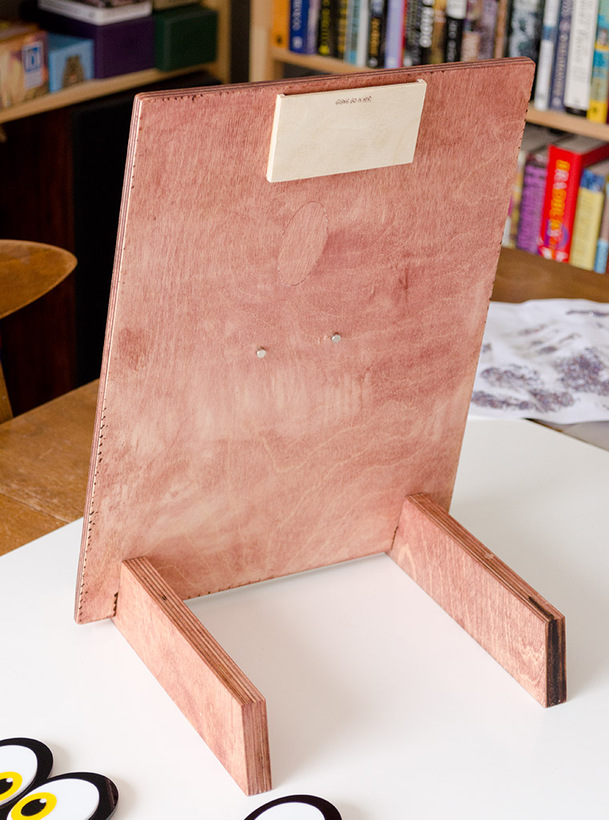
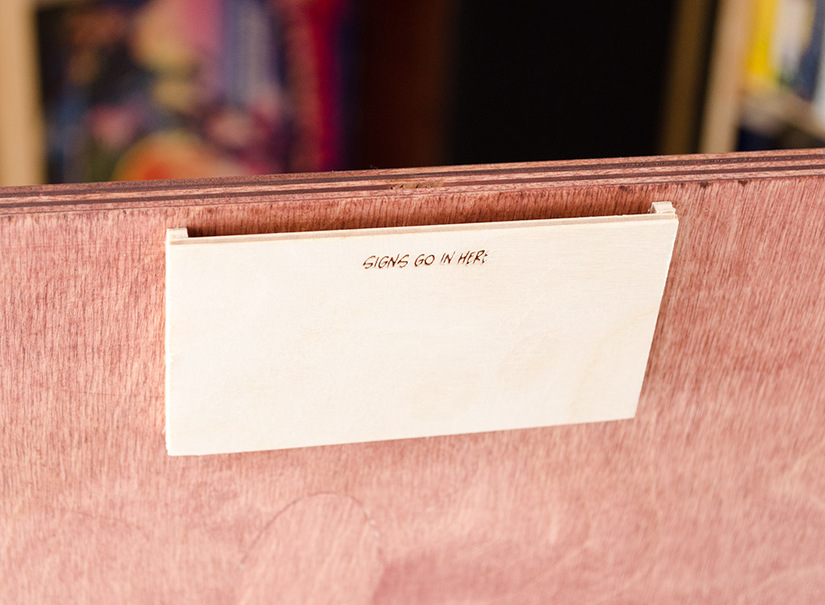
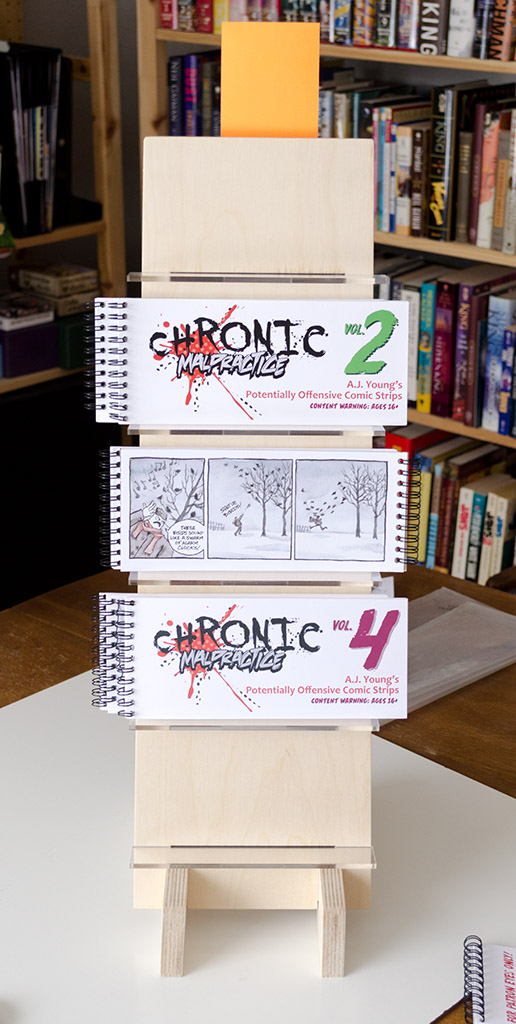
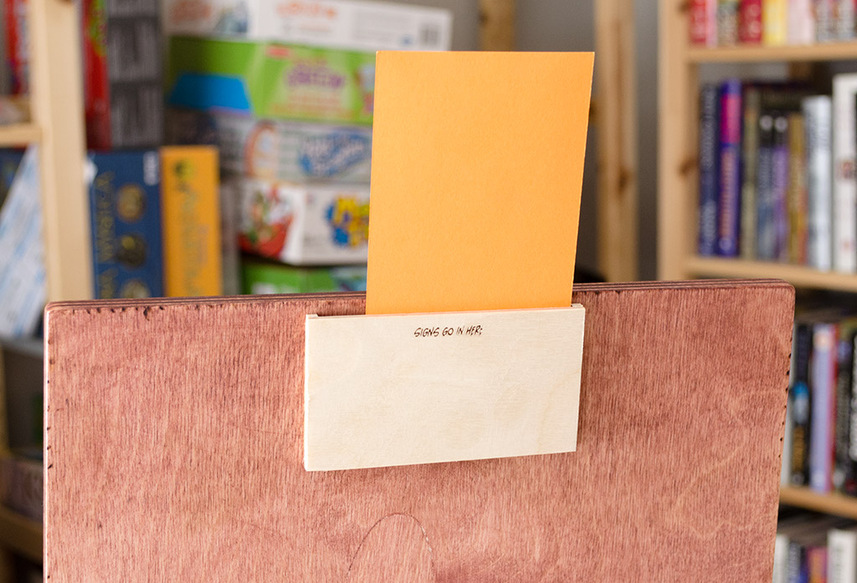
As you can see, I removed all(almost) of the char from the laser. And there’s a little slot on the back for a price sign to live.
For my comic stand, I obviously wanted something to stand out from the sea of Clear Displays Dot Com stands that are becoming more and more prevalent in Artist Alley’s. They’re great for books that are shaped like “Books,” but mine are formatted differently.

Again I used 1/4 and 1/8 ply glued together for vertical strength–this one required 3 cuts on the pass-through to come to life - and 3 sheets of 1/4 ply! The first one is when my Pro unit started messing around on me.
The 2nd one I didn’t align it properly to the edge of the sheet and lost about 1.5 inches of display when the 3rd pass-through cut ran off the end of the board ![]()
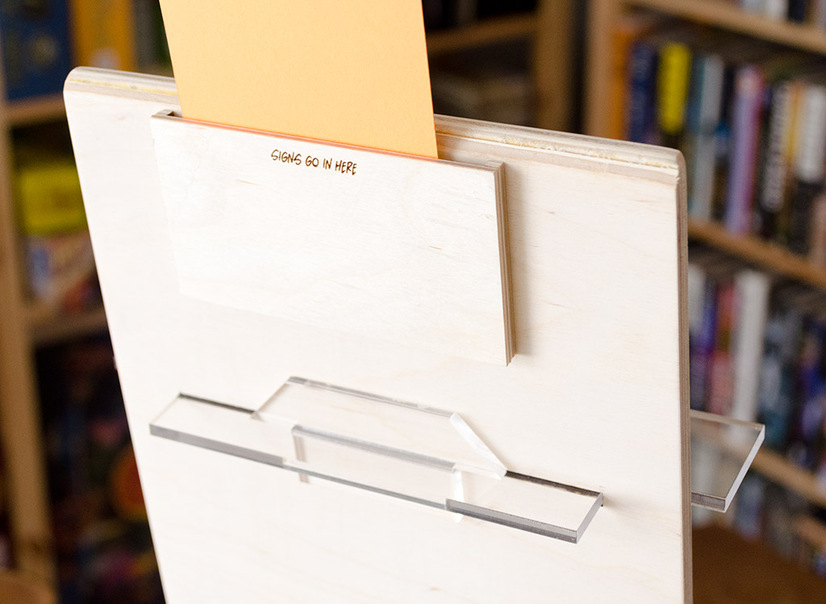
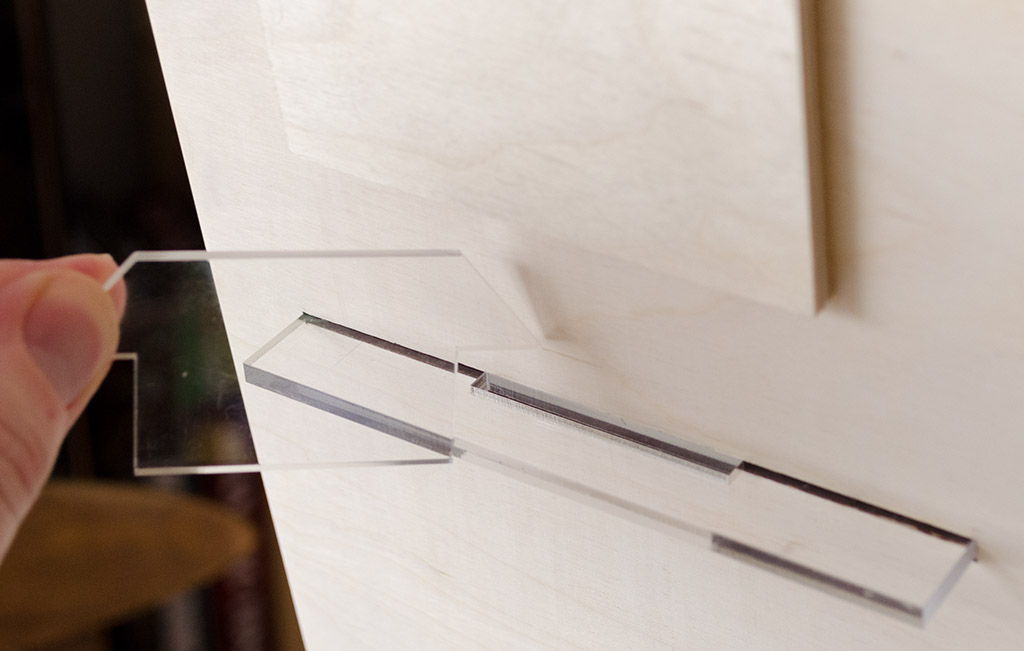
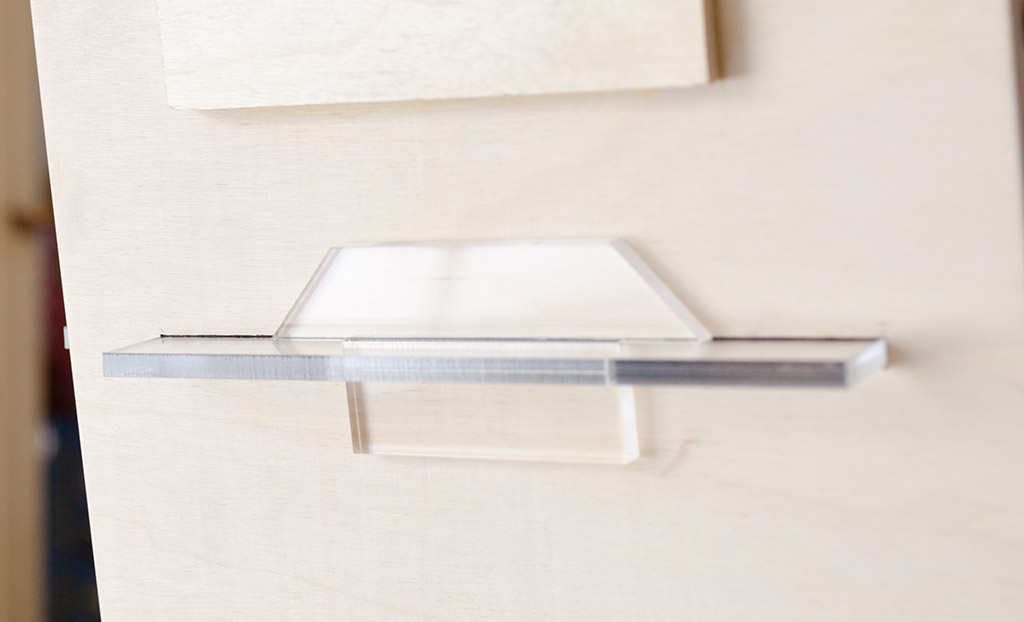
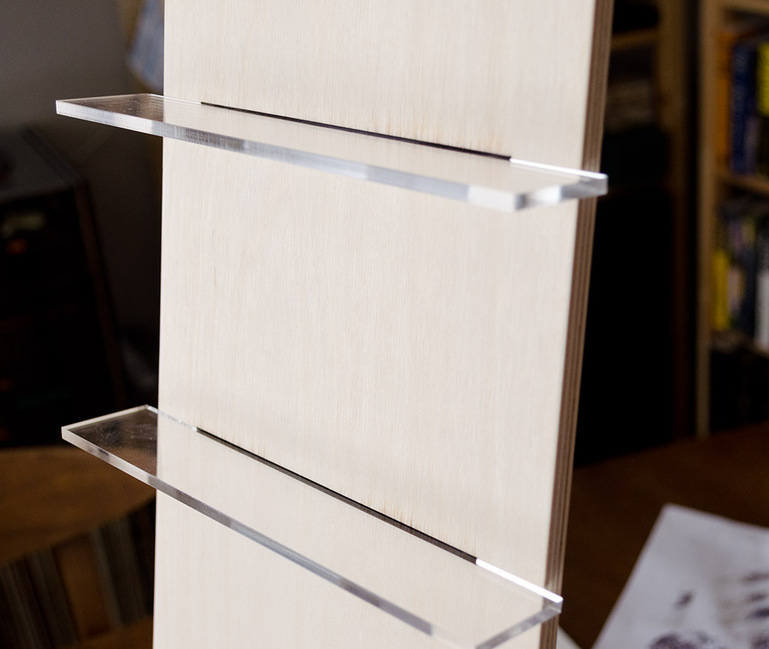
To keep the acrylic shelves in place, i made little “lock” toggle things. One is just tiny enough to fit under the sign holder. The other one is a LOT longer and slides in from the bottom. There’s enough friction between the wood and the four other shelves to keep it in place.

Then I planed all the edges & sanded the front & back up to 400 grit to make it nice and smooth. The edges of this ply gave me SO many splinters just moving the material in and out of the GF.
The Eye Stand was made completely in Illustrator and the Comic Stand was designed in Fusion 360. I cannot quite visualize the interlocking shelves and whatnot in 2D yet, so Fusion is perfect for these sorts of projects( for me ![]() ).
).
Thanks for taking a peek at my stuff!
If you are around Kansas City next week, come see me at Planet Comic Con! Or in Denver later this year for Denver Comic Con!

