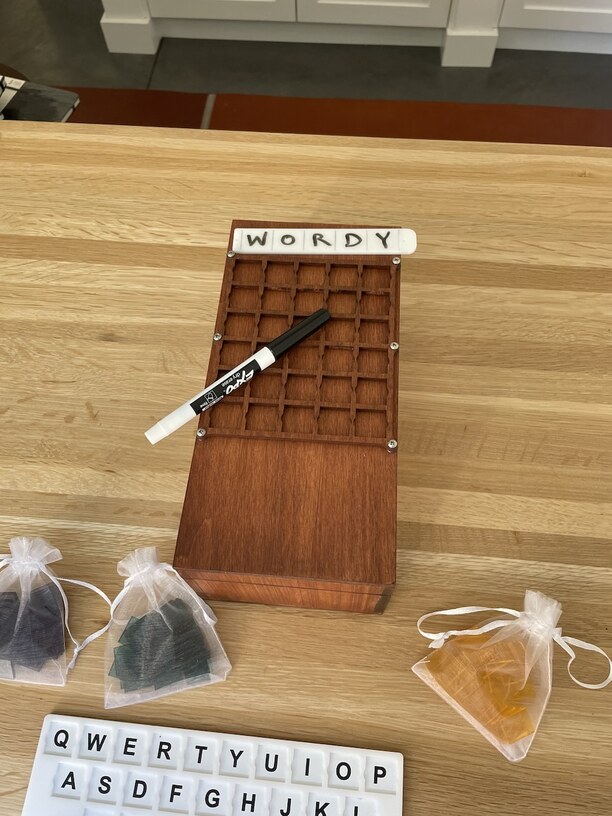
I brought Wordle from the screen to the physical world with the help of my Glowforge. It turns out, the biggest challenge in such a project is letter management: I cut/engraved 180 letters out of white on black acrylic (6 of each letter, plus 2 more for the most used letters, plus 8 writeable blanks). How to organize all of them while keeping the assembly small and easy to manipulate was a puzzler. I settled on three rows of nine characters, each letter stack being constrained on only two diagonal corners. This way, you can use the free corners to retrieve a letter tile.

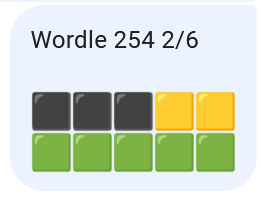
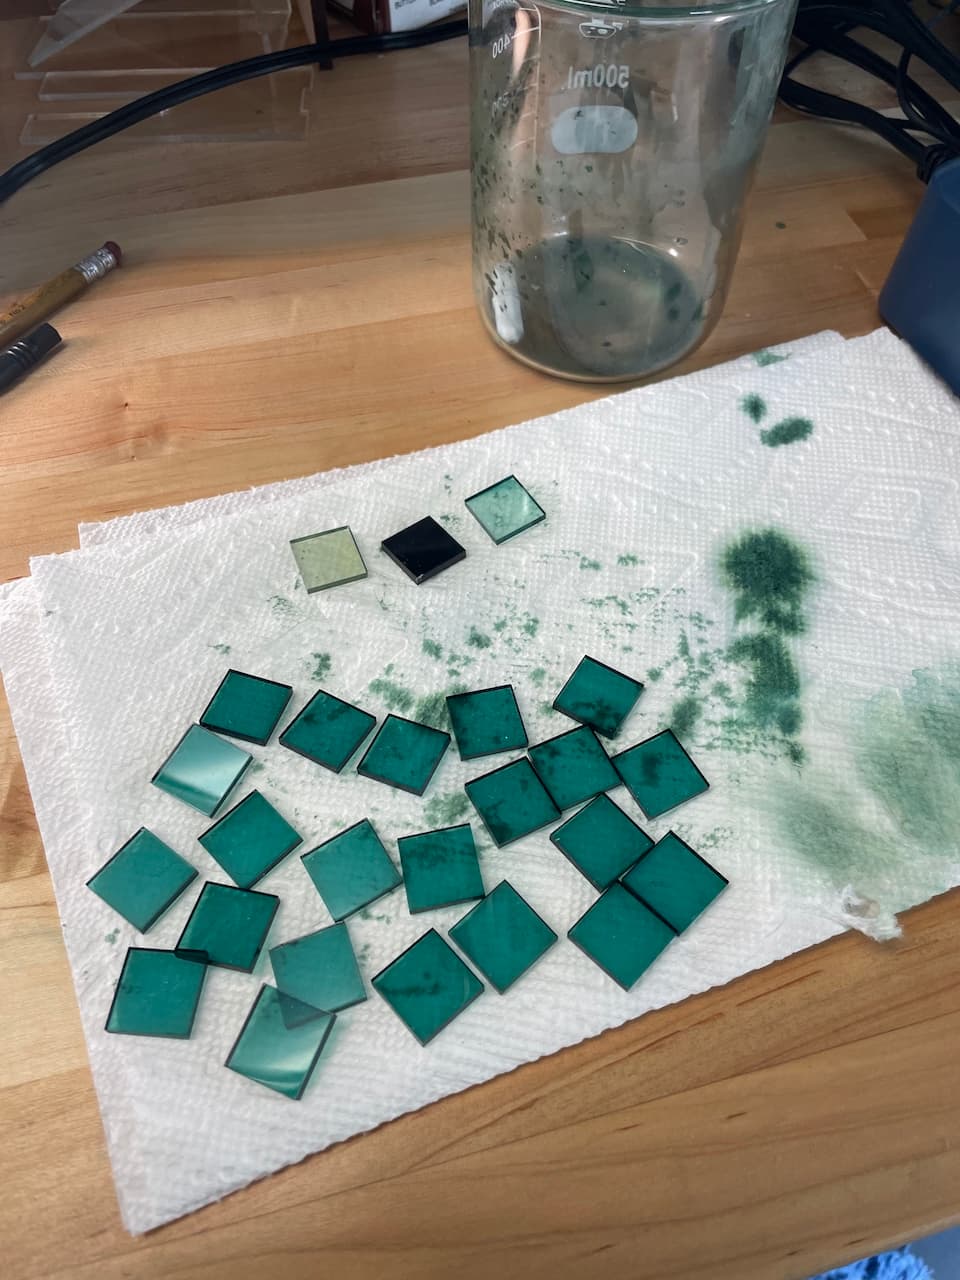
The other tricky bit was a way to indicate by color which letters were incorrect (gray), correct but not in position (yellow), and correct in the correct position (green). I did this using translucent acrylic that I dyed myself. This took a bunch of experimentation, but I settled on the following formula:
- 1 part Rit Dye More (special formulation for synthetic fibers)
- 2 parts water
Heat the above to 200F/93C and then add: - 1 part 70% isopropyl alcohol (add it last because it will evaporate fairly quickly at this temperature)
Stir for 3-5 minutes, depending on your desired color. I think I went a bit too long for my gray and green.

If like me your other hobbies include biohacking, you might have a magnetic stirring hotplate like this. Made the job a lot easier ![]()

The colored tiles are stored in see-through organza bags so it’s easy to discern what goes where.
Those who play Wordle know how helpful the keyboard is that keeps track of used letters, so this was also added.
A little innovation was the inclusion of an “answer stick”. The scorer writes the word on this white piece of acrylic with a dry erase marker and puts it in the hidden slot on the right. When the guesser finally gets the word correct, the answer stick is pulled out as a reveal, allowing for a moment of celebration.
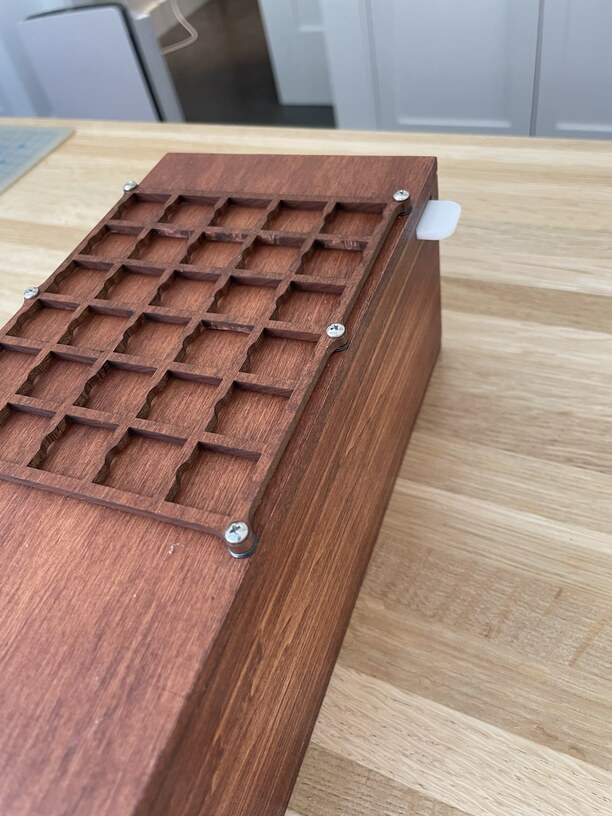
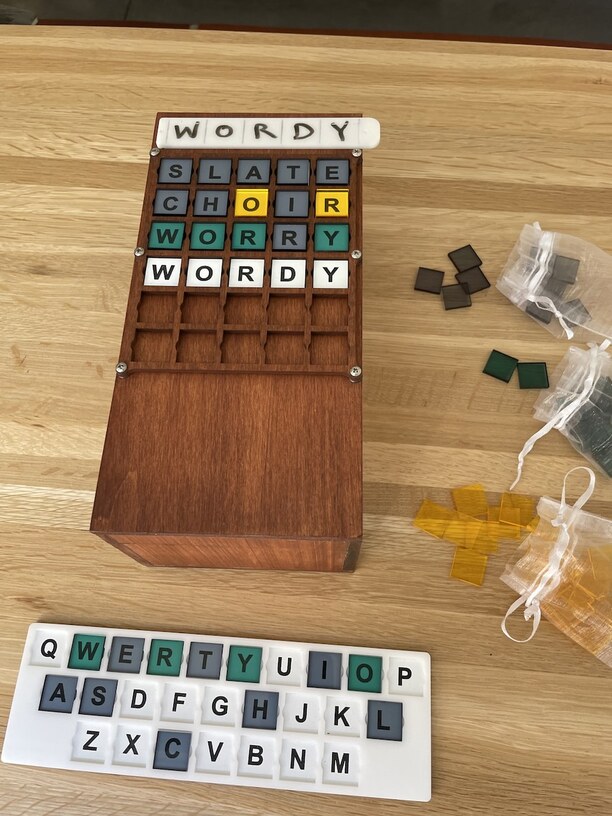
As for the box, it is solid 1/4" basswood stained with Varathane “Gunstock”. I’m not a fan of the tabbed “laser cut” look, so I made a very simple box fastened with 22ga pin-nails and glue. The top fits over an inner lip which protrudes ~1/4" from the bottom. The letter grid on the box top is cut from 1/8" basswood similarly stained. It is raised by the thickness of two very small washers so that letters sink below the top of the grid, allowing for colored tiles to be held when they are laid on top. There are little crescent “ears” on either side of the square cut outs which allow you to use your fingernail or a toothpick to pop-out misplaced letters or tiles. At the end of the game, simply turning the lid and keyboard over is the best way to get the tiles out.

It was a fun project, and my family enjoys playing with it. Some notes for those who might try something similar: The white on black acrylic is horrible to work with. Very stinky and the engraving leaves a dust on the white side (for deepest black and highest resolution, peel the protective tape off the top/white side). The edges come out sticky with a black that will rub off on fingers. I sprayed 91% IPA on a cloth and wiped each edge clean before cleaning the top. I’m not sure this “acrylic” is really acrylic. If I ever make a second one, I’d be tempted to do a light engrave on real white acrylic and fill in the engrave with black nail polish.